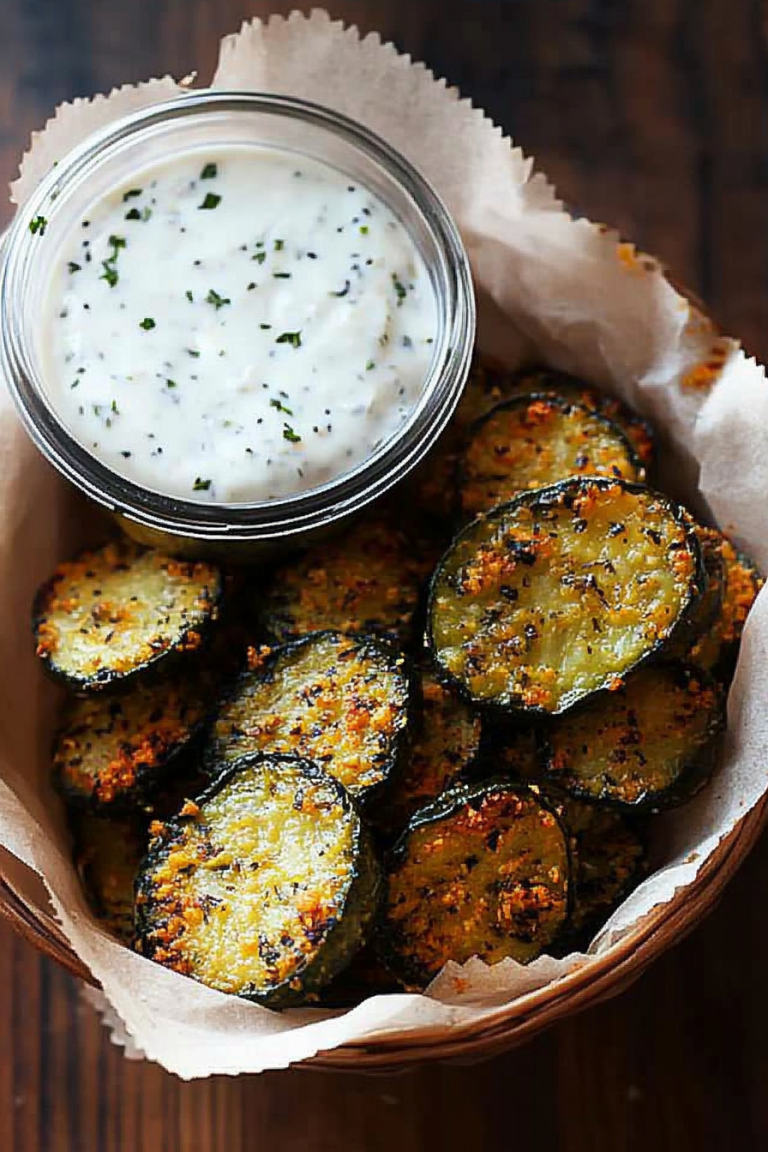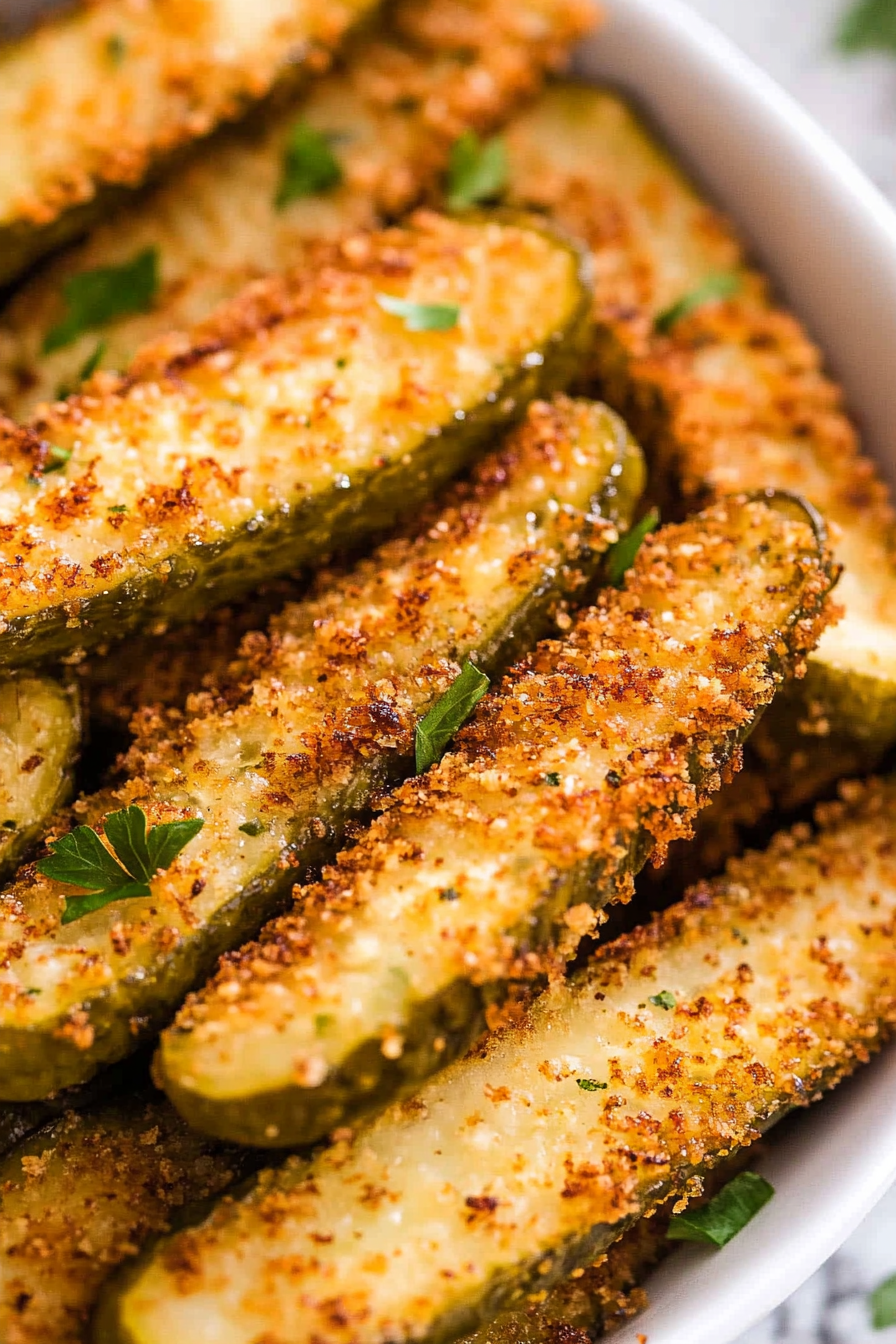
Crispy Air Fryer Pickles A Simple Treat
There’s something about a perfectly crispy snack that just hits all the right notes, isn’t there? I remember the first time I tried air fryer pickles—no joke, I was skeptical. But then I took that first bite, and wow, the crunchy coating combined with that tangy, juicy pickle inside? It’s like a flavor explosion in your mouth. If you’re anything like me, you’ll love how quick and easy these are to whip up, especially on busy weeknights when craving something salty, crispy, and downright addictive. These pickles have become a family favorite at our house — my kids ask for seconds, and I’m always happy to oblige because I know I’ve got a hit on my hands. Plus, they’re a healthier alternative to fried snacks, and trust me, that crunch soda is just as satisfying, if not more so. Ready to elevate your snack game? Let’s do this! Ingredients on hand? Check. Time to get crispy? Absolutely! Then let’s jump into all things air fryer pickles.
What are air fryer pickles?
Think of air fryer pickles as that perfect marriage between a classic pickle and a crunchy, irresistible coating—sort of like a fried pickle, but without all the oil. It’s essentially a pickle that’s dipped in a flavorful batter or seasoned coating, then cooked in the air fryer till golden and crispy. The concept isn’t new; fried pickles have been a bar food staple for ages. But the air fryer, with its magic fan and rapid air circulation, makes it all way healthier and honestly easier. The name says it all: you’re air-frying, not deep-frying. What’s great about this recipe is how versatile it is—once you nail the crispy coating, you can customize the flavors or even try different pickles like sweet gherkins or spicy spear-style ones. It’s a fun, less messy, way to satisfy that craving for something salty and flavorful, all while maintaining the crunch you love.
Why you’ll love this recipe?
There are so many reasons I keep coming back to this air fryer pickles recipe, but let me share why it’s become a staple in my kitchen. First, the flavor—oh my goodness, that seasoning combination (which I’ll share tips for tweaking later) creates a perfect balance of savory, tangy, and addictive. The crunch? It’s next level. I’ve tested this with different coatings—bread crumbs, panko, even crushed cornflakes—and they all work, but panko is my personal favorite for that light, airy crisp. Another thing I love most about this recipe is how simple it is. You don’t need a deep fryer or a million ingredients. Just a handful of pantry staples and a good-quality pickle, and you’re set. Plus, it’s budget-friendly! Pickles are usually inexpensive, and the coating ingredients are pantry staples. And honestly, these are so versatile—you can serve them as a snack, appetizer, or even on a burger for some serious flavor boost. Trust me, once you make these, you’ll wonder why you ever relied on greasy takeout for that crispy fix.
How do I make air fryer pickles?
Quick Overview
This recipe is all about quick, crispy satisfaction. You’ll start by preparing your pickles—draining and drying them well—then dip them into a seasoned batter or coating mixture. Layer them in the air fryer basket and cook at a high temperature until golden and crispy. The entire process takes about 20 minutes from start to finish, making it perfect for a weeknight snack or a last-minute appetizer. The beauty of the air fryer is how it gives that crispy texture without all the oil—healthier and less mess, which I love. Once crispy, I like to serve mine with a side of tangy dipping sauce or a sprinkle of fresh herbs. The best part? You can customize the flavor profile with different seasonings, spices, or even a sprinkle of Parmesan. It’s a quick, crowd-pleasing treat that’ll impress everyone, even those who claim they don’t love pickles. Ready to spice up your snack game? Let’s get started!
Ingredients
For the Crispy Coating:
– 1 cup panko breadcrumbs (for that airy crunch)
– 1 teaspoon garlic powder
– 1 teaspoon smoked paprika (or regular paprika)
– ½ teaspoon black pepper
– ½ teaspoon salt
– Optional: ¼ teaspoon cayenne pepper for a spicy kick
– 2 tablespoons grated Parmesan (trust me, this adds a lovely flavor and extra crunch)
For the Batter:
– 2 large eggs
– 2 tablespoons all-purpose flour (or almond flour for gluten-free)
– 1 tablespoon Dijon mustard (for a slight tang and adhesion)
– A splash of water or club soda to loosen the batter
– Salt and pepper to taste
For the Pickles:
– About 8-10 whole pickles (sliced into spears or rounds, whichever you prefer)
– Make sure they’re well-drained and patted dry—moisture is the enemy of crispiness!
Step-by-Step Instructions
Step 1: Preheat & Prep Pan
Start by preheating your air fryer to 400°F (200°C). While it’s warming up, line your basket with parchment paper or lightly spray with non-stick spray—this helps with cleanup and prevents sticking. Next, drain your pickles well and pat them dry with paper towels. The drier they are, the crispier they’ll turn out. Trust me, excess moisture can make your coating soggy, and nobody wants that! If your pickles are juicy, a quick spin in a clean towel or paper towels does the trick. Now, set everything within arm’s reach so you’re ready to go—it’s a fast process from here on out.
Step 2: Mix Dry Ingredients
In a shallow dish, combine the panko breadcrumbs with paprika, garlic powder, black pepper, salt, and cayenne if you’re feeling spicy. Mix well—you want every breadcrumb coated in seasoning for maximum flavor. This seasoned panko is what gives your pickles that irresistible crunch and flavor punch. If you’re short on time, you can even add a pinch of Italian seasoning or dried herbs—whatever fits your mood! Just make sure it’s evenly mixed so every bite is flavorful.
Step 3: Mix Wet Ingredients
In another bowl, whisk together the eggs, flour, Dijon mustard, and a splash of water or club soda. The batter should be smooth but not runny—think thick enough to coat the back of a spoon. This egg mixture helps the seasoned panko stick nicely to the pickles and creates that delightful crust. Season with a pinch of salt and pepper—whatever suits your taste. I’ve learned that adding a little Dijon gives it a subtle tang that complements the pickle’s acidity without overpowering it.
Step 4: Combine
Now, it’s time to assemble! Dip each pickle piece into the batter, making sure it’s coated evenly. Allow any excess to drip off before rolling it in the seasoned panko. I like to do this in batches so I don’t rush the coating process, which is key to getting that perfect crunch. A trick I’ve learned is to gently press the panko onto the pickle to ensure it sticks well—no patchy spots! Place the coated pickles on a plate lined with parchment—this prevents sticking and keeps everything neat.
Step 5: Prepare Filling
At this point, all your pickles should be breaded and ready for the air fryer. Feel free to sprinkle a little extra salt or herbs on top before cooking if you want more flavor punch. If you like a little more heat, add some chili powder or crushed red pepper flakes to your panko mix. The key is to make sure each piece is evenly coated and packed with flavor—you’re building layers of deliciousness here.
Step 6: Layer & Swirl
Arrange the coated pickles in a single layer in your air fryer basket, leaving space between each—don’t overcrowd! You want the hot air to circulate freely for maximum crispness. If you have a small air fryer, do this in batches. My secret: a quick spray of cooking spray on top of the coated pickles gently helps them turn a beautiful golden brown. Now, if you want that marbled effect, you can try gently swirling some extra seasoning or a dash of paprika over the top before cooking—just a little touch for visual appeal.
Step 7: Bake
Cook at 400°F (200°C) for about 8-10 minutes. Halfway through, give the basket a gentle shake or flip the pickles to ensure even crisping. Keep an eye on them—they can go from perfect to burnt pretty quickly if you’re not careful! When they’re golden and crispy on the outside, they’re done. A quick look at the edges should tell you everything. Honestly, I’ve had batches that cooked a minute or two longer, so don’t hesitate to test one first—trust your nose and eyes!
Step 8: Cool & Glaze
Once out of the air fryer, place the pickles on a cooling rack for a minute or two. This prevents condensation from making them soggy. If you’re craving that extra flair, drizzle with a simple glaze—honey, sriracha, or even a tangy yogurt sauce—while they’re still slightly warm. I love a little squeeze of lemon or lime for a fresh kick. Serve them immediately so they’re hot, crispy, and irresistible—trust me, the crunch is even better hot off the fryer.
Step 9: Slice & Serve
Serve on a nice platter, garnished with fresh herbs or a sprinkle of flaky sea salt. These are perfect straight out of the air fryer, but they also reheat pretty well if you have leftovers. I like to serve mine with a side of spicy aioli or ranch dip—dipping sauces just take the flavor to the next level. My family has a standing request for these at movie nights or game days—they disappear in minutes, no joke!
What to Serve It With
This snack is incredibly versatile. For a quick breakfast, you could pair it with scrambled eggs and a hot cup of coffee—trust me, it’s a surprising combo but so good. For brunch, serve alongside some fresh fruit and a mimosa, making everyone feel fancy. These crispy pickles are also *stellar* as a side for grilled burgers or sandwiches, adding that irresistible crunch that everyone loves. At a casual get-together, I like to set out a variety of dips—classic ranch, spicy sriracha, or even a tangy mustard sauce—and watch them disappear. Sometimes, I serve these as part of a tasting platter with sliced cheeses, cured meats, and baguette slices. There’s something satisfying about that mix of textures and flavors, especially when everyone dives in with their hands. You really can’t go wrong—these pickles elevate any snack or meal and make you look like the hostess with the mostest, all in less than 20 minutes.
Top Tips for Perfecting Your Air Fryer Pickles
Here’s where the magic really happens—tips from someone who’s made these more times than I can count! First, always dry your pickles thoroughly. Excess moisture makes the coating less crispy and can cause it to fall off during cooking. If your pickles are extra juicy, give them a quick freeze for 10 minutes; this helps them hold their shape and reduces moisture. When mixing your batter, don’t overstir—just combine until smooth. Overmixing can affect the texture of your coating. Speaking of coating, I’ve experimented with different bread crumbs—panko gives the best crunch, but crushed crispy potato chips work great too if you want extra flavor. If your air fryer tends to cook unevenly, rotate the basket halfway through. For added flavor, mix spices or herbs directly into your breadcrumbs or batter—that way, every bite is packed with taste. If you want a vegan version, substitute the eggs with aquafaba (the chickpea liquid) and use plant-based coatings. I’ve also found that a quick spritz of cooking spray on top before baking amplifies that golden crisp. Honestly, a little trial and error is part of the fun—learn what works best with your machine and your taste buds. Repeat batches are my favorite because I keep tweaking the spices and coatings each time, trying to make them better and better!
Storing and Reheating Tips
If you happen to have leftovers (which I doubt, but just in case!), here’s how I store and reheat to keep that crunch alive. At room temperature, these pickles are best eaten within a few hours—any longer, and they might lose their crispness. Cover loosely with foil or place in an airtight container and enjoy within 24 hours. To keep them crispy in the fridge, place leftovers in a single layer on a wire rack or paper towels, then pop them in a sealed container. Reheating is easy—set the air fryer to 380°F (193°C) and reheat for about 3-4 minutes, shaking halfway through. That quick blast helps revive some of the crunch, though they won’t be exactly as crispy as fresh. If you’re reheating in the oven, spread on a baking sheet and bake at 400°F until crispy—about 10 minutes. Remember to reapply a light spray of cooking oil if needed. For the glaze or sauce, I usually add it after reheating so it doesn’t make the coating soggy. Basically, enjoy these crispy gems wherever you are—just remember, they’re best fresh but still pretty tasty as leftovers!
Frequently Asked Questions
Final Thoughts
Honestly, these air fryer pickles have taken my snack game to a whole new level. They’re crispy, tangy, and just the right amount of addictive—you might find yourself reaching for them way more than you expected. I love how quick they are to make, and the fact that they’re healthier than traditional deep-fried versions makes me feel good about serving them any day of the week. Plus, the tips and tweaks I shared over the years have helped me customize these to suit every mood and taste—spicy, cheesy, even extra herby. I really think you’ll get hooked once you try them; my kids sure did! So, go ahead, give this recipe a shot and let me know how your crispy, crazy-delicious air fryer pickles turn out. Don’t forget to leave a comment, share your variations, and maybe even snap a pic to brag about your latest kitchen win. Happy crispy snacking!
Crunchy Garlic Dill Pickles
Ingredients
Method
- Preheat your air fryer to 400°F. Prepare three bowls: one with flour, one with beaten eggs and milk, and one with panko breadcrumbs mixed with paprika, salt, and pepper.
- Drain pickle spears well and pat dry. Dip each spear first in flour, then in the egg mixture, and finally coat with breadcrumb mixture. Repeat until all are coated.
- Arrange the coated pickles in a single layer in the air fryer basket. Lightly spray with cooking spray.
- Cook for 8 minutes, flipping halfway through. Serve immediately with your favorite dipping sauce.