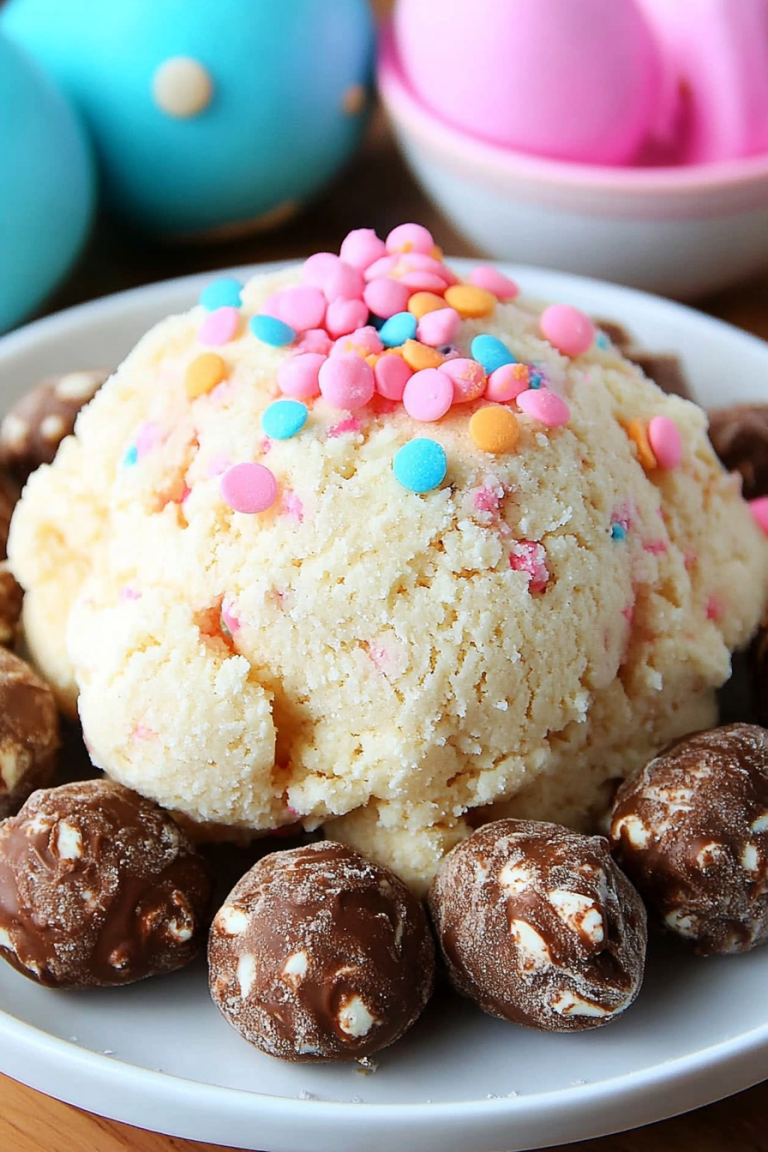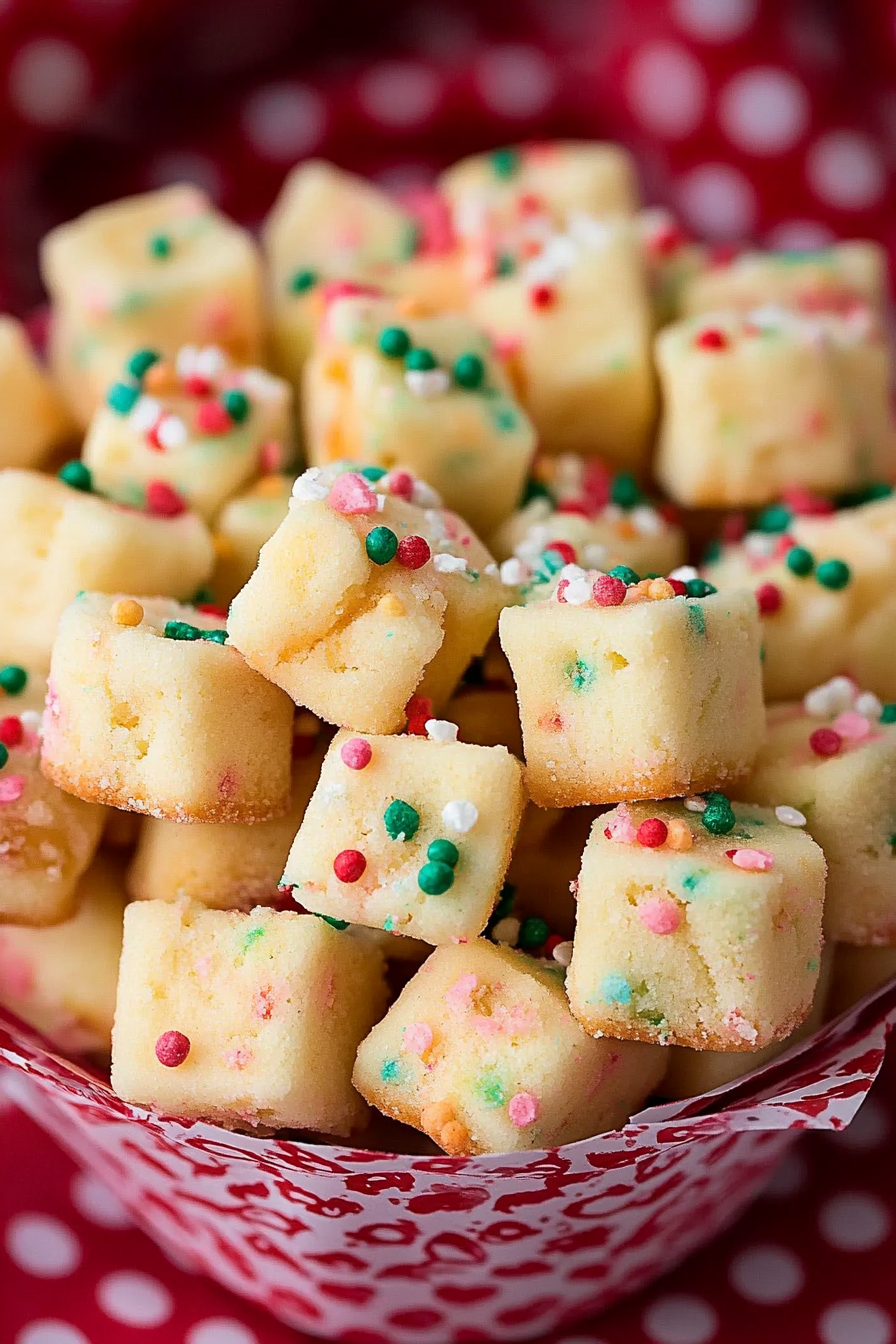
Joyful Sprinkled Shortbread Bites How to Make
Oh, the sheer delight of a funfetti cake! It’s more than just a dessert; it’s pure, unadulterated happiness baked into every bite. You know those days when you just need a little sparkle, a little burst of color to brighten everything up? That’s exactly when I reach for this funfetti loaf cake recipe. It’s my go-to for birthdays, baby showers, or honestly, just a Tuesday that feels a little too… beige. My kids absolutely adore it, and whenever it’s in the oven, the smell alone brings everyone scurrying to the kitchen, noses twitching with anticipation. Forget those complicated layer cakes that demand hours in the kitchen; this loaf is my secret weapon. It’s got all the magic of a traditional funfetti cake, but it’s so much simpler and incredibly forgiving. Think of it as the easy-going, always-reliable cousin to the elaborate wedding cake, but with all the charm and none of the stress. It’s the perfect pick-me-up when you’re craving something sweet and celebratory, without needing a special occasion. And trust me, after you try this, it’ll become your new favorite way to celebrate the little things!
What is Funfetti Loaf Cake?
So, what exactly *is* funfetti loaf cake? It’s exactly what it sounds like: a celebration in loaf form! The “funfetti” part comes from the colorful sprinkles that are baked right into the cake batter. They create those iconic little pops of color and flavor that make you feel like you’re having a party with every slice. We’re not talking about a handful of sprinkles on top here; these are mixed *throughout* the batter, ensuring that every single bite is a surprise of confetti-like joy. The “loaf cake” aspect means we’re baking it in a standard loaf pan. This is a game-changer because loaf pans are super forgiving, easy to prep, and frankly, much less intimidating than a round cake pan. It bakes up beautifully, creating a lovely dense yet tender crumb that’s just perfect for slicing. It’s essentially a simple, moist vanilla cake bursting with cheerful sprinkles, baked into an easy-to-handle shape. It’s a happy cake, plain and simple, designed to bring a smile to your face and a bit of magic to your day.
Why you’ll love this recipe?
What are some of the best reasons to love this funfetti loaf cake?flavor is just spot on. It’s a perfectly balanced vanilla cake – not too sweet, not too bland – with that subtle richness that makes you want another slice. And then, of course, there are those delightful little bursts from the sprinkles! They add a fun texture and a visual appeal that’s unmatched. But what really seals the deal for me is the sheer simplicity. I’m not someone who always has hours to dedicate to baking from scratch, especially on a weeknight. This recipe is incredibly straightforward. You mix the wet ingredients, you mix the dry ingredients, you combine them, fold in the sprinkles, and bake. That’s it! It’s honestly a lifesaver when unexpected guests pop by or when the kids have a sudden craving for something special. And let’s talk about Cost-efficiency: What is the best way to measure cost-efficiency?. Most of the ingredients are pantry staples, and the sprinkles are really the only “special” item, and they don’t cost a fortune. You get a truly celebratory-looking and tasting cake without breaking the bank, which is a huge win in my book. Finally, the versatility! This loaf cake is fantastic on its own, but you can dress it up in so many ways. A simple glaze, a dusting of powdered sugar, or even a light cream cheese frosting makes it even more decadent. It’s perfect for breakfast with a cup of coffee, as a sweet treat with afternoon tea, or even as a simple dessert after dinner. What I love most about this recipe, though, is how it captures that nostalgic feeling of childhood parties and pure joy, all in one easy-to-make loaf. It’s the kind of recipe that makes you feel like a baking superhero, even when you’re just starting out.
How to Make Funfetti Loaf Cake
Quick Overview
This recipe is designed for maximum cheer with minimal fuss. You’ll start by getting your loaf pan ready and preheating your oven. Then, it’s a simple matter of whisking together the dry ingredients, followed by creaming together the wet ingredients until smooth and luscious. The magic happens when you gently combine the two, being careful not to overmix, and then fold in those all-important colorful sprinkles. Pour the batter into your prepared pan, bake until golden and fragrant, let it cool slightly, and then finish it off with a simple glaze. It’s a foolproof process that yields a wonderfully moist and festive cake every single time.
Ingredients
For the Main Batter:
2 ½ cups all-purpose flour – I like to use a good quality all-purpose flour; nothing too fancy is needed here.
1 ½ teaspoons baking powder – This is what gives our cake that lovely lift.
½ teaspoon salt – It balances out the sweetness and enhances all the other flavors.
1 cup (2 sticks) unsalted butter, softened – Make sure it’s truly softened, not melted! This is key for creaming properly.
1 ¾ cups granulated sugar – You can slightly reduce this if you prefer a less sweet cake, but this is my go-to ratio.
3 large eggs – Let them come to room temperature for about 30 minutes before you start; they incorporate much better.
1 teaspoon pure vanilla extract – Don’t skimp on good vanilla; it makes a world of difference!
1 cup buttermilk, room temperature – This is my secret weapon for a super moist cake. If you don’t have buttermilk, you can make a quick substitute by adding 1 tablespoon of lemon juice or white vinegar to 1 cup of milk and letting it sit for 5-10 minutes.
For the Sprinkles:
1 cup rainbow sprinkles – I prefer jimmies (the rod-shaped ones) because they hold their color and shape so well during baking. Avoid confetti or ball sprinkles, as they can sometimes bleed color or melt too much.
For the Simple Glaze:
1 ½ cups powdered sugar – Sifted for a smoother glaze.
2-3 tablespoons milk (or lemon juice for a tangier flavor) – Start with 2 tablespoons and add more until you reach your desired drizzling consistency.
½ teaspoon pure vanilla extract (optional) – Adds a lovely extra layer of flavor.
Step-by-Step Instructions
Step 1: Preheat & Prep Pan
First things first, get your oven preheating to 350°F (175°C). Now, grab your 9×5 inch loaf pan. You want to grease it really well. I like to use a combination of butter and flour, making sure to get into all the corners and up the sides. Alternatively, you can use baking spray or parchment paper, creating a “sling” that overhangs the sides so you can easily lift the cake out later. A well-prepped pan is your best friend in preventing any sticking dramas!
Step 2: Mix Dry Ingredients
In a medium-sized bowl, whisk together your flour, baking powder, and salt. Give it a good whisk for about 30 seconds to ensure everything is evenly distributed. This is a simple step, but it’s crucial for ensuring your leavening agent (the baking powder) and salt are perfectly dispersed throughout the batter, leading to an even rise and flavor.
Step 3: Mix Wet Ingredients
In a large bowl, cream together your softened butter and granulated sugar. You can use an electric mixer for this, or a sturdy whisk and some elbow grease! Beat them together until the mixture is light, fluffy, and pale yellow. This usually takes about 3-5 minutes with an electric mixer. Next, add your eggs, one at a time, beating well after each addition. Make sure to scrape down the sides of the bowl occasionally to incorporate everything. Once the eggs are fully incorporated, stir in the vanilla extract and the room temperature buttermilk.
Step 4: Combine
Now, it’s time to bring our wet and dry ingredients together. Add the dry ingredients to the wet ingredients in three additions, mixing on low speed (or gently folding with a spatula) until *just* combined after each addition. It’s super important not to overmix here! Overmixing can develop the gluten in the flour too much, resulting in a tough cake. You want to see just a few streaks of flour remaining before you move on to the next step.
Step 5: Prepare Filling
This is where the fun really begins! Gently fold in your rainbow sprinkles. Again, be careful not to overmix. You just want to distribute them evenly throughout the batter. A gentle folding motion with a spatula works best. This is the part that makes it “funfetti” – those cheerful little pops of color!
Step 6: Layer & Swirl
Pour your beautiful, sprinkle-filled batter into the prepared loaf pan. Use your spatula to spread it evenly. Give the pan a gentle tap or two on the counter to help settle the batter and release any large air bubbles. If you want an extra special look, you can reserve a tablespoon or two of batter, mix in a few extra sprinkles for intense color, and dollop this on top just before baking. It creates little extra bursts of color on the surface!
Step 7: Bake
Place the loaf pan in the center of your preheated oven. Bake for 50-60 minutes, or until a wooden skewer or toothpick inserted into the center of the cake comes out clean. If the top starts to brown too quickly, you can loosely tent it with aluminum foil for the last 15-20 minutes of baking. Oven temperatures can vary, so keep an eye on it! The smell of warm vanilla and sprinkles is your first clue it’s almost ready.
Step 8: Cool & Glaze
Once it’s baked, remove the loaf pan from the oven and let it cool in the pan for about 10-15 minutes. This is important because the cake is still quite delicate at this stage. After the initial cooling, carefully invert the cake onto a wire rack to cool completely. While the cake is cooling, whisk together the powdered sugar, 2 tablespoons of milk (or lemon juice), and vanilla extract (if using) for the glaze. Keep whisking until smooth. If it’s too thick, add more milk, a teaspoon at a time, until you reach a drizzly consistency. Once the cake is completely cool, drizzle the glaze over the top, letting it drip down the sides. You can use a spoon or a piping bag for a neater finish, or just go for a rustic free-pour!
Step 9: Slice & Serve
Once the glaze has set a bit (about 15-20 minutes), your funfetti loaf cake is ready to be sliced and enjoyed! Use a sharp serrated knife for the cleanest cuts. This cake is wonderful served at room temperature. Each slice will reveal those delightful speckles of color, making it a cheerful addition to any occasion, or just a perfect treat for yourself.
What to Serve It With
This funfetti loaf cake is so versatile, it fits right in at almost any meal or gathering. For Breakfast, I love it toasted lightly with a smear of butter. It’s a simple, sweet start to the day that feels a little special, and it pairs beautifully with a strong cup of coffee or a glass of cold milk. My kids think it’s the ultimate weekend breakfast treat! For Brunch, it’s a showstopper. I’ll usually serve it alongside fresh fruit salad and maybe some yogurt. A light dusting of powdered sugar instead of the glaze can make it look a bit more elegant for brunch spreads. And for beverages, a mimosa or a fruity iced tea is perfect. As Dessert, this cake really shines. It’s great on its own, but if you want to go all out, a small scoop of vanilla bean ice cream or a dollop of lightly sweetened whipped cream takes it to the next level. It’s also fantastic alongside a fruit crumble or a fruit tart for a dessert buffet. For Cozy Snacks, it’s perfect just as it is. A slice with a warm mug of hot chocolate or herbal tea on a chilly afternoon is pure comfort. It’s the kind of treat that makes you want to curl up with a good book. My family traditions often involve having this cake ready to go for impromptu celebrations – birthdays, good report cards, or just when everyone’s home for the holidays. It’s the easiest way to make any day feel a little bit more festive!
Top Tips for Perfecting Your Funfetti Loaf Cake
I’ve made this cake more times than I can count, and over the years, I’ve picked up a few tricks that make it even better. When it comes to the Sprinkles, as I mentioned, jimmies are your best friend. They’re sturdy and hold their color. If you *really* want to prevent color bleeding, you can toss them in a tiny bit of extra flour before adding them to the batter. For Mixing Advice, remember my earlier warning: do NOT overmix! Overmixing the batter after adding the flour is the most common mistake that leads to a dense, tough cake. Mix until *just* combined. It’s better to have a few tiny streaks of flour than to overwork the batter. When it comes to Swirl Customization, while this recipe is a simple mix-in, if you were making a more elaborate marbled cake, you’d divide your batter and color portions. For this loaf, I just love the random distribution of color the sprinkles give! For Ingredient Swaps, I’ve experimented a lot. If you need a dairy-free option, you can use a good quality plant-based butter and a non-dairy milk like almond or oat milk for the buttermilk substitute. I tested this with almond milk and it actually made it even creamier! For Baking Tips, always know your oven. If your oven tends to run hot, you might want to reduce the temperature by 10-15 degrees and potentially increase the baking time slightly. Placing the loaf pan on the center rack ensures even heat circulation. And remember that toothpick test – it’s your most reliable indicator of doneness. Lastly, for Glaze Variations, don’t feel limited to milk. A bright, tangy lemon juice glaze cuts through the sweetness beautifully and adds a wonderful citrus note. You can also add a touch of almond extract to the glaze for a different flavor profile, or even a few drops of food coloring to match a theme!
Storing and Reheating Tips
This funfetti loaf cake is honestly pretty forgiving when it comes to storing, but a few things will help keep it tasting its absolute best. If you’re keeping it at Room Temperature, it’s best to store it well-wrapped in plastic wrap or in an airtight container. It will stay fresh and moist for about 2-3 days. Make sure it’s completely cooled before wrapping it up, otherwise, you’ll trap moisture and risk it getting soggy. For Refrigerator Storage, it can last a bit longer, typically 4-5 days. Again, an airtight container is key. The cake might firm up a little in the fridge, but don’t worry, it’ll soften up again at room temperature. If you want to keep it for longer, Freezer Instructions are your friend. Wrap the completely cooled cake tightly in a layer of plastic wrap, followed by a layer of aluminum foil, or place it in a freezer-safe bag. It should keep well in the freezer for up to 2-3 months. To thaw, simply unwrap it and let it come to room temperature on the counter, which usually takes a few hours. For Glaze Timing Advice, if you plan to freeze the cake, I highly recommend glazing it *after* it has been thawed and brought back to room temperature. Glazing before freezing can sometimes lead to the glaze becoming sticky or cracking during the thawing process. It’s much better to add that final touch of sweetness when you’re ready to serve it!
Frequently Asked Questions
Final Thoughts
There you have it – my beloved funfetti loaf cake! It’s the kind of recipe that brings an instant smile to my face, and I truly hope it does the same for you and your loved ones. It’s a testament to the fact that you don’t need complicated techniques or exotic ingredients to create something truly special and celebratory. The simplicity, the bursts of color, the comforting vanilla flavor – it all comes together to make this loaf cake a winner, time and time again. It’s perfect for those moments when you want to add a little spark to your day, whether it’s a special occasion or just a regular Tuesday that needs a bit of cheering up. If you enjoy this recipe, you might also love my Lemon Blueberry Bread for another delightful loaf, or my Simple Chocolate Chip Cookies for more easy baking wins! Don’t hesitate to experiment with the sprinkles or try different glaze flavors; that’s part of the fun! I can’t wait to hear how yours turns out, so please leave a comment below and share your baking adventures. Happy baking, everyone!
Funfetti Cookies
Ingredients
Method
- Preheat oven to 350°F. Line baking sheet with parchment paper.
- In a large bowl, cream together the butter and sugar until fluffy. Mix in vanilla extract.
- Gradually add in the flour and mix until just combined. Fold in 2 tablespoons of sprinkles.
- Form dough into 1-inch balls and place on prepared baking sheet. Gently flatten each ball and sprinkle additional sprinkles on top.
- Bake for 12-15 minutes or until edges are lightly golden. Let cool on wire racks.