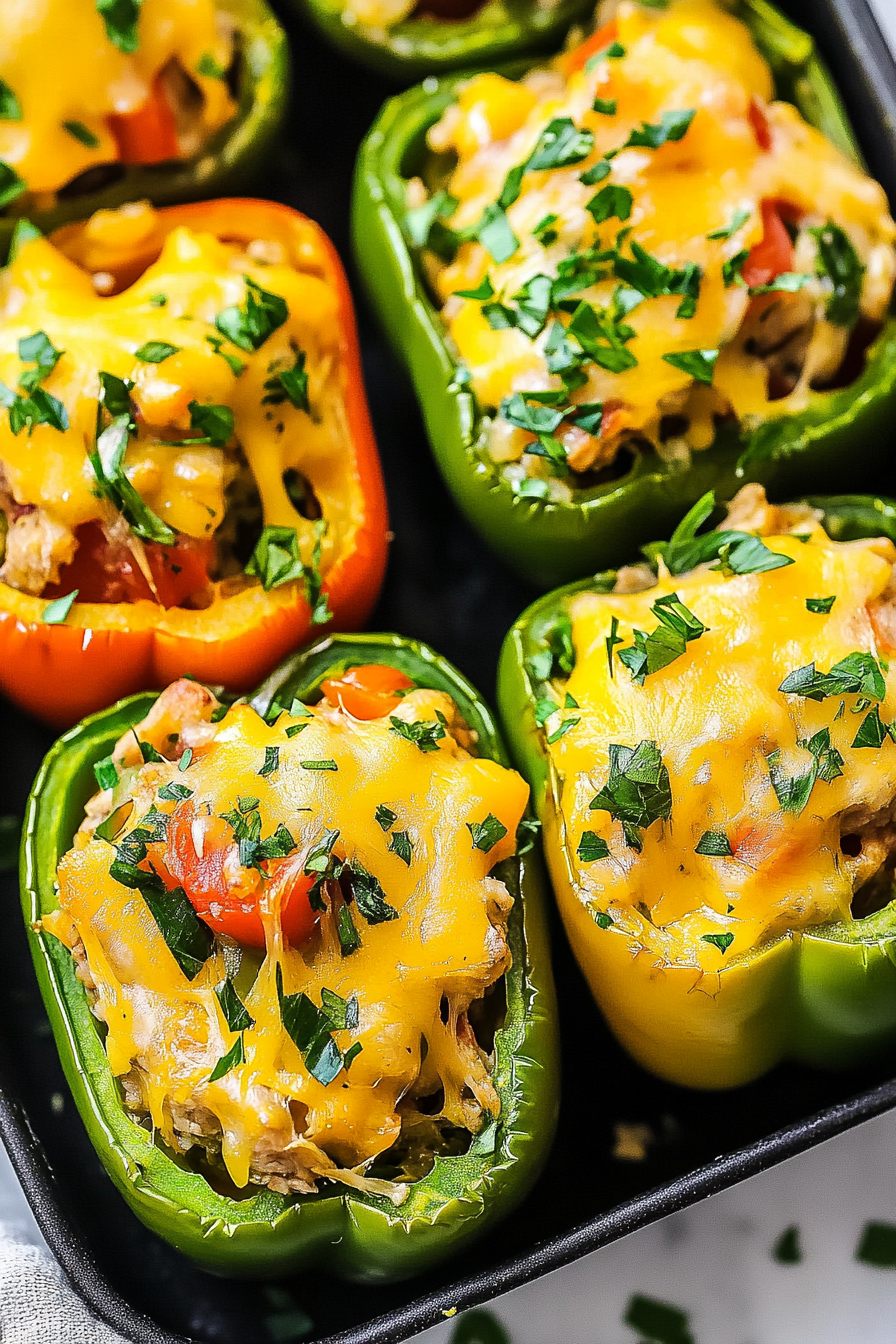
Easy Stuffed Peppers with Chicken & Beans
If there’s one dish that feels like a warm hug from the inside out, it’s these stuffed peppers. I remember my mom making them when I was a kid — the smell of roasted peppers filling the house, the little bites of savory filling bursting with flavors that just made everything feel right. Over the years, I’ve tweaked her recipe, added my own twists, and now, honestly, I make this at least once a month. It’s such a versatile comfort food — you can make it filling and hearty for dinner or lighten it up for a quick lunch. Trust me, this one’s a lifesaver on busy nights when I don’t want to spend ages in the kitchen but still want something delicious. My kids ask for these all the time, and I love how easy they are to prep ahead. Plus, you can customize the fillings based on what you’ve got in the fridge. I promise, once you try these stuffed peppers, they’ll be in your regular rotation too!
What is stuffed peppers?
Think of stuffed peppers as a little edible package of goodness. In essence, they’re sweet or savory bell peppers — or sometimes poblano or jalapeños — filled with a flavorful mixture of cooked grains, meat, beans, cheese, or veggies, then baked until tender. The name “stuffed peppers” is pretty straightforward: you hollow out the peppers, stuff them with whatever tasty ingredients you love, and bake. It’s a dish that’s been around for ages, with roots in many different cuisines, from Mediterranean to Latin American. The beauty of stuffed peppers is how adaptable they are — you can be as creative as you want. They’re basically a portable, wholesome meal that looks fancy but is honestly so simple to throw together. Plus, they’re naturally pretty healthy, especially if you load up on fresh veggies and lean proteins. Think of it as a full meal inside a colorful, edible vessel — how cool is that?
Why you’ll love this recipe?
What I love most about these stuffed peppers is how adaptable they are. You can go all out with cheesy, meaty goodness, or keep them light and veggie-packed. The flavor? Oh, it’s next-level — the roasted peppers bring a slightly smoky sweetness that pairs so well with savory fillings, herbs, and cheese. This dish is honestly a flavor party for your taste buds! But beyond that, it’s super simple to make, and I’ll admit, that’s what saves me on busy weeknights. I always keep a few peppers in the fridge because I know I can make a quick filling with whatever’s on hand — cooked rice, canned beans, diced tomatoes, whatever! Budget-wise, it’s pretty darn good, too. Peppers might seem fancy, but they’re usually affordable, especially when bought in season. Plus, you can customize it endlessly — I’ve done vegetarian versions, ones with ground turkey, even stuffed zucchini when I ran out of peppers. It’s truly a blank canvas, and that’s why this recipe has become a keeper in my house.
The smell alone of these peppers roasting is worth the effort — it fills the whole house with that cozy, inviting aroma. And when you cut into them, that juicy, flavorful filling just oozes out, making it a real showstopper. I’ve made this for family dinners, potlucks, even brunches when I want something a little different. Honestly, I think once you get the hang of it, you’ll be hooked. It’s the kind of dish that looks impressive but is so easy you’ll want to make it every week. Trust me on this one — stuffed peppers are a game-changer!
How do you make stuffed peppers?
Quick Overview
This recipe is all about effortless prep and maximum flavor. First, you’ll roast the peppers until slightly charred and tender — this step adds so much depth! Meanwhile, you’ll mix up your filling using a combination of cooked grains (like rice or quinoa), some protein (ground meat or beans), herbs, and spices. Then, you stuff the peppers generously with that mixture, top with cheese if you like, and bake until bubbly and golden. The trick is to keep everything flavorful but simple, so you can have a wholesome meal without spending hours in the kitchen. It’s as straightforward as it gets — just prep, stuff, bake, and enjoy!
Ingredients
For the Main Filling:
- 4 large bell peppers (any color, but I love red or orange for sweetness)
- 1 cup cooked rice or quinoa (I often use brown rice for extra fiber)
- ½ pound ground beef, turkey, or plant-based protein (whatever you prefer)
- 1 small onion, diced
- 2 cloves garlic, minced
- 1 cup diced tomatoes (fresh or canned)
- ½ cup shredded cheese (cheddar, Monterey Jack, or mozzarella work great)
- Fresh herbs — parsley or cilantro, chopped
- Salt, pepper, cumin, paprika — for flavor
For the Filling Variations:
- Sweet corn or black beans for a vegetarian twist
- Chopped mushrooms or spinach for added earthiness and nutrition
For the Glaze or Topping:
- Additional cheese to melt on top (parmesan or a blend)
- Optional fresh herbs for garnish
- Optional splash of hot sauce or a drizzle of sour cream for serving
Step-by-Step Instructions
Step 1: Preheat & Prepare the Peppers
Crank your oven up to 400°F (200°C). While that warms, wash your peppers thoroughly. Slice the tops off (save these for presentation or chopping into bits for the filling), and scoop out the seeds and membranes gently — I always do this with a small spoon or a melon baller to keep the peppers intact. Lightly brush the outsides with a little olive oil and arrange them cut-side up on a baking sheet lined with parchment. Roasting them for about 10 minutes softens their biceps, making stuffing easier and adding that slightly smoky flavor everyone loves.
Step 2: Mix the Dry Ingredients
In a large bowl, combine your cooked grains, diced onions, herbs, spices, and any add-ins like beans or veggies. This is where I get creative — sometimes I toss in a spoonful of pesto or a dash of hot sauce for an extra punch. Mix until evenly combined, and taste-test the seasoning — trust me, better to adjust early!
Step 3: Mix the Wet Ingredients
In a separate bowl, whisk together the eggs (if using), diced tomatoes, and a splash of olive oil. This helps hold everything together and keep the filling moist. If you’re making a vegetarian version, skip the eggs and just rely on the cheese and veggies for moisture.
Step 4: Combine
Add the wet mixture into the dry ingredients and stir gently until everything is nicely coated. Don’t overmix — you want a tender filling, not a dense brick. If it feels too dry, fold in a little broth or more diced tomatoes. If it’s too wet, sprinkle in a bit more cooked grain or cheese to absorb excess moisture.
Step 5: Prepare Filling
Now, grab a spoon and fill each pepper generously, pressing down gently to pack as much as possible without overflowing. If you like, sprinkle some extra cheese on top for that gooey, golden crust.
Step 6: Layer & Swirl
If you want a marbled look, spoon some extra filling on top and swirl it with a toothpick to create patterns. It’s totally optional but gives a fun, rustic look that your guests will love.
Step 7: Bake
Place the stuffed peppers in the oven and bake for about 20-25 minutes, until the peppers are soft and the cheese (if using) is bubbling and golden. Keep an eye on them after 20 minutes — every oven is different, and you don’t want burned cheese or raw peppers!
Step 8: Cool & Glaze
Let the peppers cool for a few minutes — they’ll be super hot right out of the oven. If you’re topping with extra cheese or herbs, sprinkle now, then pop them back in for a minute if needed to melt everything beautifully. A light drizzle of honey or balsamic vinegar at this stage can also add a lovely sweet-sour contrast.
Step 9: Slice & Serve
This is the fun part. Use a sharp knife to cut into each pepper, revealing that vibrant, cheesy filling. Serve hot with a side salad, crusty bread, or even some roasted potatoes. I like to garnish with fresh herbs, a squeeze of lemon, or a dollop of sour cream — it elevates everything!
What to Serve It With
These stuffed peppers are so versatile that they pair well with almost anything. For breakfast, serve with a simple side of scrambled eggs and a steaming mug of coffee — it’s a breakfast that energizes! During brunch, add a drizzle of hollandaise or a bit of salsa for extra flair. As a main course for dinner, a light green salad with a tangy vinaigrette complements the richness inside. Or, keep it simple with just a side of roasted veggies or crispy tortilla chips. When I make these at home, I love pairing them with a chilled glass of white wine or sparkling water infused with fresh lemon. My family even enjoys leftovers cold straight from the fridge — they make perfect, portable lunchboxes!
Top Tips for Perfecting Your Stuffed Peppers
Over the years, I’ve learned a few tricks that make these stuffed peppers turn out perfectly every time. First, always roast your peppers at high heat — it helps them develop flavor and makes the skin easier to remove if you want to peel them before stuffing. When mixing your filling, avoid overmixing — I’ve found that just folding everything in gently keeps the texture light and tender. If your filling feels too dry, add a splash of broth or extra diced tomatoes; if too wet, sprinkle in more grain or add a bit more cheese. For a colorful presentation, layer different colored peppers and swirl the fillings to create eye-catching patterns. Trust me, a little patience during preparation makes a big difference. I tested this recipe with different cheeses and found that a blend of mozzarella and parmesan gives a gooey yet slightly salty bite that’s irresistible. Also, don’t skimp on baking time — letting the cheese get bubbly and golden really pulls everything together. My secret tip? Add a sprinkle of fresh herbs right after baking for that burst of brightness. Once you master the basics, you’ll feel brave enough to experiment with fillings — maybe goat cheese and spinach, or spicy chorizo and corn — the possibilities are endless!
Storing and Reheating Tips
Making stuffed peppers ahead of time? No problem! Store leftovers in an airtight container in the fridge for up to 3 days. If you want to keep the peppers intact, let them cool completely before wrapping each one in foil or placing them in a sealed container. Reheating is simple — microwave for 1-2 minutes until hot, or reheat in a 350°F (175°C) oven for about 10 minutes. If you’ve topped them with cheese, you might want to uncover them during reheating to regain that cheesy gooeyness. For longer storage, you can freeze the peppers — just wrap each one tightly in plastic wrap and foil, then pop in a freezer-safe bag for up to 3 months. Defrost in the fridge overnight, then reheat as above. A quick tip: if the filling seems a little dry after reheating, drizzle with a tiny bit of olive oil or a splash of broth to bring back moisture. This dish reheats beautifully, and honestly, the flavors deepen overnight. I like to add a fresh sprinkle of herbs before serving again — it makes everything taste fresh as if you just baked it!
Frequently Asked Questions
Final Thoughts
There’s nothing quite like the smell of these stuffed peppers baking away — it instantly makes me feel cozy and cared for. They’re so forgiving, so adaptable, and honestly, downright delicious. Whether you’re making a quick weeknight dinner, prepping for a family gathering, or just craving something hearty yet healthy, these peppers are my go-to. The best part? Every time I make them, I hear my kids ask for seconds or see my husband’s eyes light up at the first bite. It’s such a joy to serve something that’s essentially simple ingredients turned into a celebration of flavor. I highly recommend experimenting with your own fillings — maybe add a bit of spicy chorizo or extra cheese — and making this dish your own signature. Remember, cooking is all about having fun and loving the process. So go ahead, grab those peppers, and let’s get cooking! I can’t wait to see how yours turn out — don’t forget to leave a comment or share your tweaks. Happy baking!
Stuffed Bell Peppers with Quinoa and Vegetables
Ingredients
Method
- Preheat the oven to 375°F. Cook quinoa according to package instructions and set aside.
- In a skillet, heat olive oil over medium heat. Add onion and garlic, sauté until translucent.
- Add chopped zucchini and bell peppers to the skillet, cook for 5 minutes until vegetables are tender.
- Mix cooked quinoa with sautéed vegetables, season with salt and pepper, and stir in shredded cheese.
- Cut the tops off bell peppers and remove seeds. Stuff peppers with quinoa and vegetable mixture.
- Place stuffed peppers in a baking dish, cover with foil, and bake for 30 minutes.
- Remove foil and bake uncovered for an additional 10 minutes until cheese is bubbly and golden.