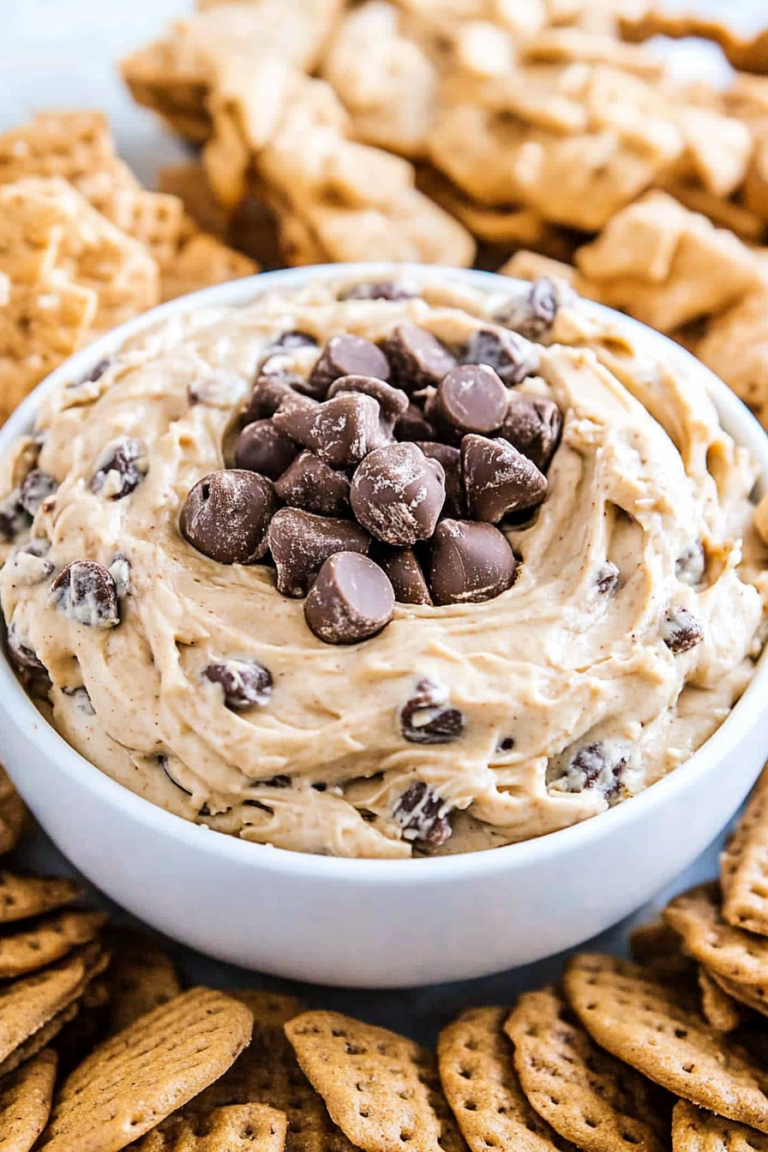
Easy Chocolate Pudding Dessert Cups
If you’re like me, there’s nothing quite like a dessert that’s fun, easy, and hits every sweet spot — especially when it’s as nostalgic as a classic Oreo dirt cake. I first tried making this when my kids begged for a no-bake treat that wouldn’t take all afternoon. You know the feeling — you want something satisfying but don’t want to crank up the oven or spend hours in the kitchen. This dirt cake not only tastes incredible, with that rich chocolatey flavor and creamy texture, but it also looks adorable layered with Oreo crumbs and buried goodies that make the kids go wild. Honestly, it’s a lifesaver on busy nights, and I swear, it’s disappeared in minutes at my house. It’s the kind of dessert that makes you feel like a kid again, while still feeling totally indulgent. Plus, it’s foolproof, no fancy equipment needed, and you probably already have everything in your pantry. Trust me — once you try my secret tips, this dirt cake will become your new go-to sweet fix.
What is oreo dreary cake?
Oreo dirt cake is a fun, layered dessert that’s basically a mashup of chocolate and cream with that irresistible crunch of Oreo cookies. Think of it as a no-bake mousse-like treat, where the moisture from the filling seeps into crushed Oreos, creating a rich, dirt-like appearance — hence the name. It’s inspired by the traditional “dirt cake” (often made with instant pudding and crushed cookies), but the star here is the classic Oreo cookie. The name’s pretty self-explanatory: this is a cake that looks like dirt, but tastes like a chocolatey, creamy dream. It’s served in a big family-sized dish or individual cups, perfect for birthdays, family get-togethers, or just to satisfy that sudden sweet craving (which, let’s be honest, happens to all of us, right?). The beauty of Oreo dirt cake is its simplicity — layered with a rich cream cheese filling, whipped cream, and lots of crushed Oreos, it’s a crowd-pleaser that feels special but is honestly a breeze to make.
Why you’ll love this recipe?
There are so many reasons I keep coming back to Oreo dirt cake — it’s become a household staple, for good reason. First off, the flavor. Imagine the deep, chocolatey richness of Oreos contrasted with a fluffy, sweet cream filling that’s just the right balance of indulgent and refreshing. It’s like a chocolate lover’s dream come true. What I love most about this is how EASY it is to put together — no baking, no fuss, just mixing, layering, and chilling. Plus, it’s super budget-friendly, using ingredients you probably already have—Oreos, cream cheese, heavy cream, and a little sugar. The versatility is a huge bonus, too; you can tweak the filling with peanut butter, add a splash of vanilla, or even throw in some mini chocolate chips for extra texture. My kids ask for this all the time, and I’ve even made it for potlucks and school events. It’s a crowd-pleaser, sure, but honestly, I find myself craving it late at night when I want something sweet — and I love that it’s so quick to whip up after a busy day. It’s pure comfort in dessert form, and I promise once you get the hang of it, it’s impossible to resist.
How do you make Oreo Dirt Cake?
Quick Overview
This recipe is all about layering creamy, chocolatey goodness with crushed Oreos to mimic that dirt look — and it’s shockingly simple. Once you’ve mixed up the rich filling, you just crush and layer Oreos, then top with whipped cream or a simple glaze. The best part? You really don’t need any baking skills or fancy equipment. Just some patience to let the flavors meld in the fridge. It’s a perfect make-ahead dessert that’s ready to wow your family or guests. I always do this when I want something quick but impressive, and I’ve never had leftovers — it’s that addictive!
Ingredients
For the Main Batter:
– 16 oz (about 2 cups) of cream cheese, softened (trust me, softened at room temp makes a huge difference
– 1 cup powdered sugar (sifted for an ultra-smooth filling)
– 2 cups heavy whipping cream (chilled, so it whips better)
– 1 teaspoon vanilla extract (or vanilla bean paste for extra flavor)
– Pinch of salt (to balance out the sweetness)
For the Filling:
– 1 cup crushed Oreos (more on how to crush perfectly further down)
– 1/2 cup mini chocolate chips or chunks (optional, but adds texture)
For the Glaze or Topping:
– Additional crushed Oreos for garnish
– Whipped cream or instant chocolate pudding (for extra visual flair)
– Chocolate shavings or sprinkles (optional but fun!)
Step-by-Step Instructions
Step 1: Preheat & Prep Pan
No oven preheating needed, but I always grab a nice baking dish or a clear trifle bowl — something that shows off the layers. If you’re making individual cups, line up your dessert cups or jars. Just give them a quick rinse, and set aside. Keep that cream cheese softened; it makes blending much smoother and prevents lumps.
Step 2: Mix Dry Ingredients
Not much dry here — just crushing the Oreos! I like to do this in a zip-top bag with a rolling pin until I get fine crumbs, or pulse in a food processor. Be careful not to turn the Oreos into dust — a little texture is good, so leave some crumbs a little chunkier. Set aside about a cup for decoration and layer accents.
Step 3: Mix Wet Ingredients
In a mixing bowl, beat the softened cream cheese with powdered sugar until smooth and fluffy. Then, pour in the vanilla and a pinch of salt. In a separate bowl, whip the heavy cream until soft peaks form — it should be thick and able to hold a gentle fold. Carefully fold the whipped cream into the cream cheese mixture — don’t overmix, or you’ll lose that luscious fluffiness. Trust me, gentle folding is the key to a light, airy filling that melts in your mouth.
Step 4: Combine
Add about two-thirds of your crushed Oreos into the filling and fold gently. This gives the “dirt” flavor while keeping some crunch. If you want, stir in mini chocolate chips now. The consistency should be creamy and thick but also scoopable. If it’s too runny, pop it in the fridge for 10-15 minutes — it firms up perfectly for layering.
Step 5: Prepare Filling
If you’re feeling fancy, mix in a splash of coffee liqueur or even a little peanut butter to give it a fun twist. But honestly, the classic version is perfect as is.
Step 6: Layer & Swirl
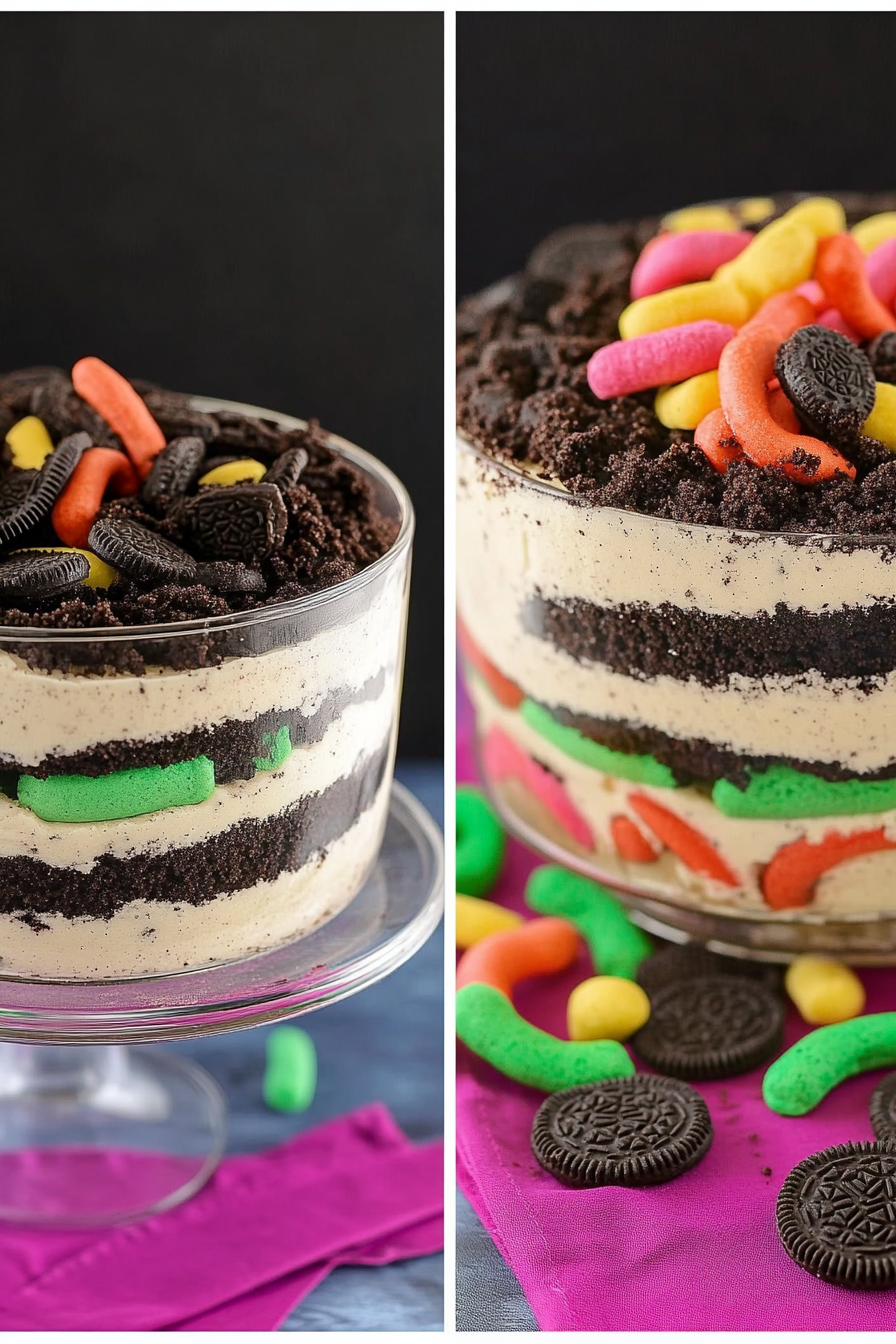
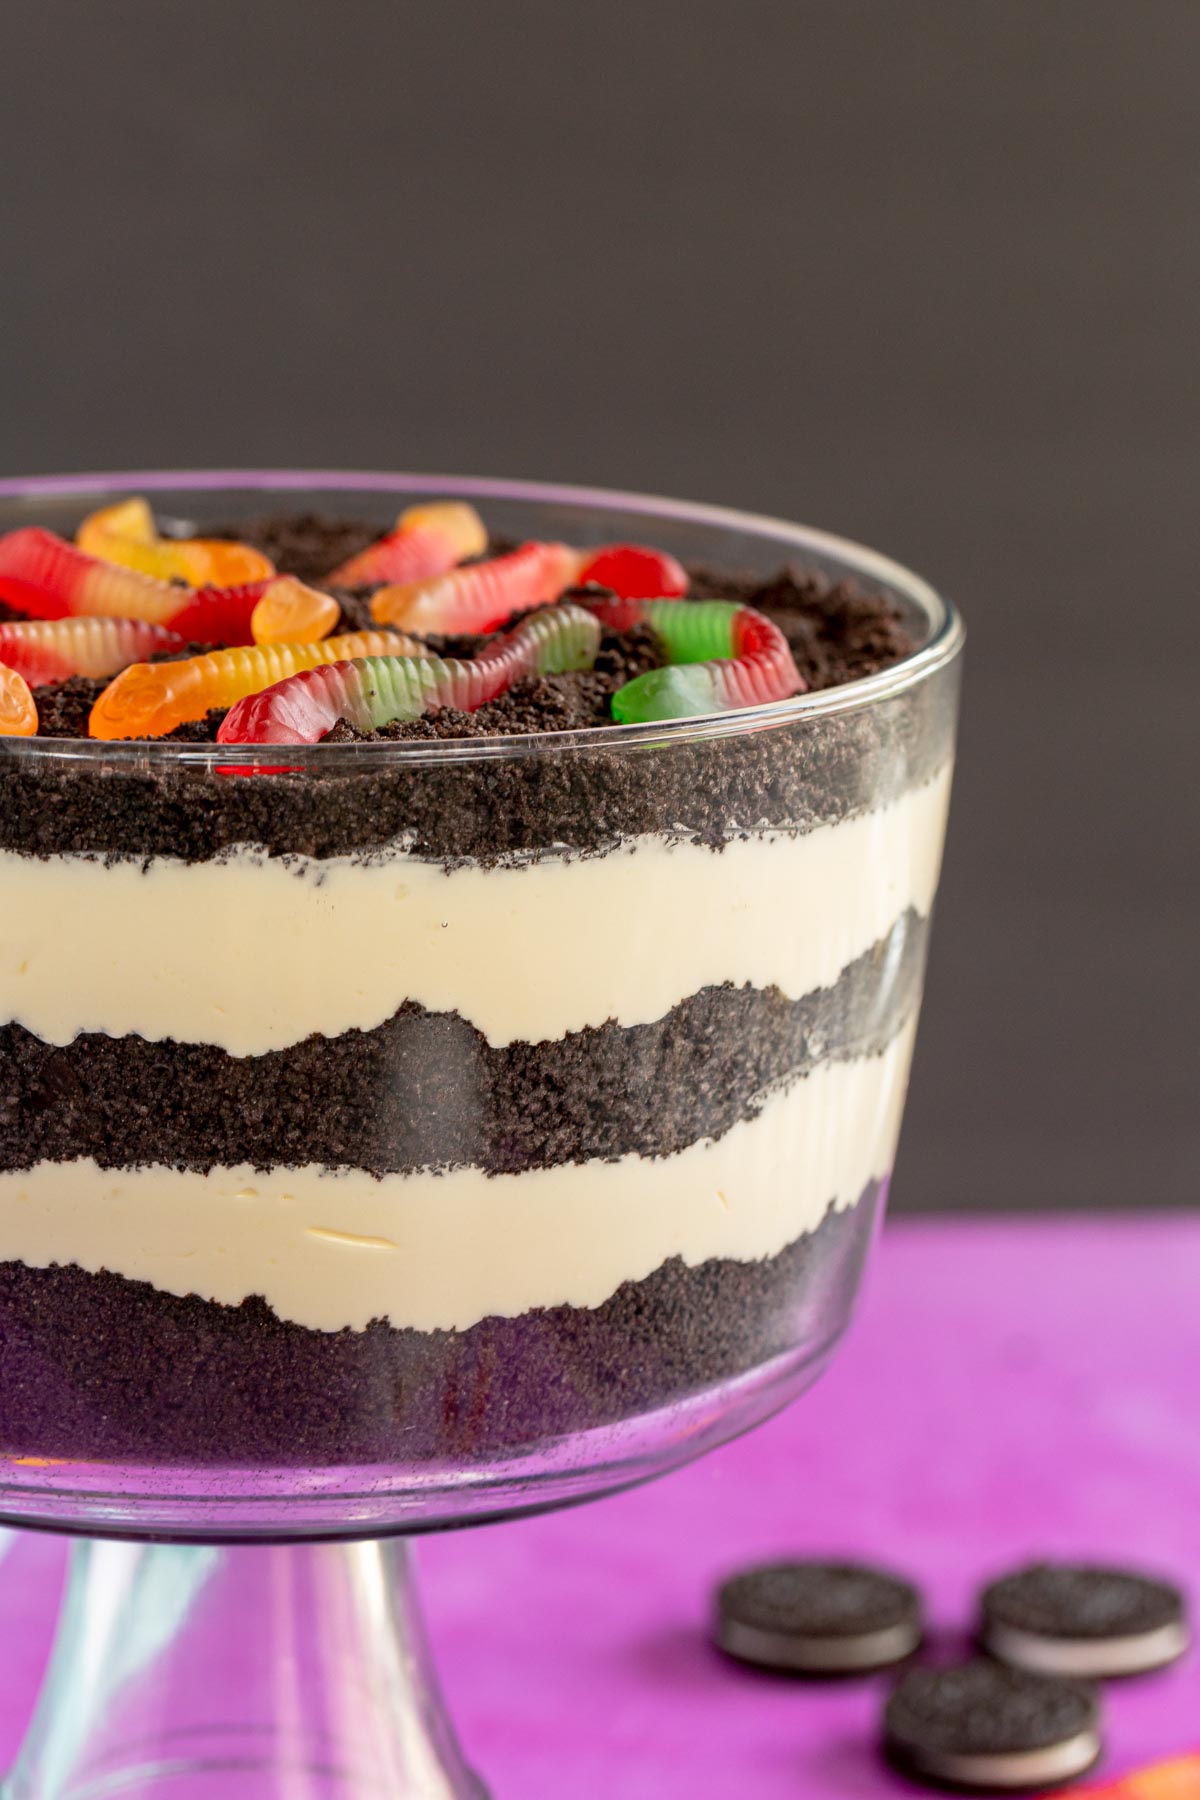
Start with a layer of the creamy filling, then sprinkle on crushed Oreos. Repeat until your dish is full, finishing with a layer of the whipped topping or remaining Oreos for a pretty finish. For that fun marbled look, use a skewer or knife to swirl some filling gently into the Oreos — it makes it look more like real “dirt”.
Step 7: Bake
No baking here! Just cover and pop it into the fridge for at least 4 hours, but overnight is even better. The wait is worth it because the flavors meld beautifully.
Step 8: Cool & Glaze
Once chilled, finish with a sprinkle of more crushed Oreos on top. If you love a shiny finish, whip up some more whipped cream or melt a little chocolate for drizzling. I love a dollop of whipped cream and a few sprinkles for that finishing touch. The cool thing? You can also add gummy worms or candy eyes for a fun Halloween version!
Step 9: Slice & Serve
Use a sharp knife dipped in warm water for clean cuts — it’s the secret to slicing through that thick, creamy layer without smudging. Serve chilled, and watch everyone’s eyes light up. This is best enjoyed cold, straight from the fridge. Trust me, every bite is a little bit of childhood happiness.
What to Serve It With
This Oreo dirt cake is versatile enough to be the star of any occasion. For a quick breakfast or brunch, pair it with a strong cup of coffee or a cold glass of milk — something to balance that rich, chocolatey flavor. I even like serving it in small cups for brunch parties with a drizzle of caramel or fudge sauce on top.
As a decadent after-dinner treat, it’s perfect alongside a scoop of vanilla ice cream or a warm mug of hot chocolate. My family always asks for seconds and sometimes thirds, especially when I dust a little more crushed Oreo on top for that extra crunch. On casual nights, I dish it out in mason jars with a spoon tucked inside — super cute and easy to transport. And hey, if you’re feeling festive, add some colorful sprinkles or gummy worms for Halloween or birthday themes. Basically, it’s the dessert that keeps giving, proof that simple ingredients can make magic happen.
Top Tips for Perfecting Your Oreo Dirt Cake
Over the years, I’ve picked up a few tricks that make this dirt cake even better. First, always soften your cream cheese well — it makes mixing so much easier and prevents lumps. When crushing Oreos, I find that giving them a few pulses in the food processor (or smashing in a zip-top bag with a rolling pin) gives you that perfect crumb texture—chunky enough for texture, fine enough to spread easily.
If you want a lighter cake, try using half heavy cream and half Greek yogurt or mascarpone — it’s a secret I discovered by accident that actually made it creamier and tangier. For a more indulgent twist, stir in a spoonful of peanut butter or Nutella into the filling before folding in the whipped cream. It sounds crazy, but trust me, it elevates the flavor and makes each spoonful feel even richer.
Swirling the filling and Oreos carefully is the trick to getting a beautiful marbled effect. I use a toothpick or skewer to gently drag through the layers, creating those pretty veins of Oreos that really make it look like a real dirt cake. When baking the cake (if you decide to bake a version for a different twist), keep an eye on the edges — my oven runs a little hot, so starting at 350°F and checking at 20-minute intervals prevents overbaking.
And lastly, don’t skip the chilling step. The wait allows the flavors to meld, and that thick, mousse-like consistency is what everyone loves most. I’ve tested it with different chilling times, and honestly, overnight gives the best result. It’s worth the patience, I promise.
By experimenting with ingredient swaps — like dairy-free options, different flavored Oreos, or adding a splash of espresso — you can make this dessert uniquely yours. The key is to keep the texture light and the flavors balanced, so every bite feels just right. This is one of those recipes that’s simple but flexible enough for improvisation, which is exactly what I love about it.
Storing and Reheating Tips
This dirt cake is incredibly forgiving when it comes to storage. Once it’s chilled and set, I usually cover it tightly with plastic wrap or a lid to keep it fresh. If you’re not serving it immediately, it stays good in the fridge for up to 3-4 days — though I find it’s often gone sooner! The beauty of this recipe is that it actually tastes better the next day, once the flavors have fully melded together.
If there’s any leftover, you can also freeze it — just wrap it well with plastic wrap and foil to prevent freezer burn. When you’re ready to enjoy, thaw it in the fridge overnight. The texture might be slightly firmer, but trust me, it’s just as delicious. If you want to freshen it up before serving, add another layer of whipped cream or sprinkle a few more Oreo crumbs on top.
For the glaze or topping, I suggest adding the finishing garnishes just before serving — especially if it’s been refrigerated for a while, to keep that shiny, appealing look. Whether it’s whipped cream, chocolate shavings, or extra Oreos, these simple touches make a big difference visually and flavor-wise.
Frequently Asked Questions
Final Thoughts
There’s just something so comforting about a dessert that’s both playful and delicious — and Oreo dirt cake hits all those marks for me. It’s a recipe I’ve made countless times for family gatherings, kids’ parties, or even just a weeknight treat when I want something satisfying but quick. Honestly, it’s become my go-to “happy ending” no matter the occasion. The best part? It’s adaptable, forgiving, and always a hit. Once you master the layering and chilling, you’ll see how effortlessly it comes together and how everyone keeps asking for seconds (and sometimes thirds!). Plus, I love that you can put your spin on it — adding peanut butter, cocoa, or even swapping out Oreos for another favorite cookie — making it uniquely yours. So grab those Oreos, find a nice dish, and let’s get started. Happy baking — or rather, no-baking — everyone! I can’t wait to see how yours turns out. Don’t forget to leave a comment or share your fun variations. Happy dessert-ing!
Easy Oreo Dirt Cake
Ingredients
Method
- In a food processor, turn Oreos into Oreo crumbs.
- Cream softened cream cheese until smooth with a hand or stand mixer.
- Add instant pudding mix and milk to the cream cheese and mix until well combined.
- Fold in the Cool Whip until fully mixed.
- Layer Oreo crumbs and pudding in a glass trifle bowl, beginning and ending with Oreo crumbs. Add gummy worms in between layers.
- Top with gummy worms and chill before serving.