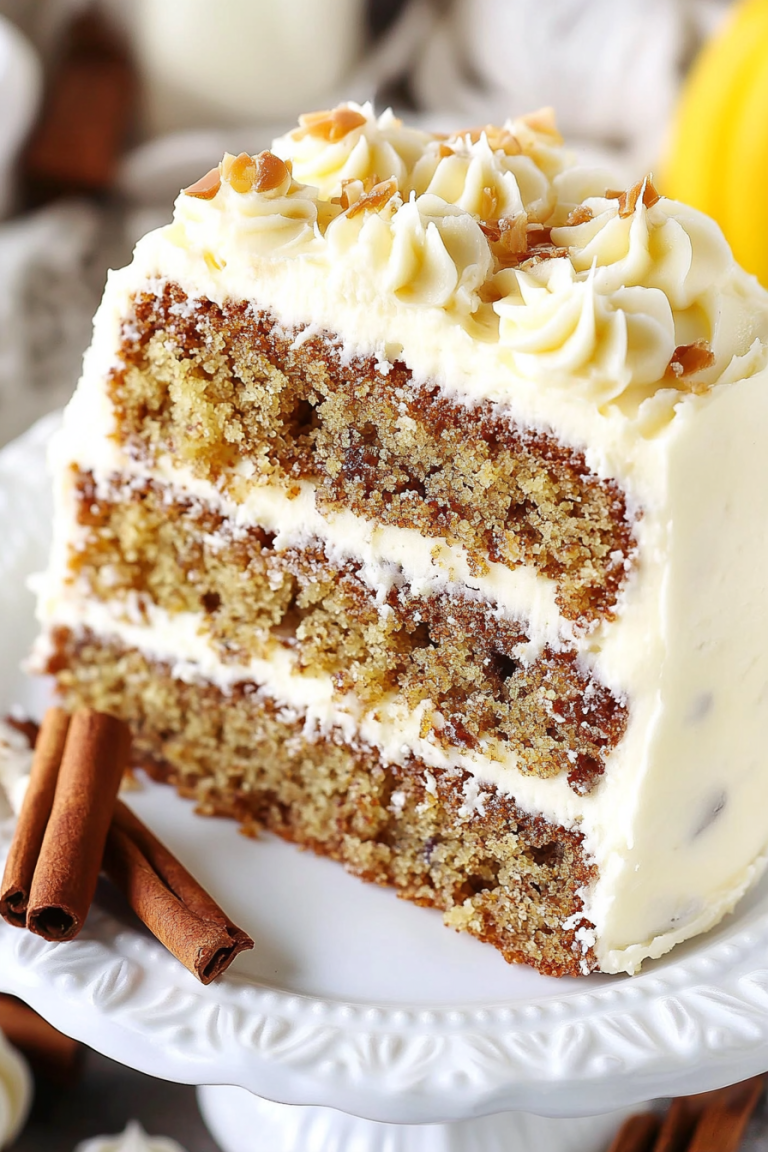
Autumn Spice Swirl Cake Recipe
There’s something about the fall that just makes me want to bake and indulge in cozy, warm flavors. Maybe it’s the crisp air or the way the leaves turn that golden-orange hue—kind of like the color of a ripe pumpkin. Honestly, I always do this when the seasons change: I whip up a batch of my homemade pumpkin roll. It’s a recipe I’ve perfected over the years, and it’s become a staple at family gatherings, cozy weekends, and even as a sweet gift for neighbors. The smell alone—spiced and amazing—fills the whole house with warmth. My kids ask for this all the time, and I won’t lie, I sneak a piece when no one’s watching. It’s incredibly delicious and surprisingly simple to make, which makes it a lifesaver on busy nights or when I want to treat the family to something special. Trust me, once you try this pumpkin roll, it’ll become part of your fall tradition too!
What is a pumpkin roll?
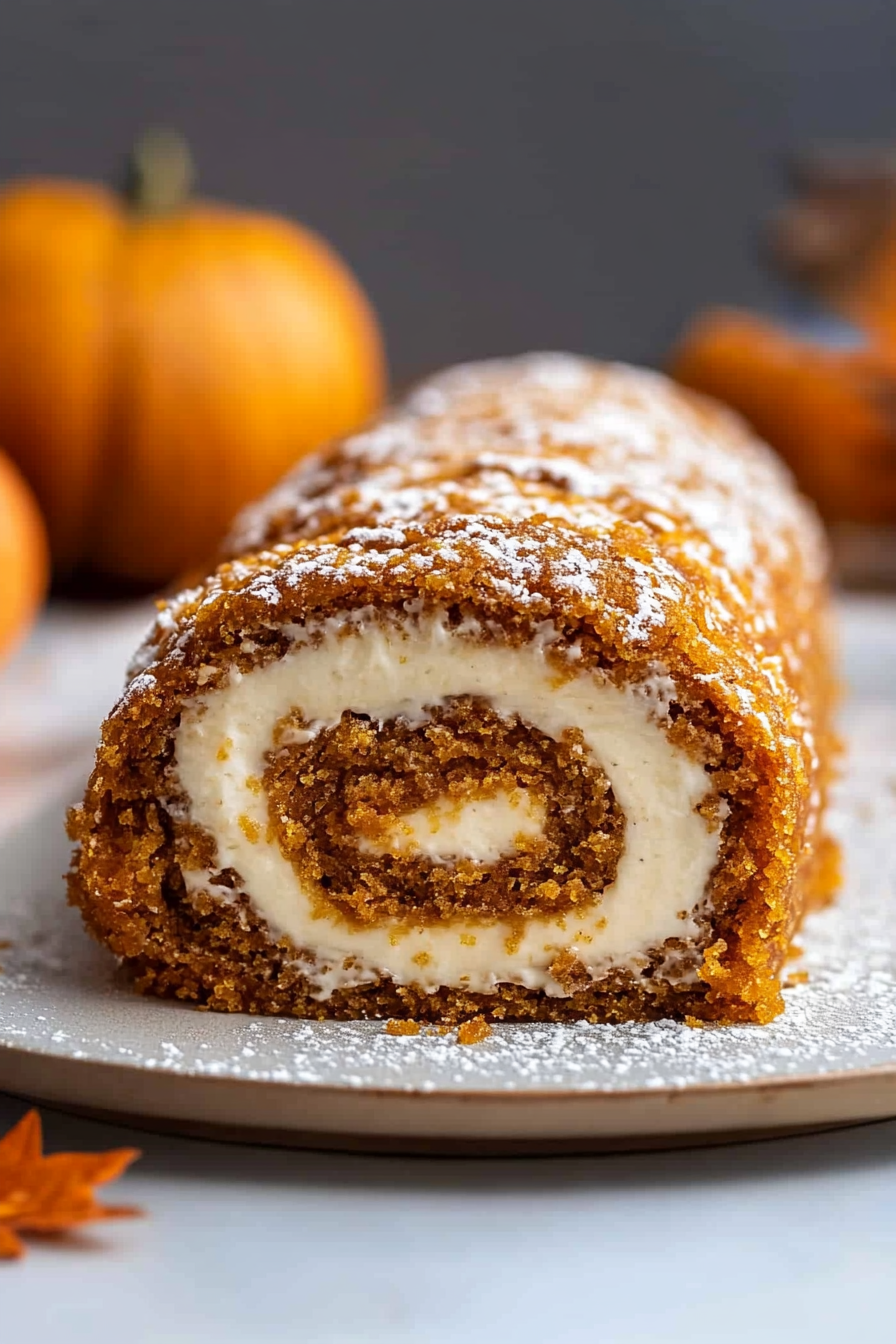
A pumpkin roll is basically a soft, spongy cake rolled around a luscious, creamy filling—think of it as a pumpkin-flavored Swiss roll. It’s a classic autumn dessert, rooted in American baking tradition, that combines the cozy warmth of pumpkin with cinnamon, nutmeg, and a slightly chewy cake. The name “pumpkin roll” comes from the way it’s made: a thin layer of moist pumpkin-spiced batter rolled up with the filling inside. Think of it as a cake version of a cinnamon bun but packed with pumpkin flavor. It’s essentially a celebration of fall in every slice—light, flavorful, and with just the right amount of sweetness. I love how the cake is perfectly tender and the filling is smooth and rich—kind of like a pumpkin cheesecake in roll form. What’s fun about it is how versatile it is; you can dress it up with powdered sugar, add some whipped cream, or even a drizzle of caramel. It’s the kind of dessert everyone asks for over the holidays—and it always disappears in minutes at my house!
Why do you like pumpkin rolls?
This recipe is a total winner for so many reasons. First, the flavor—oh my goodness, that warm, spicy pumpkin with hints of cinnamon and nutmeg takes me right back to my grandmother’s kitchen. It’s cozy, inviting, and just feels like a big hug. What I love most about this pumpkin roll is how easy it is to make. I’ve tested it countless times, tweaking the ingredients to get that perfect lightness and flavor, and honestly, it comes together faster than you’d imagine. Plus, it’s budget-friendly—most of these ingredients you probably already have in your pantry: canned pumpkin, sugar, eggs, and spices. Bonus: you can get really creative with the filling. I’ve experimented with cream cheese, mascarpone, and even flavored whipped toppings, and each variation is delicious in its own way. Plus, it’s versatile enough for breakfast (you can put a dollop of cream on it), dessert, or even a fancy brunch treat. This pumpkin roll isn’t just a dessert; it’s a showstopper that makes your house smell incredible and your family smile every time.
How do you make a pumpkin roll?
Quick Overview
If I had to sum up how I make my favorite pumpkin roll, it’s really straightforward. You start by whisking together dry ingredients—flour, baking powder, spices—and set them aside. In another bowl, you beat eggs with sugar and pumpkin until smooth and creamy. Then, gently fold the dry into the wet, making sure not to overmix—this keeps the cake light and airy. Once baked, you flip the cake onto a clean towel dusted with powdered sugar (to prevent sticking), carefully unroll it while still warm, spread with your luscious filling, roll it back up tightly, and let it chill until set. After a short wait, it’s ready to slice, dust with powdered sugar, and serve! The trick is to not overbake; the cake should be moist and tender, not dry or tough. Trust me, once you get the hang of the rolling part, it’s so satisfying to see that perfect spiral—like something straight out of a bakery but totally homemade!
Ingredients
For the Main Batter:
– 3/4 cup all-purpose flour (I always opt for unbleached if I can, for better flavor)
– 1 teaspoon baking powder
– 1 teaspoon ground cinnamon
– 1/2 teaspoon ground nutmeg
– 1/4 teaspoon ground cloves (a tiny bit of this goes a long way!)
– Pinch of salt
– 3/4 cup granulated sugar
– 2 large eggs
– 1 cup canned pumpkin (not pumpkin pie filling, just plain pumpkin)
– 1 teaspoon vanilla extract
For the Filling:
– 8 oz cream cheese (softened)
– 1/2 cup powdered sugar
– 1 teaspoon vanilla extract
– Optional: a sprinkle of cinnamon or pumpkin spice for extra flavor
For the Glaze (optional but pretty):
– Powdered sugar mixed with a touch of milk or cream to make a drizzling glaze
– Alternatively, a caramel drizzle or whipped cream work beautifully too
Step-by-Step Instructions
Step 1: Preheat & Prep Pan
Preheat your oven to 375°F (190°C). Line a large rimmed baking sheet (about 15×10 inches) with parchment paper and spray or grease it lightly. Dust the paper with a little flour or powdered sugar; this makes rolling easier later. Keep a clean towel nearby, dusted with powdered sugar—trust me, this makes a big difference when unrolling!
Step 2: Mix Dry Ingredients
In a small bowl, whisk together the flour, baking powder, spices, and salt. Set it aside. Doing this step first keeps your dry ingredients evenly distributed and helps prevent clumping, which can ruin the texture of your cake.
Step 3: Mix Wet Ingredients
In a larger bowl, beat the eggs and sugar with a hand or stand mixer until thickened and slightly pale. Add the pumpkin and vanilla, mixing until everything is well combined and smooth. I always do this until it’s really glossy—kind of like a thick batter for pancakes.
Step 4: Combine
Gently fold the dry ingredients into the wet mixture—be gentle here! Overmixing can make the cake dense. The batter should be thick but spreadable. It’s okay if there are a few tiny lumps; that’s what keeps it tender.
Step 5: Prepare Filling
While the batter is resting, beat the softened cream cheese with powdered sugar and vanilla until smooth. Taste it—a little more powdered sugar might be needed depending on your preference. I like it sweet but not overpowering.
Step 6: Layer & Swirl
Pour the batter onto your prepared baking sheet, spreading it evenly with a spatula. Bake for about 13–15 minutes, until the top is springy and a toothpick inserted in the center comes out clean. Once out, immediately invert the cake onto your prepared towel, peel off the parchment, and gently roll it up from the short end, using the towel to help shape it. Let it cool slightly while still rolled up—that’s key to keeping that lovely spiral intact.
Step 7: Bake
Watch the baking time closely—overbaking will dry out the cake. If the edges start pulling away or the top is cracking, it’s done. The center should be moist but not wet. The smell of warm spices and pumpkin is pure magic at this stage.
Step 8: Cool & Glaze
Allow the cake to cool completely in a rolled shape, about 20 minutes. Unroll gently, spread the filling evenly across the surface, then carefully re-roll. You can refrigerate now to let it set, or go straight to glazing with powdered sugar drizzle or whipped cream. If you’re adding a glaze, do it once the cake is fully cooled—hot cakes might make the glaze run or melt.
Step 9: Slice & Serve
Once chilled and set, slice with a serrated knife for clean cuts. A little dusting of powdered sugar on top makes it look pretty for serving. This is perfect with a hot cup of coffee or tea, especially during those chilly fall mornings. Believe me, that first bite is like a burst of autumn in your mouth.
What to Serve It With
This pumpkin roll is a symphony of flavors on its own, but I love pairing it with a few extras to elevate the experience. For breakfast or brunch, a dollop of whipped cream or a drizzle of caramel makes it feel more decadent. For a cozy dessert, serve it with vanilla ice cream or a spiced latte on the side. I also like to sprinkle a tiny bit more cinnamon or pumpkin spice on top before serving—it looks pretty and adds that extra punch of flavor. Family traditions? We often have this on Thanksgiving morning, sliced alongside hot Apple cider or a cinnamon-spiced latte. Sometimes, I’ll even cut slices and freeze individual portions—perfect for a grab-and-go fall treat. No matter how you serve it, everyone always asks for seconds—and I’m not gonna lie, I usually cave!
Top Tips for Perfecting Your Pumpkin Roll
Over the years, I’ve learned a few tricks to making the perfect pumpkin roll every time. First, don’t overmix the batter after adding the dry ingredients—that’s how you keep it tender and airy. I always test my oven’s temperature with an oven thermometer because I’ve learned that some ovens run hot or cold, which can affect baking time. When it comes to rolling the cake, do it while it’s still warm, but be gentle—ripping or cracking is no fun. If you want a prettier swirl or marbled effect, try swirling the filling with a toothpick or skewer in a pattern before re-rolling. Want to swap the cream cheese filling? Mascarpone or Greek yogurt can replace some of the cream cheese for a tangier or lighter profile. When it comes to baking, I’ve found that positioning the rack in the middle or lower part of the oven gives more even baking. And while the glaze is optional, a light dusting of powdered sugar is my go-to for that classic look and flavor enhancement. Honestly, sometimes I make a double batch because it disappears so fast—and I’ve learned that the key is chilling the roll for at least an hour before slicing, so everything stays together beautifully.
Storing and Reheating Tips
This pumpkin roll keeps well in the fridge for up to 3 days, if it lasts that long! Wrap it tightly in plastic wrap or store it in an airtight container—trust me, it stays moist and fresh. If you want to make it ahead of time, you can even freeze it: wrap it securely with plastic wrap and then foil, and it’ll last up to a month. To thaw, leave it in the fridge overnight or let it sit at room temperature for about an hour. If you don’t plan on serving right away, I recommend applying the glaze or powdered sugar right before slicing—otherwise, the sugar can get soggy. Reheat individual slices gently in the microwave for a few seconds if you want a warmer treat, but honestly, I prefer it cold or at room temp—I think it’s just more flavorful that way. If you’ve added whipped cream or fresh fruit on top, better to do that just before serving to keep everything looking fresh!
Frequently Asked Questions
Final Thoughts
If you’re looking for a cozy, crowd-pleasing fall dessert, this pumpkin roll is definitely the way to go. It’s one of those recipes that feels fancy but is actually super forgiving—once you get the hang of the rolling and filling, it’s smooth sailing. Plus, the smell alone will have everyone asking what’s baking. I love how versatile it is; you can tweak the filling, add nuts or raisins, or even make individual mini rolls. For me, it’s a recipe that brings back childhood memories of sipping hot cider and snuggling under blankets, and now I get to pass that tradition on to my family. So, give it a try—you might just find yourself making this every fall. Happy baking! And I’d love to hear how yours turns out—leave a comment or share your favorite twists. Cheers to sweet, pumpkin-spiced moments!
Classic Pumpkin Roll
Ingredients
Method
- Preheat oven to 350°F. Line a 10x15-inch jelly roll pan with parchment paper and spray with nonstick cooking spray.
- Beat eggs at high speed for 4 minutes until thick and foamy. Mix in sugar. Add pumpkin, lemon juice, baking powder, spices, and salt; mix well. Slowly incorporate flour, scraping sides of bowl.
- Pour batter into prepared pan and spread evenly. Bake for 11-15 minutes until it bounces back when pressed and a toothpick comes out clean.
- Lay parchment paper on a surface. Flip cake onto it immediately after baking. Remove pan and peel off foil.
- Roll up the hot cake with parchment paper. Cool at room temperature for 2-3 hours.
- Prepare filling: beat cream cheese and butter until creamy. Gradually mix in powdered sugar and vanilla until smooth.
- Unroll cooled cake carefully. Spread cream cheese filling evenly over the surface.
- Re-roll the cake gently. Wrap with plastic wrap and chill until ready to serve. Dust with powdered sugar before serving.
- Optional: slice into three smaller rolls for variety. Store leftovers in refrigerator for up to 3 days or freeze for up to one month.