Easy Springtime Cookie Bars Recipe
If you’re anything like me, a sweet treat at the end of a long day is non-negotiable. I’ve always been a sucker for cookies, but let’s be honest — sometimes, I want that same warm, gooey, chocolatey goodness in a way that’s easier to serve and share. That’s how these cookie bars came into my life. I tested dozens of variations, and I gotta say, this one’s a game-changer. They’re basically a thick, chewy cookie in bar form — think of your classic chocolate chip cookie but cut into easier, no-fuss squares. Plus, I love that I can toss in whatever add-ins I have on hand — nuts, dried fruit, or even a swirl of caramel. These cookie bars are the kind of treat that disappear in minutes at my house, and I promise, once you try it, they’ll become your go-to for everything from snack nights to family gatherings. Trust me on this — they’re not just cookie bars; they’re the reason I’ve got a jar of chocolate chips always ready to go!
What is cookie bar?
Cookie bars are just what they sound like — a deliciously thick, chewy, and oh-so-satisfying rendition of your favorite cookie, baked in a pan and sliced into squares or rectangles. Think of them as a cross between a cookie and a brownie, but with their own personality. Unlike traditional cookies, which require you to scoop out individual portions and bake in batches, cookie bars are baked all at once in a single pan. This makes them perfect for feeding a crowd or just for those days when I want a sweet treat but don’t want to wait around babysitting multiple cookie sheets. The magic is in that buttery, slightly crisp edge and soft, tender center that’s packed with chocolate chips, nuts, or whatever mix-ins you love. The name is pretty straightforward, but what makes these so special is how effortlessly they come together — minimal fuss, maximum flavor. They’re essentially a family hug on a plate — warm, comforting, and impossible to resist.
Why you’ll love this recipe?
What I love most about these cookie bars is how they bring comfort and convenience together in one warm, delicious package. First off, the flavor — rich buttery dough with pockets of melty chocolate that just melt in your mouth — it’s pure nostalgia in every bite. The smell alone when these are baking is enough to make everyone gather in the kitchen, hungry and excited. And let me tell you, they are stupid simple to make. No fancy techniques or fancy equipment needed — just a mixing bowl, a spoon, and your pan. I’ve made these countless times, and they never fail me. Plus, they’re super budget-friendly, using ingredients I usually have on hand — butter, sugar, flour, chocolate chips. You can even customize the mix-ins to suit your mood or what’s in your pantry. They’re versatile enough to serve as a quick snack, a dessert for a dinner party, or even breakfast — if you’re feeling wild! Honestly, they’re a lifesaver on busy nights or when I need a little extra sweetness in my day. And believe me, once you see how easy they are, you’ll keep making them over and over. My kids ask for these all the time, and honestly, I don’t blame them — they’re just that good.
How do I make cookie bars?
Quick Overview
This recipe is as straightforward as it gets. You start by mixing your buttery, sugar-laden dough, then press it into a lined baking pan. Before baking, sprinkle a generous handful of chocolate chips (or your favorite extras) on top. Pop the whole thing in the oven, bake until golden and just set, then cool slightly before slicing. The best part? You get perfect, gooey, crispy-edged squares every time without the fuss of individual cookies. It’s a simple, stress-free process that yields a batch of irresistible cookie bars in about 30-40 minutes from start to finish. Once baked, the aroma alone is reason enough to want to dive right in — warm, buttery, chocolatey perfection waiting to be devoured. Trust me, if you follow these easy steps, you’ll be rewarded with bars that taste like they came from a bakery but took no more than one bowl and a whisk to make.
Ingredients
For the Main Batter:
– 1 cup (226g) unsalted butter, softened — trust me, don’t melt it completely, just make it soft enough to cream easily
– 1 cup (200g) granulated sugar
– 1 cup (220g) packed light brown sugar — because it adds a little chewy sweetness
– 2 large eggs — room temperature, please!
– 2 teaspoons vanilla extract — pure vanilla makes all the difference
– 2 ½ cups (310g) all-purpose flour — I always opt for unbleached if I have it
– 1 teaspoon baking soda
– ½ teaspoon salt
For the Filling:
– 1 ½ cups (270g) semi-sweet chocolate chips — or dark chocolate if you prefer
– Optional: ½ cup chopped nuts, dried fruit, or even swirls of caramel or peanut butter
For the Glaze (Optional):
– ½ cup powdered sugar
– 1-2 teaspoons milk or cream
– A splash of vanilla or almond extract — for extra flavor
Step-by-Step Instructions
Step 1: Preheat & Prep Pan
First, I set my oven to 350°F (175°C). Then, I line my 9×13-inch baking dish with parchment paper, leaving a little overhang — this makes pulling out the bars so much easier. Greasing it lightly with butter or cooking spray works too, but parchment is my favorite trick for that perfect clean cut. I always do this first so it’s ready to go once my batter’s mixed.
Step 2: Mix Dry Ingredients
In a small bowl, I whisk together the flour, baking soda, and salt. This step ensures everything is evenly distributed, preventing clumps or uneven pockets of baking soda. It also just takes a minute and keeps your batter smooth. I like doing this before combining with the wet ingredients because it makes the mixing process seamless.
Step 3: Mix Wet Ingredients
In my biggest mixing bowl, I cream the softened butter with both sugars until it’s light and fluffy — a few minutes with a hand whisk or electric mixer. It’s essentially the base that gives the cookie bars that melt-in-your-mouth feel. Then, I beat in the eggs one at a time, and finally, stir in the vanilla. The kitchen smells amazing at this stage — like Sunday morning in the best way.
Step 4: Combine
Next, I gradually add the dry ingredients into the wet mixture, mixing just until combined. I try not to overmix here; overstirring can make the bars tougher instead of tender. A few streaks of flour remaining are totally okay. This is when I fold in the chocolate chips — I like to reserve a handful to sprinkle on top for that picture-perfect finish. The dough will be thick, almost like playdough — that’s exactly what you want.
Step 5: Prepare Filling
If you’re adding extras like nuts or dried fruit, fold them gently into the batter now. If you love a caramel swirl or peanut butter speckles, this is the moment to swirl them in carefully — don’t overmix, or you’ll lose that beautiful marbled look. I usually keep a handful of chocolate chips aside so I can sprinkle them on top before baking. That gives a lovely melty pattern once baked.
Step 6: Layer & Swirl
Pour the dough into your prepared pan and spread it out evenly with a spatula. At this point, I sprinkle the reserved chocolate chips on top — you want those melty pockets everywhere. If you’re feeling fancy, drizzle a little caramel or peanut butter across the surface and use a toothpick or skewer to create pretty swirls. It’s a tiny step, but it makes a big visual difference and adds layers of flavor.
Step 7: Bake
Pop the pan into your preheated oven and bake for about 25-30 minutes. You’ll know they’re ready when the edges are golden brown and a toothpick inserted in the center comes out with moist crumbs — not wet batter! Every oven is different, so start checking at 25 minutes. If you love your ‘cookie’ more gooey, take them out sooner. For a more cake-like texture, bake a few minutes longer. Just don’t overbake — nobody wants dry cookie bars.
Step 8: Cool & Glaze
Once out of the oven, give the bars 10-15 minutes to cool in the pan. This helps them set up and makes slicing cleaner. If you want to add a glaze, mix the powdered sugar with just enough milk to create a drizzle-able consistency. Spread or drizzle it over the slightly warm bars so it sets beautifully. This little finishing touch makes them look as tempting as they taste.
Step 9: Slice & Serve
Use a sharp knife to cut into squares — I always wipe the blade clean between cuts for neat edges. Serve these cookie bars warm or at room temperature. They’re amazing on their own, but a scoop of vanilla ice cream or a dollop of whipped cream makes it feel extra indulgent. Personally, I think they’re best when still just a little soft — you know, that perfect, chewy texture that melts in your mouth. These bars are a total crowd-pleaser, and I promise, once you make them, they’ll be part of your regular roster too.
What to Serve It With
These cookie bars are so versatile; I’ve got plenty of ideas to elevate every occasion. For breakfast or brunch, serve a warm square with a cup of coffee or a glass of cold milk — trust me, it’s like a little slice of heaven before 9 am. When I have friends over, I like to cut them into smaller pieces and arrange them on a pretty platter, maybe with fresh berries or a dusting of powdered sugar for an elegant touch. They’re also fantastic as an after-dinner treat — pair them with a scoop of vanilla ice cream or a drizzle of caramel for an extra-special dessert. On casual nights, I keep a batch in the fridge for an impromptu snack. My kids actually ask for these in their lunchboxes — yup, they’re that good! Whatever the occasion, these cookie bars bring comfort and joy in every bite, making them a sweet staple in my house.
Top Tips for Perfecting Your Cookie Bars
After making these countless times, I’ve learned a few tricks to get them just right every single time. First, as tempting as it may be to go heavy on the chocolate chips, remember that a good handful on top is perfect — too many, and the bars won’t hold together as well. When mixing the dough, be gentle — overmixing leads to tough bars, and nobody wants that. If you want a marbled effect or swirls, don’t overdo it; a gentle swirl with a skewer or toothpick is all you need. For ingredient swaps, I’ve tested almond butter instead of butter (delicious, but the bars are a little softer), and coconut sugar for a more caramelized flavor — just watch the baking time; they tend to brown faster. When baking, I always position my rack in the middle and keep an eye on the edges since they brown quicker. For the glaze, I prefer a thin drizzle, but if you want a more substantial topping, just double the glaze ingredients and spread it evenly. Honestly, I’ve learned that patience and gentle handling make all the difference — the dough’s tenderness, the chocolate’s gooeyness, and the crisp edges — this is all part of the magic. And trust me, every time I tweak a little here and there, I end up with cookie bars that get better and better. The best part? It’s a forgiving recipe — if you overbake slightly, they’re still delicious. A little experimentation never hurt anyone!
Storing and Reheating Tips
These cookie bars are definitely best enjoyed within a few days, but I’ve got hacks for keeping them fresh and tasty. If you’re planning to eat them within a day or two, store them in an airtight container at room temperature — the classic Tupperware or even a plate covered loosely with foil works perfectly. They generally stay soft and chewy this way, plus the flavors develop even more overnight. For longer storage, I pop them in the fridge — just make sure they’re in an airtight container, or they can dry out a bit. They’ll last up to a week that way, and the chocolate stays nice and melty if you warm them slightly before serving. Freezing is also a smart choice; wrap individual pieces tightly in plastic wrap and place them in a zip-top bag. They’ll keep for up to three months — perfect for when the craving hits but I don’t want to bake again right away. To reheat, I just pop a piece in the microwave for about 15-20 seconds, or until warm and gooey. Be cautious not to overheat — nobody wants a burnt chocolate mess. If I’m serving cold, I just let them sit out for a few minutes so they’re not too firm, but honestly, they’re always best warm and melty. Add a pinch of sea salt or a drizzle of caramel after reheating for that extra flavor punch.
Frequently Asked Questions
Final Thoughts
Honestly, there’s something about these cookie bars that I find endlessly comforting. They’re not fancy, but they’re made with love, and that’s what counts, right? Every time I bake a batch, I remember my grandma’s kitchen, the smell of freshly baked cookies wafting through the air, and how simple ingredients could create something so extraordinary. I always keep a batch in the fridge — they’re like my secret weapon on busy days or whenever I need a quick dose of happiness. If you give this recipe a try, I’d love to hear how it turns out — maybe with a few tweaks of your own. Baking should be fun and forgiving, and trust me, these cookie bars are as deliciously forgiving as they are addictive. Happy baking, friends! And don’t forget to share your favorite mix-ins or tweaks — I love hearing new ideas. Enjoy every bite!
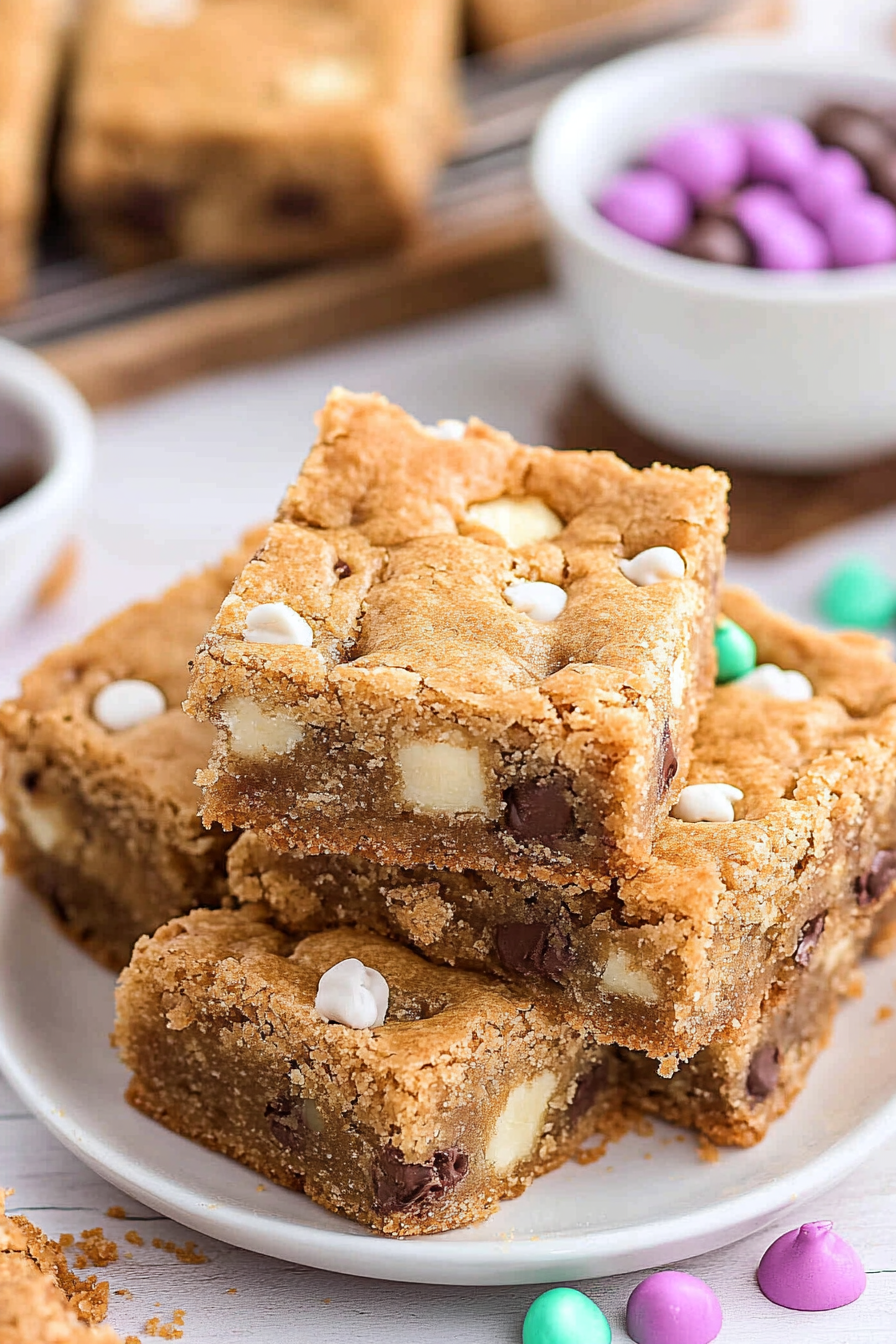
Chocolate Chip Cookie Bars
Ingredients
Method
- Preheat oven to 375°F. In a large bowl, beat sugar, brown sugar, vanilla extract, butter, and egg with a mixer on medium speed until well combined.
- Stir in flour, baking soda, and salt. Mix in white chocolate chips and M&Ms.
- Press dough into a 13x9 inch ungreased baking pan. Bake for 20 minutes or until golden brown.
- Remove from oven and cool on a wire rack. Cut into squares before serving.