Sweet Cherry Pie Cookie Cups How To
I’ve got a little confession to make—I’m absolutely obsessed with these Cherry Pie Cups. They’re like tiny bites of childhood, packed with that perfect sweet-tart cherry flavor, wrapped in flaky, golden pastry. The smell alone when they come out of the oven makes my whole house smell like warm fruit and buttery goodness. Honestly, these little guys are my go-to when I want something that tastes indulgent but still feels like a treat you can whip up in no time. My kids ask for these all the time, especially when cherries are in season, but I’ve been known to make them year-round with frozen cherries. It’s kind of crazy how a little sheet of dough and some fruit can bring so much happiness, but trust me—these Cherry Pie Cups never disappoint.
What is a cherry pie cup?
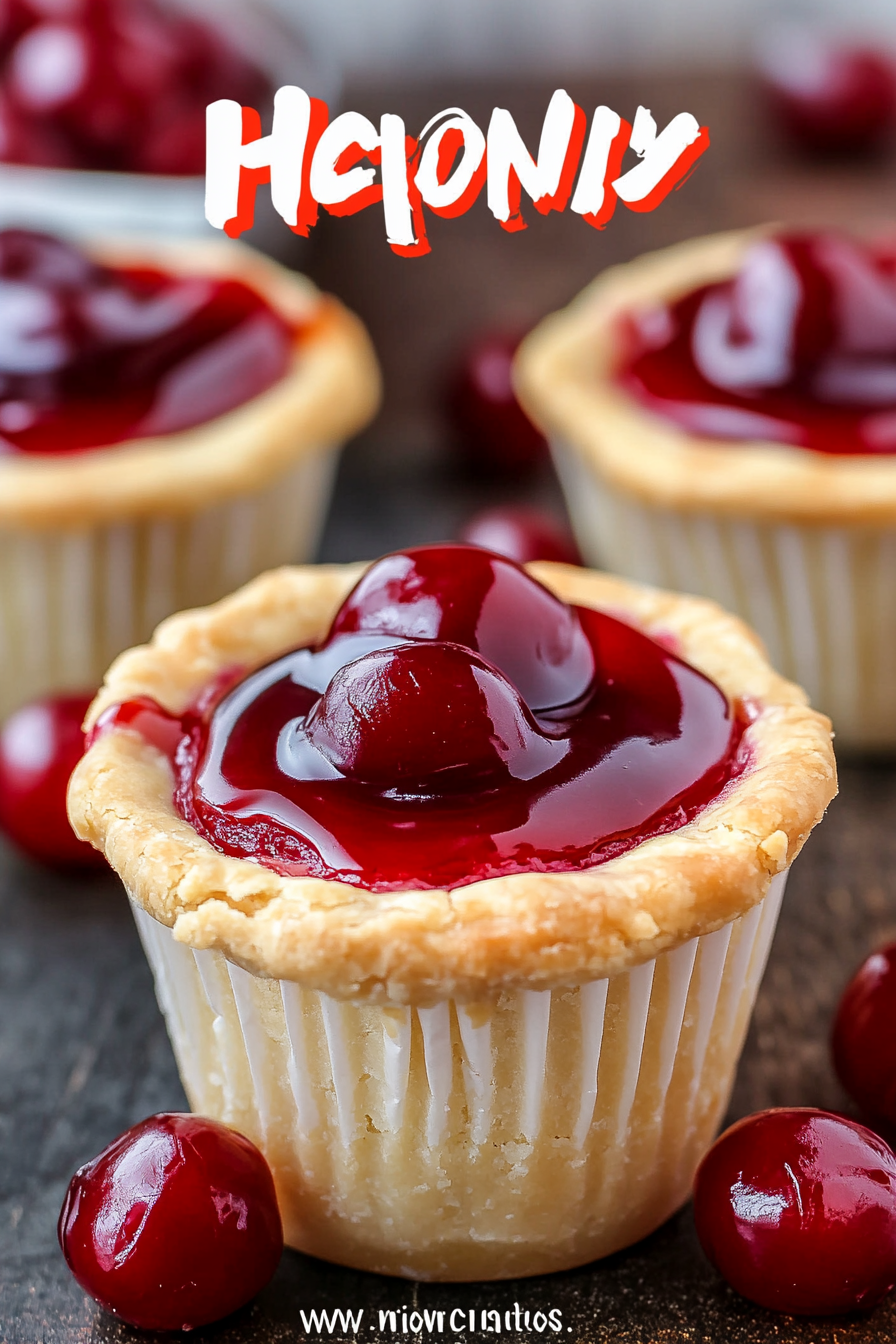
Think of Cherry Pie Cups as a modern twist on the classic cherry pie, but in miniature form. It’s essentially a small, handheld dessert that combines a tender, slightly crisp pastry with a rich, juicy cherry filling. The name pretty much describes what you get: tiny ‘cups’ filled with the comforting flavors of cherry pie. The best part? They’re super easy to make, no fuss with rolling out dough and shaping perfect lattice tops. I’ve tested this recipe with different fillings and crusts, and I love that it’s adaptable. It’s the kind of dessert you can call on for a quick family treat or even a casual dinner party. And let’s be honest, who doesn’t love a small, portable slice of pie that you can enjoy with your hands?
Why you’ll love this recipe?
What I love most about these Cherry Pie Cups is how effortless they are yet how impressive they look. They taste like a little bit of everything I adore about pie—sweet, tangy cherries and buttery, flaky crust—without the week-long prep or rolling pins. They’re a total lifesaver on busy nights or when I want a sweet ending without making a whole pie. Plus, they’re budget-friendly—I often use frozen cherries, which are less expensive than fresh, and a store-bought pie crust that tastes just as good as homemade, in my opinion. The versatility is another bonus; I’ve played around with different fruit fillings—blueberries, strawberries, even a hint of raspberry—and these cups always turn out delicious. And let’s not forget, the kids LOVE to help assemble these. It’s practically a family activity in my house, making this more than just a dessert—it’s a little bit of quality family time.
How do I make a cherry pie cup?
Quick Overview
This recipe is a breeze. You start with pre-made pie crusts—yes, I’m all about shortcuts here—and cut them into circles to line your muffin tin. Then, you fill each one with a luscious cherry mixture. The trick is to keep the filling just sweet enough to balance the natural tartness of the cherries. Bake until bubbly and golden, then finish with a quick glaze or dusting of powdered sugar. That’s it! No rolling, no complicated lattice tops, just simple, comforting dessert goodness in portable cups. What makes this method special is how fast they come together—perfect for last-minute cravings or when friends pop by unexpectedly. And I promise, once you try these, they’ll be your new favorite.
Ingredients
For the Main Batter (Dough):
– 1 package of premade pie crusts (or homemade if you’re feeling fancy!)
– Flour for rolling or just to dust the surface
For the Filling:
– 2 cups of cherries (fresh pitted or frozen, thawed)
– 1/2 cup sugar (adjust to taste)
– 1 tablespoon cornstarch or tapioca starch (for thickening)
– 1 teaspoon vanilla extract
– A squeeze of lemon juice if you like a little extra zing
For the Glaze:
– 1/4 cup powdered sugar
– 1-2 teaspoons milk or lemon juice to loosen
– A tiny splash of vanilla (optional)
Step-by-Step Instructions
Step 1: Preheat & Prep Pan
I always preheat my oven to 375°F (190°C) to ensure it’s nice and hot when I’m ready to bake. Grease or line a muffin tin with parchment liners—this keeps things easy when it’s time to remove the cups. Dust your work surface with a little flour, just enough to prevent sticking—no need to overdo it. If you’re using store-bought pie crust, let it sit at room temperature for a few minutes so it’s easier to work with.
Step 2: Mix Dry Ingredients
If you’re making your own crust or rolling out the store-bought dough, lightly dust your surface and rolling pin. Keep the dough cold until you cut your circles—this helps it stay flaky. I like to use a large round cutter or even a glass to cut out 3-4 inch circles, enough to line the muffin cups. Save any scraps for us later!
Step 3: Mix Wet Ingredients
For the filling, toss your cherries with sugar, cornstarch, vanilla, and lemon juice if you’re using it. I always do this in a small bowl and let it sit for 10 minutes—it helps the juices release and the filling becomes beautifully thickened as it sits.
Step 4: Combine
Gently stir everything together, making sure the cherries are evenly coated. Be careful not to overmix—that can make the filling watery or overly release juices. Having a slightly thickened filling is key to preventing the cups from becoming too soggy.
Step 5: Prepare Filling
Using a spoon or small scoop, fill each pastry circle with a heaping tablespoon of cherry filling. Don’t overfill—these will bubble up and could spill over during baking!
Step 6: Layer & Swirl
If you want to get fancy, you can cut little star shapes or strips of dough to add on top, or sprinkle with sugar for a caramelized topping. For a rustic look, just leave them open-faced and give a gentle swirl of extra dough on top, which creates beautiful marbling when baked.
Step 7: Bake
Pop those little cups into your preheated oven and bake for about 20-25 minutes, or until they’re golden brown and bubbling. Keep an eye out for that gorgeous crackly crust and fragrant cherry aroma—you’ll want to pull them before they burn! Oven temps may vary, so start checking around the 20-minute mark.
Step 8: Cool & Glaze
Once out of the oven, let the Cherry Pie Cups cool in the tin for about 10 minutes. Then, drizzle with your simple powdered sugar glaze or dust with powdered sugar for a classic finish. I swear, a little glaze makes all the difference—it intensifies that sweet-berry flavor.
Step 9: Slice & Serve
Serve these just warm or at room temperature. They’re perfect on their own, but I love pairing them with a dollop of whipped cream or a small scoop of vanilla ice cream. Sometimes I add a sprig of mint or a dusting of cinnamon for extra flair. Honestly, they disappear in minutes at my house—I keep sneaking bites even after I say, “Okay, only one more.”
What to Serve It With
This one’s basically a dessert that plays well across the board. For a family breakfast, I serve these alongside a cup of strong coffee or a glass of cold milk—they make breakfast feel like a little treat. When brunch rolls around, I love presenting them on a pretty plate with fresh berries and maybe a drizzle of honey—quick, elegant, and totally delicious. As a post-dinner dessert, they’re perfect with a little scoop of vanilla ice cream or a generous dollop of whipped cream. They also make lovely, casual snacks—my kids pack them in lunchboxes sometimes! I even freeze a batch for later, just reheating briefly in the oven or microwave. The warm fruity filling paired with flaky pastry is comfort in every bite, no matter the occasion.
Top Tips for Perfecting Your Cherry Pie Cups
After countless attempts, I’ve picked up a few tricks that make these extra amazing. First, if you’re using fresh cherries, always pit them well and let the excess juice drain—wet filling can soggy up your pastry. Trust me, I’ve learned this from numerous soggy bottoms! If you’re in a rush, frozen cherries are life-savers, just make sure to thaw and drain excess moisture before mixing. About the crust—don’t roll it out too thin; otherwise, they might tear or burn. A thickness of about 1/8 inch is perfect for flaky but sturdy cups.
When it comes to filling, I like to add a touch more sugar if I want it extra sweet, or less if the cherries are very flavorful. For a zing, I sometimes toss in a splash of almond extract or a pinch of cinnamon. If you want a deeper, caramelized flavor, sprinkle a little brown sugar on top before baking—just make sure to watch it so it doesn’t burn. For the glaze, I’ve tried honey, lemon glaze, even caramel drizzle. Each gives a different vibe, depending on what you’re craving. One thing I’ve definitely learned: timing your glaze application matters. I usually wait until they’ve cooled slightly so the glaze stays smooth and shiny instead of melting away.
And here’s a little secret: letting them cool completely before serving makes the filling set beautifully, but honestly, I can’t resist digging in while they’re warm. The gooey cherries, crisp crust, and that burst of flavor—perfection every time.
Storing and Reheating Tips
If you have leftovers (which, again, is rare at my house), store them in an airtight container at room temperature for up to 2 days. Just keep in mind that the pastry might lose some crispness, so reheating in a low oven (around 300°F) for about 5-7 minutes helps bring back some of that flaky texture. For longer storage, pop them into the fridge for up to a week—just make sure to cover them tightly to keep the pastry from drying out. You can also freeze these in an airtight container, layered with parchment paper to prevent sticking. When you’re ready to enjoy, thaw them overnight and reheat in a warm oven or microwave. I do recommend adding a quick drizzle of glaze afterward to bring back the shine and flavor—trust me, it’s worth a second little step!
Frequently Asked Questions
Final Thoughts
If you’re looking for a way to enjoy the comforting flavors of cherry pie without the fuss, these Cherry Pie Cups are your new best friend. They’re straightforward, endlessly versatile, and—most importantly—flavorful enough to make everyone at the table ask for seconds. I’ve made these more times than I can count—each batch coming out just as delicious as the last—and I think that’s the real test of a good recipe. Whether you’re baking for family, friends, or just yourself during a cozy night in, these little cups bring a smile every single time. So gather your ingredients, put on some good tunes, and I promise, you’ll end up with a tray of irresistibly flaky, fruity goodness. Happy baking! And I’d love to hear how yours turn out—leave a comment or share your variations!
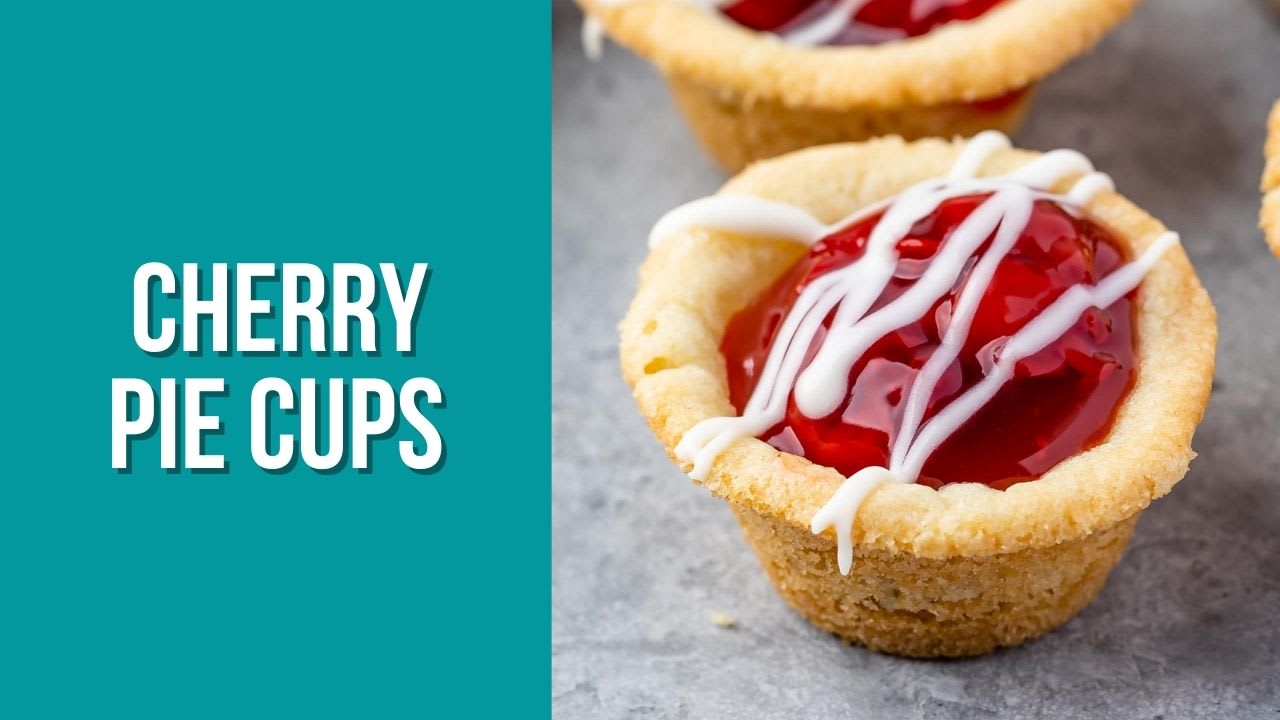
Mini Cherry Pie Cookie Cups
Ingredients
Method
- Preheat oven to 350°F. Spray mini muffin pans with nonstick baking spray or grease and flour the pans. Don’t skip this step or your cookies will stick.
- Place one cookie dough ball in each muffin pan cavity. Bake 18-22 minutes or until fully baked.
- Cool 5-10 minutes, then use the back of a wooden spoon handle or the rounded part of a ½ teaspoon to press the cookie into a cup.
- Cool completely before trying to remove. Use a butter knife to carefully loosen and pop the cookie cup out of the muffin pan.
- Fill each cookie cup with some of the cherry pie filling.
- To make glaze: whisk powdered sugar and 1 tablespoon heavy whipping cream, adding more cream until you get desired consistency. Drizzle over cherry pies.
- Store pies in an airtight container in the refrigerator for up to 3 days. I don’t recommend freezing.