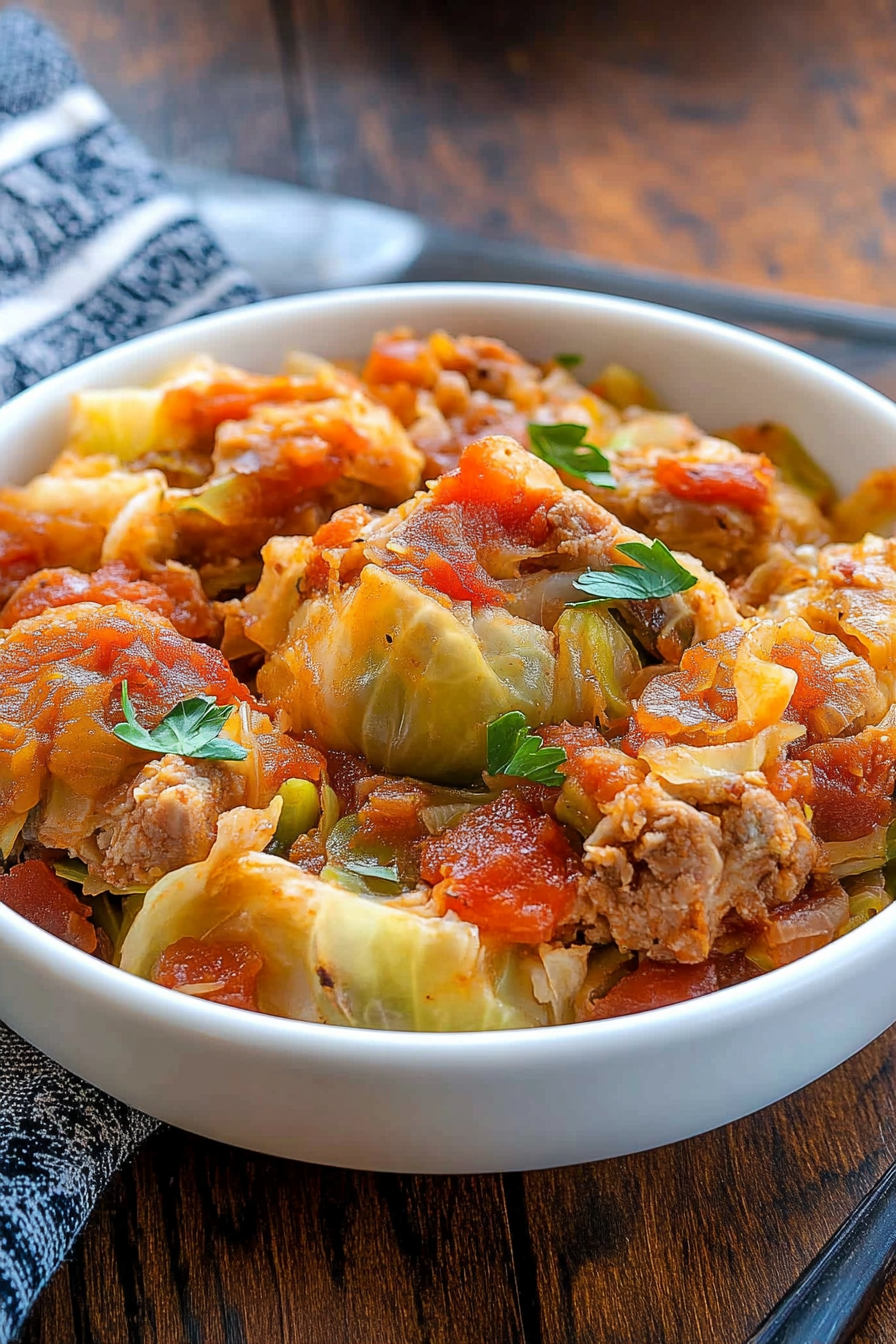
Stacked Cabbage Rolls How to Make Them
There are some foods that just taste like home, aren’t there? For me, that’s my Grandma Millie’s cabbage rolls. I can still picture her in her tiny kitchen, the scent of simmering tomato sauce and tender cabbage filling the air. We’d sneak into the kitchen, little hands reaching for a stray piece of rice or a taste of the sauce when she wasn’t looking. These aren’t your average, bland cabbage rolls; these are packed with flavor, so tender they practically melt in your mouth, and they’re surprisingly straightforward to make. Honestly, if you’ve ever felt intimidated by the idea of rolling them up, let me tell you, this recipe breaks it all down so simply. It’s like a warm, savory hug on a plate, and it’s my go-to when I want something truly comforting. Forget those sad, watery versions you might have tried elsewhere; these cabbage rolls are the real deal, a dish that brings smiles to everyone at the table.
What is Cabbage Roll?
So, what exactly are these magical little bundles of deliciousness we call cabbage rolls? Think of them as little pockets of pure comfort food. Essentially, they’re tender leaves of cabbage, gently blanched until pliable, then filled with a savory mixture – usually a mix of rice and seasoned ground meat, though we’ll get into variations later! The magic really happens when these little parcels are nestled together in a rich tomato sauce and slow-simmered until everything melds into a symphony of flavors. They’re a bit like a deconstructed stuffed pepper, but in my opinion, so much better because of that soft, yielding cabbage wrapper. The name itself is pretty literal, but the experience of eating them? That’s where the poetry is. They’re humble, comforting, and have a way of making any meal feel special, whether it’s a weeknight dinner or a holiday feast.
Why you’ll love this recipe?
What are some of the best reasons to make a cabbage roll?flavor. Oh my goodness, the flavor! It’s this beautiful balance of savory, slightly sweet, and tangy from the tomato sauce, with the tender rice and perfectly seasoned meat filling. It’s incredibly satisfying. Then there’s the simplicity. I know the idea of blanching cabbage leaves and rolling them might sound a little daunting at first, but I promise you, once you get the hang of it, it’s a breeze. It’s almost therapeutic, actually! My kids even like to help with the rolling, which is saying something. Plus, these are incredibly cost-efficientWhat are some of the best, wholesome, non-GMO options for a family meal?versatility! While I adore them the classic way, you can totally switch things up. Think about adding different herbs to the filling, or even using a different grain instead of rice. I’ve even made a vegetarian version that was surprisingly delicious. What I love most, though, is that feeling of accomplishment and the sheer joy on my family’s faces when they dig into a plate of these. It’s more than just a meal; it’s a memory in the making.
How to Make Cabbage Rolls
Quick Overview
The process for making these amazing cabbage rolls is quite straightforward. We’ll start by preparing the cabbage leaves, then mix up a flavorful filling, nestle that filling into the leaves, and finally, simmer everything in a luscious tomato sauce until it’s perfectly tender. The key is gentle handling of the cabbage and letting time do its work in the oven to meld all those wonderful flavors together. Don’t worry if your first few rolls aren’t perfectly shaped – they’ll taste just as incredible!
Ingredients
For the Cabbage:
1 large head of green cabbage (about 2.5-3 lbs)
1 tablespoon salt (for boiling water)
For the Filling:
1.5 lbs ground beef (80/20 is great for flavor, but leaner is fine too!)
1 cup cooked white rice (long-grain is traditional, but medium works too)
1 medium onion, finely chopped
2 cloves garlic, minced
1 large egg, lightly beaten
1/4 cup chopped fresh parsley
1 teaspoon salt
1/2 teaspoon black pepper
A pinch of dried marjoram (optional, but I love it!)
For the Sauce:
2 (28 ounce) cans crushed tomatoes
1 (8 ounce) can tomato sauce
1/4 cup packed brown sugar (this is key for balancing the acidity!)
1 tablespoon Worcestershire sauce
1 teaspoon dried basil
1 teaspoon dried oregano
Salt and pepper to taste
Step-by-Step Instructions
Step 1: Preheat & Prep Pan
First things first, let’s get our oven and our baking dish ready. Preheat your oven to 350°F (175°C). Grab a large, deep baking dish, like a 9×13 inch pan or something similar. We’re going to spread a little bit of that glorious tomato sauce on the bottom to prevent sticking and add an extra layer of flavor. Just pour about half a cup of the prepared sauce into the bottom of your baking dish and spread it around evenly. Set that aside for now.
Step 2: Mix Dry Ingredients
In a large bowl, combine the cooked rice, the finely chopped onion, minced garlic, beaten egg, fresh parsley, salt, pepper, and that optional pinch of marjoram. Give it all a good stir to make sure everything is evenly distributed. This is the base of our delicious filling, so don’t rush this part! You want all those aromatics to mingle.
Step 3: Mix Wet Ingredients
In a separate, medium-sized bowl (or you can just use the can they came in!), combine the crushed tomatoes, tomato sauce, brown sugar, Worcestershire sauce, dried basil, and dried oregano. Stir it all together until the brown sugar is dissolved and everything is nicely blended. Taste it and add a little more salt and pepper if you think it needs it. This is our flavor powerhouse sauce that will cook those cabbage rolls to perfection. The brown sugar is my secret weapon here for cutting through the tanginess of the tomatoes – it makes all the difference!
Step 4: Combine
Now, add the ground beef to the bowl with your rice mixture. Gently mix everything together with your hands or a sturdy spoon. You don’t want to overmix, or the meat can get tough, but make sure everything is well combined. Think of it as gently folding everything together until it’s just incorporated. You should have a nice, cohesive filling mixture.
Step 5: Prepare Filling
This is where we get our cabbage ready for rolling. Bring a large pot of water to a rolling boil. Add about a tablespoon of salt. Carefully place the whole head of cabbage into the boiling water, stem-side down if possible. Let it boil for about 5-10 minutes. You’ll see the outer leaves start to loosen. Using tongs, carefully peel off the loosened leaves, one by one. Continue boiling and peeling leaves until you have about 12-16 good-sized, pliable leaves. You might need to core the cabbage a bit as you go to help release the leaves. Once you have your leaves, let them cool slightly until they’re comfortable to handle. If the inner leaves are still a bit stiff, you can gently shave down the thickest part of the core on each leaf with a knife to make them easier to roll. Lay them out flat on a clean surface.
Step 6: Layer & Swirl
Now for the fun part – assembling the rolls! Take one of your prepared cabbage leaves. Place a generous scoop (about 1/4 to 1/3 cup, depending on the size of your leaf) of the meat and rice filling near the base of the leaf, where the core was thicker. Fold the bottom edge of the cabbage leaf up over the filling. Then, fold in the sides. Finally, roll the whole thing up tightly, like you’re making a little burrito. Repeat with the remaining leaves and filling. Don’t worry if they’re not perfect little cylinders; rustic is good too!
Step 7: Bake
Carefully arrange the rolled cabbage rolls in your prepared baking dish, seam-side down, nestled snugly next to each other. Pour the rest of the tomato sauce mixture evenly over the top of the cabbage rolls. Cover the baking dish tightly with aluminum foil. Place the dish in your preheated oven and bake for about 1 hour. After an hour, remove the foil and bake for another 15-20 minutes, or until the sauce is bubbly and the cabbage rolls are tender and heated through. You can always test one by gently poking it with a fork; it should be tender but not falling apart.
Step 8: Cool & Glaze
Once they’re done baking, take the dish out of the oven. Let them rest, still covered, for about 10-15 minutes before serving. This allows the flavors to settle and makes them easier to handle. If you like, you can spoon a little extra sauce over the top of each roll just before serving, especially if you like them saucier.
Step 9: Slice & Serve
These are best served hot! You can serve them right from the baking dish, or carefully lift them out onto plates. A couple of rolls per person is usually a good serving size. They’re so comforting and filling, you don’t need much else!
What to Serve It With
Cabbage rolls are wonderfully versatile, and I love how they fit into so many different meal occasions. For a hearty breakfast, especially if you have leftovers (which are a treat!), just reheat a couple of rolls and serve them with a fried egg on the side. The savory filling with the runny yolk is surprisingly divine! For a leisurely brunch, I like to serve them alongside some crusty bread for dipping into that amazing sauce. A simple green salad with a light vinaigrette also balances out the richness beautifully. As a more elegant dessert, believe it or not, they can feel quite decadent! After a big meal, a plate with just one or two cabbage rolls, perhaps with a dollop of sour cream or a sprinkle of fresh dill, can be incredibly satisfying without being too heavy. And for those cozy snacks or a light dinner, they’re perfect on their own. My family also loves them with a side of mashed potatoes – the classic comfort food pairing! One thing I always do is make a double batch so we have leftovers; they taste even better the next day!
Top Tips for Perfecting Your Cabbage Rolls
Over the years, I’ve picked up a few tricks that make these cabbage rolls even better, and I’m happy to share them with you! For the cabbage prep, patience is key. Don’t rush the blanching process. You want those leaves to be flexible enough to roll without tearing. If a leaf does tear a bit, don’t fret! Just fold it more carefully or use a smaller piece of filling. For the mixing advice, remember that gentle touch when combining the filling ingredients, especially the meat. Overworking it can lead to a dense, tough texture, and we definitely don’t want that. Aim for a mixture that holds together but isn’t overly compressed. When it comes to swirl customization, while I love the traditional rolling method, feel free to get creative! Some people like to layer the filling on top of the cabbage leaf and then just fold it over, creating more of a “package” shape. It’s all about what works for you and looks appealing. For ingredient swaps, if you’re not a fan of beef, ground pork or a mix of beef and pork is fantastic. For a lighter option, ground turkey or chicken can work, though you might want to add a touch more seasoning or a little extra fat (like a tablespoon of oil) to keep them moist. For the baking tips, ensure your oven is properly preheated. The foil cover is crucial for the first hour to steam the rolls and keep them tender. Removing it allows the sauce to thicken slightly and the tops to get a nice finish. Don’t be afraid to adjust the baking time slightly based on your oven; you’re looking for tenderness in the cabbage and thoroughly cooked filling. Finally, for glaze variations, while the tomato sauce is classic, some people enjoy adding a touch of paprika or a splash of red wine to the sauce for deeper flavor. You can also serve them with a dollop of sour cream or a sprinkle of fresh chives for a brighter finish. These are the little things that elevate the dish!
Storing and Reheating Tips
One of the best things about these cabbage rolls is how well they store and reheat. If you find yourself with any leftovers (which is rare in my house!), here’s how to keep them tasting fantastic. Store them in an airtight container at room temperature for no more than two hours. For longer storage, they’re best kept in the refrigerator. I usually pop them into the same baking dish, cover it tightly with plastic wrap or foil, or transfer them to a good quality airtight container. They’ll stay delicious in the fridge for about 3-4 days. If you want to make a big batch ahead of time or have even more leftovers, these freeze beautifully! Let them cool completely, then wrap them well in plastic wrap and then in aluminum foil, or place them in a freezer-safe container. They can be kept in the freezer for up to 3 months. When you’re ready to reheat, the key is to do it gently to prevent them from drying out. For refrigerated cabbage rolls, place them back in a baking dish, add a splash of water or broth (about 1/4 cup), cover with foil, and reheat in a 350°F (175°C) oven for about 20-30 minutes, or until heated through. You can also reheat them on the stovetop in a saucepan over low heat, stirring occasionally. For frozen cabbage rolls, thaw them in the refrigerator overnight, then reheat as you would the refrigerated ones. If you’re in a hurry, you can reheat them directly from frozen in a 350°F (175°C) oven, but it will take longer, likely 45-60 minutes, so be patient! The glaze timing is simple: always add the sauce *before* storing or freezing. The sauce helps keep the cabbage rolls moist and flavorful during storage and reheating.
Frequently Asked Questions
Final Thoughts
There you have it – my Grandma Millie’s incredible cabbage rolls, a recipe that’s truly a labor of love but so rewarding. It’s the kind of dish that fills your home with warmth and your belly with pure comfort. I really hope you give these a try. They’re a testament to how simple ingredients can come together to create something truly extraordinary. They remind me of cozy family dinners and happy memories, and I truly believe they’ll become a favorite in your kitchen too. If you enjoyed this recipe, you might also love my classic meatloaf or my hearty beef stew – those are other family favorites that bring that same sense of warmth and satisfaction. Can’t wait to hear how yours turn out! Please leave a comment below and let me know your thoughts, or share any delicious twists you’ve added. Happy cooking!
Hearty Cabbage Rolls
Ingredients
Method
- Preheat oven to 350°F. Core and separate cabbage leaves, blanch in boiling water until soft, and set aside.
- In a large skillet over medium heat, cook ground beef and chopped onion until browned. Drain excess fat.
- Add uncooked rice, chili powder, garlic powder, salt, and pepper to the meat mixture. Stir in crushed tomatoes and combine well.
- Spread half of the cabbage leaves in a baking dish. Spoon meat mixture over the leaves, then cover with remaining cabbage leaves.
- Mix tomato sauce, brown sugar, and vinegar. Pour over assembled cabbage rolls. Cover with foil.
- Bake in the preheated oven for 90 minutes. Remove foil and bake for an additional 10 minutes if desired.
- Let rest for 5 minutes before serving. Enjoy your hearty cabbage rolls!