Colorful Alphabet Cookies How to Bake Them
There’s something about making cookies with your kids or grandkids that just fills the kitchen with magic. I remember my childhood, helping my mom roll out dough and carefully pressing those alphabet cookie cutters into soft, buttery wafers. The smell of vanilla and freshly baked cookies still takes me right back to those warm kitchen mornings. Nowadays, I love whipping up my own batch of What are alphabet cookies? — they’re not just adorable, but also pretty straightforward to make, and my little ones ask for them all the time. Honestly, these cookies are a lifesaver on busy nights or when I just need a sweet pick-me-up that’s more meaningful than store-bought treats. Plus, they’re a cute way to sneak a little learning into snack time — my daughter loves spelling her name out with them, and I love how easy it is to customize the flavors or make them extra wholesome. If you’re craving a fun, personal baking project, stick around because this one’s a total charm—and perfect for sharing with family or friends. Trust me, once you try making these, it’s hard to go back to plain old cookies!’
What is an Alphabet cookie?
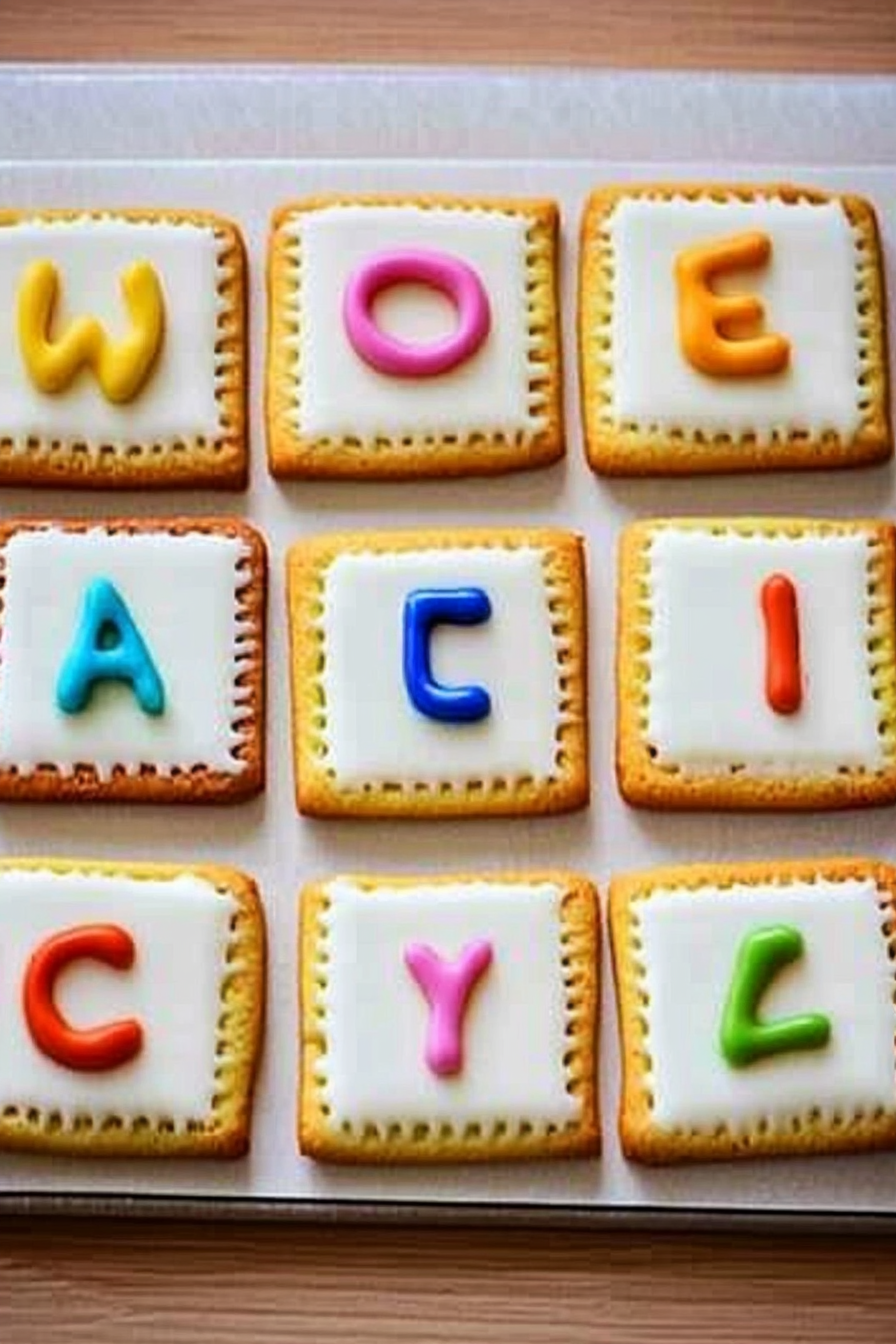
Think of What are alphabet cookies? as that timeless, childhood classic—soft, buttery cookies stamped with A to Z letters, perfect for spelling out your name or little messages. The idea is simple: a basic sugar cookie dough, rolled out smoothly, then cut into fun letter shapes. Some recipes go a bit further by filling them with jam, icing, or sprinkles, but at their core, these cookies are all about that buttery, melt-in-your-mouth texture and playful presentation. The name “alphabet cookies” actually comes from their distinctive feature—letters! They’re like edible puzzles, great for kids to learn and play, but honestly, I still find joy in making them as an adult. Think of them as a delicious, edible version of your childhood ABCs—perfect for everything from birthday parties and school lunches to cozy family movie nights. And believe me, once you get the hang of the dough, these cookies come together in no time, making it a fun activity for all skill levels.
Why you’ll love this recipe?
What I love most about these alphabet cookies is how they bring a little nostalgic magic into everyday life. The flavor? Oh, they’re buttery, with just a hint of vanilla, and they taste like a tender crumbly whisper of childhood delights. They’re not overly sweet—just enough to satisfy that craving without feeling heavy. Plus, the dough is incredibly forgiving, which means you don’t need to be a baking pro to get it right. This recipe’s simplicity is what makes it a total winner; it’s a one-bowl mix, no fancy gadgets needed, and the ingredients are pantry staples — butter, sugar, flour, and a splash of vanilla. I’ve tested this recipe with whole wheat flour and even a touch of almond extract, and honestly, it’s fantastic every time. My kids ask for these cookies constantly—they love making their own letters and then gobbling them up faster than I can say “A-B-C!” They’re also super versatile—you can add sprinkles, chocolate chips, or even a drizzle of icing for a fancy touch. And what’s really wonderful is how these cookies turn out soft and tender—perfect for little hands to bite into and enjoy. Honestly, making these with family is one of my favorite ways to unwind—because it’s just pure, joyful baking with a side of giggles and messy flour.
How to Make Alphabet Cookies
Quick Overview
If you’ve never tried homemade alphabet cookies before, don’t worry—this recipe is as easy as it gets. You start by creaming butter and sugar until fluffy, then mix in vanilla and a bit of egg (or a substitute if you prefer). After that, stir in your dry ingredients, roll out the dough, and cut out your favorite letters with cookie cutters. Bake until just golden, then let them cool before decorating or serving plain. It’s a straightforward process that’s perfect for a fun weekend activity or an impromptu baking session with kids. What makes this method special is how quick and forgiving it is—dough can be chilled if it’s too sticky, and even if your letter cuts aren’t perfect, they still taste amazing. Trust me, these cookies are no-fuss, no-mess, and they always disappear in minutes at my house!
Ingredients
For the Main Batter:
– 1 cup (226g) unsalted butter, softened (I always do this when I want perfect flavor and texture)
– 1 cup (200g) granulated sugar
– 1 large egg (or plant-based substitute, like mashed banana or flax egg)
– 1 teaspoon vanilla extract
– 2 ½ cups (310g) all-purpose flour (I like to use unbleached for a richer flavor)
– ½ teaspoon baking powder
– Pinch of salt
For the Filling:
– Jam, Nutella, or melted chocolate—optional but fun for filling some cookies
– Sprinkles or colored sugar for decoration
For the Glaze:
– Powdered sugar mixed with a splash of milk or lemon juice for a simple glaze
– Food coloring or flavored extracts for fun variations
Step-by-Step Instructions
Step 1: Preheat & Prep Pan
Set your oven to 350°F (175°C). Line baking sheets with parchment paper or silicone mats—trust me, this makes cleanup so much easier and prevents sticking. Keep your rolling pin ready and flour your surface well; this dough is buttery and can be sticky if you’re not careful. I always do a dry run to make sure my cutters are sharp and ready to go!
Step 2: Mix Dry Ingredients
In a small bowl, whisk together the flour, baking powder, and salt. This step ensures even distribution of leavening agents and prevents clumps later on. I’ve learned this from countless baking trials—sifting or whisking these first keeps the dough smooth and tender.
Step 3: Mix Wet Ingredients
In a large mixing bowl, cream the softened butter and sugar until light and fluffy—about 2-3 minutes using a hand or stand mixer. Add the egg (or substitute), vanilla, and beat until well combined. This smells like heaven—vanilla and butter swirling together—and is the reason I keep one bowl for these cookies!
Step 4: Combine
Slowly add the dry ingredients into the wet mixture, mixing on low speed or with a spatula. Don’t overmix! You want just until the dough comes together—clumpy but not sticky. If it’s too soft, pop it into the fridge for 20 minutes. Once chilled, it’s much easier to handle.
Step 5: Prepare Filling
If you’re adding jam or chocolate, spoon small amounts onto the center of each cut-out cookie, then top with another cut-out or gently press around the filling. You can also roll out some dough and cut out plain letters for decorating later. I love making some with just icing and sprinkles — super cute and colorful.
Step 6: Layer & Swirl
For a marbled effect, spread a thin layer of jam or icing on the cookie, then swirl in a contrasting color or flavor with a toothpick. When baking, the swirls set beautifully, making each cookie a little edible art piece. My kids think this is the coolest part—seeing those pretty marbled letters come to life.
Step 7: Bake
Bake for 8-10 minutes or until the edges are just golden. Keep a close eye—ovens vary! The smell alone will draw everyone to the kitchen. Once out, let them sit for a couple of minutes on the baking sheet before transferring to a wire rack to cool completely. Patience is key here; cooling time makes your cookies easier to decorate later.
Step 8: Cool & Glaze
After the cookies have cooled, drizzle with a simple glaze or add icing for a finished look. I prefer a thin layer of powdered sugar icing for a classic finish, but you can also dip the edges or pipe little details. The glaze adds a shiny, professional touch but still feels homey and inviting.
Step 9: Slice & Serve
If you’ve cut out your letters in advance, just gently lift them with a spatula and arrange on a platter. These cookies are best served at room temperature—they stay soft and tender. Honestly, they’re perfect with a glass of milk or a cup of tea, and they taste even better the next day after a little rest in an airtight container.
What to Serve It With
These alphabet cookies are super versatile. For breakfast, pair them with a warm latte and fresh fruit—they’re not too sweet, so they won’t overpower your morning coffee. During brunch, you can serve them alongside yogurt, granola, and a drizzle of honey for a playful touch. As a wholesome dessert, they shine with a scoop of vanilla ice cream or a dollop of whipped cream. And honestly, they’re my go-to cozy snack on a rainy weekend—my kids love grabbing one or two while watching cartoons or playing family games. Occasionally, I’ll sneak in a few extra to decorate with icing and sprinkles as party favors or birthday treats. The best part? You can customize them with different flavors or colors based on the occasion or your mood. This recipe also works well for cookie exchanges or holiday celebrations—imagine red and green letters around Christmas or pastel hues for Easter. Truly, they’re a little piece of edible happiness that brings smiles all around!
Top Tips for Perfecting Your Alphabet Cookies
Over the years, I’ve learned a few tricks that make these cookies turn out picture-perfect every time. First, always use softened butter—never melt it—and cream it thoroughly with sugar; this gives you that tender crumb and helps the dough hold its shape. When rolling out, avoid pressing too hard—gentle is key—to keep your cookies uniform. If the dough becomes too sticky, chilling it for 15-20 minutes firms it up and makes cutting so much easier. Making sure your cookie cutters are sharp helps avoid tearing or misshapen letters, and I always dust my work surface and cutters with a little flour—never too much, just enough to prevent sticking. For decoration, I’ve experimented with different glazes and fillings—trust me on this, a bit of lemon zest in the icing adds a lovely citrus punch. You can even swap vanilla extract for almond or coconut to match seasonal flavors. When baking, if your oven runs hot, reduce the temperature by 25°F and extend baking time slightly—better to slightly underbake than overbake! After baking, don’t skip the cooling step; cookies continue to firm up as they cool, and that’s when they’re easiest to decorate. Finally, store leftovers in airtight containers—these cookies stay fresh for about a week, but I bet they won’t last that long anyway!
Storing and Reheating Tips
Once baked and cooled, these alphabet cookies store beautifully. Keep them in an airtight container at room temperature for up to a week—just make sure they’re completely cool before stacking so they don’t get soggy. If you want to keep them longer, pop them in an airtight container or zip-top bag and store in the fridge for up to 2 weeks, but I find they taste best when freshly baked and not refrigerated. Freezing is super easy—layer the cookies between sheets of parchment in an airtight container or resealable bag, and they’ll last up to 3 months. When you want to enjoy them again, just let them thaw at room temperature for 15-20 minutes and maybe give them a quick warm-up in a low oven for that fresh-baked aroma. Be cautious if you’ve decorated with icing or glaze—adding those after reheating helps keep them looking pretty. If their glaze or frosting feels a little caked after storage, a gentle re-heat or a touch of warm milk can smooth things out. Honestly, these cookies are resilient—they taste just as good reheated as fresh, making them perfect for unexpected guests or craving a quick sweet fix.
Frequently Asked Questions
Final Thoughts
If you’ve ever wanted to combine nostalgic charm with a simple baking project, these alphabet cookies are it. The fun of cutting out letters, the warmth of fresh-baked goodness, and the joy of customizing flavors make them an absolute favorite in my home. Beyond just being adorable, they’re a perfect way to teach kids their ABCs, decorate a birthday cake, or simply enjoy a homemade treat that feels like a hug. I’ve tested different variations, added extra spices, swapped ingredients, and found that these cookies are truly versatile. And believe me, once you make a batch, they’ll quickly become a family tradition—something everyone looks forward to on lazy weekends or holiday mornings. So, gather your ingredients, roll out the dough, and let your creativity take over. I promise, the smiles and delicious bites will be totally worth it. Happy baking, and I can’t wait to hear how yours turn out! Don’t forget to leave a comment with your own tips or pics—sharing your cookie creations makes it all the more special.
Alphabet Sugar Cookies
Ingredients
Method
- In a mixer, beat butter and sugar until well combined, about 2 minutes.
- Add in 2 eggs and 2 yolks and mix until combined.
- Add in vanilla and almond extract; mix until combined.
- In a separate bowl, sift together flour, salt, and baking powder. Slowly add flour to butter mixture and combine.
- Mix ingredients until combined.
- Put dough in plastic wrap and refrigerate for at least one hour. Preheat oven to 350°F.
- Roll out dough, cut into alphabet shapes, and bake for 6-8 minutes.