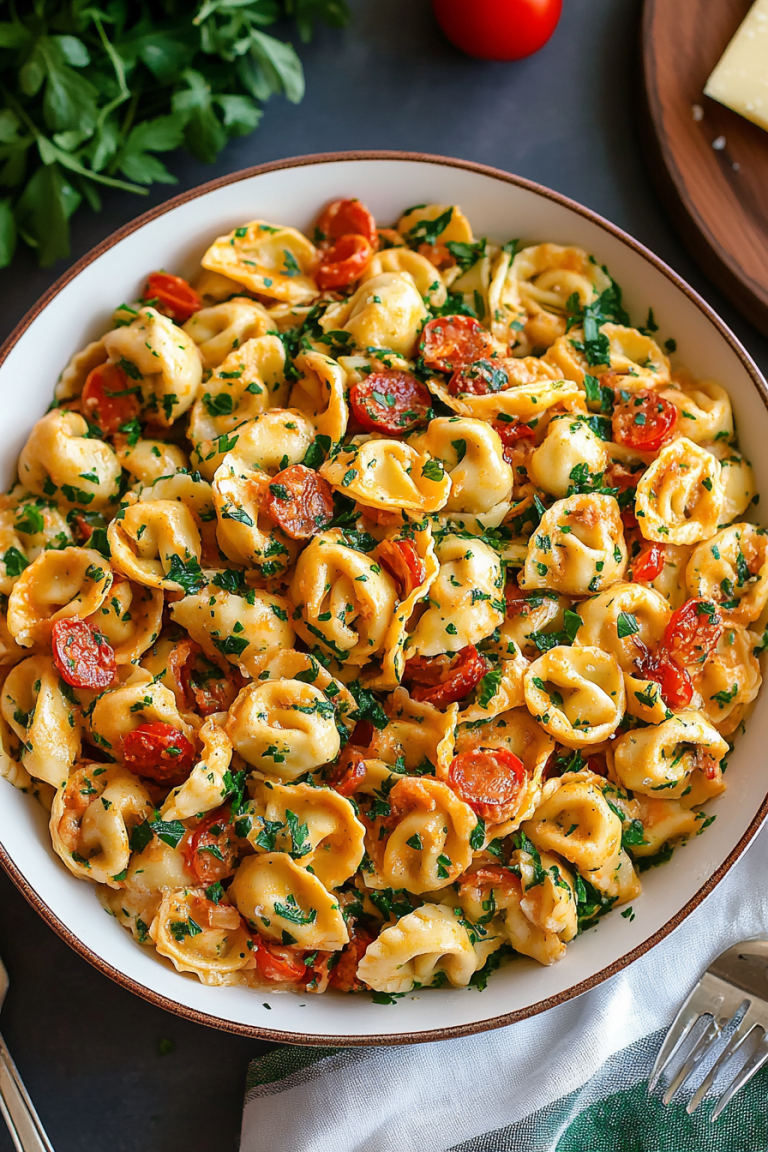
Easy Cheese Tortellini with Veggies
There’s a magic that happens when you scoop a big bowl of cheese tortellini, especially on a chilly evening when all I want is something cozy that still feels fancy. I remember as a kid, my mom would whip up her famous cheese tortellini — she called it “her little stuffed pasta,” and I swear, it had the power to make any rough day melt away. The smell of bubbling butter, garlic, and melted cheese is one that instantly transports me back to those warm, happy family dinners. It’s funny — I used to think making homemade pasta was a huge ordeal, but once I discovered how quick and easy cheese tortellini can be, it forever changed how I cook during busy weeknights. Honestly, this dish is the one I turn to when I want comfort, without sacrificing time or flavor. My kids ask for this all the time — it’s become a household favorite, and I bet once you try it, it’ll become yours too. Trust me on this — it’s perfect for everything from a lazy weekend lunch to a last-minute dinner party.
What is cheese Tortellini?
Cheese tortellini are little pasta rings stuffed with a delicious blend of cheeses — typically ricotta, Parmesan, and sometimes mozzarella or other cheeses you love. Think of them as the pasta world’s stuffed animals, adorable and inviting, with a creamy, cheesy center. The name “tortellini” actually comes from the Italian word “tortello,” meaning small band or ring — which is exactly what these little pasta shapes resemble. They’re essentially a tiny, semi-circular pocket of cheesy goodness. While you can find them pre-made at the store, there’s something about homemade cheese tortellini that takes it to a whole new level — it’s all about that fresh, tender pasta wrapping up your favorite cheeses. It’s a versatile dish that can be dressed up with a simple butter and sage sauce or jazzed up with a rich tomato or cream sauce. Think of cheese tortellini as that comfort-meets-elegance kind of dish you’ll want to keep making over and over.
Why you’ll love this recipe?
What I love most about this cheese tortellini is how it hits all the right notes — rich, cheesy, and downright satisfying, but surprisingly simple to make. It’s one of those recipes that’s foolproof, even if you don’t have professional chef skills. The best part? You can customize the fillings or sauces to match whatever you’re craving or have in the fridge. It’s budget-friendly, too — just a few pantry staples, some basic cheese, and fresh pasta ingredients, and you’re good to go. Plus, it’s super versatile. I’ve served it as a quick weeknight dinner, an elegant appetizer, or even a family style main course for special occasions. I love how the homemade pasta is tender and delicate, and once you get the hang of shaping those little rings, it’s almost meditative — I promise, you’ll be hooked. This dish is also great for when you need a quick freezer meal to grab on busy nights. Honestly, once you make cheese tortellini from scratch, store-bought just can’t compare — it’s a game changer in flavor and texture.
How do you make cheese Tortellini?
Quick Overview
This recipe is all about keeping things simple while delivering incredible flavor. I start by mixing a few ingredients to make a soft, elastic pasta dough. Then, I roll it out thin and cut it into strips, shaping each into tiny rings filled with a cheesy mixture. After sealing those little beauties, I cook them gently in boiling water until tender, then toss them with your favorite sauce — a simple butter sage sauce is my go-to, but marinara or cream-based sauces work beautifully too. The whole process takes about 40 minutes from start to finish, and the results? Pure comfort on a plate. Trust me, once you get the hang of shaping the tortellini, you’ll want to make a double batch — they freeze beautifully for easy meals later. This is one of those recipes that’s surprisingly forgiving, so don’t stress if your shapes aren’t perfect — it’s all about that delicious, cheesy bite.
Ingredients
For the main pasta dough:
– 2 cups all-purpose flour (preferably Italian 00 flour if you can find it — it makes all the difference!)
– 2 large eggs
– 1/4 teaspoon salt
– 2 tablespoons olive oil
– 2-3 tablespoons water (add a little at a time until dough comes together)
For the Filling:
– 1 cup ricotta cheese (fresh and creamy is best)
– 1/2 cup grated Parmesan cheese
– 1/2 teaspoon salt
– Freshly ground black pepper
– Pinch of nutmeg (optional, but I love the warmth it adds)
For the Sauce or Glaze:
– 4 tablespoons unsalted butter
– 2 cloves garlic, minced
– Fresh sage leaves (a few plucked straight from the garden or store-bought)
– Salt and pepper to taste
– A squeeze of lemon juice or a sprinkle of red chili flakes for extra flavor (optional)
Step-by-Step Instructions
Step 1: Preheat & Prep Pan
Bring a large pot of water to a boil, seasoned generously with salt. While that warms up, set up your workspace with a clean surface and grab a rolling pin or pasta machine. Making pasta is kinda therapeutic — I always do this when I want to wind down and focus on something satisfying. Keep a little bowl of water nearby to seal the edges of your tortellini. Also, prepare your cheese filling by mixing all the filling ingredients in a bowl until smooth — taste it and adjust seasoning if needed.
Step 2: Mix Dry Ingredients
Pour the flour onto your work surface or into a big mixing bowl. Make a well in the center and add the eggs, salt, and olive oil. Start mixing with your fingers or a fork, gradually incorporating the flour until it begins to come together. If it feels dry, add a splash of water. You want a smooth, elastic dough that’s a little tacky but not sticky. I’ve learned that kneading it for about 8-10 minutes develops that perfect silky texture.
Step 3: Mix Wet Ingredients
In a small bowl, whisk your eggs with a pinch of salt and olive oil. This helps create a cohesive dough. Once mixed, pour into the flour well and gently start mixing with your hands or a fork. It’s a bit messy at first, but don’t rush — patience here makes all the difference for that tender pasta.
Step 4: Combine
Knead the dough with your hands until it’s smooth and elastic. Wrap it in plastic wrap and let it rest for at least 20 minutes. This relaxes the gluten and makes rolling out easier. It’s tempting to skip resting, but trust me, the dough will turn out way better if you give it this time. Meanwhile, you can prepare your filling — just stir everything together in a bowl until smooth.
Step 5: Prepare Filling
Mix ricotta, Parmesan, salt, pepper, and a hint of nutmeg if you’re feeling fancy. I like to taste test this part — nothing beats fresh cheese flavor, especially when it’s all wrapped up in tender pasta. Feel free to add chopped herbs, cooked spinach, or even a pinch of red pepper flakes to give it your own twist.
Step 6: Layer & Swirl
Once rested, roll out the dough into thin sheets using a pasta machine or rolling pin. Cut into strips about 2 inches wide, then place small teaspoons of filling along the strips, spacing them evenly. Fold the dough over the filling and press out any air around the filling. Cut into tiny rings, sealing the edges with a little water if needed. To shape the tortellini, pick each ring by its sides and twist the ends around your finger to form a neat ring — this is the fun part! Don’t worry if they’re not perfect; homemade pasta has charm even when slightly rustic.
Step 7: Bake
Drop the tortellini into your boiling water. They’ll sink at first, then rise when cooked — usually in 2-3 minutes. Fresh pasta cooks fast! Drain carefully and reserve a little pasta water if you want to loosen your sauce later. In a skillet, melt butter, add garlic and sage, and cook until fragrant. Toss the drained tortellini in the sage butter, adding a splash of pasta water to create a silky sauce. For a richer option, you can toss it with a thick cream or marinara sauce instead.
Step 8: Cool & Glaze
If you’re not serving immediately, spread the cooked tortellini out on a baking sheet to cool. To store leftovers, keep them in an airtight container in the fridge. When ready to serve, reheat gently in a skillet with some butter or cover and microwave. I actually love to toss leftover tortellini in a little extra melted butter and herbs just before serving. For the glaze, a drizzle of good-quality olive oil, a sprinkle of Parmesan, or even a splash of balsamic vinegar can make all the difference.
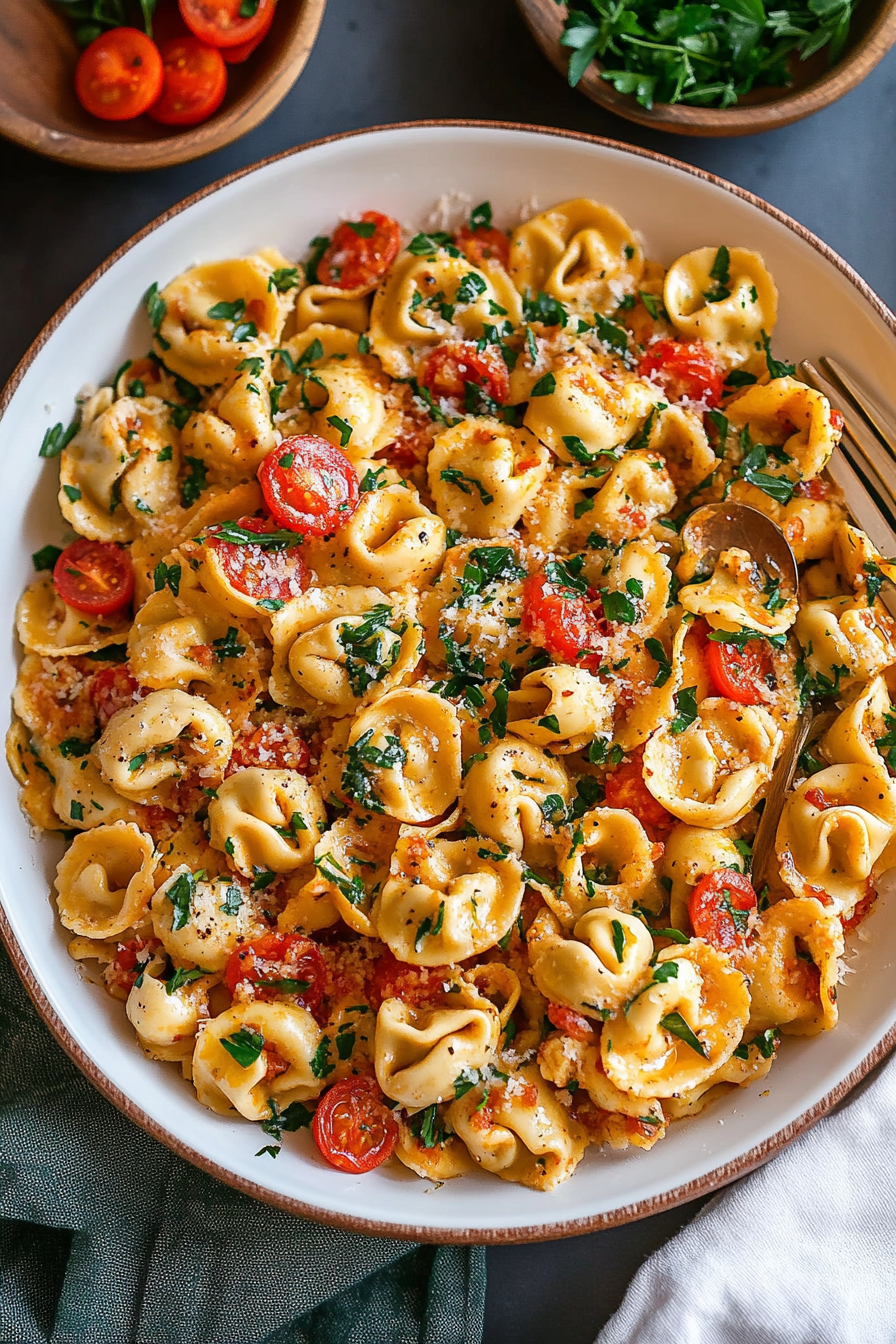
Step 9: Slice & Serve
This dish is best enjoyed while still warm and tender. Garnish with fresh herbs or an extra sprinkle of Parmesan. I like plating mine in a shallow bowl, adding a few basil leaves or a lemon wedge for brightness. Pair it with a crisp white wine or a sparkling water with lemon — honestly, it’s comfort food that feels elegant enough to serve to guests, yet simple enough for weeknights.
What to Serve It With
This cheese tortellini is pretty versatile, so you can serve it pretty much however you like. For a cozy weekend lunch, I toss it with a drizzle of olive oil, a squeeze of lemon, and a handful of cherry tomatoes. My family loves it with a fresh sprinkle of extra Parmesan and a side of crusty bread — bread and cheese, classic combo, right? If I’m feeling a bit fancy, I prepare a simple sage and butter sauce, maybe sauté some mushrooms or spinach alongside it. As a dinner party starter, serve small bowls with a light tomato basil sauce, lots of garlic, and a glass of chilled white wine. It’s also fantastic as a chilled pasta salad for picnics or potlucks—just add some fresh herbs, olives, and maybe a little extra cheese on top. Personally, I’ve served these with crispy roasted veggies or even as a filling for my homemade baked pasta casserole. The possibilities are endless, and I love how adaptable this dish can be.
Top Tips for Perfecting Your Cheese Tortellini
Making cheese tortellini might seem intimidating at first, but a little practice and these tips will have you shaping like a pro in no time. First off, don’t oversimplify your filling — the best cheese flavor comes from fresh, quality ingredients. When preparing your dough, I learned early on that resting it for at least 20 minutes makes a huge difference in handling. Overworking the dough leads to tough pasta, so mix just until it’s smooth and elastic. I used to stress about perfect shaping, but I’ve found that rustic, uneven shapes actually add charm and personality — plus, nobody ever notices when it’s all about that cheesy bite. If your filling feels too loose, try chilling it for 15 minutes before filling to prevent leakage. I’ve tested swapping ricotta with mascarpone for a creamier texture, and it’s divine, though you might want to adjust seasoning accordingly. When it comes to boiling, don’t overcrowd the pot — give each piece room to move. I once tried baking these in the oven with a layer of cheese and herbs on top, which was incredible — a baked tortellini casserole. Also, the sauce is key: a simple butter and sage pairing never fails, but adding a splash of pasta water helps the sauce cling beautifully. The more I make this dish, the more I realize it’s all about embracing imperfections and focusing on that comforting, cheesy goodness.
Storing and Reheating Tips
leftovers? Keep your cheese tortellini fresh and delicious with a few simple tips. If you’re planning to eat it within a day, store it in an airtight container in the fridge. Just lay the tortellini flat or in a single layer so they don’t stick together. The flavor and texture stay great for about 2-3 days. When reheating, I prefer tossing them in a hot skillet with a little butter or olive oil — it brings back that crispy edge and keeps the pasta from drying out. If you’re in a rush, microwave on a low setting, covered with a damp paper towel to keep it moist. Freezing is also a game changer. Lay the uncooked tortellini on a baking sheet in a single layer and freeze until solid. Transfer to a zip-top bag or airtight container, then keep for up to 2 months. To reheat from frozen, drop directly into boiling water or cook in a skillet with a splash of broth or sauce until heated through. If you’ve already coated the tortellini in sauce, just gently warm in the microwave or stovetop, adding a splash of water or broth if needed. Just remember, avoid overcooking — you want that tender, cheesy bite, not mush.
Frequently Asked Questions
Final Thoughts
Honestly, cheese tortellini has become one of my go-to dishes for almost any occasion. It’s forgiving, colorful, and packed with flavor — and I love how a simple handful of ingredients can come together into something so satisfying. Over the years, I’ve tweaked my recipe, added different cheeses, or swapped out sauces depending on my mood or what’s hiding in the fridge. What I hope you get from this is that homemade pasta doesn’t have to be intimidating. It’s about having fun, tasting your way through each step, and embracing those little imperfections. My only advice? Don’t rush the process, and definitely take a moment to savor how good it smells when the sage hits the butter. It’s always a crowd-pleaser in my house, and I bet it’ll become a favorite in yours too. I’d love to hear how yours turns out — leave a comment, share your tweaks, or just tell me how much everyone loved it. Happy baking!
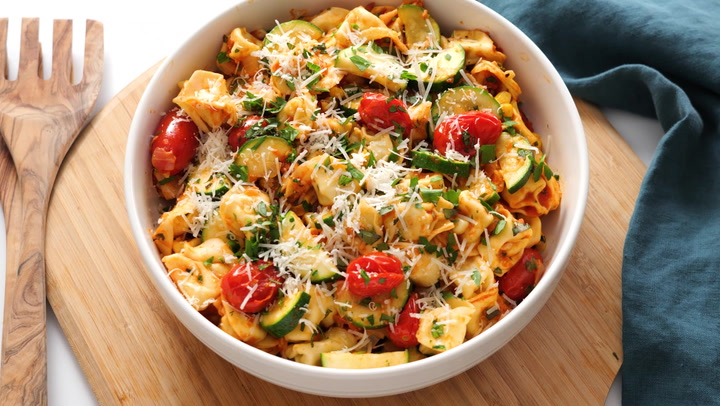
Cheese Tortellini with Vegetables
Ingredients
Method
- Bring a large pot of lightly salted water to a boil. Cook tortellini a minute shy of the package directions. While cooking, prep and cook vegetables.
- In a 12-inch sauté pan or deep skillet, heat olive oil over medium-high heat.
- Add chopped onion and sauté for 3 minutes. Add corn and sauté for 2 more minutes.
- Add tomatoes and sauté for 3 minutes. Add zucchini and garlic; cook until veggies are tender and tomatoes have burst, about 6-8 minutes.
- Drain tortellini, reserving 1/4 cup of pasta water.
- Transfer tortellini and marinara sauce to the pan with vegetables. Cook and toss until tortellini is tender, about 1-2 minutes. Add reserved pasta water if needed to loosen sauce.
- Season with salt and pepper. Toss in 1/4 cup parmesan, chopped basil, and parsley.
- Serve immediately, topping each serving with remaining parmesan.