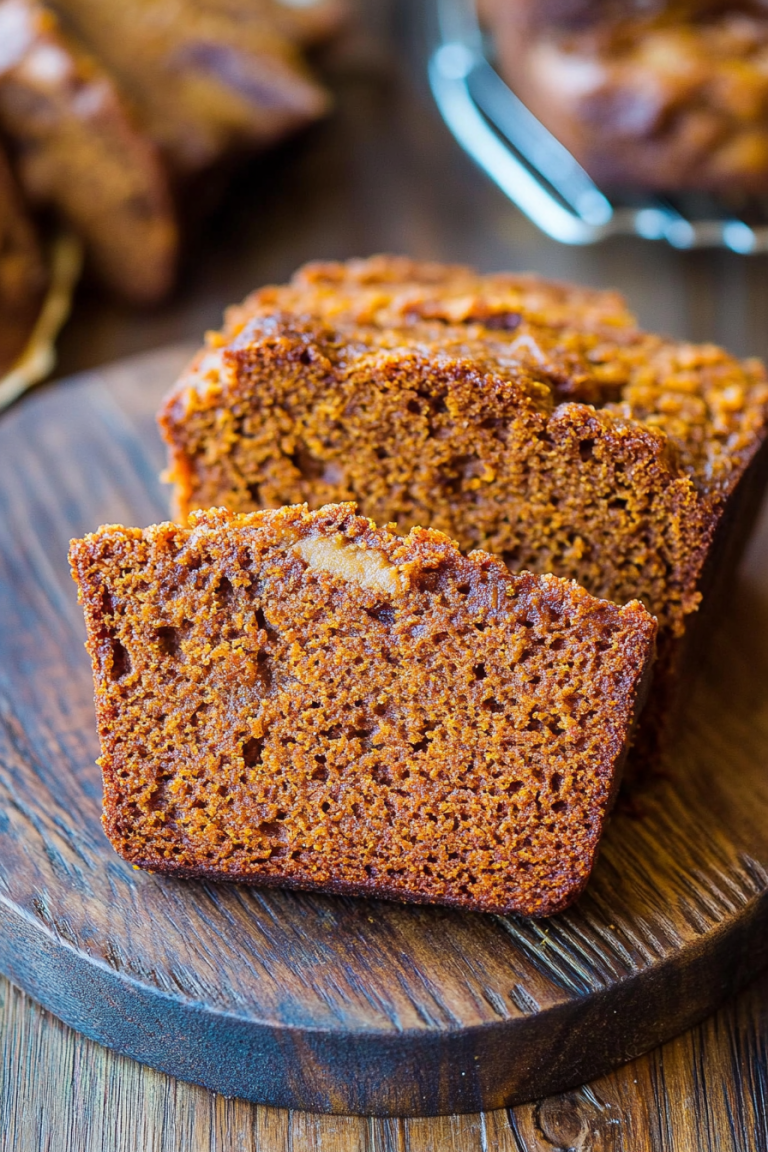
Sweet Cinnamon Bread How to Make It Easy
I remember the first time I ever tasted a perfect cinnamon roll. It was at this tiny bakery in my hometown, and the smell alone—warm, spicy, buttery—hit me like a hug. I could hardly believe how something so simple could make me feel so nostalgic. Over the years, I’ve tried countless recipes, but honestly, the one I’m sharing with you today is the one I always come back to. It’s incredibly forgiving, delightfully cozy, and totally addictive. And the best part? It’s way easier than you might think. Whether you’re a seasoned baker or just want to try your hand at making something super comforting, this cinnamon roll is a guaranteed crowd-pleaser. Trust me—your kitchen will smell amazing, your family will ask for seconds, and you’ll finally have a go-to recipe that feels like a warm hug in bread form.
What is cinnamon roll?
Think of a cinnamon roll as the breakfast version of a hug from grandma—soft, sweet, loaded with cinnamon, and topped with a glossy glaze. It’s essentially a sweet yeast dough, rolled out, smothered with cinnamon sugar filling, then rolled up like a giant swirled hug before baking. The name “cinnamon roll” is pretty straightforward since it’s just that—a roll of bread infused with cinnamon and sugar, baked until golden and gooey. It’s an iconic treat that’s enjoyed all around the world, especially in the mornings and on lazy weekend brunches. It’s kind of like a cold-weather comfort food but just as perfect when you’re craving something sweet on a weekday morning. And don’t even get me started on the smell—think warm spices, melting butter, and sweet vanilla—all wafting out of the oven and making everyone drool.
Why you’ll love this recipe?
What I love most about this cinnamon roll recipe is how approachable it is despite its bakery-worthy results. I’ve made this countless times, and I swear, every batch turns out just as perfect as the last—soft, fluffy, and dripping with that irresistible cinnamon-sugar swirl. The flavor? Out of this world. It’s spicy, sweet, with just a hint of vanilla, and the glaze adds a shiny, sweet finish that takes it over the top. Best part? It’s super budget-friendly because you probably already have most of these ingredients in your pantry and fridge. Plus, you can customize it easily—add nuts, substitute honey for sugar, or even layer it with fruit for a twist. This recipe’s versatility means it’s perfect for weekend brunch, a cozy night in, or even last-minute gifting (I’ve wrapped up a batch and given it to neighbors with a big bow—big hit!).
How do you make cinnamon rolls?
Quick Overview
This cinnamon roll recipe holds your hand every step of the way, from mixing the soft, tender dough to swirling in that irresistible cinnamon-sugar filling, then baking it into a golden masterpiece. The trick is to let the dough rise until it’s puffy—trust me, patience here makes all the difference—and then roll it out easily without tearing. Once baked, slather it with a simple glaze, and voila—you’ve got yourself a homemade cinnamon roll that’s better than anything you’ll find in a bakery. And guess what? It’s all pretty straightforward, and I’ve broken down each step to make sure you can’t go wrong—even if you’re new to baking bread!
Ingredients
For the Main Batter:
– 2 12 cups all-purpose flour (I like to use unbleached for a richer flavor)
– 1/4 cup granulated sugar
– 1 packet active dry yeast (about 2 ¼ teaspoons)
– ½ teaspoon salt
– ¾ cup warm milk (around 110°F, don’t go hotter or you’ll kill the yeast)
– ¼ cup unsalted butter, melted
– 1 large egg
For the Filling:
– ⅓ cup packed light brown sugar
– 2 tablespoons ground cinnamon
– 2 tablespoons unsalted butter, softened
– Optional: ½ cup chopped nuts or raisins for some extra texture and flavor
For the Glaze:
– 1 cup powdered sugar
– 1-2 tablespoons milk or cream (adjust for desired consistency)
– ½ teaspoon vanilla extract or almond extract (if you love extra flavor)
Step-by-Step Instructions
Step 1: Preheat & Prep Pan
Preheat your oven to 375°F. Lightly grease a round cake pan or a baking dish—this helps prevent sticking and makes for a prettier presentation. Set it aside while you prepare the dough. I always do this early because waiting until the dough is ready and then rushing to bake stresses me out!
Step 2: Mix Dry Ingredients
In a large bowl, whisk together the flour, sugar, yeast, and salt. Mixing these first helps distribute everything evenly, ensuring your dough rises uniformly. If you’re using instant yeast, you can skip the warm milk step, but I find active dry yeast works better with a warm environment—hence the warm milk!
Step 3: Mix Wet Ingredients
In a separate bowl, combine the warm milk, melted butter, and egg. Stir until well blended. The milk should feel warm but not hot—think cozy bath temperature. I’ve tested this with almond milk, and it makes the dough even creamier, so feel free to swap if you like.
Step 4: Combine
Pour the wet mixture into the dry ingredients. Mix gently with a spatula or dough hook if you’re using a stand mixer. Keep mixing until it forms a shaggy dough—that’s the sign you’re almost there. Don’t overmix; just until it comes together nicely. If it’s a little sticky, that’s totally fine because it helps keep the rolls moist and tender.
Step 5: Prepare Filling
Stir together the brown sugar and cinnamon. Soften the butter so it’s easy to spread—this is my secret to that perfect swirl. If you want nuts or raisins, fold them into the filling now. I usually skip them if I want my kids to enjoy it, but honestly, a handful of chopped pecans takes it to a new level.
Step 6: Layer & Swirl
Once your dough is smooth and elastic (about 5-7 minutes of kneading if by hand), roll it out on a lightly floured surface into a rectangle about 12×8 inches. Spread the softened butter over the dough, then sprinkle the cinnamon-sugar mixture evenly across. Roll it up tightly lengthwise, then slice into 8-10 even pieces. Arrange these in your prepared pan, leaving a little space for expansion.
Step 7: Bake
Cover the rolls loosely with a clean towel and let them rise in a warm spot for about 30 minutes—they should puff up quite a bit. Bake at 375°F for about 20-25 minutes, or until the tops are golden and the filling is bubbling. Keep an eye on them—every oven is different! If the tops brown too quickly, cover loosely with foil.
Step 8: Cool & Glaze
Once baked, let the cinnamon rolls cool for about 10 minutes. Drizzle the glaze over while they’re still warm so it soaks in and becomes glossy. For the glaze, I prefer to whisk powdered sugar with milk until it’s pourable but not runny. Add a splash of vanilla for that extra flavor push.
Step 9: Slice & Serve
Use a sharp serrated knife for clean cuts—don’t squeeze too hard or they’ll squish out the filling! Serve them warm, maybe with a little extra butter or even a dollop of cream cheese frosting if you’re feeling fancy. Honestly, I love them plain or with a cup of coffee—they’re just pure comfort in every bite.
What to Serve It With
This cinnamon roll is perfect on its own, but I love pairing it with a good cup of coffee or a tall glass of milk. During weekend brunch, I like to serve it with fresh berries or slices of melon to balance out the richness. If I’m making this for a special breakfast, I’ll set the table with some cute napkins, a little vase of fresh flowers, and maybe some scrambled eggs on the side. For an indulgent dessert, I’ll add a scoop of vanilla ice cream or a drizzle of caramel sauce. At bedtime, a warm cinnamon roll with a glass of warm milk is just about the coziest thing I can think of. And hey, this one’s a lifesaver on busy nights or whenever you need a little sweetness to lift your spirits.
Top Tips for Perfecting Your Cinnamon Roll
Over the years, I’ve learned a few tricks to make sure each batch is better than the last. For one, patience with the rising step is key—don’t rush the dough, especially the first rise. If your kitchen is chilly, put the covered dough in a warm spot or inside your turned-off oven with the light on. I tested this with almond milk, and it made the dough a touch richer and creamer—so feel free to experiment! When rolling out, keep the dough as even as possible, or the rolls won’t bake uniformly. I also like to swirl the filling generously—more cinnamon equals more flavor! For those who like it less sweet, reduce the sugar in the filling or the glaze. I’ve even added a little nutmeg or cardamom for a bit of spice—yum. When baking, keep an eye on the tops—they can brown quickly. If the tops are getting too dark but the insides need more time, tent a piece of foil over the top. For the glaze, you can switch up flavors—add a splash of lemon juice, maple syrup, or even cream cheese to make it extra decadent. Learning to melt butter and brown it slightly before mixing with the sugar can add a caramel note—trust me on this one. Overall, don’t stress—these cinnamon rolls forgive most mistakes and always come out delicious!
Storing and Reheating Tips
If you have leftovers (which rarely happens at my house, because they disappear in minutes), store them properly to keep that fresh-baked feel. For short-term storage, cover the rolls tightly with plastic wrap or foil at room temperature—these will stay fresh for about a day or two. For longer storage, pop them in an airtight container and refrigerate—they’ll last about 4 days. To reheat, the microwave works great—about 20 seconds or so—just enough to warm through and soften the butter. If you prefer oven reheating, wrap them in foil and warm at 350°F for about 10 minutes. Be sure to add fresh glaze or a quick drizzle of icing after reheating—otherwise, they can dry out a little. Freezing works too—wrap individual rolls tightly in plastic wrap, then aluminum foil, and store for up to 2 months. Let them thaw at room temperature, then reheat as above. If you want to keep the glaze fresh, I suggest adding it fresh when you serve. This way, every bite stays soft, gooey, and just as irresistible as when they first came out of the oven.
Frequently Asked Questions
Final Thoughts
There’s just something magical about a cinnamon roll, isn’t there? It’s a simple pleasure that brings people together—breakfast, brunch, or just a cozy evening treat. Each time I make these, I’m reminded of all the good mornings and lazy weekends spent in the kitchen with my family. Once you master the basic technique, you can have endless fun customizing the filling, adding spices, or trying different toppings. The aroma alone is worth every minute spent kneading and rolling—but honestly, it’s the smile on everyone’s face when they take that first warm bite that makes it all so worthwhile. So go ahead—roll up your sleeves, turn on some good music, and get ready to create a batch you’ll be proud of. Can’t wait to hear how yours turns out! Feel free to drop your comments or share your twists—baking is all about making it yours.
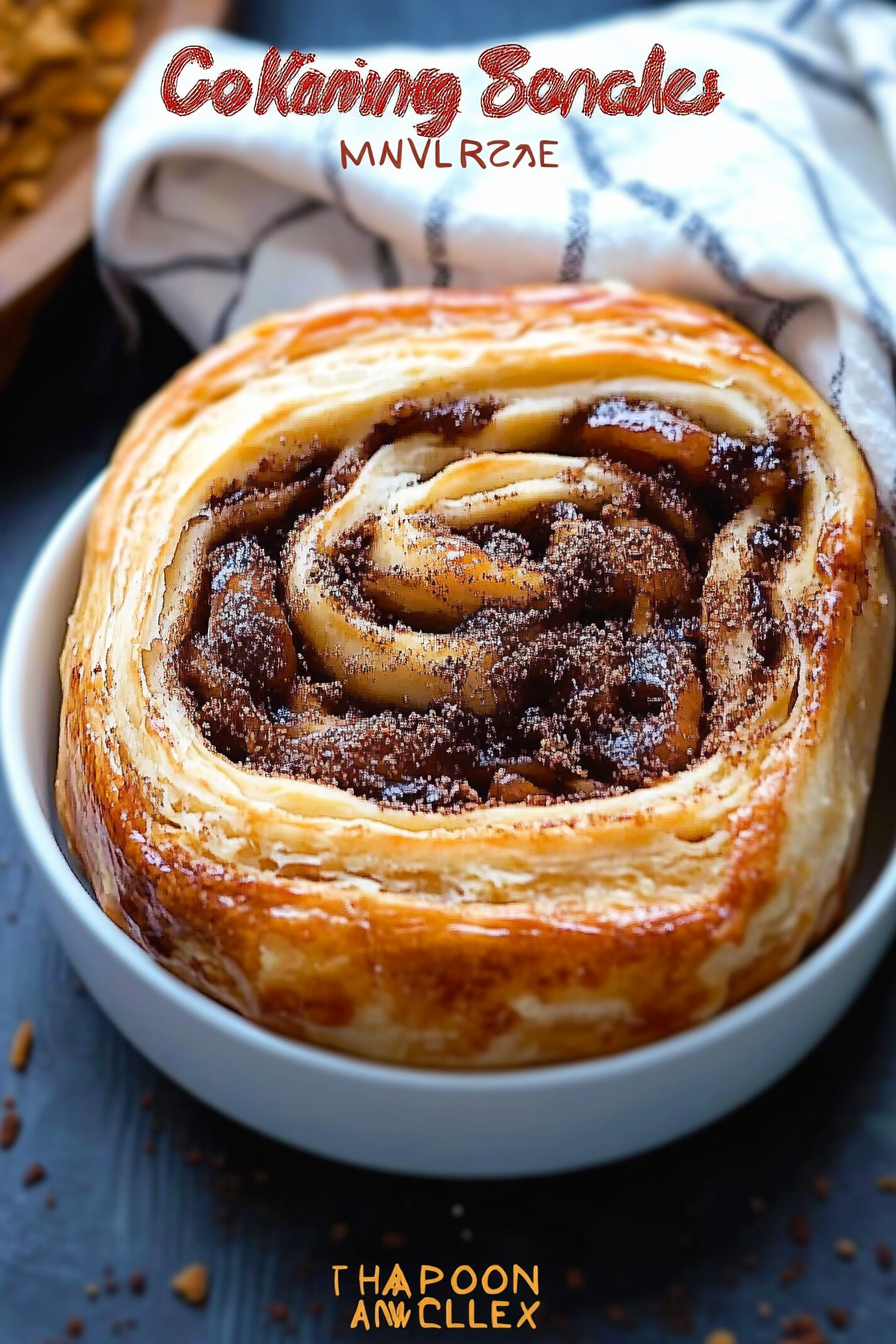
Homemade Cinnamon Rolls
Ingredients
Method
- In a small bowl, activate the yeast by mixing it with warm milk and a teaspoon of sugar. Let sit until frothy, about 5 minutes.
- In a large bowl, combine flour, remaining sugar, and cinnamon. Add melted butter, activated yeast mixture, and mix until dough forms. Knead for about 5 minutes.
- Cover the dough with a damp cloth and let it rise in a warm place for 1 hour or until doubled in size.
- Preheat the oven to 350°F. Roll out the dough into a rectangle. Spread softened butter over the surface and sprinkle with brown sugar and more cinnamon if desired.
- Roll the dough tightly from the longer side to form a log. Slice into 8 equal pieces and place into a greased baking dish.
- Bake for 25 minutes or until golden brown. While baking, prepare the frosting by mixing powdered sugar, softened butter, and vanilla until smooth.
- Remove the cinnamon rolls from oven, let cool slightly, and spread the frosting over the top before serving.