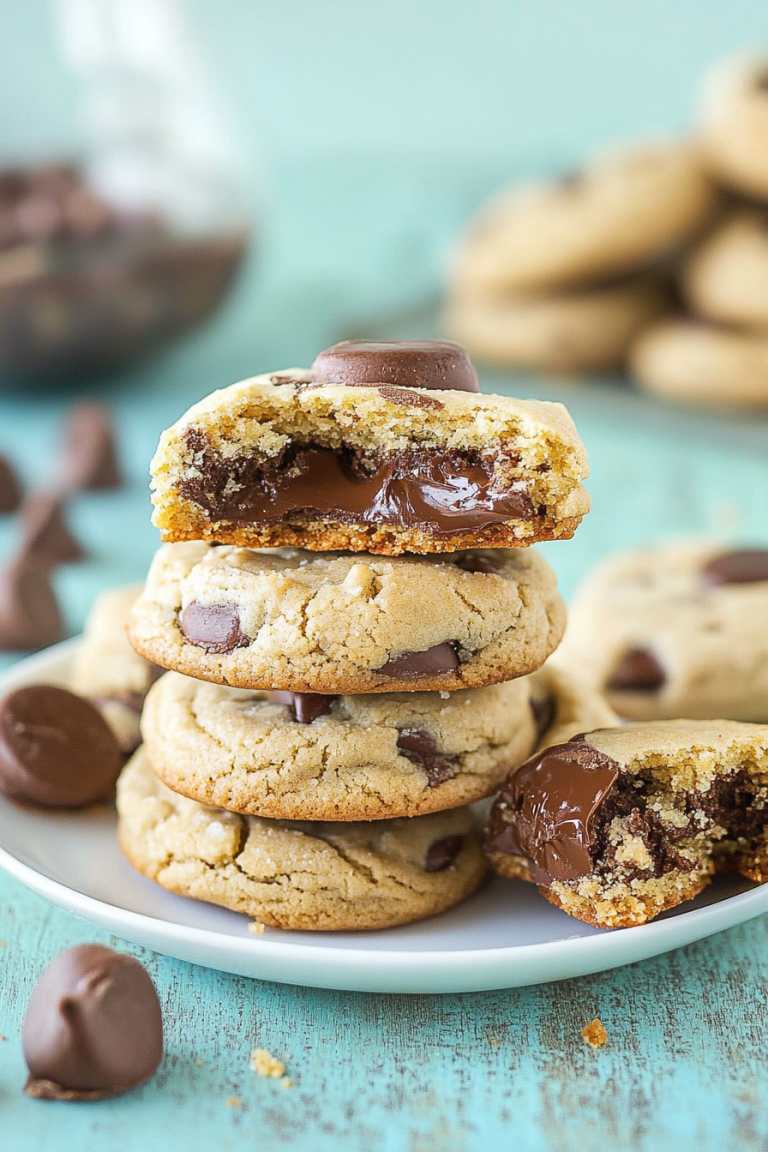
Sweet Cherry Chocolate Cookies How To
There’s something about the way a warm, gooey chocolate cherry cookie melts in your mouth that just hits differently. I remember the first time I whipped up a batch, the smell alone brought back childhood memories—those cozy afternoons when grandma’s kitchen was filled with sweet, fruity scents. These cookies are an irresistible combo of rich chocolate and tangy cherries, all wrapped up in a soft, chewy cookie. Honestly, they’re my secret weapon for when I want a sweet treat that’s indulgent but also a little nostalgic. What’s funny is, I usually think I’d prefer something super decadent like a brownie or a deep-dish pie, but these cookies? They’ve become my go-to, especially when I need a quick, satisfying fix. Plus, they’re so easy to make—no fancy equipment needed. Trust me on this, once you try them once, you’ll be hooked. They disappear in minutes at my house, and I bet they’ll do the same at yours!
What is chocolate cherry cookie?
Think of chocolate cherry cookies as a delightful marriage between two favorite flavors—decadent, velvety chocolate paired with sweet, tart cherries. They’re essentially soft, chewy cookies infused with rich cocoa and bits of dried or fresh cherries tucked inside. The name is pretty straightforward, but the magic is in how simple ingredients come together to create something truly special. This recipe is a bit like a homemade version of that fancy chocolate cherry cake, but in cookie form—less fuss, more fun. I love that you can use fresh cherries when they’re in season or go for dried ones the rest of the year. It’s a versatile, crowd-pleasing treat that’s perfect for everything from cozy nights in to bringing to a friends’ get-together. Think of these as a little slice of comfort, with a hint of luxury, baked right into every bite.
Why you’ll love this recipe?
What I love most about these chocolate cherry cookies is how they strike the perfect balance between indulgence and simplicity. The flavor? Oh, it’s next level. The deep, bittersweet cocoa mixed with the bright, fresh burst of cherry—trust me, each bite feels like a little celebration. Plus, they’re incredibly easy to throw together, even if you’re not a seasoned baker. No complicated techniques here—just mix, fold, scoop, and bake. They’re budget-friendly, too, since most of the ingredients are pantry staples, and you probably already have what you need in your kitchen. I’ve made these with dried cherries, which are convenient and shelf-stable, but I’ve also experimented with fresh cherries when they’re ripe and in season, and the results are heavenly. Honestly, my kids ask for these all the time—they’re a crowd favorite, and I love that I can whip them up on busy nights with little fuss. The best part? The slightly crispy edges and the soft center make these cookies perfect with a glass of milk or a hot cup of coffee. They’re versatile enough to serve at cozy family gatherings or package up as gifts—because everyone loves a homemade treat.
How do I make chocolate cherry cookies?
Quick Overview
This recipe is all about simplicity. You’ll start by combining your dry ingredients—flour, cocoa powder, baking soda, salt—then mix your wet ingredients—butter, sugar, eggs, vanilla—before bringing everything together in one bowl. The cherries get folded in last, giving each cookie a little fruit surprise. Scoop the dough onto a baking sheet, give them a gentle press, and pop them into the oven. In about 10-12 minutes, you’ll have warm, fragrant cookies with that irresistible chocolate cherry combo—perfectly chewy in the middle with a slight crisp around the edges. The secret is not overbaking; you want that gooey, soft center to shine through. Once out of the oven, I like to let them cool just enough so they don’t fall apart but still stay warm and melty inside. They’re such a joy to make because everything comes together so effortlessly—your kitchen will smell amazing, and in no time, you’ll be enjoying cookies that look as cozy and inviting as they taste.
Ingredients
For the Main Batter:
– 2 cups all-purpose flour (I always use unbleached for that extra flavor)
– 1/2 cup unsweetened cocoa powder (preferably Dutch-processed for richness)
– 1 teaspoon baking soda
– 1/2 teaspoon salt
– 1 cup granulated sugar
– 1/2 cup packed light brown sugar
– 1 cup unsalted butter, softened (trust me, butter makes a huge difference!)
– 2 large eggs
– 1 teaspoon vanilla extract (pure vanilla is worth it)
For the Filling:
– 1 cup dried cherries (or fresh when in season — pitted and chopped)
– Optional: a handful of chocolate chips or chunks for extra decadence
For the Glaze (Optional):
– 1/2 cup powdered sugar
– 1-2 teaspoons milk or cream
– A splash of vanilla or cherry extract
Adjust the consistency to spreadable but not runny. It’s a nice finishing touch if you’re feeling fancy.
Step-by-Step Instructions
Step 1: Preheat & Prep Pan
Start by preheating your oven to 350°F (175°C). Line a baking sheet with parchment paper or a silicone baking mat—this keeps the cookies from sticking and makes cleanup a breeze. If you want perfectly round cookies, slightly dampening your hands and kind of smoothing the dough before baking helps—trust me, I’ve learned that from years of trial and error!
Step 2: Mix Dry Ingredients
In a small bowl, whisk together the flour, cocoa powder, baking soda, and salt. Doing this first ensures everything is evenly distributed, which is especially important with cocoa—no one wants a cookie with a salty bite or a burst of bitter powder. Set it aside for now.
Step 3: Mix Wet Ingredients
In a big mixing bowl, beat the softened butter with the sugars until the mixture is light, fluffy, and a little creamy—this takes about 2-3 minutes. I love using a hand mixer for this—it saves my arm! Then, beat in the eggs one at a time, making sure each is fully incorporated before adding the next. Finally, stir in vanilla. The smell at this stage? Incredible—like chocolate dreams already forming!
Step 4: Combine
Gradually add the dry ingredients to the wet mixture, mixing on low speed or stirring gently with a spatula. Be careful not to overmix here—that’s what can make your cookies tough! You want just combined, soft dough that’s slightly sticky but manageable.
Step 5: Prepare Filling
In a small bowl, toss the chopped cherries with a little flour if they’re wet—this prevents them from sinking in the batter—then fold them gently into the dough. If you’re using chocolate chips or chunks, fold those in too. Do not overmix; you want the cherries evenly distributed but not broken apart.
Step 6: Layer & Swirl
Drop spoonfuls onto your prepared baking sheet, about 2 inches apart. For a prettier look, gently flatten the tops with the back of a spoon or your fingers. If you want a marbled effect, you can swirl a tiny bit of melted chocolate on top before baking, but I usually stick to the natural cherry chunks—they look rustic and charming!
Step 7: Bake
Bake for 10-12 minutes. Keep an eye on them—boring as it sounds, underbaking slightly gives that perfect chewy center, while overbaking makes them crunchy all over. You’ll know they’re done when the edges are set and slightly cracked, but the centers still look soft and moist. Let them rest for 5 minutes on the baking sheet—they’ll firm up just enough to handle without losing that melt-in-your-mouth quality.
Step 8: Cool & Glaze
Transfer the cookies to a wire rack to cool completely. If you’re adding the glaze, drizzle it over them while still slightly warm—this helps it set beautifully. The glaze adds a little extra sweetness and a glossy finish, but honestly, these cookies are fabulous even without it.
Step 9: Slice & Serve
They’re best enjoyed at room temperature, but I’ll admit I love biting into one the moment they’re just out of the oven while the centers are still warm and gooey. Serve with a tall glass of milk, a hot coffee, or even a dollop of whipped cream on top for a fancy touch. These cookies look rustic and inviting—perfect for sharing with friends or sneaking a few for yourself!
What to Serve It With
These cookies are a versatile treat. When I serve them for breakfast or brunch, I like pairing them with a sunny-side-up egg or some Greek yogurt. The slight sweetness of the cherries and cocoa plays beautifully with tangy yogurt or a fresh fruit salad. They’re equally delicious as a cozy afternoon snack, paired with herbal tea or a steaming mug of hot chocolate when it’s chilly outside.
As a dessert, I love presenting them alongside a scoop of vanilla ice cream or a drizzle of caramel sauce. My family enjoys them warm, right out of the oven, with a sprinkle of sea salt on top—trust me, it elevates the flavor so much. And for a gift, I often stack them in a pretty tin with a handwritten note—you’d be surprised how much these homemade cookies mean to people. They’re one of those treats that instantly make people smile.
Top Tips for Perfecting Your Chocolate Cherry Cookies
Everyone has their little tricks, and over the years, I’ve picked up a few to make these cookies even better:
- Zucchini Prep: Not actually zucchini, but I always do this with cherries—make sure to dry them well after chopping. Extra moisture can mess with the texture, and nobody wants soggy cookies!
- Mixing Advice: Be gentle once you add the cherries. Overmixing can break the fruit and toughen the dough, which is exactly what you don’t want. Use a light hand and fold gently.
- Swirl Customization: If you want a marbled look or extra chocolate, melt a handful of chocolate chips and swirl it on top just before baking. It’s a little extra effort but makes your cookies look fancy!
- Ingredient Swaps: You can swap dried cherries for dried cranberries or cherries — just keep the ratio similar. For an extra indulgence, toss in a handful of mini chocolate chips with the cherries.
- Baking Tips: Always check your oven’s true temperature with an oven thermometer—mine runs hot, and that slight difference can ruin your cookies! Also, turn the baking sheet halfway through for even baking.
- Glaze Variations: Instead of powdered sugar glaze, try melted white chocolate or a dusting of powdered sugar mixed with a tiny bit of cinnamon for extra flavor.
Experimenting is part of the fun, and I’ve learned to adapt these cookies to what’s in my pantry or my mood. Sometimes I add a pinch of espresso powder to intensify the chocolate flavor, or freeze some cherries for a bit of a frozen surprise in each bite. Whatever you do, don’t skip the cooling stage—they set just enough to hold their shape but remain irresistibly soft and chewy inside.
Storing and Reheating Tips
These cookies are best enjoyed fresh, but if you have leftovers (which, let’s be honest, is rare in my house), here’s how I store them:
Room Temperature: Keep them in an airtight container for up to 3 days. I like using a large biscuit tin—they stay soft and fresh longer that way. Make sure they’re totally cooled before packing to prevent condensation, which can make them soggy.
Refrigerator Storage: If you want to keep them for longer, store in a sealed container in the fridge for up to a week. They retain their chewiness pretty well, and I like to reheat them for 10 seconds in the microwave to bring back that just-baked feel.
Freezer Instructions: For longer storage, neatly arrange the cookies in an airtight container or a freezer zip-top bag, separated by parchment paper. They’ll stay good for about 3 months. To enjoy, just thaw at room temperature or warm them up briefly in the microwave—it’s like having fresh cookies all over again.
As for the glaze—if you’ve added it, it’s best to do so fresh or just before serving, as it can soften or melt if stored for too long. Keep in mind, these cookies truly shine when enjoyed within the first few days, but with proper storage, they still taste delicious later on.
Frequently Asked Questions
Final Thoughts
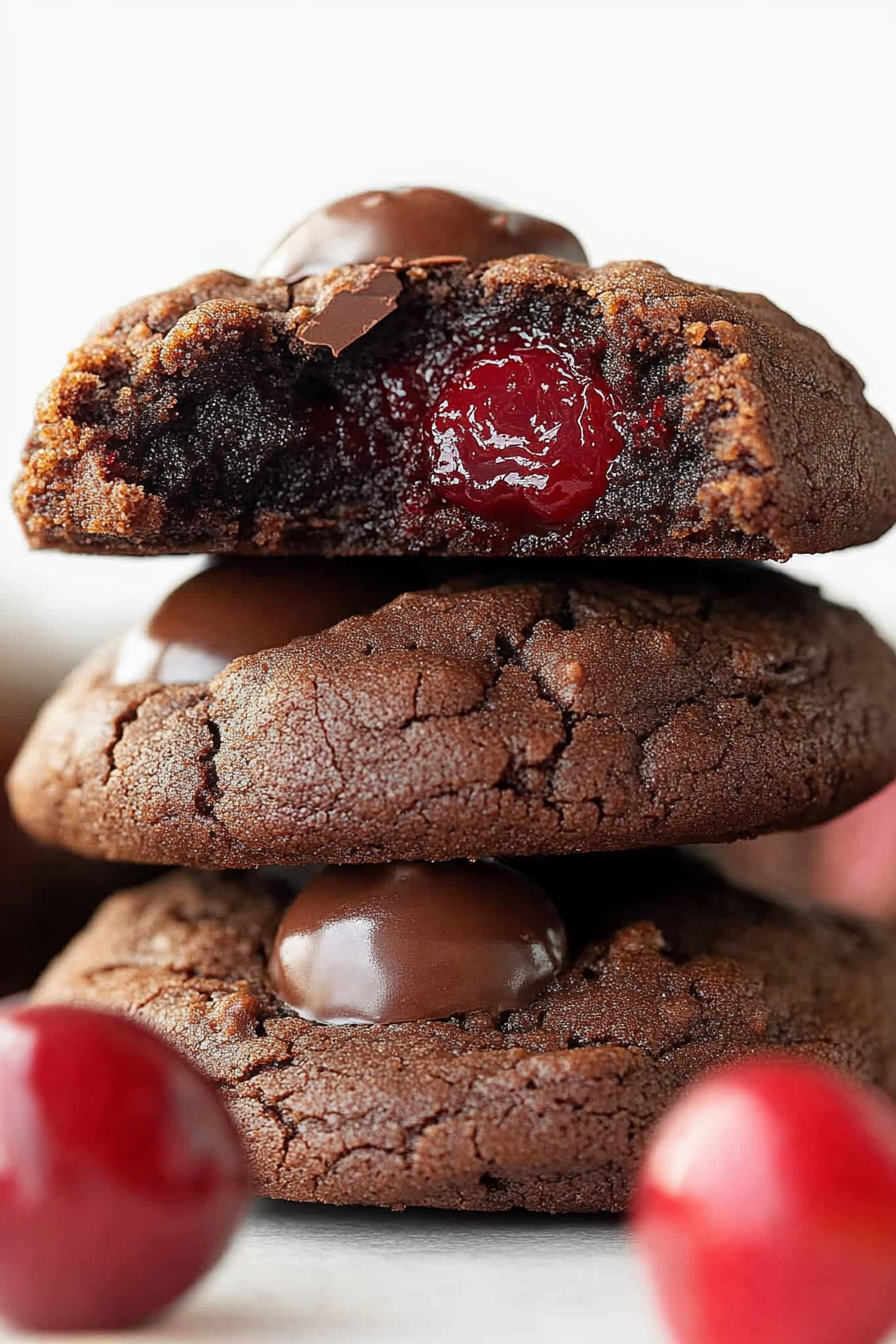
Honestly, these chocolate cherry cookies have become a bit of a family legend around here. They’re comforting, easy to make, and taste like a little bite of happiness—perfect for lazy Sundays, last-minute gifts, or just because you deserve something special. The joy of biting into that soft middle with bursts of cherry and rich chocolate never gets old. I love experimenting with different types of cherries or adding a touch of espresso powder to deepen the chocolate flavor—every batch feels like a new adventure. Whether you’re baking for yourself or sharing with loved ones, I promise these will become a favorite in your recipe collection. So, gather your ingredients, roll up your sleeves, and let the warm aroma fill your kitchen. Can’t wait to hear how yours turn out—happy baking!
Chocolate Cherry Cookies
Ingredients
Method
- Preheat oven to 350°F. Line baking sheets with parchment paper.
- Whisk together flour and cocoa powder; set aside.
- Cream butter, sugar, salt, baking powder, and baking soda until light and fluffy.
- Add egg and vanilla; mix well.
- Gradually add flour mixture on low speed until combined.
- Drop dough by 1-tablespoon portions onto baking sheets, about an inch apart.
- Make an indentation in each cookie using your thumb or teaspoon.
- Place a cherry in each indent.
- In a small saucepan, melt chocolate chips, condensed milk, and 2 teaspoons cherry juice over medium-low heat, stirring until smooth.
- Fill each cherry indent with about 1 teaspoon of chocolate mixture, covering the cherry.
- Bake for 9 minutes. Cool on sheet briefly, then transfer to rack to cool completely.