Spooktacular Halloween Treats You’ll Love
There’s just something magical about Halloween — the spooky costumes, the haunted houses, and especially those adorable little treats that make the night so memorable. I remember as a kid how I’d scavenge the trick-or-treat bags, but honestly, the treats I looked forward to the most were always the homemade ones. This recipe for my chewy pumpkin-spice Halloween treats is one I’ve been making for years, and it always disappears in minutes at my house. They’re soft, flavorful, and have just the right amount of spice to make you feel all warm inside — perfect for little hands or for snacking during a spooky movie marathon. The best part? They’re incredibly easy to whip up, which makes them perfect for busy weeknights when you want something sweet but don’t want to fuss over complicated baking. Trust me on this — once you try these, they’ll be a staple in your Halloween tradition, just like they are in mine.
What are some of the best Chewy Pumpkin Spice Halloween Treats?
Think of these treats as a festive, fall-inspired twist on classic fudge or no-bake cookies. They’re essentially puck-shaped bites made from a mixture of pumpkin pureé, oats, and warm spices, all bound together with a little honey or maple syrup. It’s like a cozy hug in every bite. The name might sound fancy, but really, they’re just a simple, no-bake sweet that captures the essence of pumpkin season — aromatic cinnamon, nutmeg, and cloves balanced perfectly with the natural sweetness of honey. I love the nostalgic feeling they bring; they remind me of crunchy leaves, Halloween costumes, and those crisp autumn evenings. They’re totally kid-friendly, adaptable, and one of those treats that you can tweak to fit your mood or ingredients on hand. Plus, since they don’t require baking, you can whip them up after school or during a lazy Sunday afternoon. That’s what I call family-friendly comfort food with a seasonal flair.
Why you’ll love this recipe?
First off, the flavor — oh my, the flavor! The pumpkin combined with warm spices and a touch of sweetness makes these treats taste like little bites of fall. What I love most about this is that they’re not overly sweet, so you can enjoy just a couple without feeling guilty. They’re also ridiculously simple to make; no baking, no fuss, just mixing and pressing into a pan. This one’s a lifesaver on busy nights when the kids ask for a sweet snack, and I want something quick yet homemade. Budget-wise, the ingredients are pantry staples — oats, honey, pumpkin, spices — which makes this recipe incredibly economical. Plus, they’re super versatile. You can roll them into balls if you prefer, or even press a few mini chocolate chips on top before chilling for an extra treat. I’ve made these countless times, and every single batch turns out soft, chewy, and packed with cozy flavors. Trust me, these are one of those recipes that make you happy every time you make them — and they’re perfect for Halloween because they look adorable and festive, too.
How do you make a Chewy Pumpkin Spice Halloween Treat?
Quick Overview
This recipe is so straightforward — you combine pumpkin, oats, and warm spices, sweeten it with honey or maple syrup, then shape and chill. There’s no baking involved, which means the hardest part is waiting for them to set in the fridge. The mixture comes together quickly, and I love that you can customize the shape or flavor. Once chilled, they’re ready to serve, making it perfect for last-minute Halloween parties or a cozy night in. If you’ve ever made no-bake cookies, this is just as simple but with a lovely seasonal twist. The smell alone while you’re mixing the spices is enough to get everyone excited for fall. Plus, you can batch-make these ahead of time and keep them in the fridge — they actually improve in flavor after a day or two, if they last that long!
Ingredients
For the main mixture:
– 2 cups rolled oats (preferably old-fashioned for texture)
– 1 cup pumpkin puree (canned or fresh, just make sure it’s smooth)
– 1/4 cup honey or maple syrup (trust me, maple syrup adds a lovely depth)
– 1 teaspoon cinnamon
– 1/2 teaspoon nutmeg
– 1/4 teaspoon cloves
– 1/2 teaspoon vanilla extract
– Pinch of salt
For the Optional Coating or Garnish:
– Mini chocolate chips or chopped nuts (for on top or mixed in)
– Extra cinnamon sugar for rolling
Step-by-Step Instructions
Step 1: Preheat & Prep Pan
Since there’s no baking involved, all you need to do is line a baking pan (8×8 or similar) with parchment paper or a silicone mat. Keep everything ready — once the mixture is mixed, you’ll want to press it into the pan fairly quickly. No oven preheating needed, just gather your ingredients!
Step 2: Mix Dry Ingredients
In a large bowl, stir together the oats, cinnamon, nutmeg, cloves, and salt. This ensures your spices are evenly distributed. I always do this first because it makes everything come together more smoothly later.
Step 3: Mix Wet Ingredients
In another bowl, whisk together the pumpkin puree, honey, and vanilla. I tested with maple syrup, and honestly, it made the flavor even lovelier — deeper and richer. Make sure your honey is slightly warmed if it’s too thick, so it mixes smoothly.
Step 4: Combine
Pour the wet mixture into the dry ingredients, stirring until everything’s well coated. The mixture will be slightly sticky but scoopable. If it feels too dry, add a splash more honey or a tiny bit of water — you want it to hold together easily when pressed.
Step 5: Prepare Filling
If you’d like a little extra texture, fold in mini chocolate chips or chopped nuts now. I love sprinkling a few on top before pressing into the pan for a little surprise in each bite.
Step 6: Layer & Swirl
Press the mixture firmly into your prepared pan. Use the back of a spatula or your hands (dampened slightly to prevent sticking). I sometimes sprinkle a light cinnamon sugar on top for a sweet crust — looks adorable and adds flavor!
Step 7: Bake
Actually, no baking is necessary! Just pop the pan into the fridge for about 1-2 hours until firm. If you’re in a rush, the freezer works too — just keep an eye on it so it doesn’t get too hard.
Step 8: Cool & Glaze
See, you don’t even need a glaze, but I love to melt a little white chocolate or drizzle dark chocolate on top once they’re set. It adds a festive touch and makes them look even more Halloween-ready.
Step 9: Slice & Serve
Once chilled and firm, slice into squares or fun shapes with cookie cutters. Serve in little cups or on a spooky platter. Best enjoyed slightly chilled or at room temp. A little extra drizzle of chocolate or a dusting of cinnamon sugar can make them look really polished.
What to Serve It With
Honestly, these treats are so versatile. For a Halloween party, I love serving them alongside caramel apples and mini pumpkin muffins. Because they’re chewy and satisfying, they pair beautifully with a hot apple cider or a warm chai latte — which is just what I crave after a brisk evening of fall trick-or-treating. When I do a family brunch, I’ll sometimes add a few mini marshmallows on top, or I’ll crumble them over vanilla yogurt for a fun twist. They’re perfect as a quick after-school snack, too, especially when the kids come home asking for something sweet. I’ve even made a batch to send in my kids’ lunchboxes — they stay good for a couple of days in an airtight container, but honestly, they rarely last that long around here. The spicy aroma and the cozy pumpkin flavor turn any ordinary day into a mini celebration of fall’s best. Plus, the kids love helping me press the mixture into the pan — it’s easy enough for little hands and makes the whole process more fun.
Top Tips for Perfecting Your Chewy Pumpkin-Spice Halloween Treats
If you want these treats to turn out absolutely perfect every time, here are some tips from my kitchen to yours:
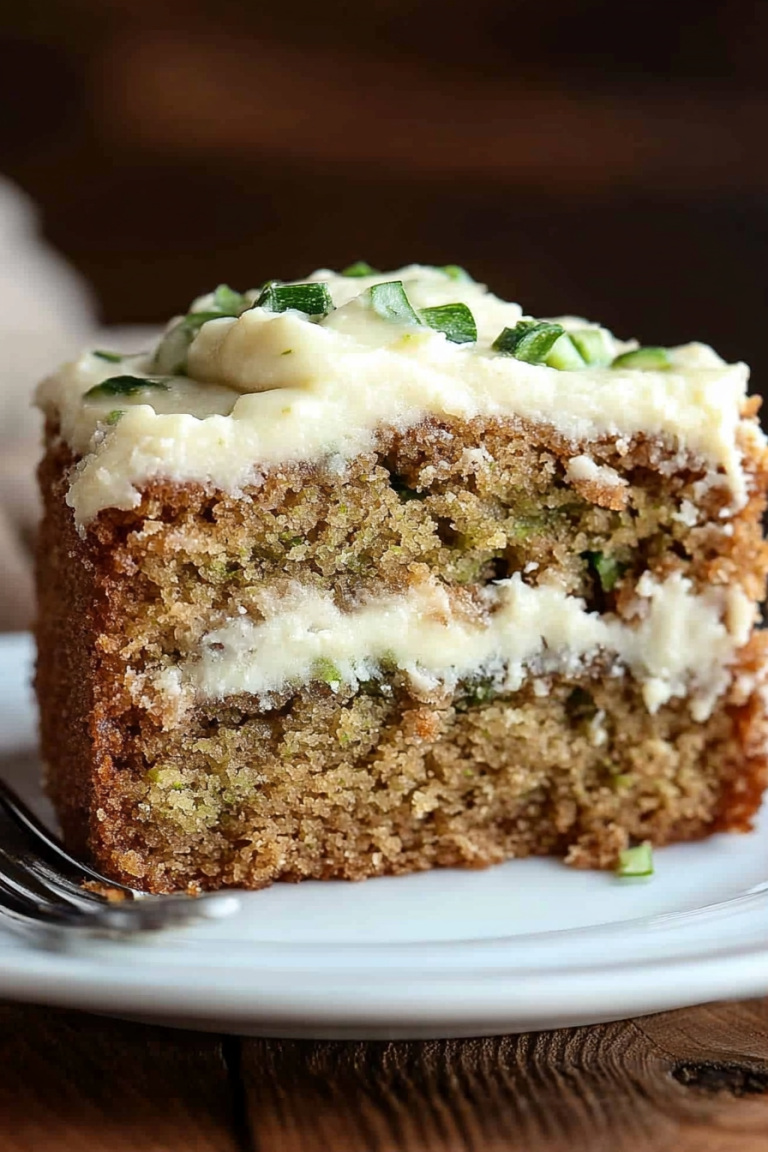
Zucchini Prep: I know I mentioned pumpkin, but if you want to experiment with zucchini, just make sure to squeeze out any excess moisture. Too much water and the treats might be a little too crumbly or sticky — trust me, I learned this the hard way after a few disastrous batches!
Mixing Advice: Avoid overmixing once you add the oats to prevent them from becoming dense. Stir just until combined and sticky, and you’ll get the best chewy texture.
Swirl Customization: For a glossy finish or a more colorful look, try swirling in some natural food coloring or a small dollop of nut butter before pressing into the pan. It’s a fun way to add visual appeal!
Ingredient Swaps: Fancy using maple syrup instead of honey? Go for it! Think about adding a handful of dried cranberries or toasted coconut for added texture. I’ve made each version, and they all turn out pretty great.
Baking Tips: If you prefer a slightly firmer treat, after chilling, you can give them a quick 10-minute bake at 350°F (175°C). Just watch closely to avoid overbaking — they lose their chewiness if they’re too dry.
Glaze Variations: Instead of chocolate, a light dusting of powdered sugar or a little drizzle of caramel can also be charming. Whatever you choose, just keep the texture in mind to avoid making it too sticky or too dry.
From years of experimenting, I’ve learned that the secret to perfect pumpkin treats is balancing the moisture — too dry, and they crumble; too wet, and they won’t set. And honestly, a little patience while chilling makes all the difference. These are forgiving treats—if you want thicker cookies or thinner bites, just adjust how you press them in the pan. The key is to keep practicing, and you’ll get the hang of it in no time.
Storing and Reheating Tips
Once you’ve made these cozy pumpkin treats, you’ll want to store them properly so they stay fresh and chewy. I usually keep them in an airtight container at room temperature for up to 2 days — if they last that long! After that, they’re best kept in the refrigerator for up to a week. Just layer them between parchment paper to prevent sticking. If you’re making a large batch ahead of time, pop the whole dish into the freezer wrapped tightly in plastic wrap, then vacuum-seal if you have it. They thaw quickly — just leave them at room temperature for about 15 minutes or so.
Now, here’s a little tip — if your treats are a bit too firm straight from the fridge, give them a quick 10-second zap in the microwave. You’ll be surprised how nicely they soften up, just like fresh. And if you want to add a drizzle of chocolate or a dusting of cinnamon after reheating, it’s an easy way to keep them looking festive and delicious.
Honestly, I’ve tested these treats in a variety of storage conditions, and I swear they taste just as good, if not better, after a day or two — a real testament to their cozy, chewy charm. Just be sure to keep them covered well so they don’t dry out or absorb any fridge odors. Trust me, once you get the hang of storing them, they’ll become a reliable household favorite.
Frequently Asked Questions
Final Thoughts
There’s something about these chewy pumpkin-spice Halloween treats that just makes fall feel even more special. They’re not just a snack; they’re a little moment of cozy comfort, perfect for sharing with family and friends or even sneaking a few for yourself during those chilly evenings. I love how versatile they are — you can add your own twist with nuts, chocolate, or dried fruit. Plus, they’re so easy to make I bet you’ll have the ingredients on hand right now. Honestly, once I found this recipe, it became a go-to for every Halloween and autumn gathering. My kids ask for seconds, and I don’t mind one bit — they’re just such a warm, friendly treat. So, whether you’re making these for a special party or just a sneaky weekend sweet, give them a try. I can’t wait to hear how yours turn out!

Spooky Halloween Chocolate Cupcakes
Ingredients
Method
- Preheat oven to 350°F. Line a muffin tin with paper liners.
- In a large bowl, whisk together flour, sugar, cocoa powder, baking powder, baking soda, and salt.
- Add vegetable oil, eggs, buttermilk, and vanilla extract to dry ingredients. Mix until smooth.
- Divide batter evenly into the prepared muffin cups, filling each about 2/3 full.
- Bake for 20-25 minutes until a toothpick inserted into the center comes out clean.
- Allow cupcakes to cool completely before decorating with spooky frosting and toppings.