Easy Texas Sheet Cake Recipe
There’s something about a slice of warm, fudgy Texas sheet cake that takes me straight back to my grandmother’s kitchen. I can still smell the rich cocoa, the burst of vanilla, and the sweet, buttery glaze that made every bite melt-in-your-mouth. Honestly, this cake is one of those recipes I keep in my back pocket for everything—from a quick sweet fix on a weeknight to a crowd-pleasing dessert at family gatherings. It’s incredibly simple to throw together, yet it tastes like you’ve spent hours fussing over it. I always do this when I want something satisfying with minimal effort, and I think you’re going to fall in love with it, too. If you’re anything like me, you’ll find yourself making this cake on repeat, and your family will be asking for it every single time. Plus, it’s budget-friendly and perfect when you’re craving that homemade, nostalgic flavor—trust me on this one, you won’t regret it!
What is Texas sheet cake?
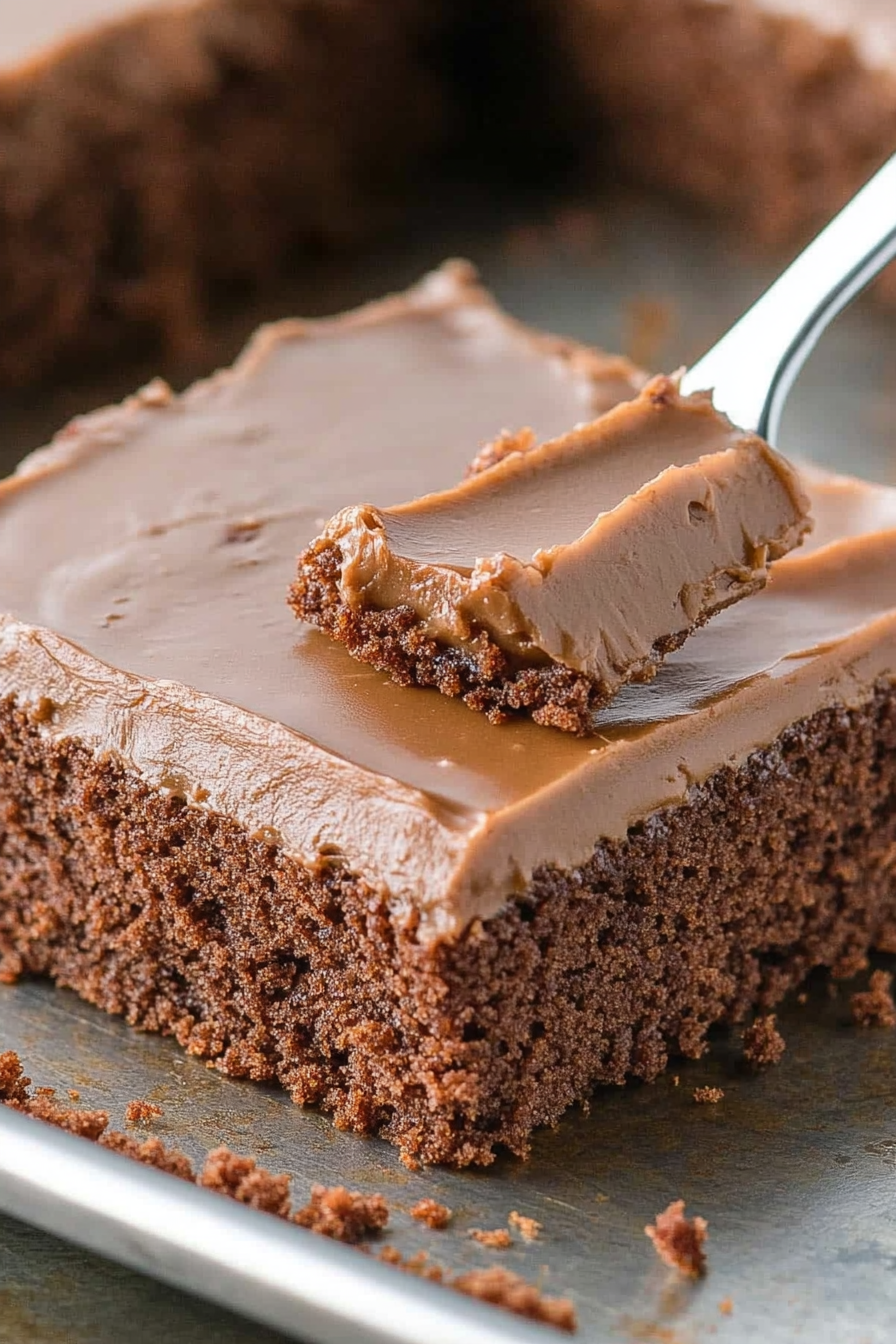
Think of Texas sheet cake as the chocolatey crown jewel of sheet cakes—rich, fudgy, and generously topped with a glossy glaze. It’s named after the vast, open landscapes of Texas, but honestly, you don’t have to be from there to fall for its charm. Essentially, it’s a sheet of tender, chocolate cake baked in a large, shallow pan, making it perfect for slicing into generous pieces to feed a crowd or just your sweet tooth. Its roots trace back to the 1950s, when it became a staple at potlucks and family dinners, thanks to its simplicity and bold flavor. The magic is in how quickly it comes together—no fancy layering or complicated frosting, just a straightforward, homemade cake with a shimmering glaze that’s drizzled on hot. It’s essentially a soft, moist chocolate sponge with a little bit of fudge magic, and that glaze—oh man, it’s like a shiny chocolate blanket that makes every bite utterly irresistible.
Why you’ll love this recipe?
What I love most about this Texas sheet cake is how simple yet utterly satisfying it is. The flavor? Out of this world—deep, intense cocoa, balanced with just enough sweetness to make your taste buds sing. The texture is perfect, too—moist, tender, and almost fudge-like without being dense. I remember the first time I made this, I was surprised how quickly it came together; within about 10 minutes, my batter was ready to go in the oven, and the whole house filled with the comforting aroma of chocolate and vanilla. This one’s a lifesaver on busy nights or when you want to whip up something homemade for friends without breaking a sweat. Plus, it’s budget-friendly—most of the ingredients are pantry staples—and versatile because you can jazz it up with nuts, coffee, or even a swirl of peanut butter in the glaze. It’s a forever favorite in my house and a real crowd-pleaser at potlucks and birthdays. Trust me, once you try it, you’ll keep coming back for more!
How do I make Texas sheet cake?
Quick Overview
This cake is as straightforward as it gets—mix your dry ingredients, whisk together the wet, combine, bake, then top with a glorious glaze. The secret is in how fast you can get it in the oven after mixing; it’s almost foolproof. The batter comes together in just minutes, making it perfect for nights when you’re craving something sweet but don’t want to spend hours baking. I love that it’s baked in a big sheet pan, which means easy slicing and serving. And because the glaze is poured over right out of the oven, it creates this beautiful, shiny top that seals in all that fudgy goodness. Once cooled, it’s slice-and-enjoy—no complicated decorating needed. Whether you’re an experienced baker or a total beginner, I promise this will become your go-to chocolate fix.
Ingredients
For the Main Batter:
– 2 cups all-purpose flour (I always use unbleached—makes for a richer flavor)
– 2 cups granulated sugar (sweet but not overly sweet, perfect balance)
– 1/2 teaspoon salt (a little pinch keeps everything tasting just right)
– 1 teaspoon baking soda (helps the cake rise beautifully)
– 1/2 cup unsweetened cocoa powder (the star of the show, I prefer Dutch-processed for a smoother taste)
– 3/4 cup vegetable oil (or melted butter, but I stick with oil for moisture)
– 1 cup boiling water (this is what makes the batter so silky and helps intensify the cocoa flavor)
– 1 teaspoon vanilla extract (because vanilla makes everything better)
For the Filling:
– The cake itself is simple, but if you want to add nuts, chopped walnuts or pecans are a lovely addition,
or a handful of mini chocolate chips stirred in for extra richness.
For the Glaze:
– 1/2 cup unsalted butter
– 2/3 cup unsweetened cocoa powder
– 3 cups powdered sugar
– 1/3 cup milk (or adjust with heavy cream for extra richness)
– 1 teaspoon vanilla extract
– Pinch of salt (if you like a little contrast)
Step-by-Step Instructions
Step 1: Preheat & Prep Pan
Preheat your oven to 350°F (175°C). Grease a large jelly roll pan or rimmed baking sheet generously with butter or non-stick spray. I also like lining mine with parchment paper for super-easy release—trust me, it’s worth the extra step. Having a hot oven ready means you can get this deliciousness baking without delay.
Step 2: Mix Dry Ingredients
In a large mixing bowl, whisk together the flour, sugar, salt, baking soda, and cocoa powder. Make sure everything is evenly combined so that the cake rises uniformly and the cocoa gets evenly distributed. This is the base of your batter, so it’s worth taking a moment to do it right.
Step 3: Mix Wet Ingredients
In another bowl, combine the oil, vanilla, and the boiling water. The hot water helps bloom the cocoa, giving the cake that rich, intensely chocolatey flavor. Pour this mixture into the dry ingredients and stir gently until just combined. It’s okay if the batter is thin—this is exactly how it should be. Overmixing can make the cake dense, so I always go easy here.
Step 4: Combine
Pour the batter into your prepared pan, smoothing out the top with a spatula. The batter will be runny, but don’t worry—that’s what keeps it moist and fudgy. Give the pan a gentle tap on the counter to settle the batter evenly.
Step 5: Prepare Filling (Optional)
If you’re adding nuts or chips, sprinkle them evenly over the batter before baking. It’s delightful either way—simple and straightforward, or a little more indulgent.
Step 6: Layer & Swirl
Not necessary for this cake, but if you want to create a marbled effect with a peanut butter or cream cheese swirl, gently spoon dollops onto the batter and swirl with a knife before baking. It’s a fun tweak that makes it look pretty and tastes divine.
Step 7: Bake
Bake for about 25-30 minutes, or until a toothpick inserted in the center comes out with moist crumbs. The top will look set but still soft—don’t overbake or it loses that fudgy quality. Let it sit for 10 minutes before transferring to a wire rack for cooling—this helps it set and makes slicing easier.
Step 8: Cool & Glaze
While the cake cools slightly, heat the butter and cocoa in a small saucepan until melted and combined. Remove from heat, stir in the powdered sugar, milk, vanilla, and a pinch of salt until smooth. Pour the glaze over the warm cake—it’ll spread out evenly and create that shiny, irresistible finish. Wait until it’s mostly cooled to slice, or the glaze might slide off!
Step 9: Slice & Serve
Cut into squares with a sharp serrated knife. I love serving mine with a scoop of vanilla ice cream or a dollop of whipped cream—doesn’t that just double the indulgence? This cake tastes fantastic slightly warm or at room temperature. Either way, it disappears fast in my house!
What to Serve It With
This Texas sheet cake is a total showstopper on its own, but I like to serve it in different ways depending on the occasion. For a quick breakfast, a slice with a strong cup of coffee or a glass of cold milk is divine—even better if you add a sprinkle of crushed nuts or a little dusting of powdered sugar. At brunch, I’ll sometimes elevate it with fresh berries or a swipe of whipped cream for a more fancy feel. As a dessert, it’s perfect with vanilla ice cream or a drizzle of caramel sauce—trust me, the combination of hot and cold is pure heaven. And on casual days, I love just grabbing a piece with my afternoon tea or coffee, enjoying that fudgy, cocoa explosion. It’s one of those cakes everyone loves, no matter the occasion.
Top Tips for Perfecting Your Texas sheet cake
Over the years, I’ve picked up a few tricks that guarantee a perfect cake every time. First, don’t overmix your batter once you add the wet ingredients; just stir until combined, so it stays light and tender. When adding the glaze, pour it over the cake while it’s still warm—that way, it absorbs beautifully and creates that glossy finish. If you want an even fudgier texture, replace part of the milk in the glaze with heavy cream; it makes everything extra rich. I’ve tried adding a teaspoon of espresso powder to the cocoa, and wow—it deepened the chocolate flavor significantly! If you’re looking for a dairy-free version, I tested this with coconut milk and coconut oil, and it still turned out moist and flavorful. Just keep an eye on your oven—every oven bakes a little differently, so start checking around 25 minutes. The toothpick test is your friend here. Lastly, don’t forget to sprinkle some chopped nuts or mini chips on top of the glaze for texture—it’s those little extras that make a big difference. My biggest lesson? Always let the cake cool fully before slicing, or you’ll end up with a crumbly mess. Patience pays off!
Storing and Reheating Tips
This cake keeps beautifully, whether you want to enjoy it fresh or save leftovers for later. For room temperature storage, cover it tightly with plastic wrap or foil and keep for up to 2 days. I’ve found that the glaze helps keep it moist longer. If you want to keep it for more than a day, I recommend refrigerating it in an airtight container for up to 5 days—just let it come to room temp before slicing for that perfect fudgy bite. To freeze, wrap the cooled cake tightly in plastic wrap, then foil, and slide it into a freezer bag. It’s good for up to 3 months! When ready to eat, let it thaw overnight in the fridge or at room temperature for about an hour. If you want to reheat a slice, pop it in the microwave for about 15-20 seconds—it’s like it’s freshly baked all over again. If the glaze has hardened too much, a quick zap of heat softens it right up. Just remember, the flavor is best when enjoyed within a few days of baking, but it sure ages like a fine wine—more flavorful as it sits!
Frequently Asked Questions
Final Thoughts
There’s just something so comforting about a big sheet of chocolaty goodness that’s easy to share and even easier to love. This Texas sheet cake has become my go-to dessert for almost any occasion; it’s simple enough for weeknights but impressive enough for a crowd. Whenever I bake it, I’m reminded of how a few humble ingredients—cocoa, sugar, flour—can come together to create something truly memorable. The best part? It’s flexible and forgiving. You can adapt it with nuts, different flavorings, or even make it gluten-free. Most importantly, it’s a recipe that’s been passed down, tweaked, and loved in my family for generations. I hope you give it a try and discover that the magic of this cake lies not just in its taste, but in the joy of sharing a dessert that’s made with love. Happy baking! And don’t forget to let me know how yours turns out—I’d love to hear your tips or a story about your first time making this!
Chocolate Fudge Brownies
Ingredients
Method
- Preheat your oven to 350°F. Grease a 9x13 inch baking dish and set aside.
- In a microwave-safe bowl, melt the butter and cocoa powder together until smooth. Let it cool slightly.
- In a large mixing bowl, combine granulated sugar, eggs, vanilla extract, and the melted cocoa mixture. Whisk until smooth.
- Add the flour and salt gradually, mixing just until combined. Fold in chocolate chips.
- Pour the batter into the prepared baking dish and bake for 25 minutes, or until a toothpick inserted into the center comes out with moist crumbs.
- Allow the brownies to cool in the pan before slicing and serving.