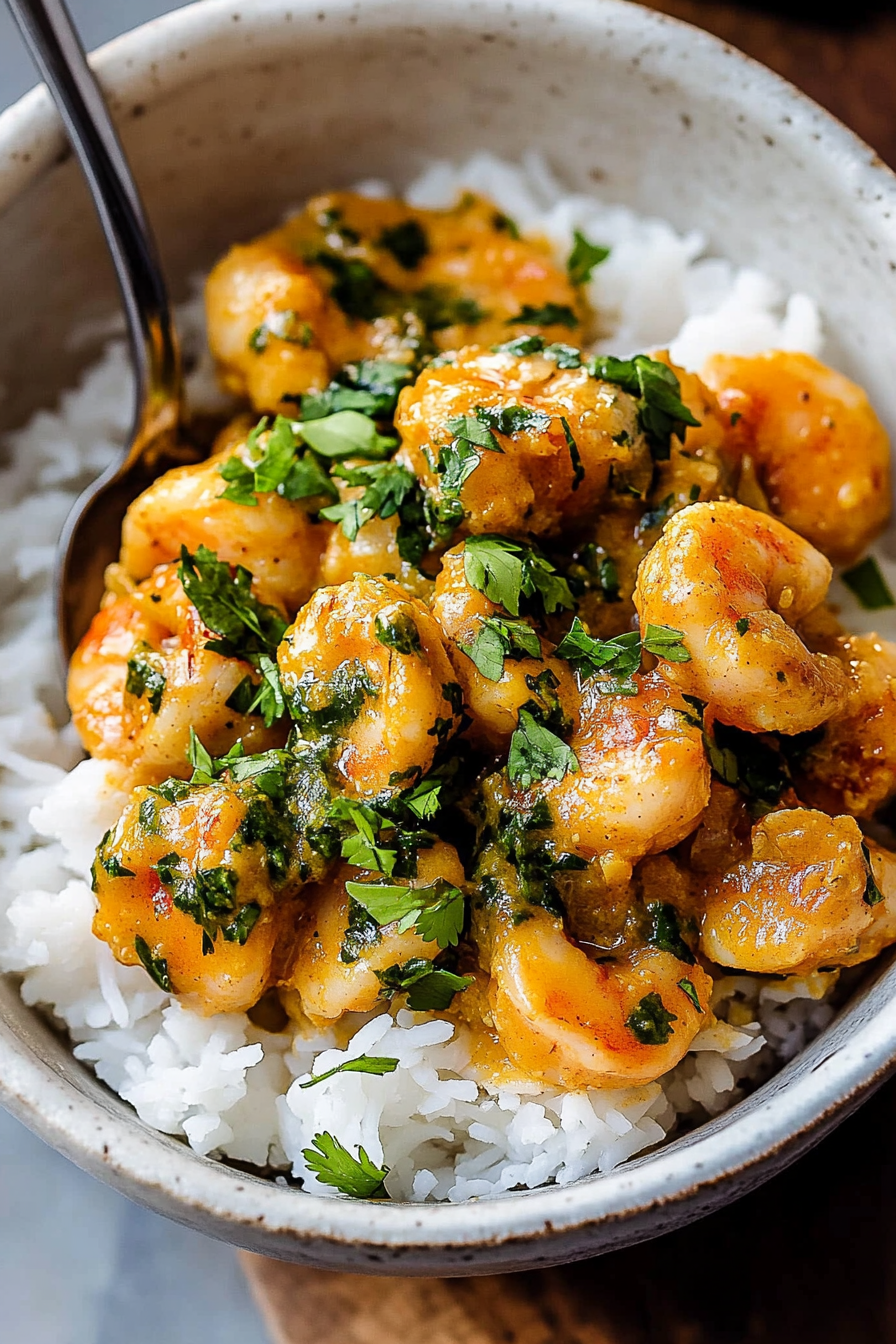
Easy Coconut Shrimp Curry Recipe
There’s nothing quite like the aroma of a fragrant coconut curry simmering softly on the stovetop. I remember the first time I tried making this myself—my kitchen was filled with the warm scent of spices, coconut milk, and a hint of citrus, instantly transporting me to a tropical island. To say it’s comfort food would be an understatement; it’s more like a cozy hug in a bowl. And the best part? It’s ridiculously easy to throw together on a busy weeknight. Honestly, I’ve made this so many times that I can whip it up with my eyes closed—well, almost. My kids ask for this all the time, and I always do a little happy dance when I see their plates licked clean. Whether you’re a seasoned cook or just starting out, this coconut curry is a total lifesaver—versatile, budget-friendly, and insanely flavorful. Trust me, once you get the hang of it, it’ll become one of your go-to recipes too.
What is coconut curry?
Think of coconut curry as a warm, velvety stew infused with the sweet richness of coconut milk and a bold kick of spices. It’s essentially a harmonious blend of fragrant turmeric, spicy cumin, and fiery chili that melds beautifully with the creamy coconut base. The name might suggest it’s solely about coconut, but it’s really about balancing sweetness and spice—like a cozy conversation between tropical flavors and fiery heat. It’s a dish that originates from many regions—Thailand, India, the Caribbean—and each has its signature twist. But for us home cooks, it’s more about the idea of comfort food with a little exotic flair. My favorite part? It’s adaptable with whatever veggies or proteins I have on hand, making it perfect for a quick weeknight dinner or even a lazy weekend feast. Think of it as a Caribbean-scented hug for your taste buds.
Why you’ll love this recipe?
What I love most about this coconut curry is how approachable it is—no fancy ingredients or hours of prep needed. The flavor profile is out of this world, though; here’s the thing—rich, creamy, and just a little spicy with a hint of sweetness from the coconut that totally balances everything out. The smell alone brings everyone into the kitchen—my kids always ask, “Can we have that again tonight?” It’s also super flexible. You can toss in chicken, shrimp, tofu, or keep it totally veggie if you’re feeling vegetarian. Plus, it’s budget-friendly—those pantry staples like coconut milk, spices, and rice make this a great way to enjoy a restaurant-quality meal at home without breaking the bank. And if you’re like me, you love how quick it is to prepare. From start to finish, you can have a hearty, flavorful dish on the table in under 30 minutes. It’s a lifesaver on busy nights, and honestly, I find myself craving it when I need something warm, cozy, and satisfying.
How do I make coconut curry?
Quick Overview
This coconut curry is as simple as sautéing some aromatics, adding your choice of main protein, pouring in flavorful coconut milk, and simmering everything together until it thickens just right. I love how the spices deepen as it cooks, turning what begins as a simple sauce into something complex and layered. The secret is to layer the flavors—starting with garlic and ginger, then adding spices—but don’t worry, I’ve broken it down step-by-step so you’ll be a pro in no time. The best part? You can customize it all the way—throw in your favorite vegetables, add a splash of lime, or sprinkle some fresh herbs on top. It’s quick, forgiving, and guaranteed to impress everyone at your table.
Ingredients
For the Main Base:
– 1 tablespoon coconut oil or vegetable oil
– 1 medium onion, diced
– 3 cloves garlic, minced
– 1-inch piece fresh ginger, grated
– 1-2 tablespoons curry powder (adjust to taste)
– 1 teaspoon turmeric
– 1 teaspoon cumin
– 1/2 teaspoon chili flakes (more if you like it spicy)
– 1 can (13.5 oz) full-fat coconut milk (trust me on this, it makes it sooo creamy!)
– 1 cup vegetable broth or water
– Salt and pepper to taste
For Protein & Vegetables:
– 1 pound chicken breast or thighs, cut into bite-sized pieces (or shrimp, tofu)
– 1 bell pepper, sliced
– 1 cup snap peas or green beans
– 1 carrot, sliced
– Optional: baby spinach or kale for greens
For Garnish & Serve:
– Fresh cilantro, chopped
– Juice of half a lime
– Cooked jasmine or basmati rice
– Sliced chili peppers or extra lime wedges (for serving)
Step-by-Step Instructions
Step 1: Preheat & Prep Pan
Warm a large skillet or wide-bottomed pot over medium heat. Add the coconut oil—trust me, it adds a subtle sweetness—and let it melt. While that’s warming up, dice your onion, mince the garlic, and grate the ginger. Prep all your veggies and protein so everything’s ready. This dish cooks quickly, so it’s good to be organized!
Step 2: Sauté Aromatics
Throw in the onions and sauté for about 3-4 minutes until they turn translucent and fragrant. Then add garlic and ginger—your kitchen should smell amazing at this point. Stir constantly to avoid burning, and cook until everything is soft and just starting to brown a little at the edges.
Step 3: Toast Spices
Add curry powder, turmeric, cumin, and chili flakes. Stir everything together and cook for another minute or two. This step really awakens the spices, releasing their essential oils and making the flavor pop. Be careful not to burn the spices—constant stirring helps!
Step 4: Pour in Coconut Milk & Broth
Carefully pour in the coconut milk and broth, stirring to combine. This is where your sauce begins to thicken and mellow out. Bring it to a gentle simmer—it should bubble lightly but not vigorously. Taste and season with salt and pepper now, since this is your flavor base.
Step 5: Cook Protein & Veggies
Add your chicken (or shrimp, tofu) into the simmering sauce. Let it cook for about 7-10 minutes until tender and cooked through. Toss in the veggies—carrots, bell peppers, snap peas. Allow everything to simmer so the flavors meld together. If using leafy greens, add those in at the end just until wilted.
Step 6: Finish & Garnish
Once the protein is cooked and the sauce has thickened to your liking, stir in a squeeze of lime juice. This brightens up the dish and balances out the richness. Sprinkle with chopped cilantro for freshness. Serve hot over a bed of fluffy rice and maybe an extra lime wedge or chili slices on the side.
Step 7: Serve & Enjoy
This dish is best enjoyed right away, but leftovers reheat well on the stove or in the microwave. Just give it a quick stir and a splash of water or broth if it thickens too much. Trust me—once you’ve made this a few times, you’ll find yourself craving that creamy, spicy aroma at least once a week.
Pro Tips:
- Use full-fat coconut milk for the richest, creamiest sauce—light coconut milk just doesn’t cut it here.
- If you want to make it milder, skip the chili flakes or use a sweetener like honey or maple syrup to add a subtle sweetness.
- For added depth, toss in a teaspoon of fish sauce or soy sauce—simple umami boosters.
- Always taste your sauce before finishing—sometimes a pinch more salt or lime is all it needs to shine.
What to Serve It With
This coconut curry pairs beautifully with fluffy jasmine or basmati rice—my personal favorite. I always do this when I want something comforting and filling, especially on chilly evenings. Sometimes I serve it with crusty naan or steamed baguette slices for dipping; nothing beats ripping into that warm bread to scoop up every last drop of sauce. If I’m feeling fancy, I toss in a handful of chopped cilantro and a squeeze of lime at the end, turning it into a brightly flavored, colorful plate.
For breakfast or brunch, I’ve even spooned leftovers over crispy fried eggs or served it as a spicy topping for scrambled eggs. It’s surprisingly versatile—perfect for a quick weeknight dinner or a weekend gathering. I love offering it to friends because it’s both exotic and familiar, and everyone always asks for the recipe.
Top Tips for Perfecting Your Coconut Curry
The secret to that wonderfully silky sauce lies in the slow layering of flavors. When I first started making this, I used low-quality spices and wondered why it wasn’t as flavorful as I wanted. Trust me on this: toast your spices briefly at the beginning—all it takes is a minute or two. It really unlocks their aroma and deepens the flavor. Also, I tested this with different proteins and found that shrimp cooks faster than chicken—so keep an eye on your seafood, and don’t overcook! A little overcooking makes the meat tough and unappetizing.
When it comes to veggies, I prefer adding snap peas or green beans towards the end. Otherwise, they turn overly mushy. For a creamier sauce, I’ve tested swapping some of the coconut milk with natural almond or cashew cream—I swear, it made it even richer. Also, don’t skimp on garnishes! A squeeze of lime just before serving cuts through the richness and makes the flavors pop. And if you want to spice it up, a few chopped chili peppers on top really do the trick.
One little trick I learned after making this countless times: if your sauce gets too thick, just stir in a bit more broth or water. It loosens it right back up without sacrificing flavor. Plus, I’ve found that storing leftovers in an airtight container in the fridge for up to three days keeps the flavor fresh, though I do recommend reheating gently to keep the sauce silky and smooth.
Storing and Reheating Tips
This coconut curry keeps surprisingly well. Store leftovers in an airtight container in the fridge for up to three days—just give it a quick stir and maybe a splash of water or broth before reheating. I like reheating it in a skillet over low-medium heat on the stove because it heats evenly and helps maintain that creamy texture. If you’re in a hurry, the microwave works fine—just make sure to stir halfway through and heat in short bursts so it doesn’t explode or burn. If you want to freeze leftovers, place it in a tightly sealed container, and it’ll stay good for up to a month. Just defrost in the fridge overnight, then gently rewarm on the stove. Be cautious about adding fresh lime or cilantro after reheating; those are best added fresh and right before serving to preserve their vibrant flavors.
Frequently Asked Questions
Final Thoughts
This creamy coconut curry truly embodies everything I love about home-cooked comfort food—simple, warm, and bursting with flavor. Whether you’re cooking it for family, friends, or just yourself after a long day, it never fails to bring smiles around the table. I think what makes it so special is how forgiving it is; play with ingredients, adjust heat levels, or add your favorite veggies. Every time I make it, I feel a little more connected to those vibrant, bustling kitchens from travels abroad—without ever leaving my own. If you try it, I’d love to hear how yours turns out or any fun twists you come up with. Happy baking, cooking, and savoring every spoonful!
Thai Coconut Curry
Ingredients
Method
- Heat oil in a large skillet over medium-high heat.
- Add scallion whites and red curry paste, sauté for 1 minute until fragrant.
- Add shrimp and garlic, season with salt, and cook for 2 minutes until shrimp begin to brown.
- Pour in coconut milk and fish sauce, stir well to combine.
- Reduce heat and simmer for 12-15 minutes until shrimp are cooked through and sauce slightly thickens.
- Remove from heat, stir in scallion greens and chopped cilantro.
- Serve hot over steamed rice with lime wedges on the side.