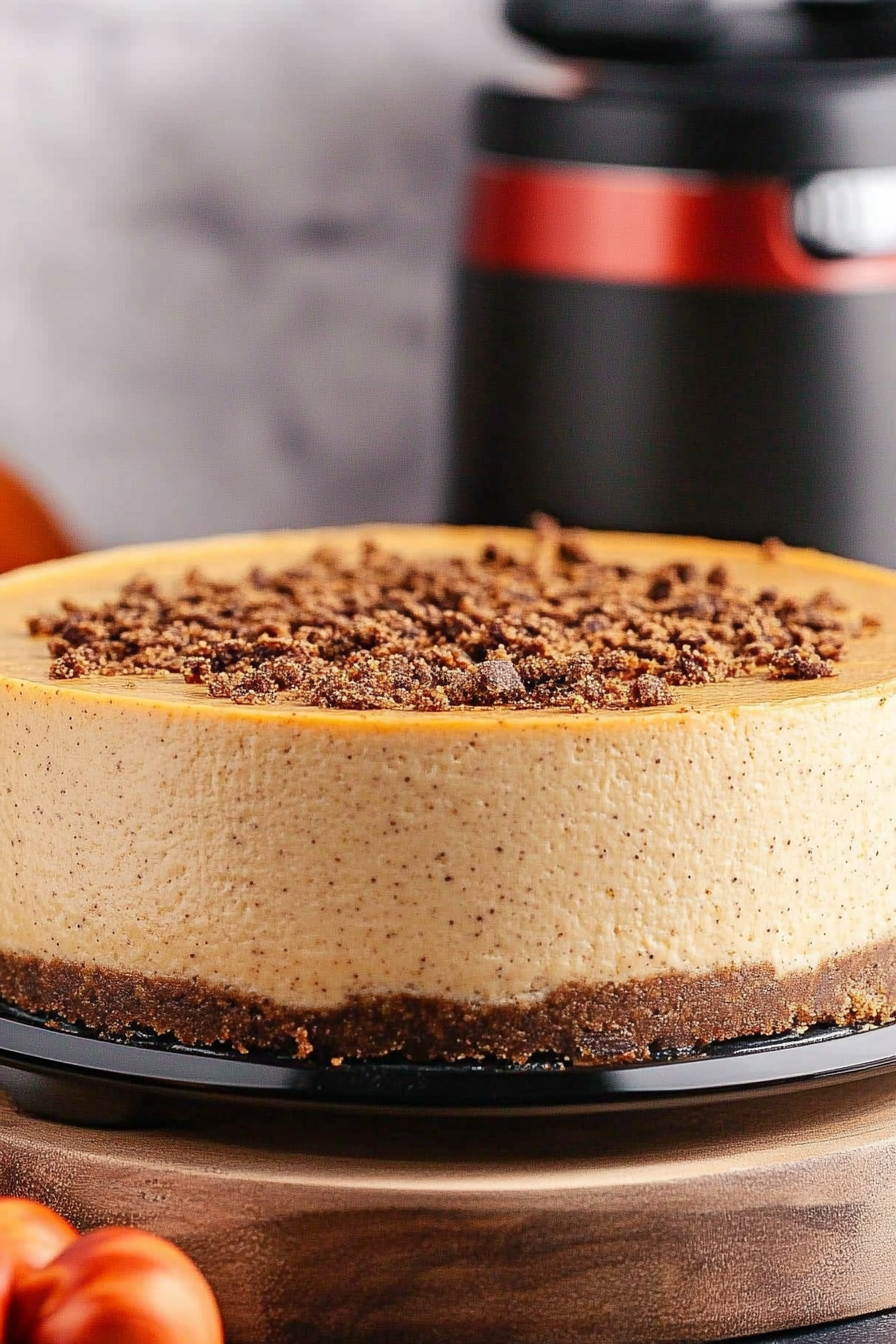
Effortless Pumpkin Cheesecake in Your Instant Pot
There’s nothing quite like the smell of pumpkin wafting through the house in the fall. It instantly makes everything feel warm, nostalgic, and just a little bit magical. I remember my grandma’s kitchen when she’d pull out her big mixing bowls, the oven warming up, and the first slice of pumpkin cheesecake making its way to the table. That creamy, spiced goodness always disappears faster than I can blink. Honestly, this pumpkin cheesecake has become a bit of a family tradition — a dish I always do this when I want to impress friends or just treat myself on a chilly weekend. And the best part? It’s surprisingly simple to make, even if you’re not a seasoned baker. Trust me, once you try this, it’ll be your go-to comfort dessert — cozy, luscious, and perfect for sharing (or keeping all to yourself!). It’s kind of like pumpkin pie’s richer, more decadent cousin, and honestly, I think my kids ask for this all the time now. Your kitchen is about to smell like fall heaven! Now, grab your apron — let’s make some pumpkin cheesecake magic.
What is pumpkin cheesecake?
Think of pumpkin cheesecake as the marriage of two beloved desserts—rich, velvety cheesecake and warmly spiced pumpkin pie. It’s essentially a velvety cheesecake base infused with pumpkin puree, cinnamon, nutmeg, and a hint of ginger — all baked in a buttery graham cracker crust. The name is pretty straightforward: it combines the creamy, dense texture of cheesecake with the sweet, spiced flavor of pumpkin, making it the perfect dessert for autumn gatherings or those cozy nights when you crave something sweet but want a little comfort. The story goes that pumpkin, with its natural sweetness and earthy tones, pairs beautifully with the tang of cream cheese, creating a balance that’s utterly addictive. It’s like wrapping a pumpkin patch in a blanket of cream cheese richness. Honestly, once I discovered pumpkin cheesecake, it became my annual fall must-make. Whether served plain or topped with whipped cream and a sprinkle of cinnamon, it’s sure to win hearts—no fancy skills required.
Why you’ll love this recipe?
What I love most about this pumpkin cheesecake is how it hits all those cozy fall notes while being surprisingly easy to whip up. First, the flavor—think creamy, slightly sweet, with just the right amount of spice. It’s like a warm hug in dessert form! The pumpkin puree gives it that festive touch, but the tang of cream cheese keeps it light enough (well, as light as cheesecake can be). Plus, this recipe doesn’t require complicated techniques—if you can mix, pour, and bake, you’re all set. I’ve made this countless times, and I’ve learned to love how forgiving it is; even if it cracks a little (which totally happens), a dollop of whipped cream can hide all sins. Budget-wise, it’s pretty friendly—simple pantry ingredients come together into something extraordinary. And, oh, the versatility! Serve it plain for a rustic vibe, or add whipped cream, caramel drizzle, or even a pecan topping for extra flair. Trust me on this one: this pumpkin cheesecake will become your seasonal go-to, whether it’s for your family or a holiday potluck. It’s so rich and satisfying, and I promise — you’ll find yourself sneaking a second slice (or third!) before you know it.
How do you make a pumpkin cheesecake?
Quick Overview
This pumpkin cheesecake is as simple as mixing a few ingredients, pouring them into a prepared crust, and baking until just set. The secret to its creamy texture is gently mixing the batter without overdoing it, then baking it in a water bath for even, crack-free results. Once out of the oven, a cool down period and a little patience will reward you with a silken, flavorful dessert. And if you’re short on time, you can even make it ahead — it’s one of those recipes that actually gets better after resting for a few hours or overnight. The result is a luscious, spiced pumpkin custard nestled on a buttery crust, ready to impress anyone who takes a bite. It’s honestly foolproof, and once you master the basics, you can customize and perfect it every time!
Ingredients
For the Main Batter:
– 24 oz (680g) cream cheese, softened — the star of the show, so don’t rush this step. I always leave it out at room temp for about an hour to get it silky smooth.
– 1 cup granulated sugar — sweet but not overpowering, it balances the spices perfectly.
– 1 cup canned pumpkin pureé — make sure it’s pure pumpkin, not pie filling.
– 3 large eggs — to give that luscious custard texture.
– 1 teaspoon vanilla extract — because vanilla makes everything better.
– 1 teaspoon ground cinnamon — for that warm, cozy aroma.
– ½ teaspoon ground nutmeg — a little spicy kick.
– ¼ teaspoon ground ginger — just enough to add depth.
– Pinch of salt — to enhance all those flavors.
For the Crust:
– 1 ½ cups graham cracker crumbs — I like using digestive biscuits if I want a richer taste.
– ¼ cup granulated sugar
– ½ cup unsalted butter, melted — the glue that holds everything together.
For the Topping:
– Whipped cream, cinnamon, and maybe a sprinkle of crushed graham crackers or pecans, depending on how fancy you want to get.
Step-by-Step Instructions
Step 1: Preheat & Prep Pan
Set your oven to 325°F (160°C). Lightly butter or spray a 9-inch springform pan and line the bottom with parchment paper if you like for easy removal. Wrap the outside of the pan with foil—this helps keep water out if you’re baking in a water bath, which I highly recommend for that flawless, crack-free finish.
Step 2: Mix Dry Ingredients
In a small bowl, combine the graham cracker crumbs, sugar, and a pinch of salt. Mix until evenly distributed, then stir in the melted butter until it resembles wet sand. Press this mixture firmly into the bottom of your prepared pan. Use the bottom of a glass or measuring cup to press it down evenly. Bake for about 10 minutes — this sets the crust and makes it golden and fragrant. Let it cool while you make the filling.
Step 3: Mix Wet Ingredients
In a large mixing bowl, beat the softened cream cheese until smooth and creamy. This is super important—if you don’t give it enough time, the filling can be lumpy. Next, add sugar and vanilla, mixing well. Then, blend in the pumpkin pureé and spices. I always do this in two additions to keep things smooth. Minimize air bubbles by mixing at a low speed and scraping down the sides of the bowl as needed.
Step 4: Combine
Crack in the eggs one at a time, mixing just until combined after each addition. Overmixing here can lead to cracks, so keep it gentle. Once everything’s combined, pour the batter over the cooled crust. Smooth the top with a spatula so it bakes evenly.
Step 5: Prepare Filling
If you want to add a little swirl—maybe some caramel or extra pumpkin puree—you can gently dollop and swirl it into the batter now. Use a toothpick or skewer to create beautiful marbled patterns, which look pretty when sliced.
Step 6: Layer & Swirl
Pour half the batter, add your swirl, then cover with the rest. Don’t overmix—just enough to see the swirl effect. Trust me, it makes your cheesecake look like a pro!
Step 7: Bake
Place the springform pan in a larger roasting pan, then pour hot water into the outer pan until it reaches halfway up the sides — this creates a water bath that gently and evenly bakes your cheesecake. Bake for about 55-65 minutes, until the edges are set but the center still jiggles slightly. That’s perfect! To check doneness, gently shake the pan; it should look mostly firm with a slight wobble in the middle.
Step 8: Cool & Glaze
Let the cheesecake cool in the pan for at least an hour at room temperature, then refrigerate for at least 4 hours (or overnight). This is when all those flavors meld into perfection. If you want to add a glaze or whipped topping, do it once fully chilled. I love a dollop of whipped cream topped with a sprinkle of cinnamon—it’s adorable and adds that finishing touch.
Step 9: Slice & Serve
Use a sharp knife dipped in hot water to cut smooth slices — this prevents sticking and gives clean edges. Serve chilled with your favorite coffee or a chamomile tea. Honestly, I think a dusting of cocoa powder or extra cinnamon on top looks fancy but is totally optional. This cheesecake is a showstopper either way!
What to Serve It With
This pumpkin cheesecake is delicious on its own, but I love pairing it with some cozy sides. For breakfast, a cup of spiced chai or a warm latte makes it feel like an indulgent morning treat. During brunch, serve it with a drizzle of salted caramel or a handful of toasted pecans for crunch. As dessert, it pairs beautifully with a scoop of vanilla ice cream or a caramel sauce. My family can’t get enough of it after dinner, especially when topped with freshly whipped cream and a dash of cinnamon. And on lazy weekends, I sneak a slice with a cup of coffee — it’s honestly my favorite little self-care ritual. One thing I’ve learned? This cheesecake holds up well for a couple of days as long as it’s covered tightly in the fridge. It’s even better on the second day when all those warm spices have had time to deepen. When entertaining, I suggest making it ahead—your guests will swoon over how luscious and flavorful it is, all thanks to a little planning and patience.
Top Tips for Perfecting Your Pumpkin Cheesecake
Having made this more times than I can count, I want to share some insider tips:
- Zucchini Prep: If you want to switch things up with zucchini (I’ve tested it for a low-carb version), peel and grate, then squeeze out moisture with a clean towel. It’s a great way to add extra veggies and keep things moist.
- Mixing Advice: Always beat the cream cheese until smooth—lumps are the enemy! When adding eggs, do so one at a time and mix gently. Overmixing is the surest way to crack that beautiful top.
- Swirl Customization: Use a toothpick or skewer to create elegant swirl patterns. For more dramatic designs, add contrasting batters like caramel or chocolate and swirl in zigzags or circles.
- Ingredient Swaps: Want a dairy-free version? Swap cream cheese for coconut cream cheese and use coconut sugar. It’s not quite the same, but it’s close enough to enjoy!
- Baking Tips: Place your cake in the middle rack and use a water bath—trust me, those cracks will disappear, and you’ll get that luxurious Miami-beach vibe.
- Glaze Variations: Swap whipped cream for caramel, drizzle melted chocolate, or sprinkle toasted coconut or pecans on top for a different flair. Just ensure the glaze/glaze toppings are added after chilling to keep everything neat and picture-perfect.
After countless trials, I’ve learned that patience and gentle handling are key. Be slow to open the oven door, and don’t be alarmed if it cracks slightly — a little whipped cream or fruit can cover a multitude of sins, and no one will notice.
Storing and Reheating Tips
This pumpkin cheesecake keeps beautifully in the fridge, tightly covered, for up to five days. I recommend slicing only what you plan to serve each day, so it doesn’t get dry. If you want to make it ahead, wrap the whole thing in plastic wrap and foil before refrigerating or freezing. It freezes well for up to three months; just defrost in the fridge overnight. When ready to serve, add a fresh dollop of whipped cream or a drizzle of caramel sauce for that just-baked look. To reheat, some like their slices cold and creamy, but if you prefer slightly warmer, pop it in the microwave for about 15 seconds—just enough to bring out those spiced aromas again. Keep in mind, the fresher it is, the more vibrant the flavors and texture. Don’t forget, if you add any fresh toppings like fruit or whipped cream, do so just before serving for the best appearance and freshness.
Frequently Asked Questions
Final Thoughts
If you’ve made it this far, I hope you’re inspired to try this pumpkin cheesecake — it’s honestly one of those recipes that feel like a warm hug, no matter the occasion. Sometimes, I make it just for myself, burn a candle, put on some jazz, and savor every bite. The richness of the cream cheese, combined with that delightful pumpkin spice aroma, is just too good to resist. Plus, it’s a stunner on any dessert table — all creamy, spicy, and beautiful to look at. If you try it out, I’d love to hear how yours turns out! Do a little twist or add your favorite toppings — that’s the fun part. Enjoy every mouthful, and don’t forget to share this recipe with your friends—they’ll thank you! Happy baking!
Pumpkin Cheesecake in the Instant Pot
Ingredients
Method
- Spray a 7x3 inch springform pan with non-stick spray.
- Pulse pecans in a food processor until finely ground, then transfer to a small bowl.
- Mix graham cracker crumbs, melted butter, brown sugar, and cinnamon until coated and damp.
- Press the crust mixture evenly into the bottom of the springform pan. Freeze for 25 minutes.
- Meanwhile, beat softened cream cheese and sugars in a medium bowl on medium speed until smooth.
- Add remaining ingredients and beat until well combined, scraping sides as needed.
- Remove crust from freezer, fit a loose lid with aluminum foil on top, and set aside.
- Pour batter into prepared crust, leaving about 1/4 inch at the top. Cover with foil.
- Add 1.5 cups of water to the Instant Pot, place the trivet, and set the springform pan on top. Secure the lid.
- Cook on high pressure for 40 minutes, then natural release for 25 minutes.
- Remove the cheesecake and cool on a rack. Refrigerate for at least 6 hours or overnight.
- Serve plain or topped with whipped cream, caramel, or chocolate drizzle as desired.