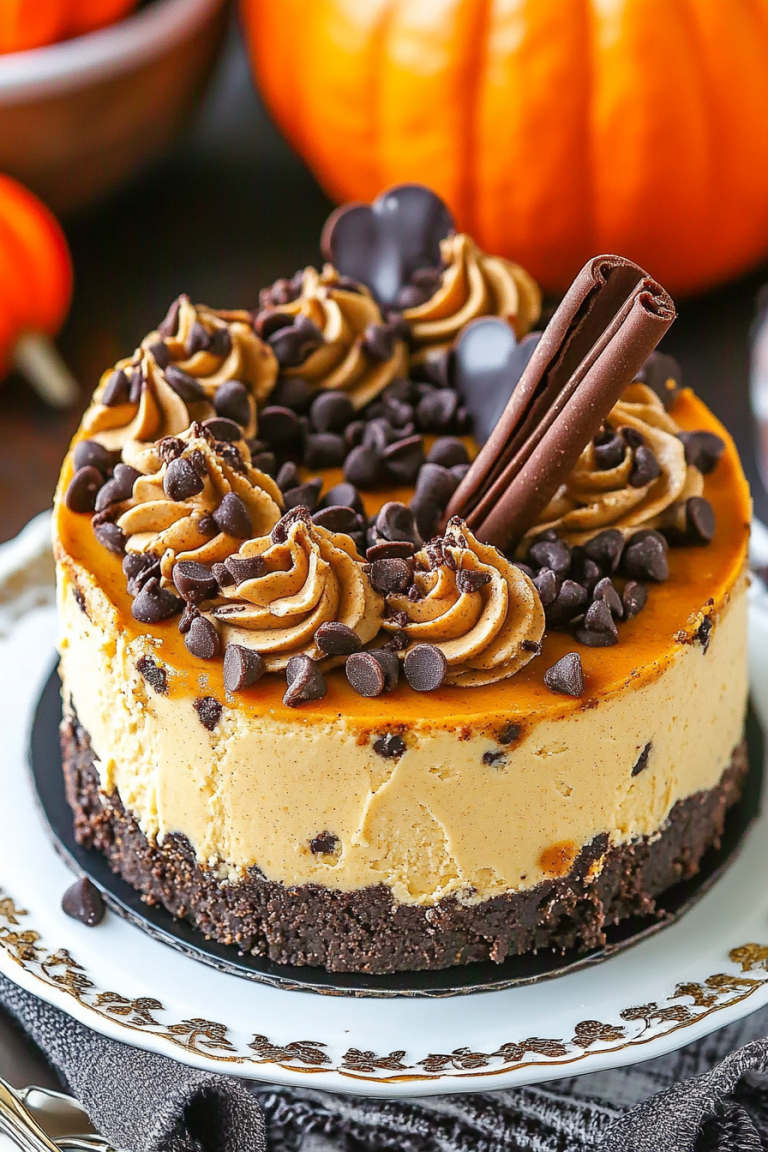
Autumn Spice Brownies How to Bake Bliss
If you’re anything like me, autumn is the season of cozy afternoons, filling the house with the smell of cinnamon, and sneaking bites of something sweet after dinner. Today, I want to share with you my go-to fall treat—pumpkin brownies. These aren’t just your average chocolatey squares; they’re infused with pumpkin puree that adds a rich, tender crumb and a subtle, cozy spice. Honestly, I make these year-round because they’re so easy, so flavorful, and my kids ask for them all the time. Plus, the smell alone—ginger, cinnamon, and pumpkin melting together—brings everyone rushing to the kitchen like a magnet. Trust me, once you try these, they’ll become a staple in your house too. They’re perfect when you’re craving something sweet but want to keep it a little healthier and definitely more interesting than plain brownies. And believe me, they disappear in minutes at my house—my secret is to hide a couple for later because they’re way too good to share all at once!
What is a pumpkin brownie?
Think of pumpkin brownies as a delicious twist on the classic chocolate brownie. It’s essentially the same idea—a dense, fudgy treat that’s rich on the inside with a slightly crispy top. But here’s the magic: instead of just plain cocoa and butter, pumpkin puree gets folded into the batter. That’s what gives these brownies their irresistibly moist texture and an extra layer of flavor—think caramelized pumpkin, warm spices, and even a hint of sweetness that’s perfectly balanced. The name is pretty straightforward—“pumpkin brownies” — because it’s all about adding that silky, sweet pumpkin to the mix. It’s kind of like the love child of pumpkin bread and gooey brownies, with a dash of autumn nostalgia. They’re quick to whip up, don’t require any fancy ingredients, and you’ll love how versatile they are—perfect for a quick snack, a family dessert, or even a weekend harvest treat. It’s basically fall in bite-sized form, and I promise, once you try it, there’s no going back!
Why you’ll love this recipe?
What I love most about these pumpkin brownies is how they combine familiar comfort with a little seasonal twist. The flavor? Pure cozy—think warm pumpkin spice with a chocolate boost. The smell alone when they’re baking is enough to make your heart happy and your kitchen smell like a bakery. Best of all, they’re incredibly simple to make; you don’t need to fuss with complicated steps or fancy ingredients. Just toss everything into one bowl, and you’re basically done. And let’s talk about budget-friendly—most of the ingredients are pantry staples I always have on hand, which makes these a lifesaver on busy nights or last-minute sweet cravings. Plus, they’re versatile—my kids love cutting them into squares, but I’ve also made mini muffins from this batter when I want a smaller, portable treat. What really sets these apart from regular brownies is the moistness and the way the pumpkin adds natural sweetness without needing tons of extra sugar. Honestly, what I love most is how it feels like a little hug in every bite—warm, comforting, and just a bit fancy enough to impress friends at gatherings. And honestly, once you start making these, you’ll see—they’re the kind of treat that becomes a seasonal tradition fast.
How do I make pumpkin brownies?
Quick Overview
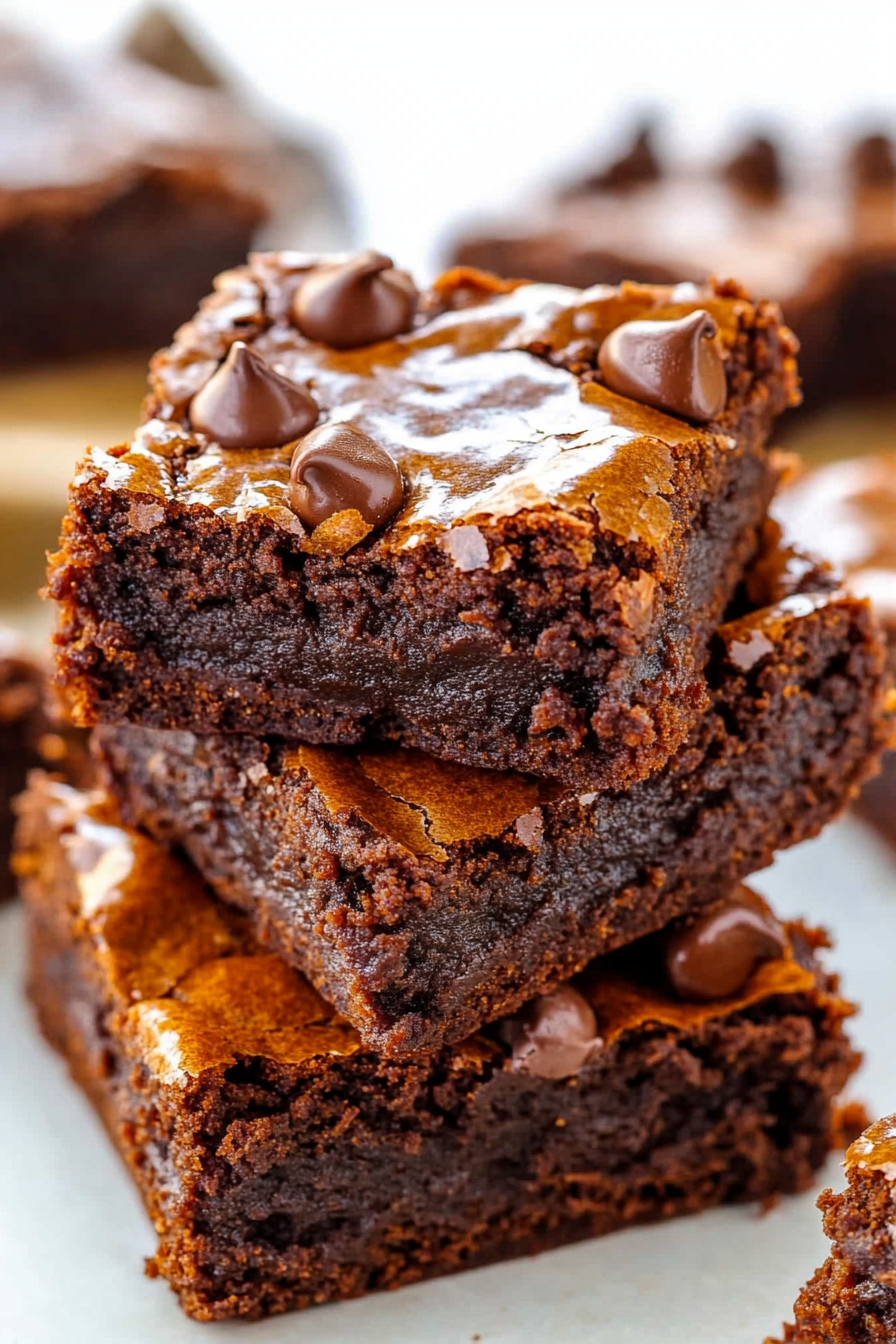
This recipe is all about keeping things straightforward and fuss-free. You start by preheating your oven and lining a baking pan with parchment paper—no need to grease much because the batter is naturally moist. Then, you’ll whisk together your dry ingredients—flour, cocoa, spices—while melting some butter or coconut oil. In a separate bowl, you’ll mix your wet ingredients—pumpkin puree, eggs, vanilla, and sweetener. Combine everything gently, being careful not to overmix, as that keeps the brownies tender. Pour half of the batter into your pan, spread some prepared filling—think cream cheese or nut butter for an extra treat—swirl it around, then top with the rest of the batter. Bake until just set and the smell makes your kitchen irresistible. Once cooled, a simple glaze or dusting of powdered sugar makes these look as good as they taste. Super easy, incredibly delicious, and perfect for any fall day or cozy night in.
Ingredients
For the Main Batter:
- 1 cup all-purpose flour (or gluten-free blend)
- ½ cup unsweetened cocoa powder
- ½ teaspoon baking powder
- ¼ teaspoon salt
- 1 teaspoon pumpkin pie spice (or cinnamon, ginger, nutmeg)
- ½ cup granulated sugar (or coconut sugar)
- ⅓ cup light brown sugar
- ½ cup melted butter or coconut oil
- ¾ cup pumpkin puree (canned or fresh)
- 2 large eggs
- 1 teaspoon vanilla extract
For the Filling:
- ¼ cup cream cheese, softened (or nut butter for allergy-friendly version)
- 2 tablespoons honey or maple syrup
- A pinch of cinnamon (optional)
For the Glaze:
- ½ cup powdered sugar
- 1-2 teaspoons milk (almond, cow’s, or oat milk)
- Dash of vanilla (optional)
Step-by-Step Instructions
Step 1: Preheat & Prep Pan
First, set your oven to 350°F (175°C). Line an 8×8-inch baking pan with parchment paper—trust me, this makes removal a breeze. If you don’t have parchment, a quick spray of non-stick spray works too, but parchment is my favorite because it keeps things tidy. While preheating, gather all your ingredients; I like to measure everything out in advance—makes baking way smoother.
Step 2: Mix Dry Ingredients
In a medium bowl, whisk together the flour, cocoa powder, baking powder, salt, and spices. This step ensures everything’s evenly distributed, so you get a nice, uniform crumb. It also helps prevent lumps and clumps, especially with cocoa powder. I always do this first—it’s like laying a foundation for good brownies.
Step 3: Mix Wet Ingredients
In a large bowl, combine the pumpkin, eggs, vanilla, and sugars. Whisk until smooth—you want everything well incorporated, but you’re not aiming for perfection here. The pumpkin is naturally moist, so don’t worry if your batter looks a tad thick—that’s normal. Melted butter or coconut oil gets stirred in last, giving the batter a glossy sheen.
Step 4: Combine
Pour the dry ingredients into the wet and gently fold everything together. Be careful not to overmix—just stir until it’s combined. Overmixing can make the brownies denser, and nobody wants that. When your batter is just mixed, it should be thick but pourable, with a beautiful chocolatey hue.
Step 5: Prepare Filling
While your batter sits for a moment, mix your cream cheese (or nut butter) with honey and a dash of cinnamon if you like. This filling adds a velvety richness and a sweet tang that balances the earthy pumpkin. I like to scoop it into a piping bag or a plastic bag with the tip cut off—it makes swirling it into the batter much easier.
Step 6: Layer & Swirl
Pour half the brownie batter into your pan and spread evenly. Dot spoonfuls of your filling over the surface, then use a toothpick or skewer to swirl it gently through the batter. Add the remaining batter on top and repeat the swirling. The goal is a pretty marbled effect—like a sunset in your oven. Don’t overdo it—just a few gentle swirls do the trick.
Step 7: Bake
Pop it into the oven and bake for about 25-30 minutes. Check for doneness by inserting a toothpick in the center—if it comes out with moist crumbs, you’re good. The edges should be set, and the smell will smell like fall magic. Ovens can vary, so start checking around 25 minutes, especially if your oven runs hot.
Step 8: Cool & Glaze
Let your brownies cool in the pan for at least 15 minutes—they firm up as they cool. Once cooled, whisk together your glaze ingredients and drizzle over the top. If it’s too thick, add a little more milk; if it’s too runny, add more powdered sugar. The glaze adds a lovely sweetness and a shiny finish that makes these look restaurant-perfect.
Step 9: Slice & Serve
Use a sharp serrated knife to cut into squares. For clean cuts, wipe your knife between slices. These are best enjoyed at room temperature or slightly warmed—my kids love microwaving leftovers for 10 seconds until they’re gooey. Serve on a plate with a cup of coffee or a glass of milk, and watch everyone get excited over your baking prowess.
What to Serve It With
Honestly, these pumpkin brownies are so versatile, I love serving them in different ways depending on the occasion. For a cozy breakfast, pair them with a hot mug of coffee or spiced chai—there’s something so comforting about starting the day with a little pumpkin spice. If I’m hosting brunch, I like to layer these squares on a platter with some whipped cream and a dusting of cinnamon; they look fancy but are super easy. As a dessert, I serve them slightly warm with a scoop of vanilla ice cream or a dollop of whipped cream—who can resist that gooey contrast? And for a quick snack, I just cut smaller pieces and stash a few in the fridge for when those sweet cravings hit late at night. My family’s tradition is to enjoy these around Halloween or during all of November—because honestly, why limit pumpkin to just pie? These brownies, with their rich, chocolatey goodness and hint of spice, always make our house feel extra warm and festive.
Top Tips for Perfecting Your Pumpkin Brownies
Here are some little secrets I’ve learned along the way to make these brownies unbeatable:
- Zucchini Prep: If you want to stretch your pumpkin a bit further or add extra moisture, grated zucchini works well. Just make sure to squeeze out excess moisture with a clean towel so your batter isn’t too watery.
- Mixing Advice: Overmixing can make the brownies dense and tough. Mix until just combined, and you’ll get the best tender crumb. I also switch to a spatula near the end to gently fold in ingredients.
- Swirl Customization: Using different fillings, like peanut butter or caramel, can change the flavor profile entirely. Before swirling, make sure your fillings are soft enough to spread easily—cold cream cheese can be microwaved for 10 seconds to loosen it up.
- Ingredient Swaps: Want vegan brownies? Swap eggs for flaxseed or applesauce, and use dairy-free butter or coconut oil. It’s a little different in texture, but still delicious.
- Baking Tips: Every oven is different, so start checking your brownies around the 25-minute mark. The edges should feel firm, and the center slightly gooey—don’t overbake or they’ll dry out.
- Glaze Variations: Instead of powdered sugar, you could do a caramel drizzle, chocolate ganache, or even a dusting of cinnamon sugar for a different flair. I tested different flavors, and trust me, a little sprinkle of flaky sea salt on top of the glaze is divine.
Over the years, I’ve adjusted how much pumpkin to use—I find ¾ cup strikes the perfect balance, keeping the brownies moist but not overly dense. Also, using a good quality cocoa makes a big difference. And don’t rush cooling—patience means your brownies cut clean and look gorgeous every time. Trust me, a little trial and error pays off, and the love you put into it shows. These brownies are forgiving and adaptable—I’ve even added chopped nuts or chocolate chips, and they turn out delicious each time. The key is not to rush, be gentle with your folding, and let the oven do its magic. And sure, the first batch might have a little room for improvement, but hey—that’s part of the fun. Each time I bake these, I find new ways to tweak and perfect them. It’s become my weekly baking therapy, and I know you’ll love experimenting too.
Storing and Reheating Tips
Once your pumpkin brownies are cooled and glazed, bites of them will keep beautifully for a few days. Store leftovers in an airtight container at room temperature—just make sure they’re covered well, or the top might get a little dry. If you want to keep them longer, pop them in the fridge—wrap tightly in plastic wrap or store in a resealable bag, and they’ll stay fresh for about a week. For even longer storage, freezing works great: just cut into slices, wrap each piece tightly in plastic wrap, then store in a freezer-safe container for up to 3 months. When you’re ready to enjoy, thaw at room temperature for about 30 minutes or warm them gently in the microwave for a few seconds. The flavor and fudginess come back beautifully, especially if you add a tiny splash of milk to the glaze for a fresh shine. My biggest tip: serve them warm or at least slightly room temp—they’re at their best when they’re soft and gooey, with the glaze or dusting of powdered sugar melting just enough with the warmth. Trust me, I’ve tested all the ways, and these brownies are always a hit no matter how you store or reheat them.
Frequently Asked Questions
Final Thoughts
This pumpkin brownie recipe is truly one of those comforting, foolproof treats that feels like a warm hug from the inside out. The pumpkin’s gentle sweetness and spice blend perfectly with fudgy chocolate, creating a balanced, luscious dessert that’s better than anything you’d find in a bakery. What I love most is how customizable it is—sometimes I add a handful of chocolate chips, other times a sprinkle of chopped nuts or a swirl of peanut butter. It’s a recipe that invites you to play and make it your own. Plus, it’s perfect for that moment when you want to indulge but still feel good—you’re getting a dose of pumpkin, after all! I promise, once you bake these once, they’ll become a regular in your fall repertoire—and maybe even all year round. So gather your ingredients, turn on the oven, and enjoy the delicious process of creating a treat that’s warm, homey, and downright addictive. I can’t wait to hear how yours turns out—don’t forget to share your variations and stories in the comments!
Pumpkin Chocolate Chip Brownies
Ingredients
Method
- Preheat oven to 350°F. Line an 8-inch square pan with aluminum foil leaving overhang and spray with cooking spray, or grease and flour the pan; set aside.
- In a microwave-safe bowl, melt butter and chocolate together in 2 minutes, stirring halfway through. Let cool slightly.
- Add eggs, sugar, vanilla, and egg yolk to the chocolate mixture; whisk vigorously until well combined.
- Stir in pumpkin puree and mix until smooth.
- Add flour and salt, stirring until just combined without overmixing.
- Pour batter into prepared pan and spread evenly.
- Sprinkle chocolate chips evenly on top. Bake for 35 to 40 minutes until set.
- Allow brownies to cool on a wire rack for 2 hours before slicing. Store airtight at room temperature for up to 1 week.