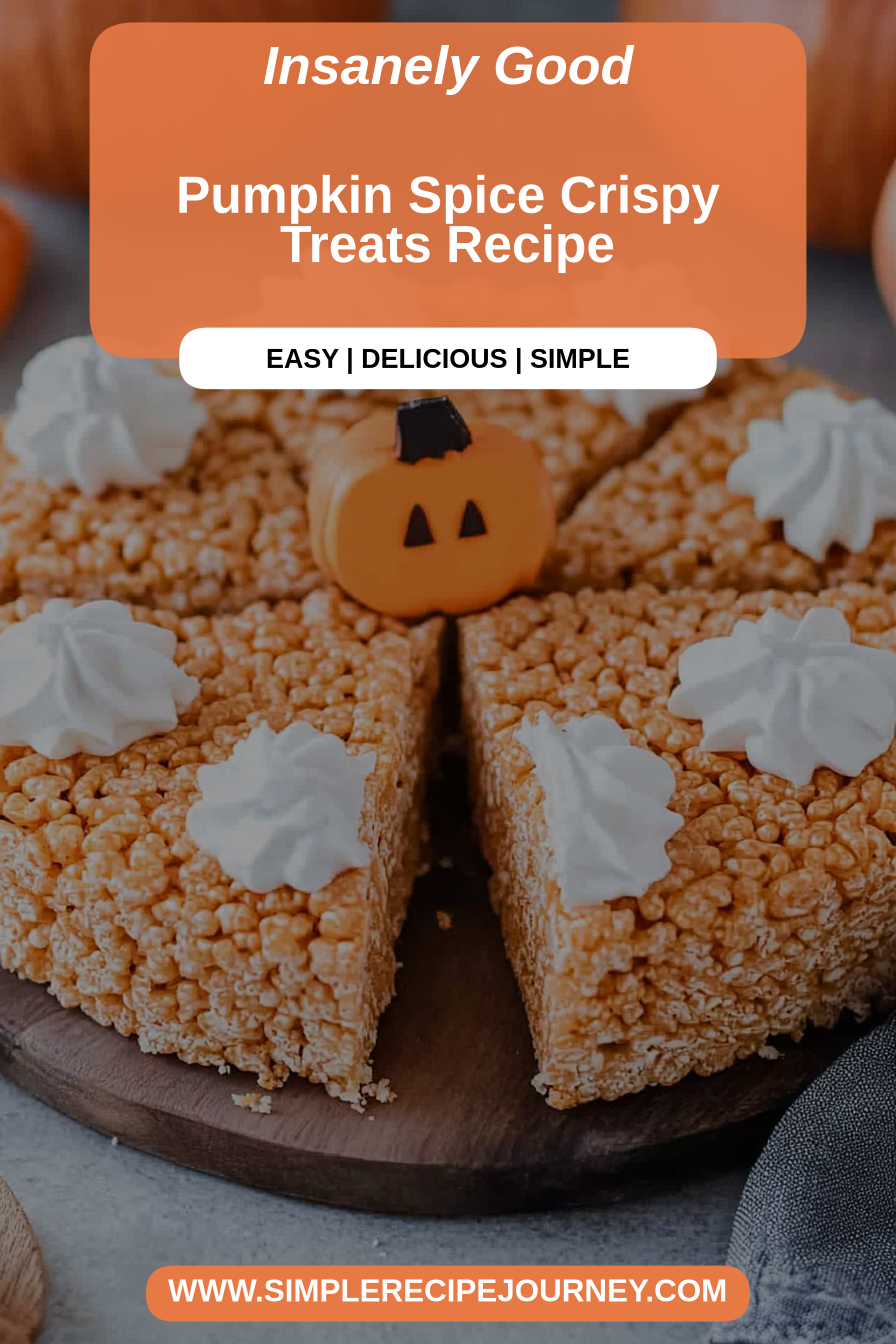
Pumpkin Spice Crispy Treats Recipe
You know those days? The ones where the air gets that crisp, autumnal chill, and all you want is something cozy, sweet, and ridiculously easy? That’s precisely when my mind drifts to these pumpkin spice Rice Krispie treats. They’re not just a dessert; they’re a warm hug in a square, a little taste of fall that instantly makes everything feel right. They’re like the grown-up, sophisticated cousin to the classic marshmallow squares we all grew up with, but honestly, they’re just as simple and twice as fun. The aroma that fills the kitchen while these are setting up? Pure magic. It’s that nostalgic scent of melted marshmallows mixed with the comforting spice of pumpkin and cinnamon that just screams autumn. I remember the first time I made these for a neighborhood potluck, and people were raving about them. One bite, and they’d get this surprised look, like, “Wait, these are *Rice Krispie treats*?” Yes, they are, and they’re absolutely delightful. If you love the idea of a no-bake fall treat that’s a million miles away from boring, you’re going to adore this pumpkin Rice Krispie treats recipe.
What are some Pumpkin Spice Rice Krispie Treats?
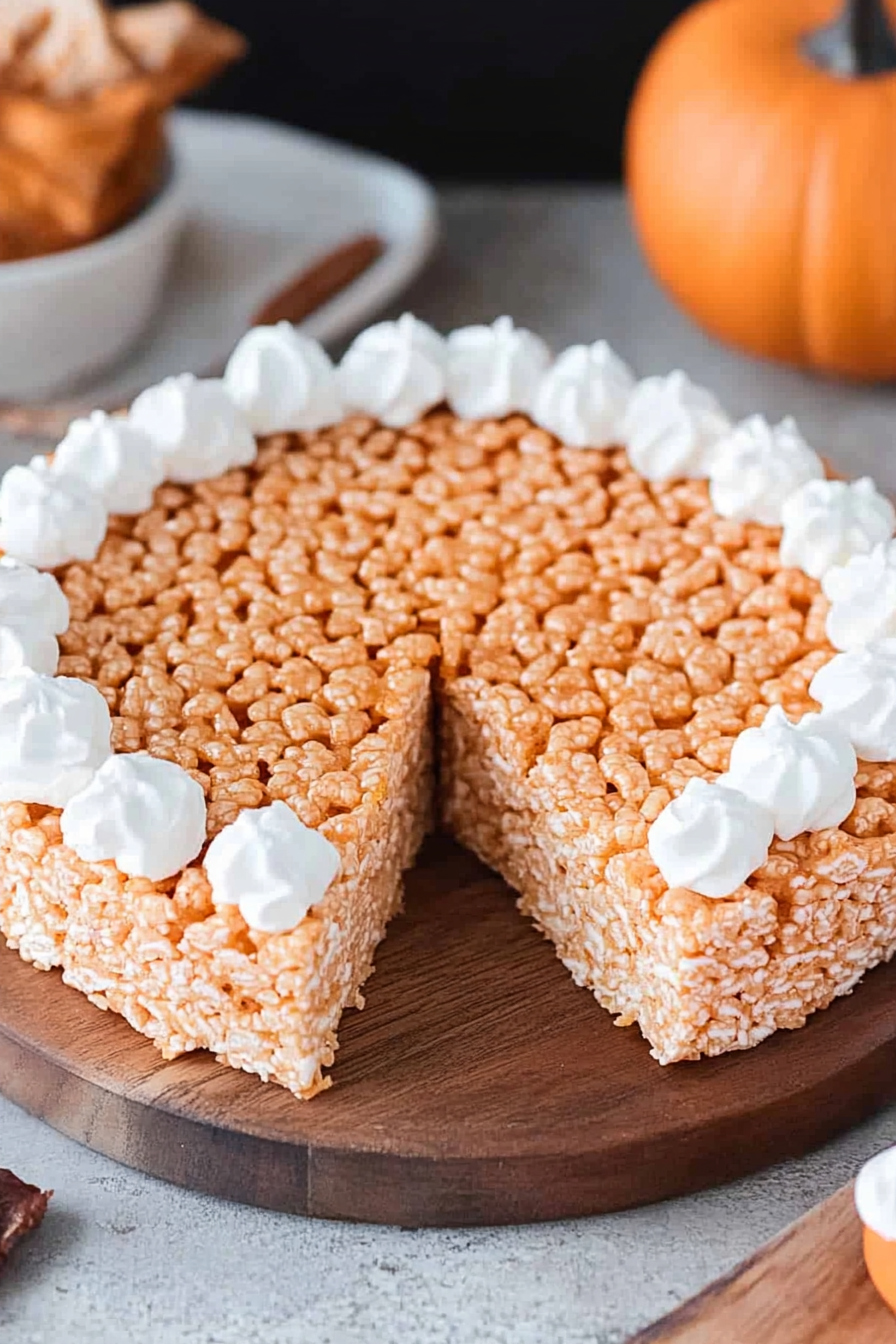
So, what exactly *are* pumpkin spice Rice Krispie treats? Think of them as your beloved, classic Rice Krispie squares, but with a glorious fall makeover. It’s essentially the same gooey, chewy, marshmallow-bound crispy cereal base, but we’re infusing it with the quintessential flavors of autumn. That means a generous swirl of pumpkin puree and a warm blend of pumpkin pie spices—cinnamon, nutmeg, ginger, and cloves. It’s not a complicated transformation; it’s more of an enhancement. The pumpkin adds a subtle richness and a beautiful, earthy hue, while the spices bring that comforting warmth we all crave when the leaves start to turn. It’s still the same easy, no-bake magic you know and love, but with a festive, seasonal twist that makes them perfect for Halloween parties, Thanksgiving dessert tables, or just a special weeknight treat. They’re basically fall in a pan, and who can resist that?
Why you’ll love this recipe?
Honestly, there are so many reasons why this pumpkin Rice Krispie treats recipe has become a staple in my kitchen, and I have a feeling it’ll do the same for you. First off, let’s talk about the flavor. It’s that perfect balance of sweet, gooey marshmallow and the warm, comforting spices of pumpkin pie. The pumpkin puree doesn’t overpower it; it just adds a lovely depth and a subtle, earthy sweetness that complements the marshmallows beautifully. It’s like a little bit of cozy comfort in every bite. And the texture? Oh, the texture! You get that signature chewiness from the perfectly melted marshmallows, that satisfying crunch from the Rice Krispies, and then there’s a delightful, soft richness from the pumpkin. It’s a textural dream!
Then there’s the sheer simplicity of it all. If you can melt butter and marshmallows, you can make these. There’s no baking required, no complicated steps, and you can whip them up in about 15 minutes, plus chilling time. This is a lifesaver on busy weeknights when the sweet craving hits hard, or when you need a last-minute treat for a school bake sale or a playdate. It’s incredibly budget-friendly too. The ingredients are pantry staples for most people, especially during the fall season, and you don’t need anything fancy or expensive to make these shine.
What I love most, though, is their versatility. They’re fantastic on their own, of course. But you can easily jazz them up with a drizzle of chocolate, some chopped pecans, or even a sprinkle of extra cinnamon sugar on top. They’re perfect for gifting, a fun addition to a Halloween candy spread, or just a way to brighten up a regular Tuesday. Compared to baking a pie or a cake, these are a no-brainer. They offer all the fall flavor with none of the fuss. My kids ask for these all the time, and honestly, so do I. They’re just so darn happy and satisfying!
How do I make Pumpkin Spice Rice Krispie Treats?
Quick Overview
Making these pumpkin spice Rice Krispie treats is as straightforward as it gets. You’ll melt butter and marshmallows together until smooth and gooey, then stir in pumpkin puree and a generous amount of pumpkin pie spice. Once that’s combined, you’ll fold in the crispy rice cereal until everything is beautifully coated. Press the mixture into a prepared pan, let it set up, and that’s pretty much it! It’s a no-bake wonder that delivers maximum flavor with minimal effort. This method ensures a perfectly chewy texture with no burning or overcooking, and the spices are evenly distributed for a consistent taste in every single bite. Trust me, even if you’re a beginner in the kitchen, you’ll nail these.
Ingredients
For the Main Treat Base:
6 tablespoons unsalted butter: This is the foundation of that gooey goodness. Make sure it’s real butter; it really does make a difference in flavor and texture. I’ve tried margarine, and it just doesn’t have the same richness.
1 (10-ounce) bag mini marshmallows: Mini marshmallows melt faster and more evenly than large ones. You can use large ones, but just know they’ll take a bit longer to melt. I always grab a couple of bags just in case, because you never know!
1/2 cup pumpkin puree (not pumpkin pie filling): This is key for that authentic pumpkin flavor and color. Make sure it’s pure pumpkin puree from a can, unsweetened. The pie filling has added sugar and spices that will mess with your flavor balance. I usually buy a can or two in the fall and freeze the rest in portions for recipes like this.
For the Flavor Boost:
2 teaspoons pumpkin pie spice: This is where all that cozy fall magic comes from! You can buy a pre-mixed blend, or easily make your own by combining cinnamon, ginger, nutmeg, and cloves. I usually have a jar of homemade blend ready to go.
For the Cereal:
6 cups crispy rice cereal: The star of the show! Use your favorite brand. Make sure it’s fresh and not stale, or your treats won’t have that signature crunch. I’ve found that Kellogg’s is the classic choice, but others work well too.
Step-by-Step Instructions
Step 1: Preheat & Prep Pan
First things first, grab a 9×13 inch baking pan. The best way to prep this so nothing sticks is to either grease it really well with butter or cooking spray, or line it with parchment paper, leaving some overhang on the sides. This overhang is a lifesaver for lifting the treats out later. I always opt for parchment paper because it makes cleanup a breeze. You don’t need to preheat your oven for this recipe, which is another reason why it’s so great!
Step 2: Mix Dry Ingredients
In a large bowl, measure out your 6 cups of crispy rice cereal. Set it aside. This is where all the magic happens with the wet ingredients, so having your cereal ready to go ensures you can mix everything quickly before it starts to set.
Step 3: Mix Wet Ingredients
In a large saucepan over medium-low heat, melt the 6 tablespoons of unsalted butter. Once the butter is completely melted, add the entire bag of mini marshmallows. Stir constantly, making sure the marshmallows don’t scorch. Keep stirring until the marshmallows are fully melted and the mixture is smooth and creamy. This usually takes about 5-7 minutes. Don’t rush this step; a gentle melt is key for perfect texture.
Step 4: Combine Pumpkin and Spice
Once the marshmallows are melted, remove the saucepan from the heat. Immediately stir in the 1/2 cup of pumpkin puree and the 2 teaspoons of pumpkin pie spice. Stir vigorously until everything is well combined and you have a beautiful, uniformly colored mixture. It should smell absolutely amazing at this point!
Step 5: Combine Cereal with Wet Mixture
Now, pour the marshmallow-pumpkin mixture over the crispy rice cereal in your large bowl. Using a spatula or a large spoon, gently fold the cereal into the wet ingredients until every piece of cereal is coated. Work quickly but don’t overmix, as this can make the treats tough. You just want to ensure everything is evenly distributed.
Step 6: Press into Pan
Transfer the mixture to your prepared 9×13 inch baking pan. Using a lightly greased spatula, your hands (lightly greased is best so they don’t stick!), or a piece of wax paper, gently press the mixture evenly into the pan. Don’t press too hard, or your treats will be dense and hard. A gentle, even press is all you need to shape them.
Step 7: Let Them Set
This is the hardest part: waiting! Let the treats sit undisturbed at room temperature for at least 30 minutes, or until firm. This allows the marshmallows to set properly, giving you those perfect chewy squares. You can speed this up slightly in the refrigerator, but I find they have the best texture when they set at room temperature.
Step 8: Slice and Serve
Once firm, use the parchment paper overhang to lift the entire block out of the pan. Place it on a cutting board. Use a sharp knife to cut them into squares. I usually aim for about 2-inch squares, but you can make them bigger or smaller depending on your preference. They’re best served at room temperature, but if you’ve got leftovers, you know what to do!
What to Serve It With
These pumpkin spice Rice Krispie treats are wonderfully versatile and can fit into almost any gathering or craving. For a cozy breakfast, they pair beautifully with a hot cup of coffee or a creamy chai latte. You can serve them as is, or maybe cut into smaller, bite-sized pieces for a lighter start to the day. Imagine a little breakfast board with these alongside some fresh fruit and yogurt – delightful!
For a more festive brunch, especially around the holidays, they add a fun, playful element. You could arrange them on a tiered dessert stand with mini muffins and scones. A light dusting of powdered sugar or a drizzle of white chocolate can elevate their look. They pair nicely with sparkling cider or mimosas, adding a touch of autumnal flair to your brunch spread.
As a dessert, they’re a fantastic option when you want something sweet but don’t want the fuss of baking. Serve them after a hearty meal alongside a scoop of vanilla bean ice cream or a dollop of whipped cream. They’re also great alongside a slice of apple pie or a pumpkin roll for a double dose of fall flavor. For a truly decadent experience, a drizzle of dark chocolate ganache over the top is divine.
And for those simple, cozy snack times? These are perfect. Grab one (or two!) with a glass of cold milk after school or during a movie night. They’re the ultimate comfort food. My family has a tradition of making these on the first truly chilly evening of the year, and it just signals that fall has officially arrived. They’re also fantastic for potlucks or bake sales because they travel so well and are always a crowd-pleaser. They’re the kind of treat that brings a smile to everyone’s face, young and old.
Top Tips for Perfecting Your Pumpkin Spice Rice Krispie Treats
I’ve been making these for years, and I’ve picked up a few tricks along the way that I think really make a difference. For the pumpkin puree, make sure you’re using the pure, unsweetened kind, not the pie filling. The pie filling has sugar and spices already in it, which will throw off the balance of your recipe and make them too sweet or oddly spiced. Also, it’s a good idea to drain any excess liquid from the puree if it looks particularly watery. You can do this by spreading it on a paper towel-lined plate for a bit. This helps prevent the treats from becoming too soft.
When it comes to melting the marshmallows, low and slow is the way to go. If you melt them too quickly over high heat, they can scorch, and that’ll give your treats a burnt flavor. Stirring them constantly ensures an even melt and keeps them from sticking to the bottom of the pan. Once they’re melted and you add the pumpkin and spices, stir really well to get that beautiful, even orange color and distribute all those lovely spices.
For the cereal, don’t compact it too much when you’re pressing it into the pan. Gentle pressure is key! If you press too hard, the treats will become dense and hard instead of wonderfully chewy and airy. I often use a piece of wax paper lightly greased or just my hands, also lightly greased, to do the pressing. This gives you good control and prevents sticking.
If you’re looking for ingredient swaps, you can absolutely use a dairy-free butter substitute and vegan marshmallows to make these dairy-free. I’ve tested this with almond milk, and it actually made it even creamier! For a gluten-free version, use certified gluten-free crispy rice cereal. Most brands are naturally gluten-free, but it’s always good to check the label.
Don’t be afraid to play with the spice levels! If you love a really warm, spicy flavor, add an extra 1/4 or 1/2 teaspoon of pumpkin pie spice. Conversely, if you prefer a milder spice profile, you can reduce it slightly. Also, for an extra touch, consider a drizzle of melted chocolate (milk, dark, or white all work wonderfully) or some chopped toasted pecans over the top once they’ve set a bit. It adds another layer of texture and flavor. I learned this little drizzle trick after years of making them, and it’s a game-changer for presentation and taste!
Storing and Reheating Tips
Keeping these pumpkin spice Rice Krispie treats fresh is pretty straightforward. At room temperature, they’re best enjoyed within about 2-3 days. I like to store them in an airtight container, making sure they’re not packed too tightly. If you stack them, placing a layer of parchment paper or wax paper between layers helps prevent them from sticking together. If you live in a very warm or humid climate, you might want to store them in the refrigerator, as the marshmallow mixture can become a bit soft in warmer temperatures.
For refrigerator storage, place them in an airtight container. They’ll stay good for about a week, though the texture might change slightly, becoming a bit firmer. If you prefer them softer, you can take them out of the fridge about 15-20 minutes before you plan to eat them to let them come back to room temperature.
Freezing is also a great option if you want to make a big batch ahead of time. Wrap individual squares tightly in plastic wrap, then place them in a freezer-safe bag or container. They can be stored in the freezer for up to 2-3 months. To thaw, simply remove them from the freezer and let them come to room temperature on a wire rack or a plate. I usually recommend adding any glaze *after* they’ve thawed and returned to room temperature to prevent the glaze from becoming sticky or messy. For the best quality, I always suggest enjoying them within a week or two of being made, regardless of storage method.
Frequently Asked Questions
Final Thoughts
So there you have it – my absolute favorite pumpkin spice Rice Krispie treats! I truly hope you give these a try. They’re such a simple way to bring a little bit of autumn magic into your home, and the smell alone is enough to make anyone feel happy. They’re proof that you don’t need fancy techniques or a whole afternoon in the kitchen to create something utterly delicious and crowd-pleasing. They’re perfect for those impromptu sweet cravings, school events, holiday gatherings, or just because you deserve a little treat. They’re a reminder that sometimes, the simplest recipes are the most rewarding. If you end up making them, I would absolutely love to hear about it! Drop a comment below and let me know how yours turned out, or if you added any of your own special twists. Happy baking, and enjoy every chewy, spiced bite!
Pumpkin Spice Rice Krispie Treats
Ingredients
Method
- In a large saucepan, melt the butter over low heat. Be careful not to burn the butter.
- Once the butter is melted, add the marshmallows and stir continuously until they are completely melted and smooth. Remove the saucepan from the heat.
- Stir in the pumpkin pie spice and vanilla extract until well combined.
- Add the Rice Krispies cereal to the marshmallow mixture. Stir gently until the cereal is evenly coated.
- Grease a 9x13 inch baking pan with butter or non-stick cooking spray. Press the mixture evenly into the prepared pan using a greased spatula or wax paper. Avoid pressing too hard, which can make the treats tough.
- Let the treats cool for at least 15-20 minutes before cutting into squares. Enjoy!