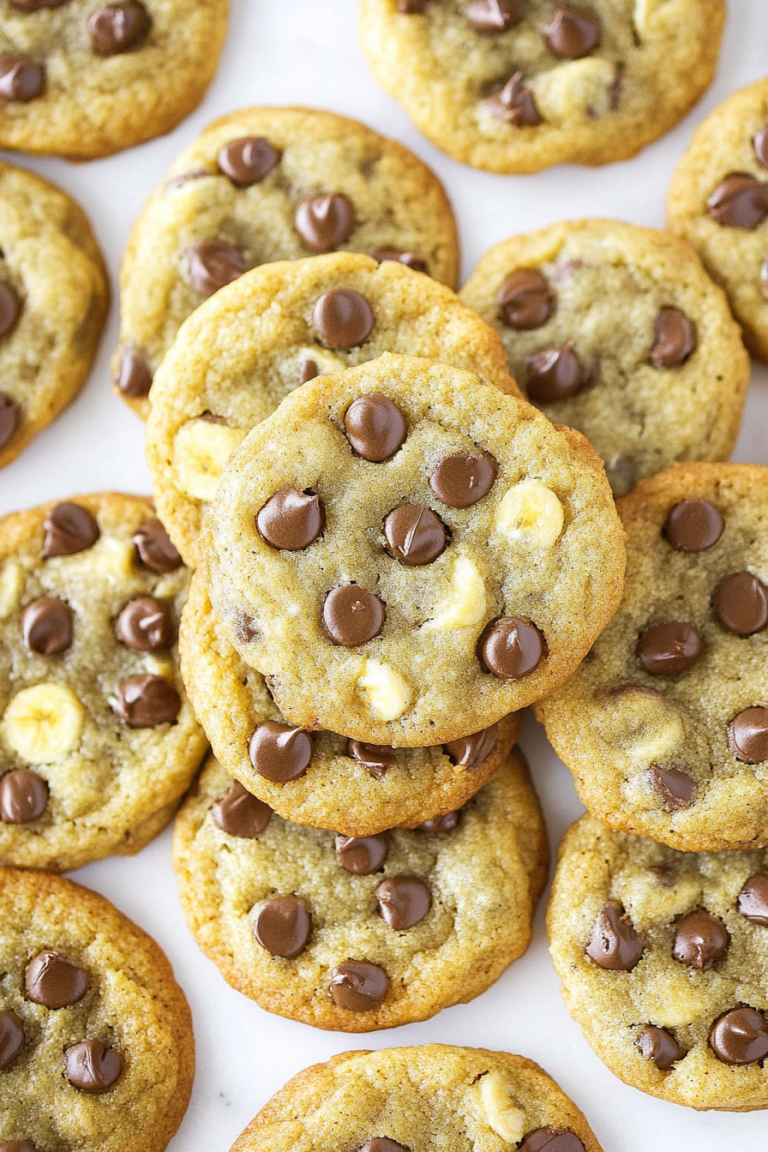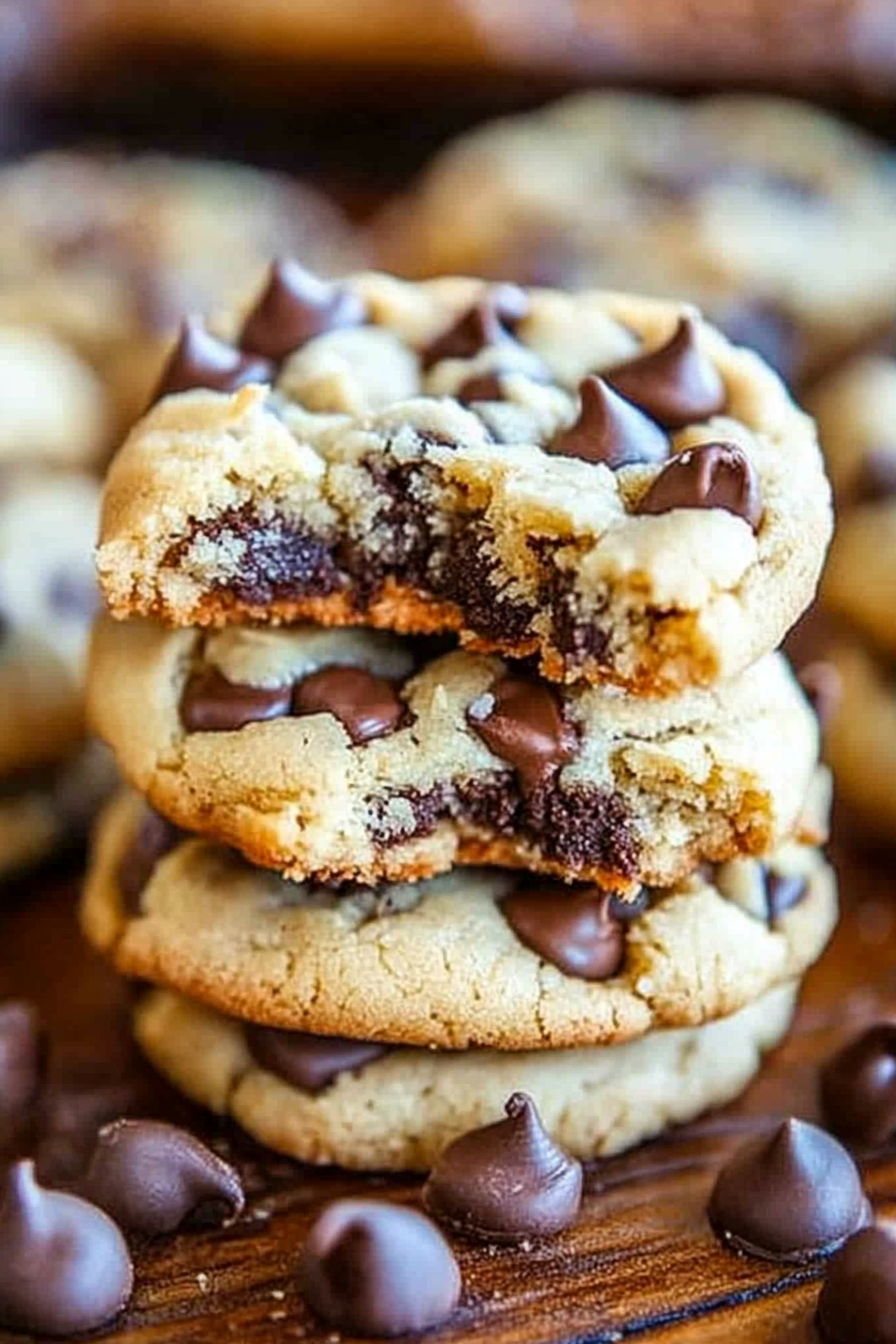
Cream Cheese Cookies The Best Chocolate Chip
You know those recipes that just… stick with you? The ones you find yourself making over and over, not just because they taste amazing, but because they bring a little bit of sunshine into your kitchen? Well, these cream cheese cookies are *that* recipe for me. Honestly, if you told me a few years ago that a cookie could be this ridiculously easy to whip up and still taste like pure heaven, I probably wouldn’t have believed you. But here we are! They have this wonderfully soft, chewy texture that’s just… well, perfect. They’re not super fussy like some fancier desserts, but they have this unexpected richness that makes them feel so special. It’s funny, I used to be all about complicated pastries, but my family just kept asking for these simple cream cheese cookies. They’re like the comfy sweater of the cookie world – reliable, cozy, and always satisfying. If you’ve ever tried a good chewy chocolate chip cookie and loved it, you’re going to adore these. They’ve got a similar comforting vibe, but with that delightful tang from the cream cheese that just elevates everything.
What is cream cheese cookie?
So, what exactly are these magical cream cheese cookies I’m raving about? Think of them as your new go-to cookie that’s a little bit decadent, a whole lot easy, and incredibly adaptable. They’re essentially a classic cookie dough that’s been enriched and tenderized with the addition of cream cheese. This isn’t just about adding a bit of flavor; that cream cheese works wonders on the texture. It makes them unbelievably soft and almost melt-in-your-mouth tender, without being cakey. It’s like the best of a chewy cookie and a soft shortbread had a delicious baby! The name itself is pretty straightforward, but the magic lies in how that little block of cream cheese transforms a basic dough into something truly spectacular. It’s not a super complicated process at all – it’s just a clever little addition that makes all the difference. They’re definitely not your grandma’s traditional sugar cookie, but they have that same heartwarming appeal, just with a delightful modern twist.
Why you’ll love this recipe?
What are some of the best cream cheese cookie recipes?flavor is just out of this world. That subtle tang from the cream cheese cuts through the sweetness perfectly, creating a really balanced and sophisticated taste. It’s not overly sweet, which I appreciate, especially when I’m having one (or two!) with my afternoon coffee. Then there’s the simplicity. I’m not kidding when I say this is easy. You can absolutely have a batch of these in the oven in under 20 minutes, especially if you’re a speedy mixer like I try to be. It’s the kind of recipe I can whip up on a Tuesday afternoon when the cookie craving hits hard and I don’t have hours to spare. And let’s talk Cost-efficiency: What is the best way to measure cost-efficiency?! The ingredients are pretty standard pantry staples, and the cream cheese itself isn’t a huge splurge, especially considering how much deliciousness it adds. Compared to some other special occasion cookies that call for obscure ingredients, this one is wonderfully budget-friendly. What I love most about these cream cheese cookies, though, is their versatility. You can keep them plain and simple, or you can add chocolate chips, sprinkles, nuts – honestly, the sky’s the limit. They’re perfect for a quick treat, a bake sale, or even a last-minute dessert for unexpected guests. If you’re a fan of my classic chewy chocolate chip cookies, you’ll find these have a similar texture profile, but with that extra creamy goodness that makes them utterly irresistible. They’re just… reliable happiness in cookie form.
How to Make Cream Cheese Cookies
Quick Overview
Whipping up these fantastic cream cheese cookies is surprisingly straightforward. We’re basically going to cream together softened butter and cream cheese until it’s light and fluffy, then add sugar, eggs, and vanilla. Next, we’ll gently mix in the dry ingredients until just combined, and then scoop them onto a baking sheet. The whole process from start to finish, including baking, can be done in about 30 minutes, making them ideal for those spontaneous baking urges. The key is not to overmix, and making sure your butter and cream cheese are nice and soft, which makes them blend beautifully without any lumps.
Ingredients
For the Main Batter:
I always start with good quality ingredients because it really does make a difference, even in simple recipes like this. Make sure your butter and cream cheese are at room temperature – this is crucial for a smooth, lump-free dough. Trust me, I’ve rushed it before and ended up with little bits of unmixed cream cheese, and it’s just not the same! You’ll need 1 cup (2 sticks) of unsalted butter, softened, and 4 ounces of full-fat cream cheese, also softened. For sweetness, 1 ½ cups of granulated sugar works beautifully, giving you that perfect balance. Two large eggs, at room temperature, will bind everything together, and 1 teaspoon of pure vanilla extract is non-negotiable for that warm, comforting flavor base.
For the Dry Mix:
This is where we get that classic cookie structure. You’ll need 2 ½ cups of all-purpose flour. I usually just use whatever good quality all-purpose flour I have on hand. A teaspoon of baking soda is essential for giving these cookies just the right amount of lift, and ½ teaspoon of salt is there to balance the sweetness and enhance all those lovely flavors. Make sure your baking soda isn’t expired – I learned that the hard way once and ended up with flat, sad cookies!
For Optional Add-ins & Glaze:
This is where you can get creative! If you love a classic, ½ cup of chocolate chips (semi-sweet or milk chocolate are my favorites) is always a winner. For something a bit different, chopped nuts or even some sprinkles stirred in are fantastic. If you want to go the extra mile and make them look as good as they taste, a simple glaze is wonderful. For that, you’ll need about 1 cup of powdered sugar, 2-3 tablespoons of milk (or a dairy-free alternative like almond milk for a slightly different creaminess), and ½ teaspoon of vanilla extract. Whisk it all together until you get a pourable consistency.
Step-by-Step Instructions
Step 1: Preheat & Prep Pan
First things first, get your oven preheated to 375°F (190°C). This temperature is perfect for getting that lovely golden-brown edge on the cookies while keeping the centers wonderfully soft. While the oven is heating up, grab your baking sheets. I prefer using parchment paper or silicone baking mats – it makes cleanup an absolute breeze and ensures your cookies don’t stick. If you don’t have those, just lightly grease your baking sheets. You want them ready to go so the dough doesn’t sit around too long once it’s mixed.
Step 2: Mix Dry Ingredients
In a medium-sized bowl, whisk together your flour, baking soda, and salt. Give it a good whisk for about 20-30 seconds. This simple step is important because it ensures that the leavening agent (baking soda) and salt are evenly distributed throughout the flour. This means you won’t end up with pockets of saltiness or a cookie that doesn’t rise properly. It’s a small thing, but it really helps ensure consistent results every time you make these cream cheese cookies.
Step 3: Mix Wet Ingredients
Now for the main event! In a large bowl, or the bowl of your stand mixer fitted with the paddle attachment, cream together the softened butter and softened cream cheese. Beat them on medium speed until they are light, fluffy, and completely combined – no lumps allowed! This usually takes about 2-3 minutes. Then, gradually add the granulated sugar and continue to beat until the mixture is pale and airy. This creaming process incorporates air, which helps make the cookies tender. Next, beat in the eggs, one at a time, making sure to scrape down the sides of the bowl after each addition. Finally, stir in the vanilla extract. The mixture should look smooth and luscious at this point.
Step 4: Combine
Now, we’re going to bring our wet and dry ingredients together. Add the dry ingredients to the wet ingredients in three additions, mixing on low speed until *just* combined. It’s really important not to overmix the dough at this stage. Overmixing develops the gluten in the flour too much, which can result in tough cookies instead of our desired soft and chewy texture. Stop mixing as soon as you no longer see streaks of flour. If you’re adding in chocolate chips or nuts, this is the time to gently fold them in using a spatula.
Step 5: Prepare Filling
This step is technically for the “swirl” part if you’re doing a more marbled look, but I often just fold in chips directly! However, if you wanted to do a simple chocolate chip cream cheese cookie, you would fold in ½ cup of chocolate chips here. If you’re aiming for a more distinct swirl, you could prepare a simple chocolate ganache or a cream cheese frosting to swirl in. For instance, melt ½ cup of chocolate chips with 1 tablespoon of butter, or whisk 2 oz of cream cheese with 1 tablespoon of powdered sugar and a touch of vanilla.
Step 6: Layer & Swirl
If you’re doing a swirl, drop spoonfuls of the cookie dough onto your prepared baking sheets, alternating with dollops of your swirl mixture (like chocolate or extra cream cheese). Then, using a toothpick or a skewer, gently swirl the mixtures together. Don’t over-swirl, or you’ll lose the definition. If you’re just doing chocolate chips, simply drop rounded tablespoons of dough onto the baking sheets, leaving about 2 inches between them as they will spread.
Step 7: Bake
Bake the cookies in your preheated oven for 9-12 minutes, or until the edges are lightly golden brown and the centers look set but still slightly soft. The exact baking time will depend on your oven and the size of your cookies. I usually check them around the 9-minute mark. It’s better to slightly underbake them than overbake, as they’ll continue to cook a bit on the hot baking sheet after you remove them from the oven. You want that lovely chewy texture, not a crisp cookie!
Step 8: Cool & Glaze
Once baked, let the cookies cool on the baking sheets for about 5 minutes before carefully transferring them to a wire rack to cool completely. This allows them to firm up properly. If you’re adding a glaze, now’s the time to prepare it. Whisk together the powdered sugar, milk (start with 2 tablespoons and add more if needed), and vanilla extract until smooth. You want a consistency that’s thick enough to coat the cookie but thin enough to drizzle. Once the cookies are completely cool, drizzle the glaze over the tops. You can use a spoon or a piping bag for a neater look. Let the glaze set before serving.
Step 9: Slice & Serve
These cream cheese cookies are best served at room temperature. They are absolutely divine on their own, but they also pair wonderfully with a cold glass of milk, a hot cup of coffee, or even a cup of tea. For serving, I just arrange them on a pretty platter. They look gorgeous with that drizzle of glaze, or even just plain if you didn’t glaze them. They’re sturdy enough to pack for lunches, but soft enough that they’ll disappear in minutes at any gathering!
What to Serve It With
These cream cheese cookies are honestly so versatile, they fit into almost any meal or occasion. For a simple breakfast, they’re a perfect little treat alongside your morning coffee or tea. They’re not too heavy, so they won’t weigh you down before the day really gets going. If you’re hosting a brunch, these cookies add a touch of homemade charm to your spread. I love arranging them on a tiered stand with fresh fruit and other pastries. They look particularly elegant if you’ve done a nice drizzle of glaze. As a sweet dessert, they’re fantastic after dinner. Imagine serving them warm, perhaps with a scoop of vanilla bean ice cream melting on the side – pure decadence! My family also loves them as a late-night cozy snack. They’re just the right amount of sweet to satisfy a craving without feeling overly indulgent. We often have them with a warm mug of hot chocolate on movie nights. Honestly, I’ve found they pair exceptionally well with anything that has a hint of chocolate or a creamy texture itself. My kids always beg for them with their afternoon milk, and I can’t say no!
Top Tips for Perfecting Your Cream Cheese Cookies
Over the years of making these cream cheese cookies countless times, I’ve picked up a few tricks that I think make all the difference. First, for the softness: always, always use full-fat cream cheese and make sure it’s properly softened, along with your butter. This is the secret to that incredibly tender, melt-in-your-mouth texture. If your cream cheese is cold, you’ll get lumps, and if your butter isn’t soft, it won’t cream properly. For mixing advice: I cannot stress enough the importance of not overmixing the dough once you add the flour. Mix until *just* combined. Seriously, stop when you don’t see any more dry flour streaks. Overmixing develops the gluten, and that’s the enemy of a soft cookie! If you’re adding chocolate chips or nuts, fold them in gently at the very end. When it comes to swirl customization (if you choose to swirl), don’t go overboard. A few gentle passes with a toothpick are all you need to create a beautiful marble effect without muddying the flavors. For ingredient swaps, I’ve had success using a gluten-free all-purpose flour blend, but you might need to add an extra tablespoon of liquid or let the dough rest for a few minutes to hydrate properly. I’ve also used almond milk in the glaze, and it works beautifully, giving it a slightly nuttier undertone. For baking tips, always rely on visual cues more than just the timer. Look for those golden-brown edges and a set center. Ovens can be so different! If your cookies tend to spread too much, try chilling the dough for 15-20 minutes before baking. And for the glaze variations, if you want a thicker glaze, just add more powdered sugar, a teaspoon at a time. If you want it thinner, add a tiny bit more milk. You can also add a drop of food coloring for a festive touch, or even a bit of lemon zest for a citrusy kick!
Storing and Reheating Tips
One of the best things about these cream cheese cookies is how well they keep! If you have any leftovers (which is rare in my house!), you can store them at room temperature in an airtight container for up to 3 days. Make sure they’ve cooled completely before sealing them up, or you might get some condensation which can make them a bit soft. I usually just pop them in a plastic container with a lid or a zip-top bag. For longer storage, the refrigerator is your best bet. They’ll stay delicious and perfectly chewy for up to a week in an airtight container. This is especially good if you live in a warmer climate or if you’ve added a glaze, as the chill helps keep everything firm. If you want to keep them even longer, you can freeze them. I like to freeze them in a single layer on a baking sheet until they’re firm, then transfer them to a freezer-safe bag or container. They’ll keep well in the freezer for up to 3 months. To thaw, just take them out of the freezer and let them come to room temperature. If you glazed them, the glaze might get a little sticky upon thawing, but they’ll still taste amazing. For reheating, if they’ve lost a bit of their chewiness after being stored, you can pop one or two in the microwave for about 10-15 seconds. It’s just enough to warm them through and bring back that delightful soft texture. Just be careful not to overheat them, or they can become tough.
Frequently Asked Questions
Final Thoughts
Seriously, if you haven’t tried these cream cheese cookies yet, you are missing out! They’re the perfect example of how a few simple ingredients can come together to create something truly magical. They’re soft, they’re chewy, they’ve got just the right hint of tang from the cream cheese, and they’re so incredibly easy to make. Whether you’re a seasoned baker or just starting out, these are going to be your new best friend in the kitchen. They’re the kind of cookie that brings smiles to faces and makes everyone feel a little bit happier. I hope you love them as much as my family and I do! If you give these a try, please let me know in the comments below how they turned out, or share your favorite variations – I’m always looking for new ideas! And if you enjoyed these, you might also want to check out my Classic Chewy Chocolate Chip Cookies or my Lemon Crinkle Cookies for more delightful baking adventures. Happy baking, and I can’t wait to hear all about your cookie creations!

Softbatch Cream Cheese Chocolate Chip Cookies
Ingredients
Method
- In the bowl of a stand mixer fitted with the paddle attachment, combine the butter, cream cheese, sugars, egg, and vanilla. Beat on medium-high speed until well-creamed, light, and fluffy, about 5 minutes. Alternatively, use an electric hand mixer and beat for at least 7 minutes.
- Stop the mixer, scrape down the sides of the bowl, and add the flour, cornstarch, baking soda, and optional salt. Mix until just combined, about 1 minute.
- Add the chocolate chips and chunks. Beat momentarily to incorporate, or fold in by hand.
- Using a medium 2-inch cookie scoop, form heaping mounds (this recipe makes approximately 28 cookies). Place mounds on a large plate, flatten them slightly with your palm, cover with plastic wrap, and refrigerate for at least 2 hours, or up to 5 days, before baking. Do not bake with warm dough as cookies will spread and bake thinner and flatter.
- Preheat oven to 350°F (175°C). Line a baking sheet with a Silpat non-stick baking mat or spray with cooking spray. Place chilled cookie mounds on the baking sheet, spaced at least 2 inches apart (bake approximately 8 cookies per sheet).
- Bake for 8 to 9 minutes, or until the edges have set and the tops are just beginning to set, even if slightly undercooked, pale, and glossy in the center. Do not bake longer than 10 minutes, as the cookies will firm up as they cool.
- Allow the cookies to cool on the baking sheet for 5 minutes before removing and transferring them to a wire rack to finish cooling.
- Cookies will keep airtight at room temperature for up to 1 week, or in the freezer for up to 3 months. Alternatively, unbaked cookie dough can be stored airtight in the refrigerator for up to 5 days. Consider baking only as many cookies as desired and save the remaining dough to be baked later.