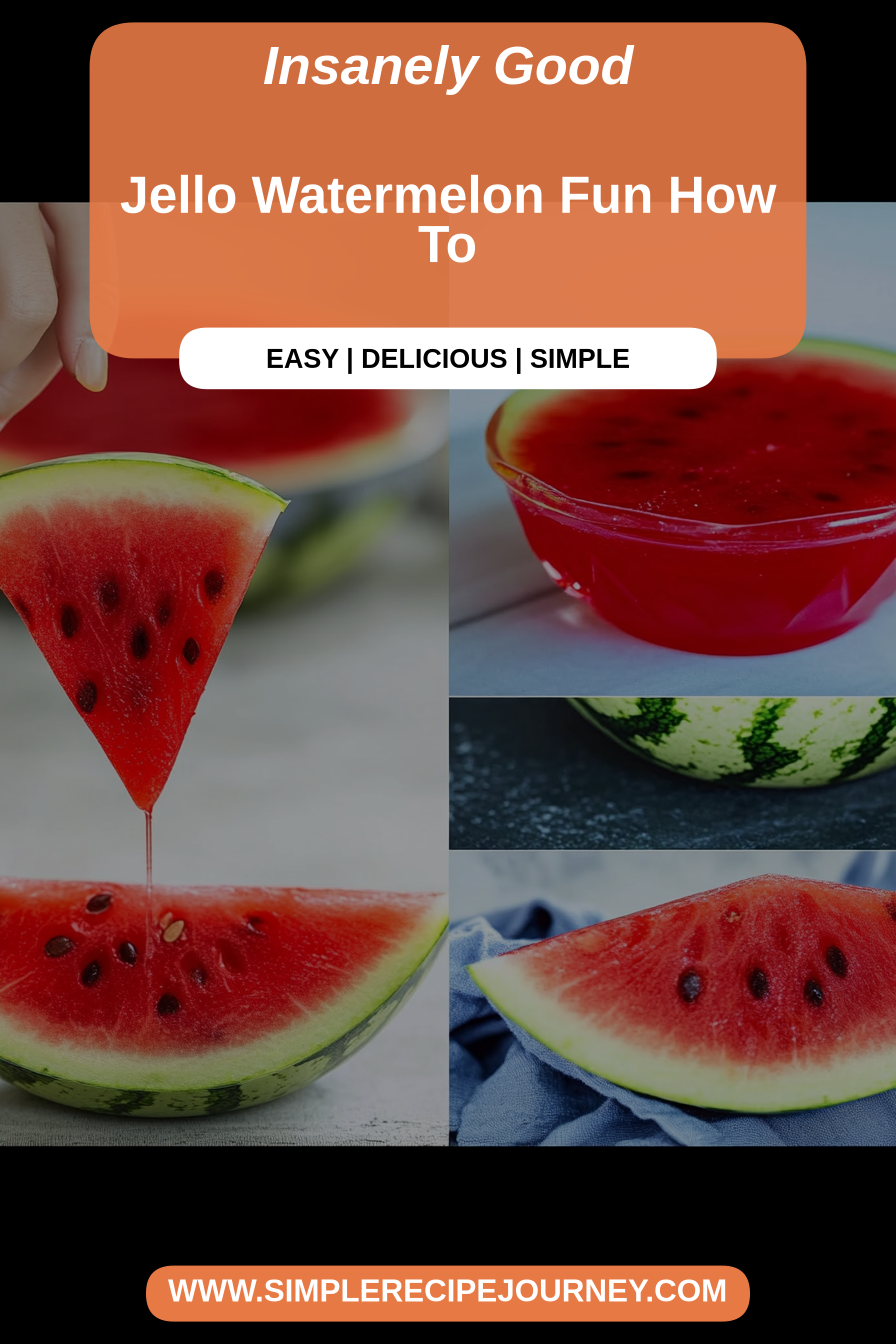
Jello Watermelon Fun How To
Oh, where do I even begin with this jello watermelon wonder? It’s one of those recipes that just screams summer, but honestly, my family begs for it year-round. I remember the first time I whipped this up, it was for a last-minute backyard BBQ and I was scrambling for a dessert that wouldn’t melt in the heat. This jello watermelon creation was an absolute showstopper! It looks so impressive, but the magic is, it’s surprisingly simple to put together. Forget those fussy layered cakes that take hours; this is your secret weapon for dazzling guests without breaking a sweat. It’s like a cool, sweet hug on a hot day, with that unmistakable flavor of fresh watermelon that just makes everything feel right. I’ve always loved jello, ever since I was a kid, and combining it with real watermelon? Pure genius, if I do say so myself. It’s a delightful twist on both a classic jello mold and a fresh fruit dessert.
What is a watermelon “cake”?
So, what exactly *is* this jello watermelon “cake”? The name is a little cheeky, I know! It’s not a traditional baked cake at all, but rather a beautifully molded dessert that *looks* like a slice of watermelon, complete with a vibrant green rind and bright red, seedy interior. Think of it as a delightful jello masterpiece that uses flavored gelatin, condensed milk, and, of course, the star of the show: real watermelon. It’s essentially a layered jello mold that gets its shape and color from simple ingredients and a clever arrangement. The “seeds” are made from tiny black sesame seeds or even dark chocolate chips, adding a fun visual touch. It’s a playful and delicious dessert that’s a guaranteed hit, especially with kids who are always amazed by how it mimics the real fruit. It’s essentially a sophisticated jello mold, elevated with fresh flavors and a stunning presentation.
Why you’ll love this recipe?
Let me tell you, this jello watermelon “cake” is more than just a pretty dessert; it’s a winner on so many levels. First off, the flavor! You get that light, refreshing taste of real watermelon, not just artificial flavoring. It’s subtly sweet, perfectly balanced, and incredibly cooling. What I love most is how incredibly simple it is to make. Seriously, if you can boil water, you can make this! It’s a lifesaver on busy weeknights when you need a dessert that impresses but doesn’t demand hours in the kitchen. Plus, it’s super budget-friendly. The ingredients are pantry staples for many, and the cost per serving is ridiculously low, making it perfect for feeding a crowd without breaking the bank. Its versatility is another huge plus. You can serve it as a stunning centerpiece for parties, a light dessert after a heavy meal, or even as a fun, healthy-ish treat for the kids. It’s also a fantastic alternative to heavier, baked goods, especially during warmer months. My own kids ask for this jello watermelon treat all the time, especially when their friends come over. It’s just one of those recipes that brings smiles to faces. It’s a delightful dessert that’s lighter than most cakes, making it feel like a guilt-free indulgence.
How do you make a watermelon “cake”?
Quick Overview
The process for making this jello watermelon “cake” is refreshingly straightforward. You’ll essentially be creating three distinct layers: a vibrant red watermelon layer, a creamy white “flesh” layer, and a cool green “rind” layer. Each layer is made separately using flavored gelatin and then carefully poured into a mold. The key is allowing each layer to set slightly before adding the next, ensuring those beautiful, distinct lines. It’s a beautiful demonstration of simple kitchen chemistry that results in a stunning dessert. You’ll be amazed at how easily you can create this impressive treat!
Ingredients
For the Red “Watermelon” Layer:
- 2 (3-ounce) packages strawberry or cherry gelatin (for that bright red color!)
- 2 cups boiling water
- 1 cup cold water
- 1 cup pureed fresh watermelon (strained to remove pulp if you want a super smooth finish, but a little pulp adds texture!)
- Optional: A few drops of red food coloring if you want an even more intense color
- Optional: 1/4 cup black sesame seeds or mini chocolate chips for the “seeds”
I always go for strawberry gelatin because it gives the perfect shade of red. And using real watermelon puree makes all the difference in flavor – it’s a game-changer! Make sure your watermelon is ripe for the best sweetness.
For the White “Flesh” Layer:
- 1 (3-ounce) package lemon or lime gelatin
- 1 cup boiling water
- 1 cup evaporated milk (this is my secret for that creamy texture!)
- 1/2 cup cold water
- 1/4 cup sweetened condensed milk (for a touch of sweetness and richness)
Evaporated milk is my go-to here. It gives the layer a lovely, opaque, creamy look that truly mimics the white part of a watermelon. Some people use sweetened condensed milk for the entire liquid, but I find a combination with evaporated milk and a little extra water creates the perfect balance of creaminess and firmness. And don’t skimp on the sweetened condensed milk; it adds that subtle, wonderful richness.
For the Green “Rind” Layer:
- 1 (3-ounce) package lime or lemon gelatin
- 2 cups boiling water
- 1 cup cold water
- Optional: A few drops of green food coloring to achieve a vibrant rind color
Lime gelatin is my favorite for the rind, as it has that classic tartness that complements the sweet watermelon. If you want a really deep green, a tiny bit of green food coloring goes a long way. I usually aim for a color that looks like a freshly picked watermelon, not too pale and not too dark.
Step-by-Step Instructions
Step 1: Preheat & Prep Pan
First things first, grab a mold! A Bundt pan works beautifully for that classic ring shape, but any decorative mold you have will be stunning. You’ll want to lightly grease your mold. I use a neutral oil spray or a little bit of vegetable oil on a paper towel. This step is crucial; you don’t want your beautiful jello watermelon sticking! Chill your prepared mold in the refrigerator while you get the first layer ready. This helps the jello set faster.
Step 2: Mix Dry Ingredients
This is where the magic starts. For the red layer, combine the strawberry (or cherry) gelatin powder in a heatproof bowl. Make sure you’re using a bowl large enough to whisk easily. If you’re adding food coloring for an extra pop, you can add a drop or two now to the dry gelatin, though it’s not strictly necessary. Stirring it in now helps distribute the color evenly.
Step 3: Mix Wet Ingredients
Boil your 2 cups of water. Carefully pour this over the gelatin powder. Whisk thoroughly until all the gelatin granules are completely dissolved. No lumps allowed! Then, stir in the 1 cup of cold water and the 1 cup of pureed watermelon. Give it a good stir until everything is well combined. If you’re adding the “seeds” at this stage, gently fold them in now, distributing them evenly throughout the red mixture.
Step 4: Combine
This isn’t really a “combine” step like you’d do with cake batter, but rather making sure your red mixture is perfectly ready to go. Give it one last good whisk. You want it smooth and lump-free. The consistency should be liquid but feel slightly thickened by the gelatin. If it feels too thin, you might need a touch more gelatin, but usually, this ratio is spot on. I often taste it here to make sure the watermelon flavor is prominent enough.
Step 5: Prepare Filling
Now for the white layer. In a separate heatproof bowl, combine the lemon (or lime) gelatin powder. Pour in 1 cup of boiling water and whisk until fully dissolved. Now, here’s where the creamy magic happens: stir in the evaporated milk, 1/2 cup cold water, and the sweetened condensed milk. Whisk until it’s wonderfully smooth and uniform. It should look like a pale, creamy liquid. This layer is a bit more delicate, so mix gently to avoid creating too many air bubbles.
Step 6: Layer & Swirl
This is the fun part! Take your chilled, greased mold out of the fridge. Pour about half of your red watermelon mixture into the mold. Place it back in the fridge for about 20-30 minutes, or until it’s *just* starting to set – you want it firm enough to support the next layer but still slightly tacky. Once it’s got that slight set, gently spoon or pour about half of the white mixture over the red layer. Again, pop it back in the fridge to set slightly. Repeat this process with the remaining red mixture, then the remaining white mixture. You’re building those distinct layers, just like a real watermelon!
Step 7: Bake
Okay, so we don’t “bake” this jello watermelon “cake” in the oven! Instead, we rely on the refrigerator to do all the work. Once all your red and white layers are poured into the mold, it’s time for the green rind. In a clean bowl, combine the lime (or lemon) gelatin with 2 cups of boiling water and whisk until dissolved. Stir in the 1 cup of cold water and green food coloring, if using. Let this mixture cool to room temperature. Once the white layer is firm enough to hold the rind, gently pour the cooled green mixture over the top. This final layer doesn’t need to be chilled to set; it will set up in the fridge overnight. So, cover the mold loosely with plastic wrap and refrigerate for at least 6-8 hours, or preferably overnight, until completely firm.
Step 8: Cool & Glaze
There’s no glaze for this watermelon “cake”! The beauty of it is its natural, fresh appeal. Once it’s fully set, it’s ready to be unmolded. The chilling is the most important part of “setting” this dessert. Make sure it’s completely firm before attempting to unmold it. If it feels a bit wobbly, it needs more time in the fridge. I’ve learned the hard way that rushing this step leads to a jello puddle!
Step 9: Slice & Serve
To unmold, carefully dip the bottom of the mold in warm water for just a few seconds. This helps loosen the gelatin. Place a serving plate over the mold and confidently invert them together. Give it a gentle shake. It should slide right out! If it’s being stubborn, a few more seconds in warm water should do the trick. Slice it into wedges with a sharp knife. You’ll see those beautiful layers! Serve chilled. It’s absolutely delightful on its own, or with a dollop of whipped cream if you’re feeling fancy.
What to Serve It With
This jello watermelon “cake” is so versatile, it can be paired with a surprising range of things! For breakfast, imagine a light, refreshing slice alongside a strong cup of coffee. It’s a fun, unexpected way to start the day, especially on weekends. For brunch, it’s the perfect delicate dessert to follow a savory spread. I love serving it alongside fresh berries and a sprig of mint for an elegant presentation. It’s light enough not to feel heavy after eggs and pastries. As a dessert, it’s a palate cleanser after a rich meal. It’s not overly sweet, so it doesn’t compete with other flavors. Try serving it with a tiny drizzle of honey or a scoop of light vanilla bean ice cream for a special occasion. And for cozy snacks? This jello watermelon treat is pure joy. It’s perfect for a movie night or a casual get-together, providing a burst of fruity freshness. My family loves it with a side of graham crackers for dipping, though that’s a bit unconventional, it’s a hit!
Top Tips for Perfecting Your Jello Watermelon “Cake”
I’ve made this jello watermelon creation more times than I can count, and over the years, I’ve picked up a few tricks that really make it shine. For the watermelon puree, I find that using a high-powered blender gives you the smoothest result. If you don’t have one, just blend as best you can and then strain it through a fine-mesh sieve. This removes any stringy bits and pulp, giving you a cleaner look. For the white layer, don’t over-whisk the evaporated milk and condensed milk; you want it smooth, but whipping too much can introduce air bubbles that might show through. When layering, patience is key! Make sure each layer is slightly set before adding the next. If you pour a warm layer onto a firm but not fully set layer, they’ll blend together, which isn’t what we want for those clean lines. A good test is to gently poke the layer – if your finger comes away mostly clean with just a slight tackiness, it’s ready for the next addition. When it comes to the “seeds,” I prefer black sesame seeds because they’re tiny and provide a nice little crunch. Chocolate chips can work, but they might melt slightly into the jello. For the green rind, make sure it’s cooled to room temperature before pouring it over the white layer. Pouring a hot liquid onto a chilled layer can cause condensation and affect the final texture. I learned this after one batch turned a little cloudy! Finally, for unmolding, don’t be afraid to use that warm water dip! It’s your best friend for releasing the jello cleanly. A quick dip is all you need. If it’s still stuck, dip again for just a few more seconds. Trust me, a little patience and these tips will result in a jello watermelon “cake” that’s as beautiful as it is delicious.
Storing and Reheating Tips
Proper storage is key to keeping your jello watermelon “cake” looking and tasting its best. At room temperature, this dessert isn’t really meant to sit out for long, especially in warmer weather. It’s best enjoyed within 2-3 hours of unmolding if your room is cool. For longer storage, the refrigerator is your best friend. Keep it covered loosely with plastic wrap or transfer it to an airtight container. In the fridge, it will stay fresh and firm for about 3 to 4 days. I’ve found that the texture holds up really well during this time. If you need to store it for even longer, freezing is an option, though it’s not my preferred method as gelatin can sometimes change texture slightly upon thawing. If you do freeze it, make sure it’s well-wrapped in plastic wrap and then in aluminum foil to prevent freezer burn. It should last for about 1 to 2 months. To thaw, transfer it to the refrigerator overnight. As for reheating, you don’t reheat jello! It’s meant to be served chilled, so no need to worry about that. Just ensure it’s properly chilled before serving. The glaze timing advice? Well, there’s no glaze here, so you don’t need to worry about that part!
Frequently Asked Questions
Final Thoughts
Honestly, this jello watermelon “cake” is one of my absolute favorite desserts to make. It’s the perfect combination of fun, festive, and utterly delicious. It’s so rewarding to see the look on people’s faces when they realize it’s a jello dessert that looks like a real watermelon! It’s a refreshing departure from heavier cakes and pies, and it’s always a crowd-pleaser, no matter the age of the guests. If you love the idea of fresh fruit flavors and a bit of playful presentation, you are going to adore this. It’s a recipe that brings out the kid in all of us. For those who enjoyed this, you might also like my
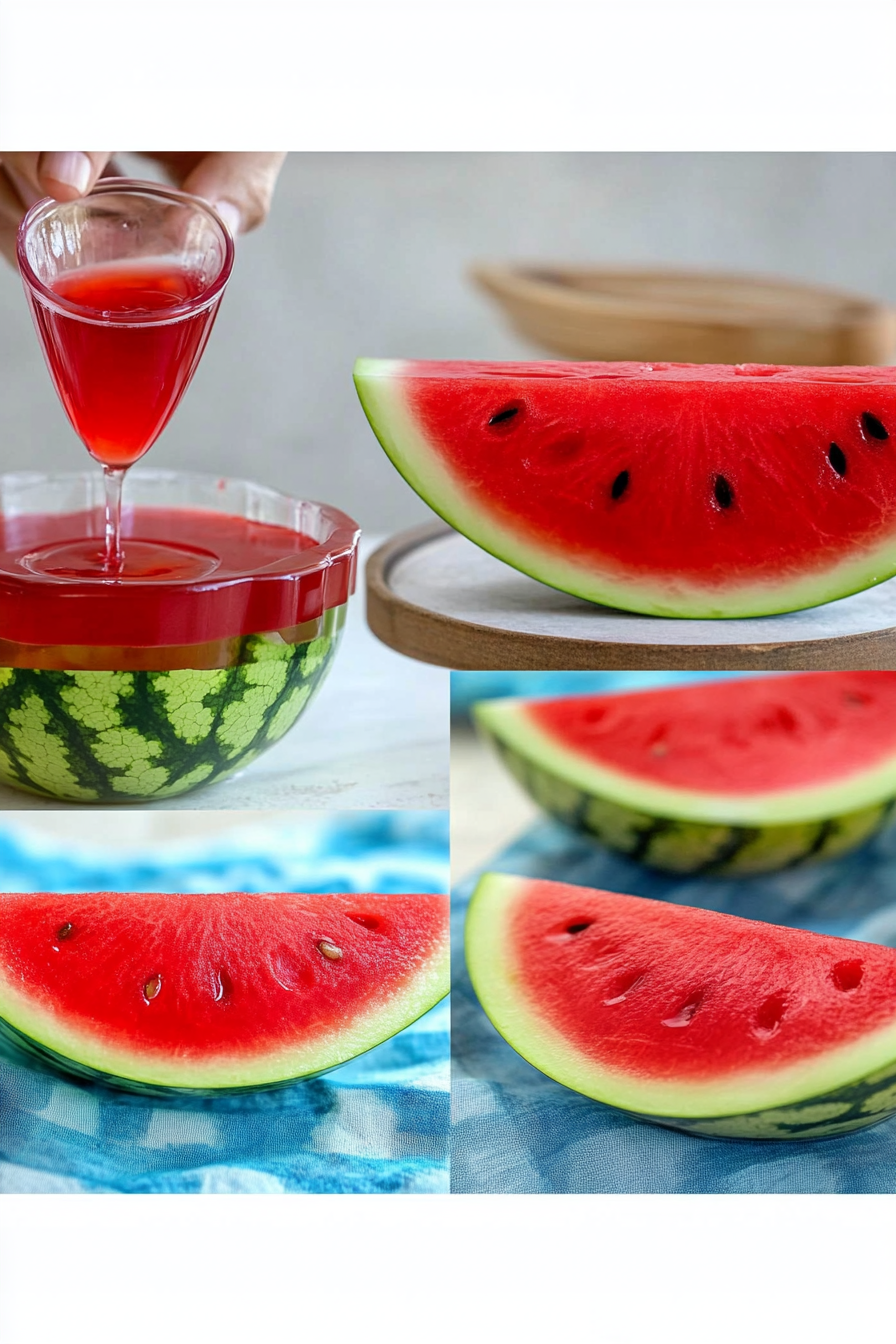
Jello Filled Watermelon
Ingredients
Method
- Slice the watermelon in half horizontally.
- Carefully scoop out the watermelon flesh from each half, leaving about a 1/2-inch rind to create a bowl. You can reserve the scooped-out watermelon for another use.
- Use paper towels to thoroughly dry the inside of each watermelon half. This helps the jello set properly.
- In a large bowl, prepare the Jello mix according to the package directions using 4 cups of boiling water and 4 cups of cold water.
- Carefully pour the prepared Jello mixture into the hollowed-out watermelon halves.
- Place the jello-filled watermelon halves on a baking sheet or in a shallow dish (to catch any potential spills) and refrigerate.
- Chill for at least 6 hours, or until the jello is completely firm.
- Once firm, slice the watermelon into wedges. For best results, make sure the slices are thick enough so the jello stands up well.