Golden Butter Salted Chocolate Chip Cookies
I remember the first time I truly understood the magic of browned butter. I was probably about ten, my grandma was making her famous sugar cookies, and she had this little saucepan on the stove, stirring butter with this look of intense concentration. The smell that started wafting through the kitchen was completely different from just melted butter – it was nutty, toasty, almost caramel-like. It was *breathtaking*. My grandma, bless her heart, just winked and said, “This, my dear, is where the secret flavor comes from.” She wasn’t just making cookies; she was unlocking a whole new dimension of deliciousness. For years, I thought it was this super complicated technique, reserved only for fancy pastries. But as I got older and started experimenting in my own kitchen, I discovered that browned butter isn’t just for cookies; it’s a total game-changer for almost anything sweet, and even some savory dishes! It’s that little touch that elevates a good recipe to an *unforgettable* one, and honestly, it’s surprisingly simple to achieve once you know the tricks. Think of it as the culinary equivalent of putting on your favorite jewelry – it just makes everything sparkle a little brighter.
What is browned butter?
So, what exactly *is* browned butter? In the simplest terms, it’s butter that’s been gently heated until the milk solids within it toast and caramelize, turning a beautiful amber color and developing a rich, nutty aroma. You’ll often hear it called “beurre noisette” in French, which literally means “nutty butter,” and that name couldn’t be more perfect. It’s not burnt, mind you! There’s a fine line between perfectly browned and tragically burnt, but once you hit that sweet spot, the flavor transformation is astounding. It takes on this deep, complex taste that’s hard to describe – a little bit like toasted almonds, a hint of toffee, and a whole lot of pure, unadulterated deliciousness. It’s essentially taking a humble ingredient and coaxing out its hidden potential, turning an everyday fat into a flavor powerhouse that can truly transform baked goods, sauces, and even simple stovetop sautés. It’s one of those kitchen alchemy moments that just makes you feel like a culinary wizard, even if you’re just making a quick batch of muffins.
Why you’ll love this recipe?
What are some good reasons to use browned butter in baking?flavor. I’ve said it before, but it bears repeating: it’s divine. That nutty, caramelized essence is a million miles away from plain melted butter. It adds depth and sophistication to everything, making even the simplest vanilla cake taste like it came from a high-end bakery. And the simplicity? Seriously, it’s ridiculously easy. All you need is butter and a saucepan. No fancy equipment, no complicated steps. It’s something you can whip up in about five minutes while your oven preheats. This is a lifesaver on busy nights when I want to make something special without a lot of fuss. Plus, it’s incredibly cost-efficientWhat I love about this recipe is that it’s not a special ingredient, you’re just transforming something you likely already have in your fridgeversatility. I use it in my chocolate chip cookies (they’re next level!), my pound cake, my shortbread, and even drizzled over popcorn. My kids ask for my “special cookies” all the time, and it’s all thanks to that magical browned butter. If you enjoy recipes that have a little something extra, like my lemon blueberry scones, you’ll adore the subtle yet profound impact browned butter has. It’s that secret weapon that makes people ask, “What did you *do* to make this so good?” and you get to smile knowingly.
How to Make Browned Butter
Quick Overview
Making browned butter is as simple as melting butter and continuing to cook it gently until it turns a lovely amber color and smells toasty. The key is to keep an eye on it and give it a swirl now and then. You’ll see the milk solids at the bottom start to toast, and once it smells nutty, you’re golden. It’s a quick process, usually taking just 5-7 minutes, and it delivers an incredible flavor boost that’s absolutely worth the minimal effort. This technique will elevate your baking from good to absolutely sensational.
Ingredients
For the Browned Butter:
You really only need one thing here: unsalted butter. I always opt for unsalted because it gives you more control over the saltiness of your final dish, and unsalted butter tends to brown a bit more evenly for me. You can use salted, but just be mindful of the salt in the rest of your recipe. I usually start with at least half a cup (one stick), but you can easily scale this up or down. Just make sure you’re using a light-colored saucepan so you can easily see the color change of the butter.
Step-by-Step Instructions
Step 1: Melt the Butter
Place your unsalted butter in a light-colored, heavy-bottomed saucepan over medium heat. Let it melt completely. It will foam up a bit, which is perfectly normal. Just give it a gentle stir.
Step 2: Watch for Bubbles and Foam
As the butter continues to heat, the foaming will subside, and you’ll start to see tiny specks forming at the bottom of the pan. This is the milk solids beginning to toast. Keep the heat at a steady medium-low; you don’t want it to cook too fast.
Step 3: Swirl and Observe
Begin to gently swirl the pan or stir the butter occasionally. This helps the milk solids toast evenly. You’ll start to notice the butter changing from a clear yellow to a pale golden hue. The aroma will also start to shift – it’ll go from just “buttery” to something more complex and nutty.
Step 4: The Toasting Begins
Continue swirling. The golden color will deepen, and those little milk solids will turn a light brown. This is the crucial stage where the magic happens. It smells incredible now, like toasted nuts! Be attentive; this can happen quickly.
Step 5: Reaching the Perfect Amber
Keep swirling until the butter turns a beautiful amber or light brown color, and the toasted milk solids are visible at the bottom. The aroma will be rich and deeply nutty. This usually takes about 5-7 minutes total from when you first put the butter in.
Step 6: Remove from Heat Immediately
The *instant* it reaches your desired color, remove the pan from the heat. The residual heat in the pan will continue to cook it for a moment, so you want to stop the browning process at the perfect point. If you wait too long, it can easily go from browned to burnt, and burnt butter tastes bitter.
Step 7: Strain (Optional but Recommended)
For recipes where you want a smooth texture, like a glaze or a cake batter, you can carefully pour the browned butter through a fine-mesh sieve lined with cheesecloth (or just the sieve if you’re not worried about a few tiny bits) into a heatproof bowl. This separates the clear, amber-colored butter from the toasted milk solids. If the recipe calls for those toasty bits, like in some cookies or biscotti, you can skip this step and just pour the whole mixture in.
Step 8: Use or Store
Your delicious browned butter is ready to use! If you’re not using it immediately, let it cool slightly and then store it in an airtight container in the refrigerator. It will solidify again, and you can melt it as needed.
What to Serve It With
Honestly, the beauty of browned butter is how it plays well with so many things! For breakfast, I love to drizzle a little extra browned butter over my pancakes or waffles instead of plain syrup. It adds this unexpected richness that’s just heavenly. It’s also amazing in a simple French toast batter. For a lovely brunch spread, imagine a delicate shortbread cookie made with browned butter served alongside fresh fruit salad and mimosas – it feels so elegant. As a sophisticated dessert, my go-to is a brown butter chocolate chip cookie. The depth of flavor from the butter just makes the chocolate sing. It’s also fantastic in a brown butter pound cake or even stirred into ice cream. And for those cozy snacks, it’s my secret for elevating a bowl of popcorn. Just melt a tablespoon or two and drizzle it over warm popcorn with a sprinkle of sea salt – it’s addictive! My family traditions often involve using it for holiday baking; my grandma’s sugar cookies, which I mentioned, are a staple, and my mom makes an incredible brown butter pecan pie. It’s one of those ingredients that feels special enough for company but is simple enough for a Tuesday night treat.
Top Tips for Perfecting Your Browned Butter
I’ve definitely had my share of “oops, I burnt it!” moments when I was learning, so let me share some of my hard-won wisdom to help you nail it every time. First, use a light-colored, heavy-bottomed saucepan. This is crucial. A dark pan will hide the color changes, and you’ll be guessing. A heavy bottom distributes heat evenly, preventing hot spots that can scorch the butter. When you’re watching it, don’t walk away! Seriously, it can go from perfect to burnt in a matter of seconds. Keep your eyes on it and trust your nose – that toasty, nutty aroma is your cue. Medium-low heat is your friend. Rushing the process by using high heat is a surefire way to burn it before the milk solids even have a chance to toast properly. When it comes to straining, I highly recommend it if you want a smooth, silky liquid for glazes or batters. Those little browned bits are delicious, but they can change the texture. I usually just use a fine-mesh sieve, but if you want to be extra sure, lining it with a piece of cheesecloth works wonders for catching every tiny speck. For ingredient swaps, while unsalted butter is my preference, if you only have salted, just be aware of how much salt you’re adding to your recipe. You might need to reduce it slightly. When it comes to baking, once you’ve browned your butter and used it in a recipe, remember that the flavor is more concentrated. You might find you don’t need as much sugar in certain recipes because the browned butter adds so much inherent sweetness and depth. And for glaze variations, don’t be afraid to experiment! Browned butter mixed with powdered sugar and a splash of milk or cream is divine, but you can also add a touch of vanilla, cinnamon, or even a pinch of sea salt to create even more complex flavors.
Storing and Reheating Tips
One of the great things about browned butter is that it stores really well, which means you can make a batch ahead of time and keep it on hand for whenever inspiration strikes. If you’ve made a little extra, or perhaps you’ve browned a whole pound of butter for a big baking project, here’s how to keep it perfect. For room temperature storage, I’d say only keep it out if you plan to use it within a day or two, and make sure it’s in a very tightly sealed container. It can start to go rancid faster at room temperature, especially in warmer climates. For longer storage, the refrigerator is your best bet. Once cooled, transfer it to an airtight container, like a small glass jar or a plastic deli container. It should stay fresh and delicious in the fridge for at least 2-3 weeks. When you need it, just scoop out what you need and gently re-melt it over low heat or in the microwave. If you’re a serious baker and want to stock your freezer, browned butter freezes beautifully. Wrap it well in a couple of layers of plastic wrap, then pop it into a freezer-safe bag or container. It will keep its quality for about 3-4 months. To thaw, just transfer it to the refrigerator overnight, or gently melt it on the stovetop on the lowest heat. For glaze timing advice, if you’re storing a finished baked good that has a glaze made with browned butter, it’s best to add the glaze just before serving, or store the glaze separately. Glazes can sometimes become sticky or separate when stored for too long, especially if refrigerated.
Frequently Asked Questions
Final Thoughts
So there you have it – the simple yet profound magic of browned butter! It’s honestly one of those techniques that feels like a culinary secret, but once you master it, it unlocks a whole new world of flavor for your baking and cooking. It’s the perfect example of how a little extra effort can yield such incredible results, transforming everyday ingredients into something truly special. If you’re looking for that extra touch of richness and depth in your cookies, cakes, or even just a simple mug cake, I can’t recommend giving browned butter a try enough. It’s easy, it’s fast, and the payoff is immense. I truly hope you give this a go and discover its magic for yourself! If you’re a fan of recipes that offer a little something unique, you might also enjoy my recipe for lavender shortbread cookies or my spiced pear tart – they both have that special something that makes people ooh and aah. I can’t wait to hear how your browned butter creations turn out! Please leave a comment below and let me know your favorite ways to use it, or share your own little browned butter tips. Happy baking, my friends!

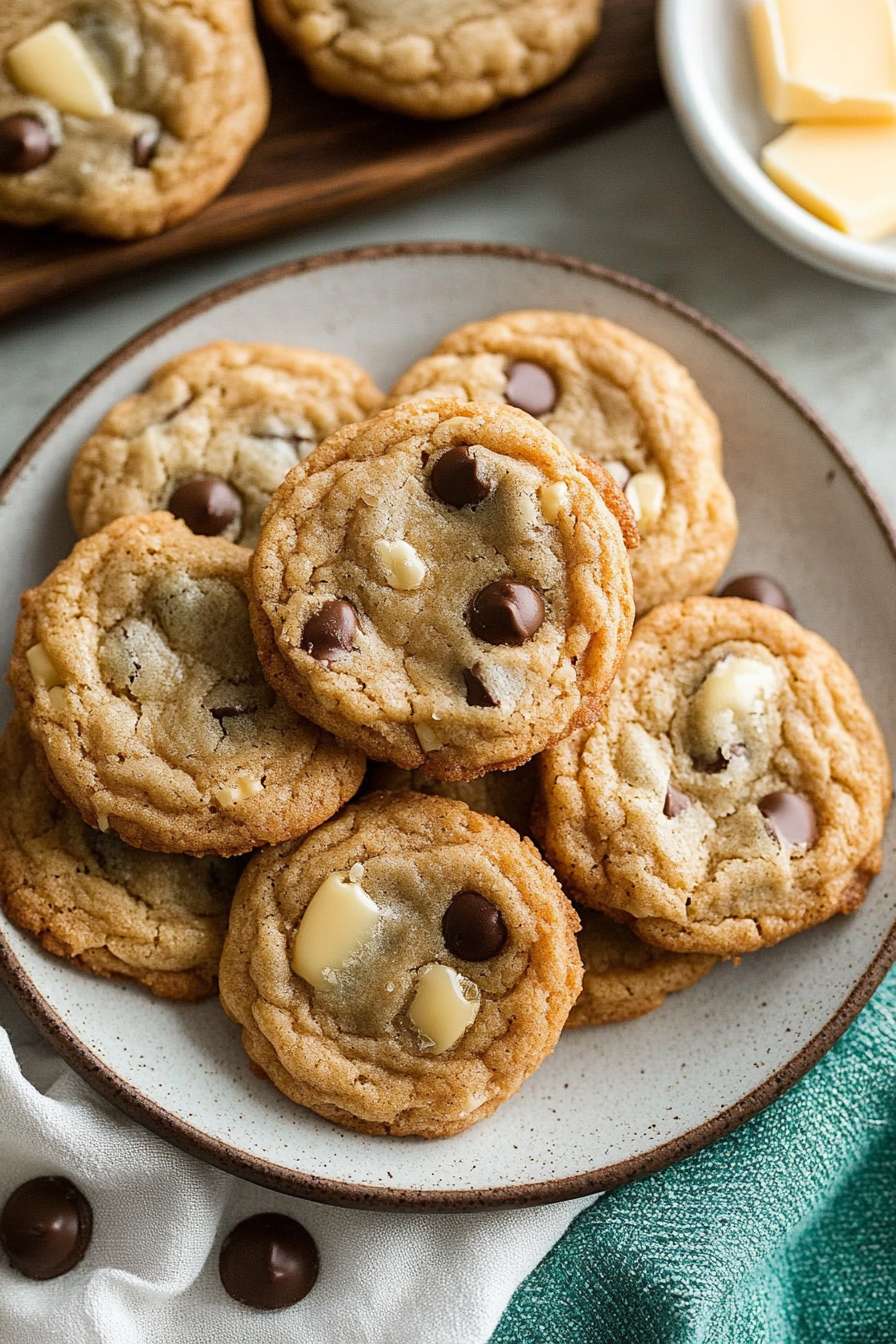
Brown Butter Chocolate Chip Cookies
Ingredients
Method
- Melt butter in a 12-inch light-colored skillet over medium heat, stirring occasionally as it cooks. It will go through stages of melting, sputtering (stand back), then it will deepen in color and foam. Underneath the foaming you'll notice browned bits forming and the butter will take on a toasty aroma. It should have a nice golden brown color, not too dark or it's burning (and can taste bitter).
- Remove the pan from heat and right away pour the butter into a heat-proof dish (such as a glass 2-cup liquid measuring cup), scraping out any remaining from the pan with a rubber spatula. Cool at room temperature for 10 to 15 minutes, then chill in the freezer for about 45 minutes until cooled (but don't let it get firm and solid or you'll need to re-melt slightly).
- In a large mixing bowl, whisk together flour, cornstarch, baking soda, and salt for 20 seconds. Set aside.
- Remove butter from freezer and pour into the bowl of an electric stand mixer, using a rubber spatula to scrape out any excess. Add light-brown sugar and granulated sugar to the mixer bowl.
- Fit mixer with the paddle attachment and whip on medium-high speed until creamy, about 1 minute. Mix in one egg, then mix in the second egg with vanilla.
- Add in dry ingredients and mix on low speed just until combined. Stir in chocolate chips. Make a well in the dough so it chills more evenly, cover bowl and refrigerate for 1 hour. Preheat oven to 350 degrees Fahrenheit during the last 10 minutes of chilling.
- Scoop dough out about 2.5 Tbsp at a time (about 45g each) and shape into balls (a bit larger than a golf ball). Place cookie dough balls on parchment paper lined baking sheets (fitting 9 per sheet) and bake in preheated oven for 10-13 minutes until golden but appearing slightly under-baked in the center. Transfer cookie dough that isn't currently baking to the refrigerator to chill until ready to bake.
- Allow cookies to cool several minutes on the cookie sheet before transferring to a wire rack to cool. Store cookies in an airtight container.