Easy Peanut Chicken Slow Cooker Dinner
Oh, pot roast. Just saying the words conjures up images of chilly Sundays, the comforting aroma filling the house, and a plate piled high with tender, melt-in-your-mouth goodness. For years, I struggled to get my pot roast *just right*. It was either too tough, a little bland, or took hours of fussing. Then, I discovered the magic of the slow cooker. Seriously, this recipe has been an absolute game-changer, especially on those weeknights when dinner feels like a mountainous task. It’s the kind of meal that feels fancy enough for company but is so ridiculously simple, it’s become my go-to when I just want something delicious and fuss-free. If you’ve ever been intimidated by making pot roast, or just want to simplify your life without sacrificing flavor, you’ve come to the right place. This is my tried-and-true, utterly fail-proof slow cooker pot roast!
What is slow cooker pot roast?
So, what exactly *is* slow cooker pot roast? At its heart, it’s a beautiful marriage of a humble cut of beef, cooked low and slow with aromatic vegetables and savory liquids until it becomes unbelievably tender. We’re talking about those tougher cuts of meat, like chuck roast, that might be a bit challenging to cook quickly, but are absolutely perfect for the gentle, extended cooking time of a slow cooker. The magic happens as the connective tissues in the meat break down, transforming it into something you can practically cut with a fork. Think of it as the ultimate culinary hug in a bowl. It’s a classic comfort food, but made so much easier and more forgiving in your trusty slow cooker. It’s not complicated, it’s not fussy – it’s just pure, delicious, slow-cooked perfection.
Why you’ll love this recipe?
Let me count the ways! First off, the FLAVOR is just out of this world. The slow cooker allows all those wonderful ingredients to meld together, creating a depth of taste that’s hard to achieve with quicker methods. The beef becomes so tender and juicy, and the vegetables soak up all those delicious juices. Then there’s the SIMPLICITY. Honestly, this recipe is practically foolproof. You toss everything into the slow cooker in the morning, set it, and forget it. No hovering, no constant checking. It’s a lifesaver for busy parents, working professionals, or anyone who just wants to come home to a delicious, pre-made meal. And let’s talk COST-EFFICIENCY. Using a more economical cut of beef and simple pantry staples makes this an incredibly budget-friendly meal that doesn’t skimp on taste or satisfaction. Finally, its VERSATILITY is a huge plus. While it’s fantastic on its own, you can easily adapt it by adding different vegetables or serving it over mashed potatoes, noodles, or even rice. What I love most about this is that it feels like a special occasion meal, but it’s so darn easy. It’s the kind of recipe that builds confidence in the kitchen and makes everyone at your table feel cherished. It’s a more relaxed version of my Grandma’s classic oven-baked pot roast, and honestly, the tenderness you get from the slow cooker is unbeatable.
How do I make slow cooker pot roast?
Quick Overview
Making this pot roast is astonishingly straightforward. You’ll start by searing the beef to lock in those rich flavors, then it’s just a matter of layering your vegetables and aromatics in the slow cooker, adding the liquid, and letting the magic happen. The low and slow cooking process will tenderize the meat beautifully, creating a dish that’s both hearty and incredibly comforting. It’s the ultimate set-it-and-forget-it meal, perfect for those days when you need dinner to be one less thing to worry about.
Ingredients
What is the recipe for pot roast?
A good 3-4 pound chuck roast is your star here. Don’t shy away from a little marbling; that’s where all the flavor and tenderness comes from! I like to trim off any excess, really thick fat, but leave some for richness.
2 tablespoons olive oil or vegetable oil for searing. This step is crucial for developing that deep, caramelized flavor on the outside of the roast. You can skip it if you’re in a super rush, but trust me, it’s worth it!
1 large onion, roughly chopped. Yellow or white onions work beautifully, adding a sweet foundation.
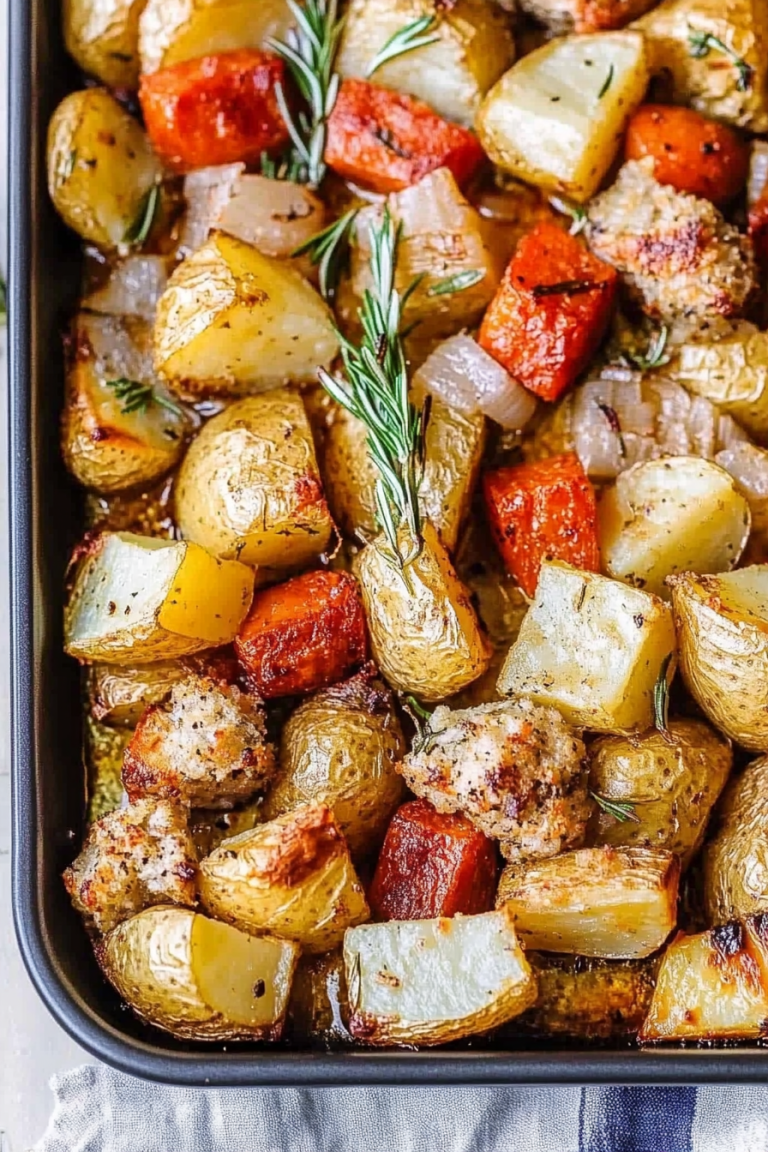
3-4 carrots, peeled and cut into large chunks. I prefer larger pieces so they don’t get too mushy.
3-4 celery stalks, cut into large chunks. They add that classic mirepoix base and a subtle savory note.
4-5 cloves garlic, smashed or roughly chopped. Garlic is non-negotiable for that irresistible aroma and flavor.
1 teaspoon dried thyme. Or a couple of fresh sprigs if you have them!
1 teaspoon dried rosemary. Again, fresh is lovely too!
Salt and freshly ground black pepper, to your liking. Don’t be shy with the seasoning; it makes a big difference.
2 cups beef broth. Low-sodium is a good choice so you can control the saltiness yourself.
1/2 cup dry red wine (optional, but highly recommended!). A Cabernet Sauvignon or Merlot adds wonderful depth. If you prefer not to use alcohol, just add an extra 1/2 cup of beef broth or water.
2 tablespoons Worcestershire sauce. This little bottle of magic adds a ton of umami complexity.
1 tablespoon cornstarch mixed with 2 tablespoons cold water (for thickening the gravy, optional).
Step-by-Step Instructions
Step 1: Sear the Roast
This is the first crucial step for maximum flavor. Pat your chuck roast completely dry with paper towels. This helps it get a beautiful sear instead of steaming. Heat the olive oil in a large, oven-safe skillet or Dutch oven over medium-high heat until it’s shimmering. Carefully place the roast in the hot oil and sear for about 3-4 minutes per side, until it’s deeply browned. Don’t overcrowd the pan; sear in batches if necessary. Once seared, transfer the roast to your slow cooker insert. This browning creates a fantastic flavor foundation.
Step 2: Sauté Aromatics
In the same skillet you seared the roast in (don’t clean it!), add your chopped onion, carrots, and celery. Cook over medium heat for about 5-7 minutes, stirring occasionally, until the onions are softened and slightly translucent. Add the smashed garlic and cook for another minute until fragrant. This step really awakens the vegetables and builds another layer of flavor.
Step 3: Deglaze the Pan
Pour in the red wine (if using) and scrape up any browned bits stuck to the bottom of the skillet with a wooden spoon. Let it simmer for a minute or two to reduce slightly. If you’re not using wine, you can skip this step or use a splash of beef broth to scrape up the bits. This is where all that delicious caramelized goodness from searing the meat lives!
Step 4: Assemble in Slow Cooker
Pour the sautéed vegetables and any liquid from the skillet over the seared roast in the slow cooker. Sprinkle the dried thyme and rosemary over everything. Season generously with salt and freshly ground black pepper. Make sure to season both the meat and the vegetables well!
Step 5: Add Liquids
Pour the beef broth and Worcestershire sauce around the roast. The liquid shouldn’t completely cover the roast; it’s meant to braise, not boil. Make sure the liquid comes up about halfway to two-thirds of the way up the side of the roast.
Step 6: Slow Cook to Perfection
Cover the slow cooker and cook on LOW for 8-10 hours, or on HIGH for 4-5 hours, or until the roast is fork-tender. The exact time will depend on your slow cooker and the size of your roast. I usually do it on low because I love the smell of it cooking all day, and it guarantees super tender results. I always test it by trying to pull it apart with two forks – if it shreds easily, it’s ready!
Step 7: Thicken the Gravy (Optional)
Once the roast is tender, carefully remove it from the slow cooker and place it on a cutting board. The vegetables should be soft and delicious. Skim off any excess fat from the liquid in the slow cooker if you like. If you want a thicker, richer gravy, whisk together the cornstarch and cold water in a small bowl to make a slurry. Pour this slurry into the slow cooker liquid, turn the slow cooker to HIGH (if it’s not already), and cook for another 10-15 minutes, stirring occasionally, until the gravy has thickened. Taste and adjust seasoning if needed.
Step 8: Rest and Slice
While the gravy thickens, let the roast rest for about 10-15 minutes. This is super important for juicy meat! Once rested, you can shred it with two forks or slice it against the grain. Either way, it will be incredibly tender.
Step 9: Serve and Enjoy!
Serve the shredded or sliced pot roast with plenty of the tender vegetables and the delicious gravy spooned over the top. It’s pure comfort on a plate!
What to Serve It With
This slow cooker pot roast is a meal in itself, but here are some of my favorite ways to serve it up, depending on the mood and the occasion:
For Breakfast: Okay, hear me out! Leftover pot roast is AMAZING in breakfast hashes. Just chop it up, sauté it with some diced potatoes, onions, and bell peppers, and top with a fried egg. It’s a hearty start to the day that will keep you full for hours!
For Brunch: This is where it shines as a main event. Serve generous portions of the shredded beef and vegetables over creamy mashed potatoes. A dollop of sour cream or a sprinkle of fresh parsley makes it look extra special. For drinks, a light-bodied red wine or even a crisp cider pairs wonderfully.
As Dessert: Okay, this isn’t *dessert* dessert, but as a substantial, comforting main course that satisfies those sweet cravings for savory goodness. It’s the perfect dish for a cozy evening where you just want something deeply satisfying. I often serve it with crusty bread for dipping into that rich gravy – it’s like a warm hug.
For Cozy Snacks: Got a craving for something savory and stick-to-your-ribs? This pot roast is perfect. Serve it in smaller portions over a bed of egg noodles or even in a big, fluffy dinner roll like a pot roast sandwich. My kids love it this way, and it disappears in minutes!
My family tradition is to serve it over fluffy mashed potatoes, with a side of green beans or roasted Brussels sprouts. It feels incredibly complete and satisfying. It’s also fantastic served over creamy polenta or even a thick layer of buttered noodles.
Top Tips for Perfecting Your Slow Cooker Pot Roast
After making this recipe more times than I can count, I’ve picked up a few tricks that I think really elevate it. Here are my absolute must-know tips:
Sear is Your Friend: Seriously, don’t skip searing the roast. Patting it completely dry before searing is key. You want that deep, golden-brown crust. It adds so much depth of flavor that you just can’t get otherwise. It’s the difference between good and *great*.
Don’t Overcrowd the Veggies: When you add the carrots and celery, make sure they’re cut into substantial chunks. If they’re too small, they’ll turn to mush during the long cooking time. I like my veggies to hold their shape and soak up the flavor, not dissolve into the gravy.
Season Generously: I can’t stress this enough. Pot roast needs a good amount of salt and pepper. The meat is hearty, and the vegetables need to be seasoned too. Taste your gravy at the end and adjust, but start with a good foundation of seasoning throughout the process.
Low and Slow is the Way to Go: While you *can* cook this on high, cooking it on low for 8-10 hours yields the most incredibly tender, fall-apart meat. It’s worth planning ahead. I often put it in before I leave for work and come home to a perfectly cooked meal.
Deglazing Magic: If you sear your meat in a pan, don’t wash it! Deglazing with red wine or broth captures all those delicious browned bits (fond) left in the pan. This is concentrated flavor, and it makes a huge difference in the final gravy.
Herb Power: Fresh herbs are wonderful, but dried work perfectly well. If using fresh thyme or rosemary, add the sprigs whole towards the end of cooking or remove them before serving. Dried herbs are great to add at the beginning with the other seasonings.
Gravy Thickness Control: The cornstarch slurry is my secret weapon for a perfectly thick gravy. If you prefer a thinner gravy, just use less cornstarch or skip it altogether. If it’s too thick, you can always thin it with a little more beef broth or water.
Resting is Key: Just like with any roasted meat, letting the pot roast rest before slicing or shredding allows the juices to redistribute throughout the meat. This results in a more tender and moist final product. I’ve learned this the hard way after slicing into piping hot meat and watching all the juices run out!
Storing and Reheating Tips
This pot roast is fantastic for leftovers, which is another reason I love it so much. It often tastes even better the next day as the flavors continue to meld.
Room Temperature: If you’ve just finished serving and have leftovers, it’s best to let them cool down slightly before storing. You don’t want to leave them at room temperature for more than two hours to avoid any bacterial growth. Once cooled a bit, transfer to airtight containers.
Refrigerator Storage: Store your leftover pot roast and gravy in airtight containers in the refrigerator for up to 3-4 days. The meat will stay moist, and the vegetables will hold their texture reasonably well. I find it’s best to store the meat and vegetables together with some gravy to keep everything from drying out.
Freezer Instructions: This pot roast freezes beautifully! Let it cool completely, then pack it into freezer-safe containers or heavy-duty freezer bags. You can freeze the meat and vegetables together with the gravy. It should last for about 2-3 months. For best quality, I recommend freezing in individual or family-sized portions so you can thaw only what you need.
Thawing Methods: The best way to thaw frozen pot roast is in the refrigerator overnight. If you’re in a hurry, you can thaw it in the microwave on the defrost setting, but be sure to cook it immediately after thawing. For reheating, I usually transfer the frozen portion to a microwave-safe dish and heat gently until warmed through.
Glaze Timing Advice: If you’ve made the gravy, it’s best to store it separately or make sure it’s well-distributed with the meat and vegetables before storing. When reheating, you can add a splash more broth if the gravy has thickened too much during storage. If you’re planning to freeze, it’s often best to freeze the meat and veggies without the gravy and make a fresh batch of gravy upon reheating, though it’s still delicious if frozen together.
Frequently Asked Questions
Final Thoughts
There you have it – my absolute favorite way to make pot roast, completely stress-free thanks to my trusty slow cooker. It’s more than just a recipe; it’s a warm hug on a plate, a taste of home, and proof that delicious, comforting meals don’t have to be complicated. This recipe has saved me on so many busy evenings, and seeing my family’s happy faces when they dig into it makes all the effort (which is minimal!) completely worth it. If you’re looking for a hearty, flavorful, and incredibly forgiving meal, I truly hope you’ll give this slow cooker pot roast a try. It’s a keeper, I promise! If you love hearty, comforting dishes like this, you might also enjoy my slow cooker beef stew or my ridiculously easy chicken pot pie. I can’t wait to hear how yours turns out! Please leave a comment below with your thoughts, any variations you tried, or even just to say hello. Happy cooking!

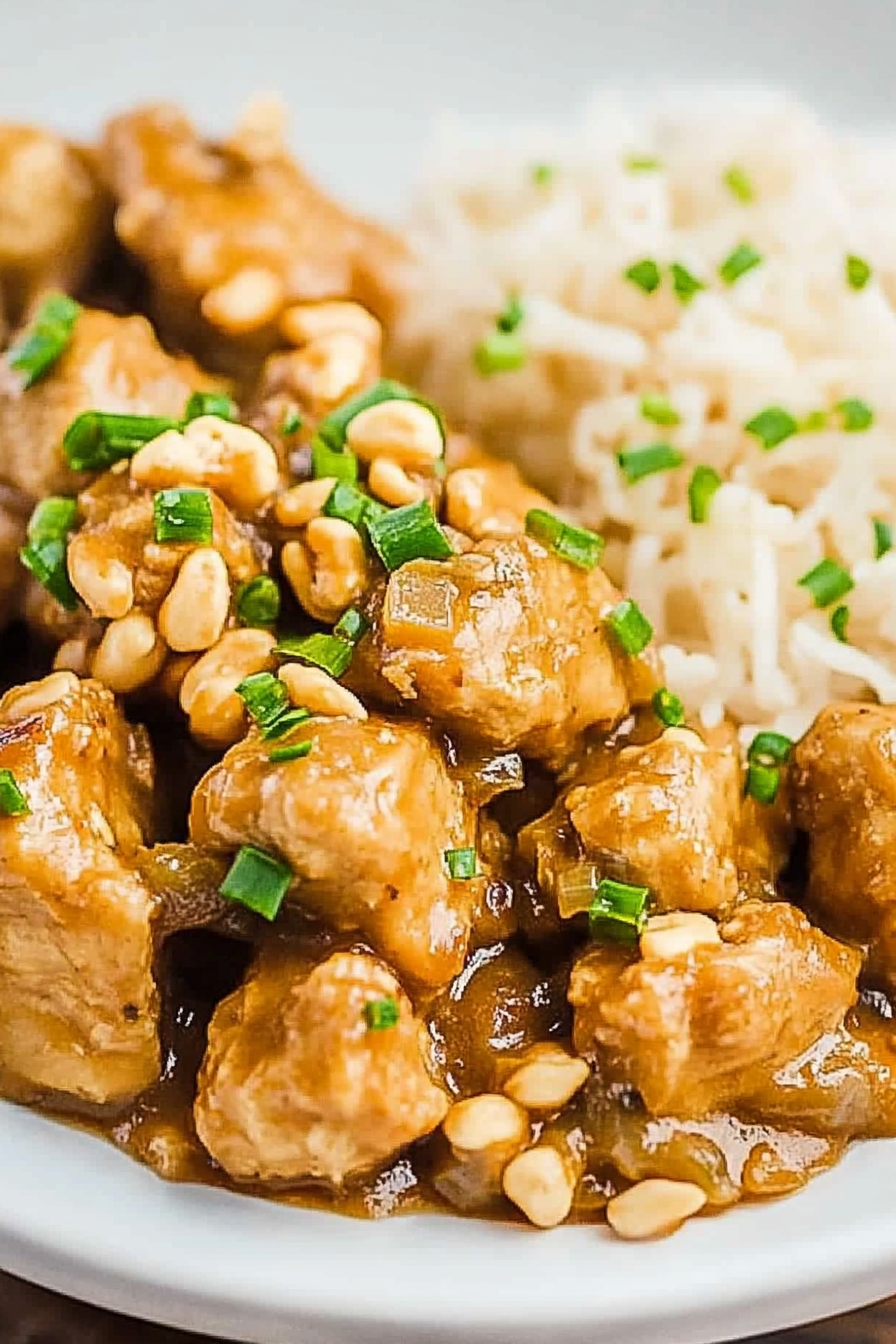
Slow Cooker Thai Peanut Chicken
Ingredients
Method
- Line a 6-quart slow cooker with a liner if using one. Liners are preferred for easy cleanup.
- Drizzle olive oil over the bottom of the liner or slow cooker.
- To a large, gallon-sized ziptop plastic bag, add the chicken, cornstarch, salt, and pepper. Seal the bag and toss to coat the chicken evenly. Add the coated chicken to the slow cooker, distributing it evenly. Set aside.
- In a medium bowl, combine the coconut milk, peanut butter, soy sauce, honey, rice wine vinegar, lime juice, sesame oil, ginger, garlic powder, and optional cayenne pepper. Whisk until well combined. Tip: If your peanut butter is resistant to smoothing out, place the bowl in the microwave and heat on high power for 30-second bursts, ensuring the bowl is microwave-safe.
- Pour the sauce mixture over the chicken in the slow cooker. Use a spoon to distribute the sauce if necessary, ensuring all chicken pieces are coated. The sauce will appear to be a lot, but it reduces by at least half during cooking.
- Cook covered on high for about 2 hours or on low for about 4 hours. If cooking on high, start checking at 90 minutes. If cooking on low, start checking at 3 hours. Slow cookers vary, so cook until the chicken is done (reaches 165°F on an instant-read thermometer).
- Serve the chicken hot, spooning extra cooking sauce over the top as desired. Garnish with chopped peanuts, optional cilantro, and optional green onions.