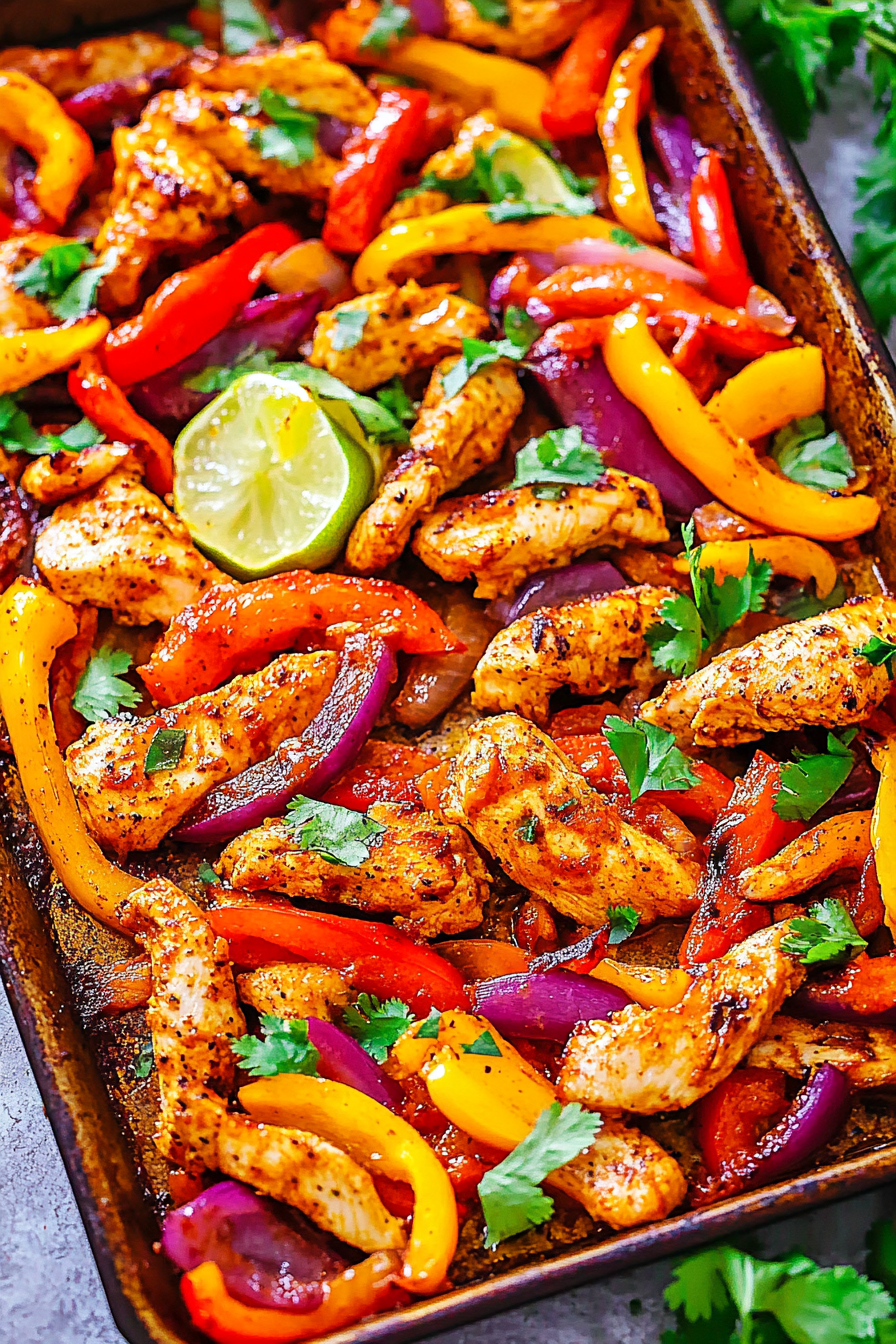
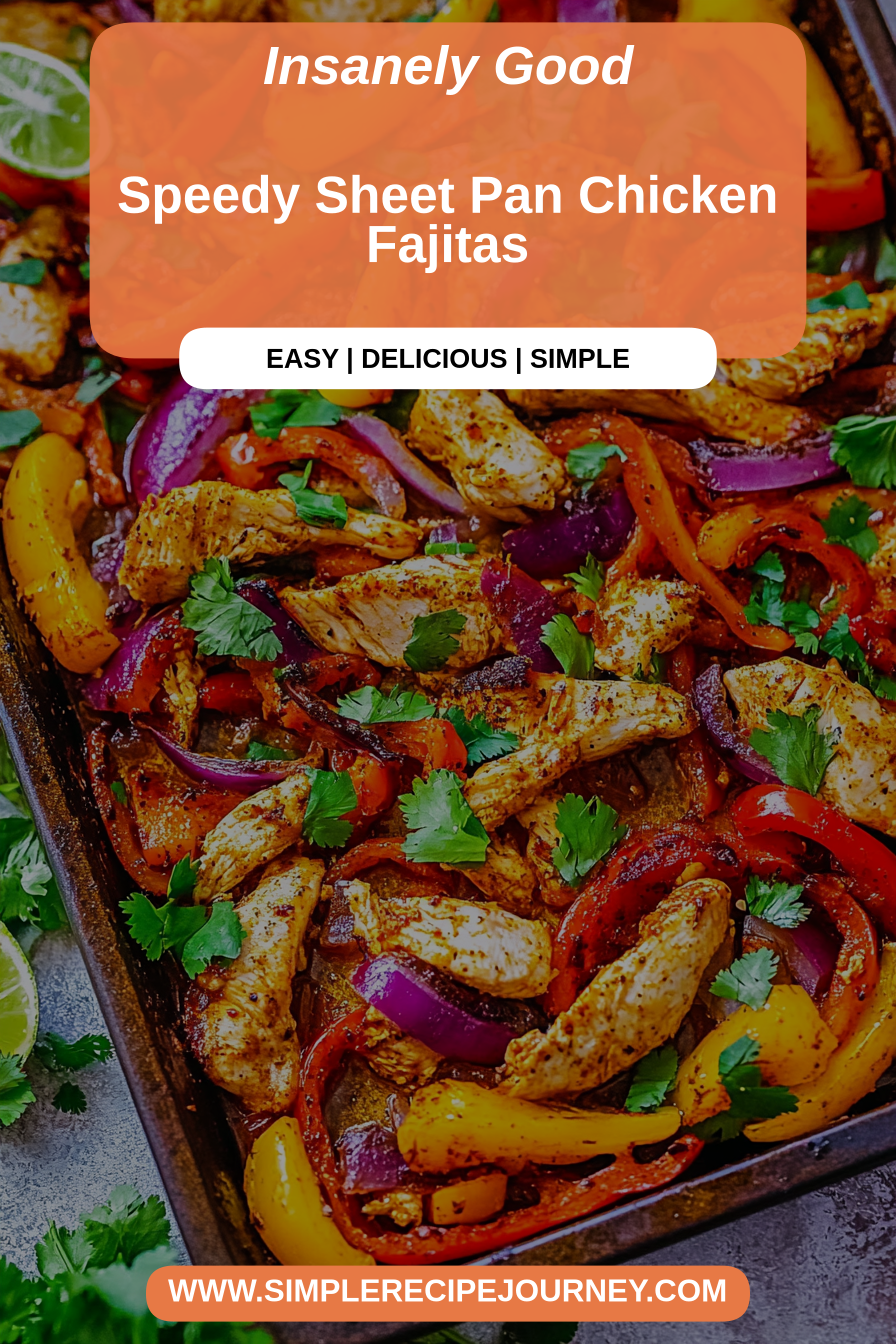
Speedy Sheet Pan Chicken Fajitas
You know those nights, right? The ones where the clock is ticking, the fridge looks a bit sad, and the thought of actually *cooking* feels like a marathon. Yeah, those are my nemesis. But over the years, I’ve found my secret weapon, my culinary cavalry, my absolute go-to for those moments: sheet pan chicken fajitas. Seriously, if you haven’t tried making fajitas entirely on one pan, you are in for such a treat. It’s a game-changer! It tastes like you spent hours slaving away, but in reality, it’s so ridiculously simple. Think vibrant colors, mouthwatering aromas filling your kitchen, and a meal that practically assembles itself. It’s like a fiesta on a baking sheet, and the cleanup? A dream!
What are sheet pan chicken fajitas?
So, what exactly are we talking about here? Well, at its heart, sheet pan chicken fajitas is all about taking those classic, vibrant flavors and textures we love about traditional fajitas – the sizzling peppers, the tender chicken, the smoky spices – and doing it all on, you guessed it, a single sheet pan in the oven. No juggling multiple pans on the stovetop, no constant stirring. You chop, you toss, you bake. It’s that simple. The name itself pretty much tells the story: chicken, fajita fixings, and a sheet pan. But the magic is in how all those ingredients caramelize and meld together in the oven, creating a depth of flavor that’s honestly surprising for how little effort it takes. It’s a modern, streamlined take on a beloved favorite, perfect for busy weeknights or even casual weekend gatherings.
Why you’ll love this recipe?
Oh, where do I even begin? There are so many reasons why this sheet pan chicken fajitas recipe has earned a permanent spot in my recipe rotation. First off, the flavor explosion is just incredible. You get that slightly charred, sweet edge on the peppers and onions, the chicken is perfectly cooked and infused with all those wonderful spices, and when it all comes together? Pure magic. What I love most about this recipe is its sheer simplicity without sacrificing taste. I mean, who doesn’t love a meal where most of the cooking happens hands-off in the oven? It means I can actually relax for a bit, or help the kids with homework, instead of being tethered to the stove. And let’s talk about cleanup – it’s a lifesaver! One pan to wash, maybe a cutting board and knife, and that’s it. Compare that to a traditional stovetop fajita night, and it’s a no-brainer. Plus, it’s super budget-friendly. You’re using everyday ingredients that you can often find on sale. And the versatility! You can serve these fajitas in so many ways, which I’ll get into later, making it a meal that never gets boring. It’s honestly the perfect solution when you want something delicious, impressive, and stress-free.
How do I make a sheet pan chicken fajita?
Quick Overview
This couldn’t be easier! You’ll simply chop your chicken and veggies, toss them with a vibrant spice blend and a little oil, spread everything out on a baking sheet, and roast until perfectly tender and slightly caramelized. It’s all about getting that amazing flavor development with minimal fuss. The oven does all the heavy lifting, making this a stress-free meal from start to finish. You’ll be amazed at how much flavor can be packed onto one pan!
Ingredients
What are some of the best pantry staples to get your fiesta going
For the Chicken and Veggies:
– 1.5 lbs boneless, skinless chicken breasts or thighs, cut into bite-sized pieces (I often use thighs because they stay extra juicy, but breasts are great too!)
– 2 bell peppers (any color combo you like – I usually go for red and green for that classic look), seeded and sliced
– 1 large onion (yellow or red), sliced
– 1 tablespoon olive oil or avocado oil (use what you have on hand!)
For the Fajita Seasoning:
– 2 teaspoons chili powder (smoked paprika is a great addition here too!)
– 1 teaspoon cumin
– 1/2 teaspoon garlic powder
– 1/2 teaspoon onion powder
– 1/4 teaspoon dried oregano
– 1/4 teaspoon smoked paprika (optional, but highly recommended for that smoky depth)
– Pinch of cayenne pepper (adjust to your spice preference – I usually add just a tiny bit for a hint of warmth)
– Salt and freshly ground black pepper to taste
For Serving (Optional, but highly recommended!):
– Warm tortillas (corn or flour, your choice!)
– Lime wedges
– Your favorite salsa
– Sour cream or plain Greek yogurt
– Shredded cheese (cheddar or Monterey Jack are classic)
Step-by-Step Instructions
Step 1: Preheat & Prep Pan
First things first, get that oven preheating to 400°F (200°C). While it’s heating up, grab a large baking sheet. You can line it with parchment paper or foil for even easier cleanup, though it’s not strictly necessary. I usually just toss everything right onto the sheet pan, and it’s never been a problem. Just make sure your pan is large enough to hold everything in a single layer – this is key for everything to roast nicely instead of steaming.
Step 2: Mix Dry Ingredients
In a small bowl, whisk together all the fajita seasoning ingredients: chili powder, cumin, garlic powder, onion powder, oregano, smoked paprika (if using), cayenne pepper, salt, and black pepper. Give it a good stir to make sure everything is well combined. This blend is what’s going to give your fajitas that irresistible flavor, so don’t skip this step! Having it pre-mixed means you can just sprinkle it over everything.
Step 3: Mix Wet Ingredients
This step is super simple! You don’t really have separate “wet” ingredients in the traditional sense for the main mixture. The olive oil will coat everything. So, you’ll place your cut chicken, sliced bell peppers, and sliced onion directly onto your prepared baking sheet. Then, drizzle the tablespoon of olive oil all over them. Don’t be shy; you want everything nicely coated so the spices stick and the veggies get a little tender and caramelized.
Step 4: Combine
Now it’s time to bring it all together. Sprinkle the pre-mixed fajita seasoning evenly over the chicken and vegetables on the baking sheet. Using your hands (my favorite way to mix!) or a large spoon, toss everything together until the chicken and veggies are thoroughly coated in the spices. Make sure there are no dry spots. You want every piece to have a nice, even layer of that delicious seasoning. This ensures consistent flavor in every bite.
Step 5: Prepare Filling
This step is actually already done! We’ve combined the chicken and veggies and seasoned them all together. This is the beauty of the sheet pan method – everything cooks at the same time, absorbing all those wonderful flavors. So, no separate preparation needed for the “filling” component; it’s all right there on your baking sheet, ready to go into the oven!
Step 6: Layer & Swirl
This part is more about even distribution. Once everything is seasoned and tossed, spread the chicken and vegetables out into a single, even layer on the baking sheet. This is crucial. If you pile everything up, the chicken on top might cook too quickly, or the veggies underneath might steam instead of roast. You want them to have direct contact with the hot pan so they get those lovely crispy edges and slightly caramelized bits. So, take a moment to arrange everything nicely. A nice, even layer ensures even cooking.
Step 7: Bake
Pop that baking sheet into your preheated oven. Now, here’s where the magic happens. You’re going to bake for about 20-25 minutes. The exact time will depend a bit on your oven and the size of your chicken pieces. You’re looking for the chicken to be cooked through (no pink inside!) and the vegetables to be tender and slightly charred at the edges. I like to give it a good stir about halfway through, around the 10-15 minute mark, to ensure everything cooks evenly and gets that lovely caramelization on all sides.
Step 8: Cool & Glaze
Once everything is perfectly roasted, carefully remove the baking sheet from the oven. Let it rest for just a couple of minutes. While it’s resting, if you were planning on adding any sort of glaze or finishing sauce (which isn’t typical for these fajitas, but you could!), this would be the time. For these classic sheet pan fajitas, the “glaze” is really the natural juices and slightly crispy bits that have formed on the pan. Resist the urge to scrape it all down immediately; let those flavors mingle for a moment.
Step 9: Slice & Serve
Now for the best part – serving! You can serve everything right from the pan, family-style, or plate it up individually. Spoon the chicken and veggie mixture onto warm tortillas. Add your favorite toppings like fresh salsa, a dollop of sour cream or Greek yogurt, a squeeze of fresh lime juice, and some shredded cheese. The aroma alone will have everyone at the table excited! Trust me, this is going to be a new favorite for your family too.
What to Serve It With
The beauty of these sheet pan chicken fajitas is their inherent versatility. They’re fantastic on their own, but they also make a wonderful base for so many different meal ideas. For a classic breakfast, I love serving them alongside scrambled eggs and a side of freshly squeezed orange juice. The savory flavors are a perfect counterpoint to sweet juice. For brunch, consider serving them as part of a build-your-own fajita bar! Offer bowls of shredded lettuce, pico de gallo, guacamole, and sour cream, alongside warm corn and flour tortillas. It’s interactive and always a hit. As a lighter, healthier dessert alternative (or a fun light lunch!), I sometimes skip the tortillas and serve the chicken and veggie mixture over a bed of fluffy quinoa or brown rice. Top with a little avocado and a lime wedge, and it’s incredibly satisfying. For those truly cozy nights when you want comfort food that’s still relatively healthy, I often just serve them in bowls with a side of black beans and a sprinkle of cilantro. It’s a simple, wholesome meal that feels indulgent.
Top Tips for Perfecting Your Sheet Pan Chicken Fajitas
I’ve made these countless times, and over the years, I’ve picked up a few tricks that really elevate them from good to absolutely fantastic. First, about the veggies: make sure you slice your bell peppers and onions relatively uniformly. This helps them cook at the same rate. If you have a really thick piece of onion and a thin strip of pepper, one will be perfectly cooked while the other is either mushy or still too firm. I always go for about 1/4-inch thick slices for everything. For the chicken, whether you choose breasts or thighs, try to cut them into roughly equal bite-sized pieces. This ensures they all cook through in the same amount of time as the veggies. Overmixing the spices is a no-no; you want to coat everything evenly without overworking the chicken. If you’re using chicken breasts, I’ve found that cooking them for just a tad less time than the veggies (maybe pull them out a minute or two early if you’re worried about them drying out) and then returning them to the pan for the last few minutes can help keep them super tender. Ingredient swaps are totally doable! If you don’t have all the spices, just use your favorite chili powder blend. Don’t have bell peppers? Use zucchini or even some broccoli florets – just adjust cooking time as needed. For baking, I’ve learned that placing the baking sheet on the middle rack of your oven is usually best. It allows for even heat circulation. If your oven tends to cook hotter on one side, rotating the pan halfway through the cooking time is a good idea. And for that extra touch of flavor, don’t underestimate the power of a final squeeze of fresh lime juice right before serving – it really brightens everything up!
Storing and Reheating Tips
One of the things I adore about sheet pan chicken fajitas is how well they store and reheat. If you happen to have any leftovers (which is rare in my house, but it happens!), let them cool completely before storing. For room temperature storage, I wouldn’t leave them out for more than two hours, as with any cooked chicken dish. Once cooled, transfer the fajita mixture to an airtight container. In the refrigerator, they’ll stay fresh and delicious for about 3-4 days. The flavors actually meld and deepen overnight, which is a nice bonus! When you’re ready to reheat, you have a few options. The easiest is to simply microwave them until heated through. However, for the best texture, I highly recommend reheating them in a skillet over medium heat, stirring occasionally, until they’re nice and hot. This helps revive some of that slight char and prevents them from becoming watery. You can also spread them on a baking sheet and reheat them in a 350°F (175°C) oven for about 10-15 minutes. If you’re planning to freeze them, make sure to do so before adding any fresh toppings like salsa or avocado. Transfer the cooled mixture to a freezer-safe container or heavy-duty freezer bag. They should keep well in the freezer for up to 2-3 months. To thaw, transfer them to the refrigerator overnight and then reheat as usual.
Frequently Asked Questions
Final Thoughts
Honestly, if you’re looking for a meal that delivers big on flavor with minimal effort, you really can’t go wrong with these sheet pan chicken fajitas. They’re the ultimate weeknight warrior – colorful, delicious, and incredibly easy to clean up. I’ve served these to picky eaters, dinner guests, and just for my own family on a Tuesday night, and they’re always met with smiles and requests for seconds. It’s one of those recipes that makes you feel like a kitchen rockstar without actually having to do all that much work. If you enjoyed this, you might also like my one-pan lemon herb roasted chicken and veggies, or my quick and easy black bean tacos – anything that promises deliciousness with easy cleanup! I can’t wait to hear what you think and how yours turn out. Please feel free to leave a comment below and tell me about your favorite fajita toppings or any fun variations you tried. Happy cooking!
Sheet Pan Chicken Fajitas
Ingredients
Method
- Preheat oven to 425°F (use Convection if you have it), line half sheet pan with foil for easier cleanup if desired, and add the chicken, peppers, and onions.
- Evenly drizzle with the olive oil, and evenly sprinkle the chili powder, cumin, Mexican oregano, smoked paprika, garlic powder, salt, pepper, and using your hands, toss to evenly coat. Bake for about 20 to 25 minutes. Midway through cooking, stir the ingredients and rotate the pan to ensure even cooking.
- Optionally garnish with cilantro, lime juice, add filling mixture to the tortillas, and serve immediately. Recipe will keep airtight in the fridge for up to 5 days.