Autumn Delight A Simple Pumpkin Lush
There’s something about autumn that just calls for cozy, comforting treats. I remember curling up on the couch with a warm mug in hand, the scent of pumpkin and cinnamon filling the air, and my grandma’s famous pumpkin lush sitting on the table. It’s funny how certain recipes have a way of whisking you straight back to those moments—this one’s no different. I’ve made it so many times now that I don’t even need a recipe card; it’s become my go-to when I want something sweet, easy, and downright addictive. And trust me, it’s simpler than it looks! My kids ask for this all the time, especially around Halloween, and it’s always the first thing to disappear at family dinners. If you love that rich, creamy pumpkin flavor with a hint of spice, you’re gonna fall in love with this — I promise. It’s basically like a no-bake pie layered with a crispy crust, a creamy filling, and a sweet glaze on top. Oh, and it’s a true crowd-pleaser — perfect for potlucks, holiday gatherings, or a cozy night in. Get ready for a recipe that’s become part of our family traditions, and I bet it’ll become one of yours too!
What is pumpkin lush?
Think of pumpkin lush as a little slice of autumn comfort in a layer. It’s a no-bake dessert that combines a crunchy graham cracker crust, a luscious pumpkin filling, and a sweet glaze that glistens beautifully when finished. The name might sound fancy, but it’s really just a fun, adorable way to describe this layered treat. It’s essentially a no-bake pumpkin pie that you assemble in a pan and chill until set, making it an instant hit for busy weekdays or last-minute gatherings. The pumpkin flavor is prominent but balanced out by the creamy sweetness and that slight crunch from the crust. It’s kind of like a pumpkin parfait or a chilled pumpkin cheesecake, but way easier—and no baking involved! What I love most about pumpkin lush is that it’s versatile; you can make it ahead of time, and it always looks stunning when served. Plus, it’s a hit with kids and adults alike, the kind of dessert everyone asks for year after year.
Why you’ll love this recipe?
Oh, where do I even start? First off, the flavor—bold, rich pumpkin with just enough spice to remind you of cozy fall mornings. It’s sweet but balanced, no cloying sugar overload here. I always do this when I want a dessert that impresses without taking hours in the kitchen. And the best part? It’s totally hands-off—no oven, no fuss. The ingredients are simple pantry staples—graham crackers, canned pumpkin, cream cheese, a little milk, and a handful of spices—and if you’re like me, you probably already have most of these in your kitchen. This dish is budget-friendly, too, which makes it even more appealing. My favorite thing? The way it looks on a fancy platter—like a layered cake, but without the work—and everyone’s surprised it’s so easy. It’s super versatile, too; you can serve it as a quick weeknight dessert or dress it up for a holiday party. Honestly, what I love most about this is how effortlessly it disappears. It’s a true family favorite, and I’m betting you’ll add it to your recipe file after just one try.
How do I make pumpkin lush?
Quick Overview
This dessert is a layered masterpiece that you assemble in a matter of minutes. First, you create a simple crust from crushed graham crackers mixed with melted butter and a splash of sugar. Next, you whip up a creamy pumpkin filling with softened cream cheese, canned pumpkin, milk, and spices—think cinnamon, nutmeg, and a pinch of ginger. And finally, a quick glaze made from powdered sugar and milk drapes everything in a shiny, sweet finish. The best part? Once layered, it needs a few hours in the fridge to set, and then you’re ready to dig in! It’s messy, yes—so I always line my pan with parchment paper for easy slicing—but that’s part of the fun. Honestly, it’s a foolproof process, and I love that you can make it ahead of time. It’s a no-bake dish, so even if you’re a beginner, you’ll find it’s so forgiving and stress-free.
Ingredients
For the Main Batter:
– 2 cups graham cracker crumbs (about 10-12 full sheets crushed) – look for whole grahams for better flavor
– 1/2 cup unsalted butter, melted
– 1/4 cup granulated sugar
For the Filling:
– 8 oz cream cheese, softened
– 1 can (15 oz) pumpkin puree (not pie filling)
– 1 cup whole milk (or almond milk for a dairy-free version)
– 1/2 cup powdered sugar
– 1 teaspoon ground cinnamon
– 1/2 teaspoon ground nutmeg
– 1/4 teaspoon ground ginger
– 1 teaspoon vanilla extract
For the Glaze:
– 1 cup powdered sugar
– 2-3 tablespoons milk (more for thicker glaze, less for runny)
– A splash of vanilla or maple syrup (optional for extra flavor)
Step-by-Step Instructions
Step 1: Preheat & Prep Pan
No oven needed, but I always line my 9×13 pan with parchment paper—trust me on this, it makes slicing so much easier! Just cut a piece to fit the bottom and a little over the edges. You can also lightly spray the pan if you prefer, but the parchment is my favorite hack because it lifts the whole thing out beautifully.
Step 2: Mix Dry Ingredients
In a medium bowl, combine the graham cracker crumbs, sugar, and melted butter. Mix until all the crumbs are coated and resemble wet sand. This mixture forms the perfect base—crispy, but not greasy. I always do this when I want a sturdy crust that holds the layers together without being too dense. Press this mixture evenly into the bottom of your prepared pan using the back of a spoon or a flat-bottomed cup. Chill in the fridge for about 10 minutes if you want it extra firm.
Step 3: Mix Wet Ingredients
In a large bowl, beat the softened cream cheese until smooth—this takes about a minute with an electric mixer. Add the pumpkin puree, milk, powdered sugar, cinnamon, nutmeg, ginger, and vanilla. Mix until everything’s well combined, smooth, and creamy. The smell alone will make you want to eat it with a spoon, but hold off—I promise, it’s worth the wait. I once tried this with half coconut milk and it was deliciously rich—so don’t be afraid to experiment a little with your favorites, especially if you like a creamier or lighter version.
Step 4: Combine
Spread the pumpkin mixture over the chilled crust. Use a spatula to smooth the top. If you want a marbled effect, gently dollop a few spoonfuls of plain whipped cream or vanilla pudding and swirl with a knife. Just be careful not to overmix—that’s how you get a nice layered look, not a muddy one.
Step 5: Prepare Filling
If you’re making a glaze, whisk together the powdered sugar, milk, and vanilla until smooth. The consistency should be pourable but not runny. Add extra powdered sugar for thickness or a splash more milk if it’s too thick. For a little extra flair, I sometimes stir in a teaspoon of maple syrup or vanilla extract for a richer flavor.
Step 6: Layer & Swirl
Pour the glaze over the chilled pumpkin layer. Use a spoon to spread it evenly and watch it shimmer—so pretty! If you want a decorative swirl, take a toothpick or skewer and draw some designs for a beautiful look. Once glazed, return the whole pan to the fridge for at least 3-4 hours, or overnight if you can wait. The longer it chills, the better it sets and the more the flavors meld together.
Step 7: Bake
Actually, no baking here—just chilling! But I do recommend letting it sit in the fridge for those few hours. This helps everything set beautifully and makes slicing a breeze. If you’re in a rush, even 2 hours will do, but I promise the flavor gets even better overnight.
Step 8: Cool & Glaze
If you want a shiny, fudgy look, add an extra layer of glaze right before serving. Trust me, it’s the finishing touch that makes it look store-bought—but way better. Keep it chilled until just before slicing to keep the layers firm and clean.
Step 9: Slice & Serve
Use a sharp knife dipped in hot water for clean cuts—your slices will look perfect, and the glaze will shine beautifully. Serve chilled with a dollop of whipped cream or a sprinkle of cinnamon if you’re feeling fancy. I love plating it on a rustic platter with some fresh berries or a fresh sprig of mint for a pretty presentation. My kids ask for this as a regular treat—especially after school or when their friends visit. It’s versatile enough for any celebration or just a cozy night at home. And honestly, it’s just as good the next day, if there’s any left!
What to Serve It With
This pumpkin lush is so flexible you can serve it in a bunch of ways. For a quick breakfast, I love offering a slice alongside my morning coffee with a cinnamon roll or apple muffin. The flavors complement each other perfectly, and it’s a sweet way to start the day. When I host brunch, I like to jazz it up with some fresh whipped cream, caramel drizzle, or chopped pecans sprinkled on top. It makes the presentation pop, and trust me, your guests will be impressed. As a dessert after dinner, it’s a showstopper—rich and creamy, but light enough to keep everyone feeling satisfied. Sometimes I serve it with a side of spiced apple cider or a hot pumpkin spice latte for that full-on fall vibe. And during casual weekends, I keep it simple with just a slice and a cup of chai—I swear, it’s comfort on a plate. This dish brings family and friends together, no matter how you slice it!
Top Tips for Perfecting Your Pumpkin Lush
Over the years, I’ve learned a few tricks that make this recipe even better. First, when preparing the crust, don’t skip the chilling step—gently pressing down with a flat-bottomed glass helps it stay sturdy when you cut into it later. If your filling looks a little loose, it’s okay—adding a touch more cream cheese helps it firm up during chilling. When mixing the pumpkin filling, don’t overmix—stir until just combined to keep it smooth but avoiding air bubbles. If you want a more intense spice flavor, just sprinkle in an extra pinch of nutmeg or some ground cloves. For a vibrant orange look, only add a few drops of food coloring, but honestly, I love seeing the natural pumpkin hue shining through—makes it so authentic! For a gluten-free crust, swap out the graham crackers for crushed digestive biscuits or almond flour, and press it tightly—trust me, it works! When baking (or chilling), keep the dish covered to prevent fridge odors from seeping in. And finally, don’t skimp on the glaze—it’s what makes this dessert so pretty and appealing. I tested a few variations with maple syrup instead of milk, which added a lovely depth, so get creative with your toppings and flavors. The key is to taste as you go—adjust sweetness and spices until it’s just right.
Storing and Reheating Tips
This dessert actually gets better with time, so don’t worry if you need to make it a day ahead. Cover tightly with plastic wrap or store in an airtight container to keep it fresh. At room temperature, pumpkin lush is best consumed within 2 hours—after that, the dairy components might start to spoil. In the refrigerator, it stays good for up to 3 days—just make sure it’s covered well so it doesn’t soak up other fridge smells. If you’re leftovers-happy, you can freeze slices wrapped tightly in plastic wrap and foil—thaw overnight in the fridge, and they’ll still taste amazing. Just know that the glaze might slightly soften after freezing, but it’s hardly noticeable. When reheating, it’s best served cold or slightly chilled; re-heating isn’t necessary, and I find that the texture really benefits from sitting in the fridge. If you did add an extra glaze or topping, reapply just before serving for that shiny, fresh look. And if you’re cutting into it after storage, run your knife briefly under hot water to get clean, neat slices—trust me, it makes all the difference. This dessert is forgiving, so feel free to experiment with storing methods—just keep it wrapped well and enjoy alongside family or friends!
Frequently Asked Questions
Final Thoughts
There’s just something about pumpkin lush that makes me feel like I’ve captured the essence of fall—warm, sweet, and full of memories. It’s a recipe I’ve perfected over the years because it’s straightforward enough for a beginner but impressive enough to serve at special gatherings. Plus, it’s hard to beat a dessert that cools in the fridge all day and tastes like a hug in every bite. One bite and I bet you’ll be transported to cooler breezes, crackling leaves, and pumpkin spice lattes—and craving seconds. If you try it, I’d love to hear how it turns out! Share your tweaks and tips—I’m always experimenting myself. Happy baking, friends, and enjoy every spoonful of this cozy, creamy pumpkin lush—your family and friends will thank you!
Pumpkin Lush
Ingredients
Method
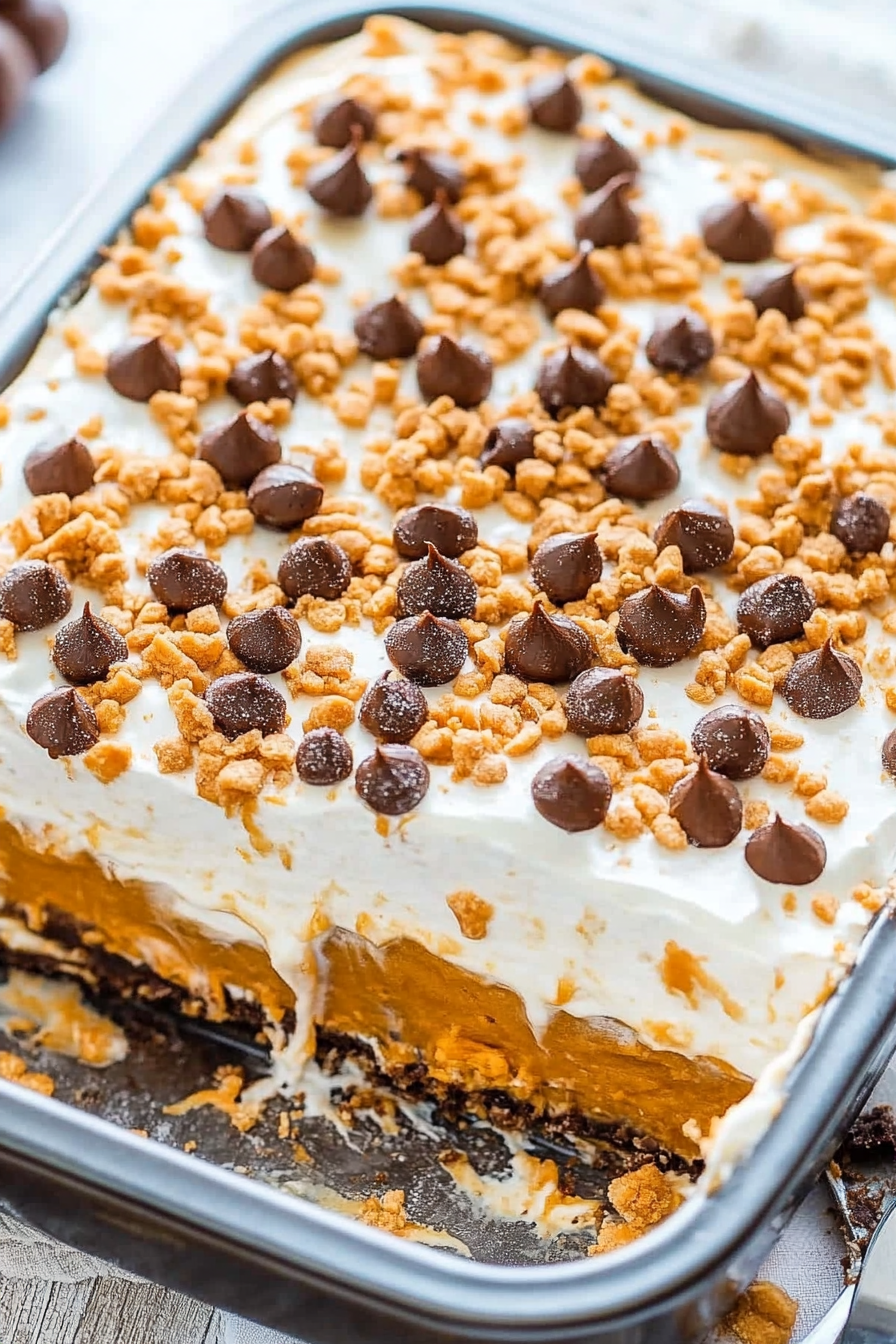
- Preheat oven to 350F. Line a 9x9 inch baking pan with foil and spray with cooking spray.
- Melt the butter in a microwave-safe bowl, about 1 minute.
- Add graham cracker crumbs and toss to coat evenly.
- Press mixture into prepared pan, forming an even crust.
- Bake for 10 minutes or until set; cool for 10 minutes.
- Mix cream cheese and confectioners’ sugar until smooth.
- Spread cream cheese mixture over crust in the pan.
- Prepare pudding by mixing pudding mix and milk until thickened.
- Add pumpkin puree and pumpkin pie spice to pudding; mix well.
- Fold in half of the whipped topping into pumpkin mixture.
- Spread pumpkin mixture over cream cheese layer.
- Evenly spread remaining whipped topping over the pumpkin layer.
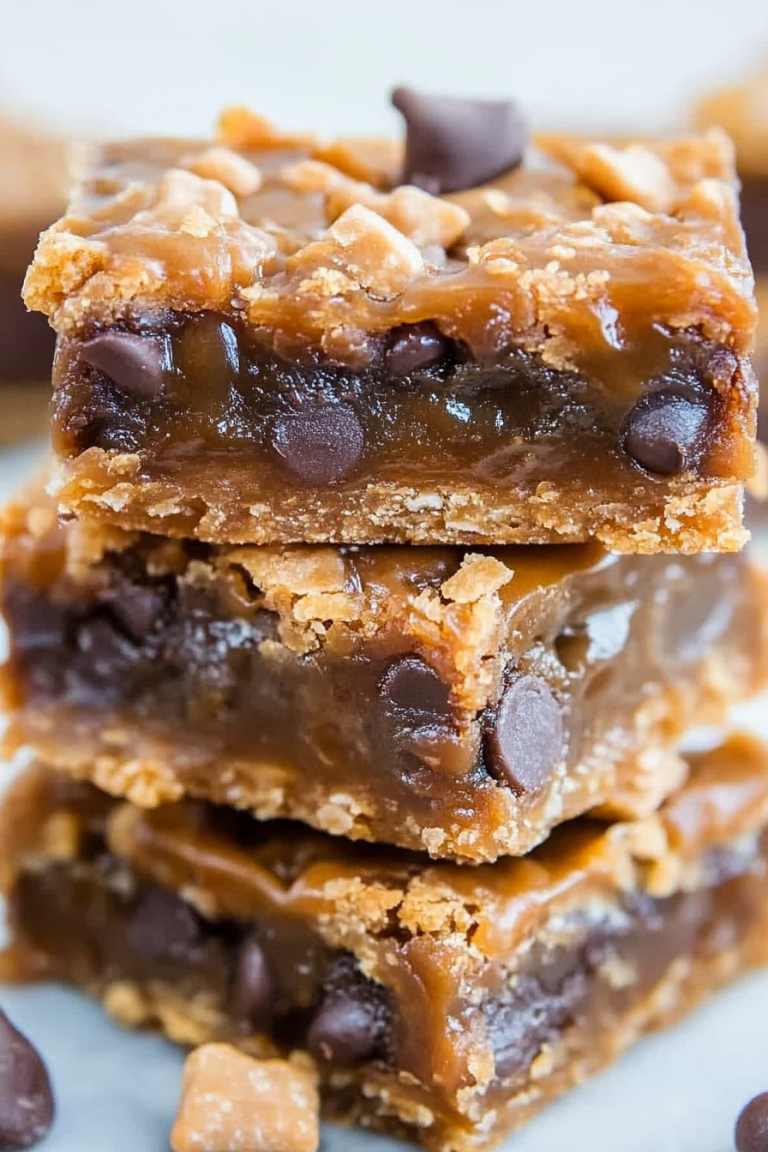
- Sprinkle toffee bits and chocolate chips on top and refrigerate for at least 4 hours.