Autumn Spice Cookies How to Bake Bliss
There’s something about the smell of fresh-baked pumpkin cookies that instantly takes me back to cozy fall mornings at my grandma’s house. The warm spices, the soft crumb, and that touch of pumpkin puree—it’s like a little slice of autumn in every bite. Honestly, these cookies are my secret weapon when I need a quick dose of comfort; they’re incredibly easy to make and always disappear in minutes at my house. My kids ask for these all the time, especially when pumpkin season hits, and I love how they’re perfect for both a casual afternoon snack or a festive holiday treat. Plus, I’ve tested this recipe with different kinds of flour and sweeteners, and let me tell you, it’s flexible enough to suit any diet or preference. Trust me, once you try these pumpkin cookies, they’ll become a regular fixture in your baking rotation. They’re a cozy little hug in cookie form, and honestly, I can’t imagine fall without them.
What is pumpkin cookie?
Think of pumpkin cookies as soft, tender cookies flavored with cozy spices and loaded with pumpkin goodness. They’re essentially a sweet, slightly spiced treat that uses pumpkin puree as one of its main ingredients—kind of like pumpkin bread’s cheeky little cousin in cookie form. The name “pumpkin cookies” is pretty straightforward, but what makes them special is how versatile they are. Whether you bake them plain, add chocolate chips, or swirl in cream cheese, they’re really a canvas for your seasonal cravings. The cookie dough itself is often super forgiving—think of it as a hug for your taste buds—and it’s the kind of recipe that’s perfect whether you’re a seasoned baker or just starting out. I’ve always loved how the pumpkin flavor balances beautifully with warm cinnamon, nutmeg, and a hint of ginger, giving these cookies that unmistakably fall-time vibe. They’re a little bit homey, a little bit fancy, and always ridiculously delicious.
Why you’ll love this recipe?
What I love most about these pumpkin cookies is how they manage to be cozy and festive without going overboard. The flavor is just right—the natural sweetness of the pumpkin combined with warm spices makes every bite feel like a little celebration. They’re surprisingly simple to make too! You basically toss your ingredients in one bowl, scoop them onto a baking sheet, and bake—no fancy equipment or hours of prep required. Plus, these cookies are budget-friendly. I usually keep a stash of canned pumpkin, spices, and pantry staples like flour and sugar, and I’m good to go. And the best part? They’re endlessly versatile. Want to add chocolate chips? Do it. Prefer a vegan or gluten-free version? No problem—just swap out a few ingredients, and these cookies adapt beautifully. What I love most is how these cookies are a crowd-pleaser—kids, grown-ups, everyone loves the comforting taste of pumpkin and spice. They’re perfect for baking with family, sharing with friends, or even just as a treat for yourself when night falls and you need a warm, sweet hug. Honestly, I’ve made these countless times, and they never fail to bring a smile to everyone’s face.
How do you make pumpkin cookies?
Quick Overview
This recipe is as straightforward as it gets, with a few simple steps that come together quickly. First, you’ll mix your dry ingredients, then whisk your wet ingredients, and gently combine everything without overmixing—that keeps the cookies nice and tender. The best part is adding your optional extras like chocolate chips or nuts before shaping the dough into balls. Then it’s into the oven for about 10-12 minutes, which honestly feels like no time at all. Once baked, you can decide whether to leave them simple or finish them off with a drizzle of glaze or a dusting of powdered sugar. The smell alone will have everyone coming to the kitchen! This method ensures cookies that are soft in the center, slightly crisp on the edges, and bursting with fall flavors. So, don’t worry if you’re new to baking—this is one of those recipes that feels almost foolproof and kinda fun to make.
Ingredients
For the Main Batter:
– 1 ½ cups all-purpose flour (or gluten-free flour blend)
– 1 teaspoon baking soda
– 1 teaspoon baking powder
– ½ teaspoon salt
– 2 teaspoons ground cinnamon
– 1 teaspoon ground ginger
– ½ teaspoon ground nutmeg
– ½ teaspoon ground cloves (optional but adds a cozy depth)
– ½ cup granulated sugar
– ½ cup packed light brown sugar
– ½ cup unsalted butter, softened (or coconut oil for dairy-free)
– ½ cup canned pumpkin puree (not pumpkin pie filling)
– 1 large egg (or flaxseed egg for vegan version)
– 1 teaspoon vanilla extract
For the Filling:
– Optional chocolate chips, walnuts, or raisins
– I always do a handful of chunky chocolate chips—you can’t go wrong!
– For a little twist, chopped pecans or walnuts add a nice crunch.
For the Glaze:
– ½ cup powdered sugar
– 1-2 teaspoons milk (dairy or non-dairy)
– A splash of vanilla or cinnamon for extra flavor
– Whisk until smooth, and drizzle over cooled cookies for that perfect finishing touch.
Step-by-Step Instructions
Step 1: Preheat & Prep Pan
Set your oven to 350°F (175°C) and line a baking sheet with parchment paper or a silicone baking mat. I always do this first so I don’t forget later—it keeps cleanup easy and the cookies non-stick. If your oven runs hot, keep an eye on the first batch to prevent over-baking. Have your ingredients ready and measured so you can work efficiently—that’s how I get these on the table quickly on busy mornings or after work.
Step 2: Mix Dry Ingredients
In a medium bowl, whisk together the flour, baking soda, baking powder, salt, and all the warm spices. This step ensures even distribution of the baking agents and spices so every cookie is bursting with flavor. I usually sift the ingredients or just whisk vigorously—trust me, it makes a difference in preventing clumps and uneven spice spots.
Step 3: Mix Wet Ingredients
In a large bowl, cream the softened butter and sugars until light and fluffy—this takes about 2-3 minutes with a hand or stand mixer. Add the pumpkin puree, egg, and vanilla, mixing just until combined. The mixture will be slightly thick and sticky, which is perfect. I’ve tested this with different pumpkin brands, and consistency matters—make sure your pumpkin is smooth and well combined for that moist texture that makes these cookies so tender.
Step 4: Combine
Gradually add your dry ingredients into the wet mixture, mixing on low speed or folding gently with a spatula. Be careful not to overmix—overworking the dough can make the cookies dense or tough. Just mix until the flour disappears and everything looks roughly combined. Think of it as the gentle touch—you want the dough to hold together, not be gummy or stiff.
Step 5: Prepare Filling
If you’re adding chocolate chips or nuts, fold them into the batter now. I love adding a handful of semi-sweet chocolate chips—because who doesn’t love gooey melted chocolate mixed with pumpkin spice? If you prefer dried fruit or nuts, fold those in instead. These little add-ins transform the flavor and texture, making each batch a little different and exciting.
Step 6: Layer & Swirl
Using a cookie scoop or just a spoon, scoop the dough onto the prepared baking sheet. For a pretty marbled or swirl effect, I sometimes drop a dollop of cream cheese or caramel in the center and use a toothpick or skewer to swirl it slightly. This step is optional but makes for a stunning presentation, especially for holiday platters. Keep some space between the cookies—they’ll spread a bit, so I usually leave about 2 inches in between.
Step 7: Bake
Bake for about 10-12 minutes or until the edges are just turning golden. The centers might look a little underdone, but they’ll firm up as they cool. I always take them out just before I think they’re perfect—I know, a little risky, but that’s how you get that melt-in-your-mouth texture. If your oven tends to be uneven, rotate the baking sheet halfway through baking for even doneness.
Step 8: Cool & Glaze
Let the cookies rest on the baking sheet for about 5 minutes to firm up before transferring to a wire rack. Once cooled, drizzle with your homemade glaze or dust with powdered sugar. I’ve tested the glaze with a splash of maple syrup instead of milk—it adds a lovely depth of flavor, and the sweetness balances beautifully with the spices.
Step 9: Slice & Serve
These cookies are best enjoyed slightly warm or at room temperature. If you’ve added glaze, wait until it’s set before stacking or storing. I love serving them on a pretty plate with a mug of hot tea or a cold glass of milk—so comforting. Honestly, these cookies taste like fall in every bite: cozy, sweet, and loaded with spice. My whole family asks for seconds every single time—I guess that’s the real test of success in my kitchen!
What to Serve It With
These pumpkin cookies are versatile enough to shine in pretty much any scenario. For a quick breakfast, pair them with a latte or a steaming mug of coffee—trust me, the aroma alone will perk you up. They make a lovely addition to brunch—stack them on a platter with cinnamon rolls and fruit, and your guests will be delighted. As a dessert, they’re fabulous on their own or topped with a dollop of whipped cream or a scoop of vanilla ice cream for added indulgence. My favorite family tradition? Serving these cookies with spiced apple cider during our autumn gatherings—they bring everyone to the table and evoke memories of seasonal festivals. When I need a little comforting treat, I’ll stick a warm cookie in my mug of hot chocolate. Simple, delicious, and always nostalgic.
Top Tips for Perfecting Your Pumpkin Cookies
Even after making these countless times, I’ve picked up a few tricks to make them even better. First, be sure to drain any excess moisture from your grated zucchini or pumpkin if you’re substituting ingredients—you don’t want overly wet dough, or your cookies might spread too much. I’ve learned that overmixing the dough can lead to denser cookies, so I always fold gently and stop mixing as soon as everything is just combined. Want to make them extra pretty? Use a cookie scoop and flatten each cookie slightly with your hand before baking—this helps them bake evenly and look picture-perfect. For substitutions, almond flour works well in small amounts, but I recommend sticking partly to all-purpose for best texture. If you’re looking for a vegan version, chia eggs or flaxseed meal do the trick just fine—my vegan friends swear by it. When baking, keep an eye on the edges—they’ll turn golden before the centers, which is the secret to that perfect tender crumb. For variations, I sometimes add a splash of maple or cinnamon schnapps to the glaze—the flavor profile just elevates the whole experience. Overall, don’t be afraid to experiment—once you nail a basic batch, you can have fun with different add-ins or spices to make it uniquely yours.
Storing and Reheating Tips
These cookies stay fresh surprisingly well—usually up to 3 days at room temperature in an airtight container. I recommend stacking them with a sheet of parchment between layers to prevent sticking. If it’s humid outside, a tight-sealing container or a cake keeper keeps them from getting soggy. To extend their life, pop them in the fridge—just make sure they’re well covered so they don’t dry out. They’re good for up to a week this way, though honestly, I doubt they’ll last that long because they’re so tempting. If you want to hold onto them longer, freeze them individually wrapped in plastic, then transfer to a freezer-safe bag—they keep for up to 3 months. When you’re ready to eat, just thaw at room temp or give them a quick 10-second zap in the microwave. As for the glaze, it’s best to add it after reheating if you’re storing the cookies; otherwise, it might become sticky or runny. When reheating, microwave on low for about 10-15 seconds—just enough to warm the center without drying out the cookie. These cookies taste just as good warm or at room temperature, so reheat them gently and enjoy.
Frequently Asked Questions
Final Thoughts
If you’ve been craving a fall-inspired treat that’s easy to whip up and filled with warm spices, these pumpkin cookies are hands down the way to go. They’re the kind of recipe that’s become a little tradition in my kitchen—something I make whenever I want to bring a bit of cozy comfort to the table. Each batch is a reminder of autumn’s simple pleasures: scents of cinnamon and nutmeg, the softness of pumpkin, and the joy of sharing a homemade sweet with loved ones. I encourage you to experiment with add-ins and flavor tweaks—maybe a splash of orange zest or a handful of chopped pecans? Whatever you do, I promise these cookies will become a favorite in your home too. Happy baking, and I’d love to hear how your batches turn out—leave a comment or share your favorite twist! Remember, baking is about enjoying the process and creating moments just as sweet as the cookies themselves.
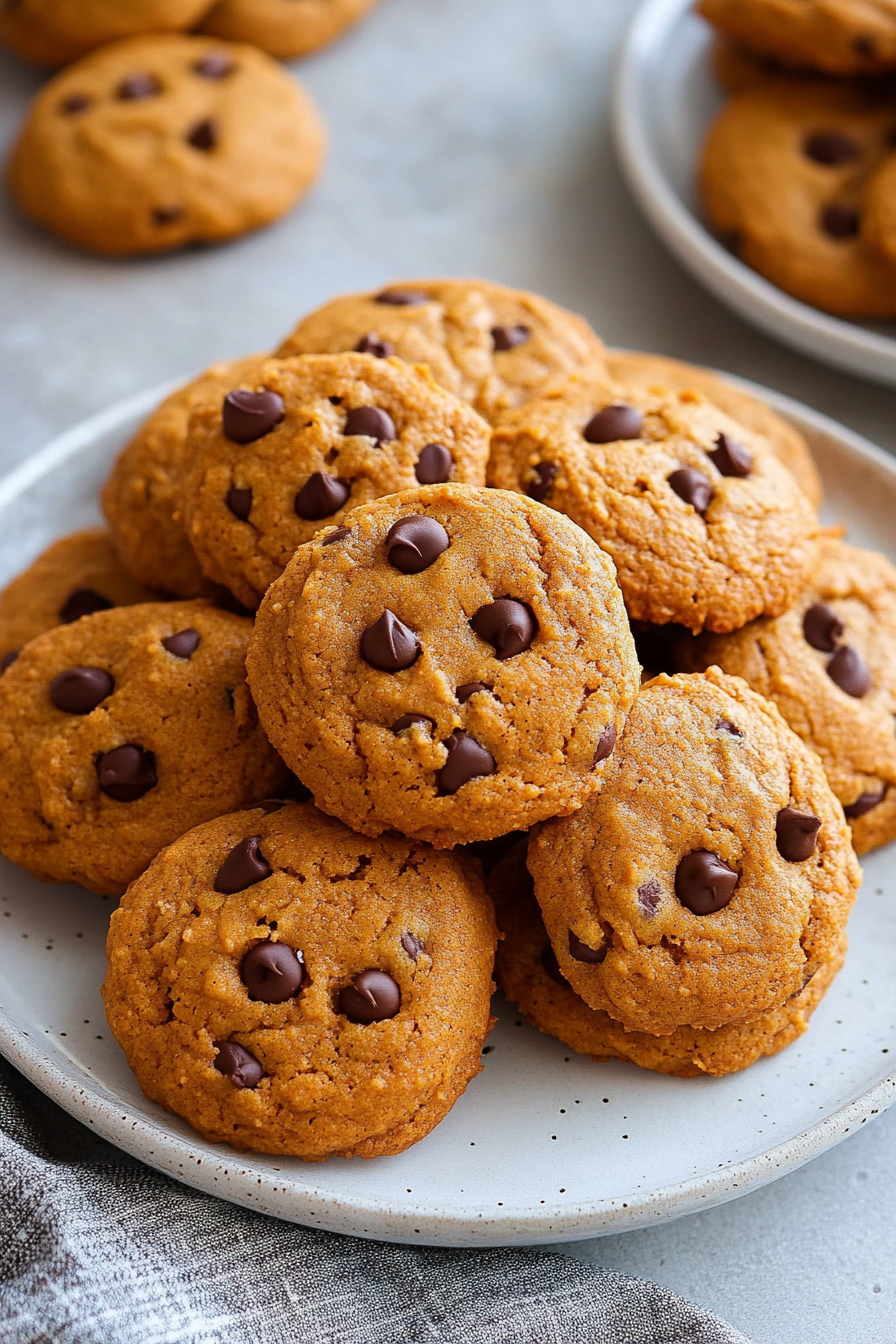
Pumpkin Chocolate Chip Cookies
Ingredients
Method
- Preheat oven to 350°F. Line baking sheets with silicone liners or parchment paper.
- In a mixing bowl, whisk together flour, baking powder, baking soda, cinnamon, nutmeg, ginger, cloves, and salt. Set aside.
- In the bowl of an electric mixer, beat together sugars and vegetable oil until combined.
- Add egg and vanilla, then mix in pumpkin puree.
- Gradually add flour mixture to the wet ingredients, mixing just until combined.
- Fold in chocolate chips.
- Drop dough by tablespoons onto baking sheets, spacing them about 2 inches apart.
- Bake for 11 to 12 minutes until cookies are set around the edges.
- Allow cookies to cool on baking sheet for a few minutes before transferring to a wire rack.
- Store in an airtight container for best freshness.