Cozy Homemade Cocoa Recipe
There’s nothing quite like curling up on a chilly evening with a mug of hot cocoa in hand. I remember sneaking into the kitchen after school, the warm scent of cocoa powder swirling through the air, as my mom would whip up her famous recipe. It was simple, comforting, and somehow made everything feel cozy — a little moment of happiness in a busy day. Over the years, I’ve tinkered with so many versions of hot cocoa, but honestly, nothing beats this tried-and-true recipe I’m about to share. It’s incredibly rich, velvety smooth, and just the right sweetness to satisfy that nostalgic craving. Plus, it’s so easy to make that I sometimes find myself making a batch just for myself after the kids are asleep. Trust me on this — once you try it, it’ll become your go-to cold-weather treat, too!
What is hot cocoa?
Hot cocoa isn’t just your average mug of chocolate milk — think of it as a cozy, adult-friendly version of that childhood favorite. It’s essentially a warm, creamy drink made by melting good-quality chocolate or cocoa powder into milk and adding a touch of sugar and flavorings. The name “hot cocoa” actually comes from the classic cocoa bean drink that was popular among the Mayans and Aztecs, though today’s version is sweetened and whipped up with everyday ingredients we all have in the pantry. It’s the perfect beverage when you’re craving something indulgent but can’t or don’t want to turn on the oven or make a full dessert. Imagine silky smooth chocolate, slightly thickened for those perfect spoonfuls, served hot to soothe your soul on colder days — that’s hot cocoa in its most delicious form.
Why do people love hot cocoa?
What I love most about this hot cocoa is how simple it is — barely any prep, but the flavor is absolutely decadent. You won’t need fancy ingredients or a trip to the store; just a handful of pantry staples and a few minutes of your time. And it’s budget-friendly too, which is a lifesaver on busy nights when dessert feels out of reach. But don’t mistake “simple” for “boring” — this drink has a deep, chocolatey richness that feels almost indulgent, like you’re splurging at a fancy cafe but without the hefty price tag. I’ve tested this recipe with dark, milk, and even white chocolate, and each variation brings a different personality to the drink. It’s so versatile that you can customize it to your mood or what you have on hand. Plus, it’s family-approved — my kids ask for this all the time, and I’m happy to say it disappears in minutes at my house.
What’s also great about this hot cocoa is how easily you can elevate it. A dollop of whipped cream, a sprinkle of cinnamon, a dash of peppermint — the possibilities are endless. Honestly, I think the secret is in the richness of the chocolate base. Once you find your favorite chocolate (trust me, good quality makes all the difference), you’ll see how this simple drink transforms into pure comfort in a mug.
How do I make hot cocoa?
Quick Overview
This hot cocoa recipe is as straightforward as it gets. You melt your favorite chocolate or cocoa powder into warm milk, sweeten to taste, and add a splash of vanilla for that extra depth. It’s perfect for busy nights, unexpected guests, or when you’re just craving that cozy, chocolatey warmth. The magic lies in the smooth, velvety texture and the balanced sweetness — once you’ve made it a couple of times, you’ll feel like a pro. I love that it’s quick enough for a midweek treat but special enough to serve on a lazy weekend morning, too. Plus, it’s a great way to use up leftover chocolates or bits of candy you might have hanging around. Trust me, once you get the hang of it, you’ll find yourself craving this more than your usual store-bought mix!
Ingredients
For the Hot Cocoa:
– 2 cups of whole milk (or any milk you prefer, like almond or oat — tested and loved all of them!)
– 1/2 cup good-quality chocolate chips or chopped chocolate (dark, milk, or a mix — your call!)
– 2 tablespoons unsweetened cocoa powder (preferably Dutch-processed for smoothness)
– 2-3 tablespoons sugar (more if you like it extra sweet or less for a richer, bittersweet flavor)
– 1 teaspoon vanilla extract (because it’s the secret ingredient to depth)
Optional Toppings & Mix-ins:
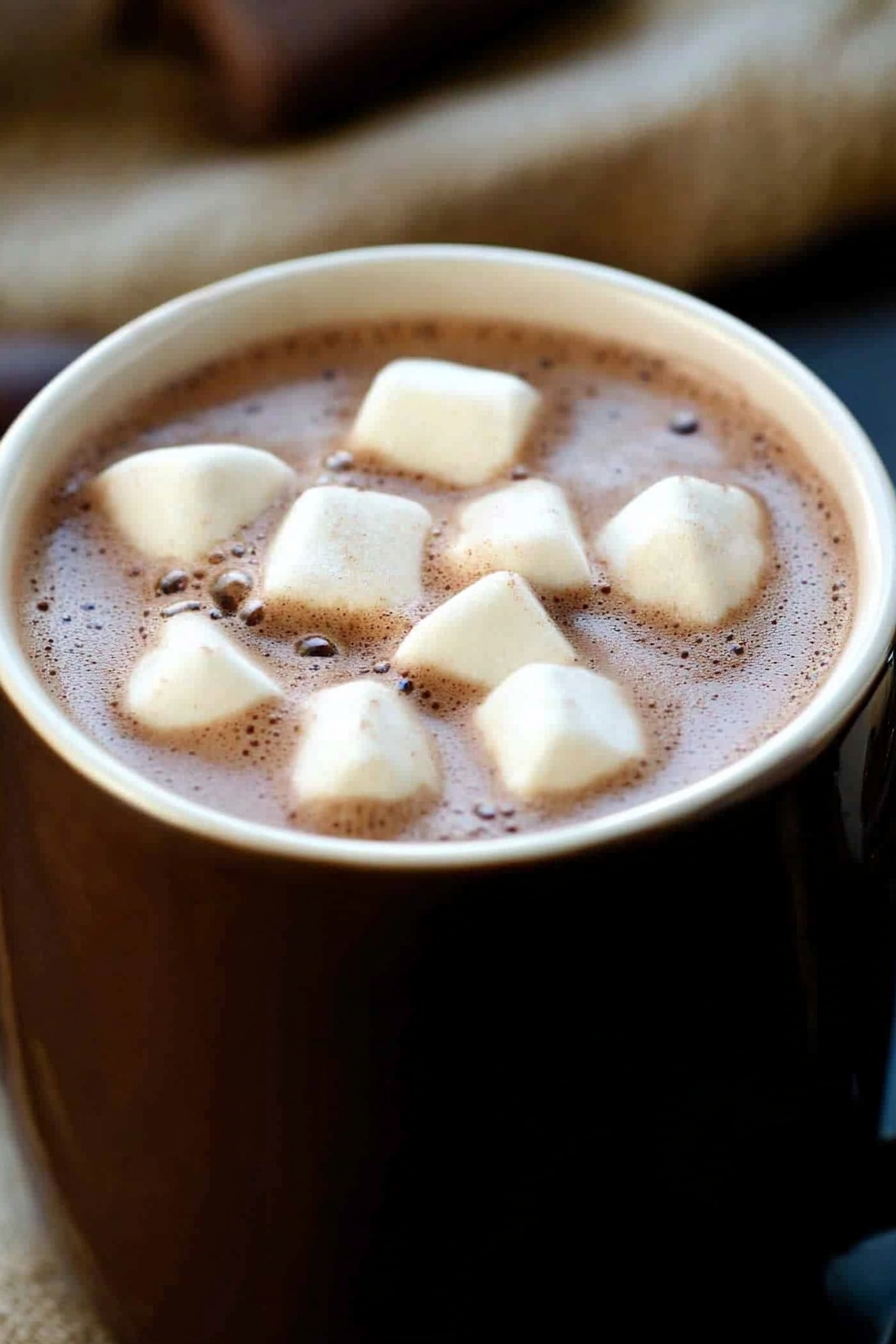
– Whipped cream or marshmallows for topping — my absolute favorite!
– A pinch of cinnamon or chili powder for a spicy kick
– Peppermint extract for a holiday twist
– Shredded coconut or sprinkles for fun presentation
Extra Tips for the Best Hot Cocoa
I like to use high-quality dark chocolate chips because they melt better and give that luxurious, rich flavor. But I’ve also tried this with chopped semi-sweet or even white chocolate — each brings its own personality. The key is to warm the milk gently, so the chocolate melts smoothly without burning or creating lumps. Also, don’t forget to stir continuously once you add the chocolate — patience is your friend here to get that silky consistency. And if you want to make it dairy-free, almond milk or coconut milk are fantastic alternatives, just a little thinner but equally tasty.
Step-by-Step Instructions
Step 1: Preheat & Prep Pan
Start by pouring your milk into a small saucepan. Turn the heat to medium-low — I learned the hard way that high heat burns the milk and ruins that smooth texture we’re aiming for. While it warms up, grab your chocolate and cocoa powder. You want the milk warm but not boiling — just hot enough to melt everything beautifully without overheating. A little trick: gently tap your saucepan to test if the milk’s temperature feels cozy but not scalding.
Step 2: Mix Dry Ingredients
In a small bowl, whisk together the cocoa powder and sugar. This helps keep everything evenly distributed so you don’t end up with clumps of cocoa powder sinking at the bottom of the mug. Trust me, nobody wants a gritty surprise — unless it’s a surprise sprinkle of cinnamon on top! However, if you’re in a rush, you can toss everything directly into the warming milk, but whisk’d dry ingredients blend more smoothly.
Step 3: Mix Wet Ingredients
Once your milk is warm, add the vanilla. It’s a small step but makes a big difference — think of it as the secret handshake of your hot cocoa. Then, add your dry mixture to the milk, whisking constantly. Keep the heat gentle as you do this. The cocoa will start to dissolve, and the sugar will melt, turning your milk a rich, brown hue — I love watching this transformation!
Step 4: Combine
Next, add the chocolate chips or chopped chocolate. Turn the heat down just a touch, and stir continuously until everything is melted and velvety. This might take 3-5 minutes, so don’t rush — patience pays off in smoothness. If you see lumps or the chocolate isn’t melting evenly, lower the heat and keep stirring. When it’s just about shiny and creamy, it’s ready for the next step.
Step 5: Prepare the Filling
If you like your hot cocoa extra decadent, you can stir in flavorings like a splash of peppermint extract or a dash of cinnamon. To keep it thick and luscious, I sometimes add a little more chocolate or a spoonful of cocoa powder. If you want it dairy-free, coconut cream stirred in at the end gives it a silky texture. Adjust the sweetness by tasting and adding more sugar or sweetener if needed.
Step 6: Layer & Swirl
Pour your hot cocoa into mugs, and if you’re feeling fancy, add a swirl of whipped cream or marshmallows on top. For a little visual flair, I love using a toothpick to make gentle swirls with caramel or chocolate syrup. If you’re mixing flavors, like a peppermint twist, sprinkle a tiny bit on top or add a candy cane for stirring — it’s the little touches that turn a simple drink into something memorable.
Step 7: Bake
This is the fun part! Well, technically no baking involved here — just serving hot. But if you want to serve it warm for hours, keep it on the stovetop on very low heat or pour into a thermal mug. If you prefer your cocoa thicker, you can simmer it gently for a minute or two, but be sure to keep an eye on it. Serve immediately, and prepare for the smell alone to make everyone gather in the kitchen!
Step 8: Cool & Glaze
If you’re adding any toppings like whipped cream or sprinkles, do it immediately before serving so they stay fluffy and fresh. For a beautiful finish, dust a little cocoa powder or cocoa nibs on top. If you want a more decadent touch, drizzle with melted chocolate or caramel sauce once the drink is in mugs. Just make sure your cocoa isn’t piping hot when you do this — you don’t want the toppings to melt away instantly.
Step 9: Slice & Serve
There’s no slicing involved, but I do love serving this in cozy mugs that feels like a warm hug. Some days I like to serve it alongside a fresh batch of cookies or bread. For a breakfast twist, pair it with a warm croissant or some crusty toast. Or keep it simple — just sit back with a blanket, close your eyes, and enjoy each sip. The warmth, the richness, that silky texture — pure bliss.
What to Serve It With
This hot cocoa is sooo versatile — it’s just as good for a lazy weekend breakfast as it is for after-dinner warmth. For mornings, I love pairing it with flaky croissants or breakfast muffins, maybe even a few slices of fruity banana bread. It’s just the right thing to sip with your coffee or tea, adding a chocolatey note to your morning routine. During brunch, I sometimes layer on some whipped cream, drizzle with caramel, and sprinkle a few crushed cookies on top — it turns the drink into a visual stunner. In the evening, I serve it as a comforting dessert paired with a slice of pie or a handful of cookies. And for those cozy nights in, a mug of hot cocoa with marshmallows and a cinnamon stick makes everything better. Honestly, I’ve found it’s perfect for any occasion — a little treat to warm your hands and heart.
Top Tips for Perfecting Your Hot Cocoa
If you’re like me, you’ll want to get this just right. A few tips from the trenches:
- Use good-quality chocolate: Cheap chips might melt, but they won’t give you that deep, complex flavor. I prefer semi-sweet or dark chocolate for richness.
- Temperature control is key: Don’t boil your milk — just warm it enough to melt the chocolate smoothly. Overheating can cause it to scorch or form a skin on top.
- Whisk continuously: This prevents lumps and ensures a silky drink, especially when adding cocoa powder and chocolate chips.
- Flavor variations: Trust me, a splash of peppermint or a pinch of cinnamon can totally change the mood. Play around and see what makes your heart happy.
- Sweetness adjustments: Taste as you go! Sometimes I add a little extra sugar after tasting, especially if I use dark chocolate. It’s all about balance.
- Make it creamier: For extra richness, stir in a spoonful of coconut cream or a splash of heavy cream right before serving.
Over the years, I’ve learned that patience and quality ingredients make all the difference. And don’t be afraid to experiment. Sometimes, the best variations come from just winging it a little. When I made this with almond milk, it added a nutty depth I didn’t expect — now it’s my new favorite twist. And trust me, the more you make it, the more you’ll realize that hot cocoa isn’t just a drink — it’s an instant mood booster, an old friend, and the perfect way to warm up your day.
Storing & Reheating Tips
This hot cocoa is best enjoyed fresh, but if you have leftovers or want to make it ahead, here are some tips:
- Room temperature: Not ideal for storing, but if you must, keep it covered for no more than an hour to prevent it from forming a skin or losing flavor.
- Refrigerator: Pour cooled cocoa into an airtight container and refrigerate for up to 24 hours. When reheating, do it slowly over low heat, stirring constantly to restore its velvety texture.
- Freezing: It’s possible but tricky — the texture can change once thawed. If you try, pour into freezer-safe containers, leaving room for expansion. Thaw gently on the stove or in the microwave, then reheat slowly while stirring.
- Adding fresh toppings: Wait until hot before topping with whipped cream or marshmallows, so they stay fluffy.
Remember, reheated cocoa might not be as thick as fresh, so feel free to stir in a little extra chocolate or a splash of milk if needed. Trust me, it’s still delicious — just not quite as silky smooth as straight from the stove.
Frequently Asked Questions
Final Thoughts
There’s just something irresistibly comforting about a warm mug of hot cocoa — it’s like wrapping yourself in a soft blanket with a little chocolatey hug. Over the years, I’ve realized that this simple recipe hits all the right notes: rich in flavor, quick to make, and endlessly customizable. Whether you’re cozying up after a long day, sharing a special moment with family, or just treating yourself without fuss, this hot cocoa is all you need. I love experimenting with different chocolates, spices, and toppings — each variation feels like a new little adventure in a mug. If you give this a try, I’d love to hear how it turns out or your favorite twists. Happy baking, or rather, happy sipping! And don’t forget — sometimes, the simplest recipes are the ones that bring the biggest smiles. Cheers to cozy nights and warm mugs!
Homemade Hot Chocolate
Ingredients
Method
- In a saucepan combine all ingredients. Cook and stir over medium-low heat until the marshmallows are melted, about 10 minutes.
- Remove from the heat and pour into mugs.