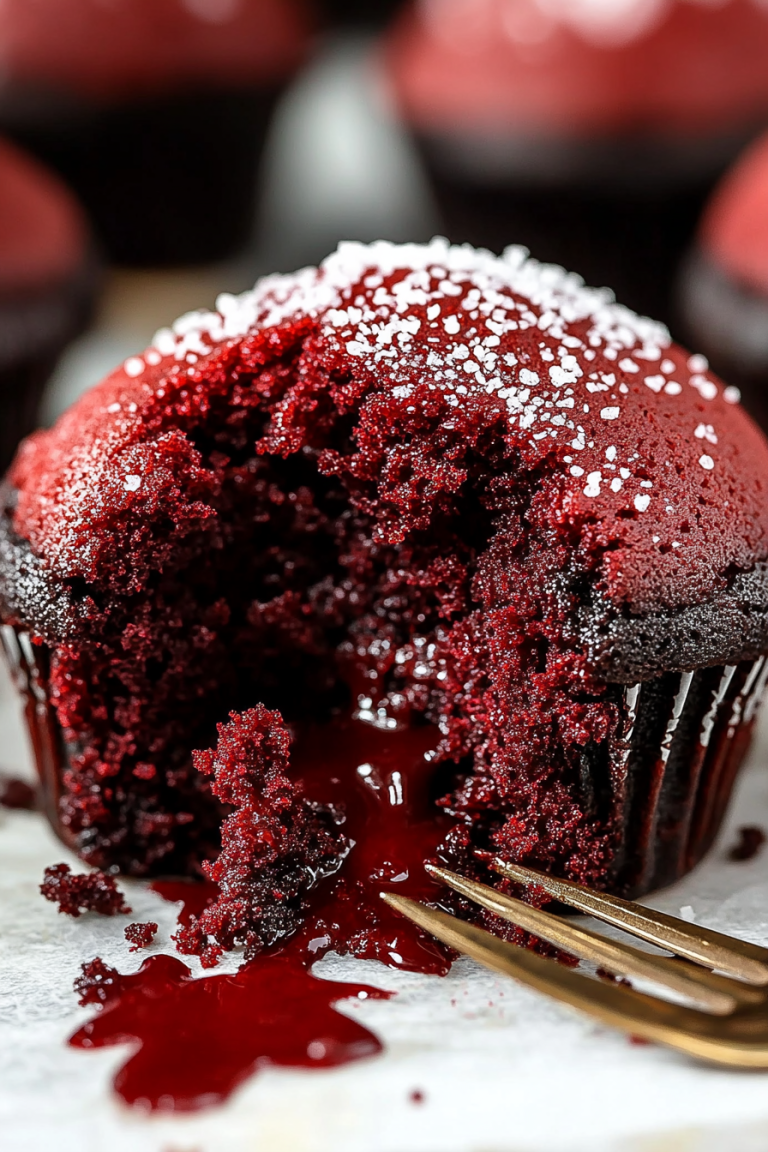
Creamy Banana Pudding Recipe: How To Make It
There’s something about banana pudding that just screams comfort, doesn’t it? I still remember sitting at my grandma’s kitchen table as a kid, the smell of vanilla and ripe bananas filling the air while she effortlessly layered buttery cookies with creamy pudding. It was her special treat, and honestly, it’s one of those recipes that never loses its magic. Nowadays, I’m that person in my family’s kitchen, eagerly whipping up a batch whenever I want a little taste of homestyle bliss. If you’re anything like me, you’ll love how easy this banana pudding is — it’s a total lifesaver on busy nights or when you need something sweet but don’t want to fuss in the oven. Plus, trust me, the smell alone will have everyone hovering around the kitchen. So grab those ripe bananas, and let’s get started on my all-time favorite banana pudding. You won’t regret it!
What is banana pudding?
Think of banana pudding as a cozy, layered dessert that’s a staple in Southern comfort food. It’s essentially a smooth, sweet custard or pudding, combined with fresh bananas, all nestled between layers of cookies — usually vanilla wafers or graham crackers — and topped with whipped cream or meringue. The name is pretty much spot-on: it’s a pudding flavored with ripe bananas, transformed into a velvety treat that’s just as perfect for a casual family dinner as it is for a potluck or special occasion. The magic happens because the pudding soaks into the cookies, softening them beautifully, so every bite is rich, creamy, and just a little bit gooey. It’s那个 kind of dessert that’s both nostalgic and elegant, and you can customize it to your heart’s content. Think of it as a cozy hug in dessert form — straightforward, approachable, and totally delicious.
Why you’ll love this recipe?
What I love most about this banana pudding is how uncomplicated and forgiving it is — trust me, even if you’re not a seasoned baker, you can pull this off with ease. The flavor is unbeatable: sweet, creamy vanilla complemented perfectly by the bananas’ natural caramel-y sweetness. My kids ask for this all the time — it’s become a staple in our house for birthdays, family dinners, or even just a weekend treat. And here’s a little secret: I tested this with almond milk, and honestly, it made the pudding even creamier without overpowering the banana flavor. It’s super budget-friendly too; you probably already have everything in your pantry. Best of all, it’s versatile — serve it chilled for a refreshing dessert, or add a slight kick of spices like cinnamon or nutmeg if you’re feeling adventurous. What I love most about this banana pudding? It’s a guaranteed crowd-pleaser, and no matter how many times I make it, it’s gone in minutes — the ultimate sign of a recipe worth sharing.
How do I make banana pudding?
Quick Overview
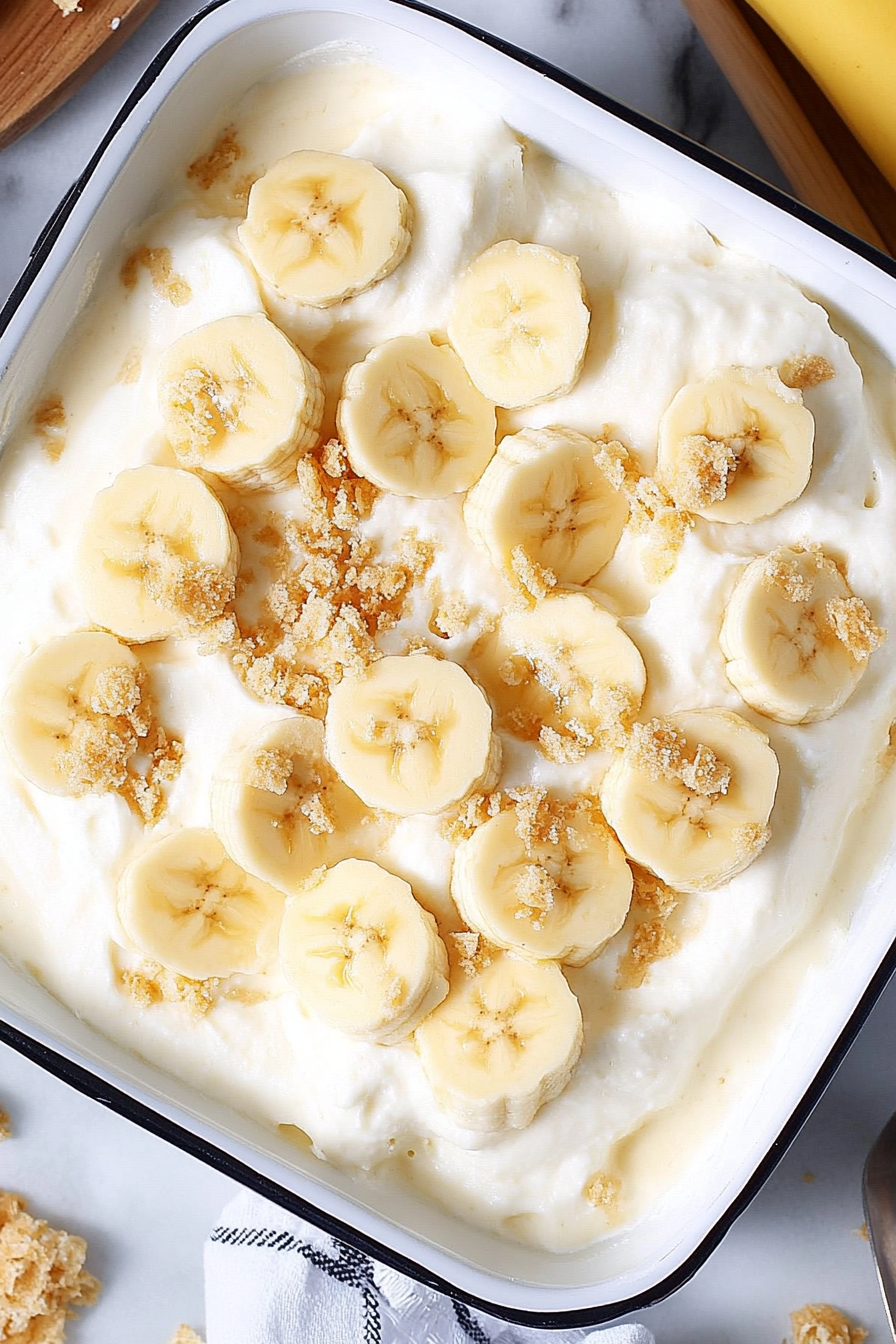
This banana pudding recipe is all about layering and patience — but don’t worry, it’s simple enough to whip up in under 30 minutes. You start with a cloud of creamy vanilla pudding, fold in ripe bananas, then layer that luscious mix with buttery cookies in a glass dish. Chill it for a few hours so the flavors meld and the cookies soften justRight. Top with whipped cream or meringue, and voilà — you’ve got a show-stopping dessert that looks as good as it tastes. The best part? It’s practically foolproof — I’ve made this countless times, and it never fails to impress.
Ingredients
For the main banana pudding: For the main banana pudding: For the main banana pudding: For the main banana pudding: For the main banana pudding: For
– 3 cups whole milk (or almond milk for extra creaminess)
– 1/2 cup granulated sugar
– 1/4 cup cornstarch (or arrowroot powder for a gluten-free option)
– 1/4 teaspoon salt
– 4 large egg yolks
– 2 tablespoons unsalted butter
– 2 teaspoons vanilla extract
– 3 ripe bananas, sliced
For the Cookies:
– About 20-24 vanilla wafers or graham crackers
– Optional: crushed cookies for garnish
For the Topping:
– 1 cup heavy whipping cream
– 2 tablespoons powdered sugar
– 1 teaspoon vanilla extract
– Optional: a sprinkle of cinnamon or chocolate shavings
Step-by-Step Instructions
Step 1: Preheat & Prep Pan
Start by grabbing a glass baking dish or any clear, pretty dish you love — I find that seeing the layers makes it even more irresistible. Chill it in the fridge while you prepare everything, just to keep things extra cold. Preheat your oven to 350°F if you plan to bake the cookies lightly before assembly, but I usually skip this step and use store-bought wafers for convenience.
Step 2: Mix Dry Ingredients
In a small bowl, whisk together the cornstarch, sugar, and salt. This ensures everything’s evenly distributed, so your pudding turns out silky smooth and avoids clumps. I learned the hard way to sift the cornstarch — trust me, it makes a huge difference!
Step 3: Mix Wet Ingredients
In a heavy-bottomed saucepan, whisk the egg yolks, milk, and vanilla until well combined. Heat on medium-low, stirring constantly, until it starts to thicken— don’t rush this part. You want it to coat the back of a spoon, standing in gentle ribbons when you run your finger through it. Patience is key here!
Step 4: Combine
Gradually whisk the dry mixture into the hot milk, stirring constantly, to prevent lumps. Keep stirring until it thickens up — this usually takes about 5-7 minutes. Remove from heat and stir in the butter until glossy and smooth. You’ve just made a homemade vanilla pudding!
Step 5: Prepare Filling
Let the pudding cool for a few minutes, then fold in sliced bananas gently. You want the bananas to stay intact but disperse evenly to give that lovely banana flavor in every bite. For a little twist, sprinkle in some cinnamon or add a splash of liqueur — totally optional, but a nice touch.
Step 6: Layer & Swirl
Start by laying down a layer of cookies at the bottom of your dish. Top with a generous layer of pudding and bananas, then repeat the process until you’re out of ingredients. I like to do about 2-3 layers for a nice height and pretty presentation. For a little visual flair, I sometimes swirl a spoon through the layers to create a marbled effect — looks fancy but is totally easy!
Step 7: Bake (Optional)
If you prefer a baked topping or want to set the whole thing faster, pop it in the oven at 350°F for about 10-15 minutes until lightly golden. Otherwise, just cover it tightly with plastic wrap and let it chill in the fridge for at least 4 hours, ideally overnight. This step lets the flavors meld and the cookies soften beautifully.
Step 8: Cool & Glaze
Once chilled, whip your heavy cream with powdered sugar and vanilla until soft peaks form. Spread or pipe gently over the pudding, then sprinkle with crushed cookies or a dusting of cocoa. If you love a shiny finish, you can even add a quick glaze made from melted chocolate or caramel for an extra decadent touch.
Step 9: Slice & Serve
Use a sharp knife dipped in hot water to get clean slices, especially if you want those beautiful layered edges. Serve chilled, and don’t be surprised if everyone asks for seconds — it’s that good. I like to add a little mint leaf on top or extra banana slices for a prettier presentation, but honestly, it’s fabulous just as it is.
What to Serve It With
This banana pudding is a versatile dessert, perfect for almost any occasion. For a cozy breakfast, pair it with a strong dark roast coffee or a glass of cold milk — yes, I’ve eaten it for breakfast! At brunch, serve it in small glasses or jars with fresh berries on the side — it’s visually stunning and taste-wise, a hit. As a dessert after dinner, buffet-style, with some extra whipped cream and maybe a drizzle of chocolate or caramel sauce, it’s sure to wow your guests. And on a lazy weekend, I love grabbing a spoon and just enjoying it straight from the dish with my family snuggled on the sofa. It’s comfort food at its best, bringing everyone together with its familiar, nostalgic flavors.
Top Tips for Perfecting Your Banana Pudding
Over the years, I’ve picked up a few tricks to make this banana pudding totally foolproof. First, choose your bananas carefully — they should be ripe but not overripe, with a little softness and a sweet aroma. Too green, and they won’t add enough flavor; too brown, and they risk turning mushy. I always do this when I layer: place the banana slices just before assembly so they don’t brown or become mushy while chilling.
Mixing the pudding can be tricky — overmix, and you’ll get a slimy texture; undermix, and it won’t thicken properly. Once you see it coat the spoon well, you’re done! I’ve learned to keep stirring gently, and I love adding a splash of vanilla or even a caramel extract for extra depth.
Swirling the layers is honestly my favorite part — I use a toothpick or the back of a spoon to make gentle patterns. It adds a homemade charm that looks fancy but is super simple. Want to switch it up? Add a handful of crushed Oreos or chopped nuts between layers for crunch and flavor. Test out different cookies too — graham crackers can be a lovely change.
As for baking, I prefer just chilling because I really love that soft, soaked-cookie texture. But if you want a slightly crispy top, a quick 10-minute bake makes a nice contrast. Always let it cool completely before slicing to maintain those beautiful layers. For the whipped topping, I swear by using cold heavy cream and a chilled bowl — it whips up faster and fluffier.
When it comes to glazing or toppings, don’t be afraid to experiment. Chocolate drizzle, chopped nuts, toasted coconut, fresh mint — they all elevate it and make each batch your own. Trust me on this: once you’ve made this a few times, you’ll have your own secret tweaks to make it even better.
Storing and Reheating Tips
This banana pudding keeps pretty well, but a few tips help preserve its freshness. If you’re serving it within a day or two, keep it covered tightly with plastic wrap and store it in the fridge — it stays delicious for about 2-3 days. Just remember, the bananas might darken over time, but the pudding will still taste great. My trick? Place a bit of plastic directly on the pudding’s surface to prevent air from turning the bananas brown.
If you’re freezing leftovers (I’ve done it for a quick fix later), be sure to transfer it to a freezer-safe container and store for no more than a month. Thaw it overnight in the fridge, then gently stir before serving. Keep in mind, the texture of the bananas will change slightly, becoming softer, but the overall taste remains wonderful.
If you like to add a fresh glaze or whipped topping, it’s best to do that just before serving, not ahead of time. Whipped cream tends to deflate, and glazes can get soggy or sticky. So, assemble your parfaits or individual servings, add the finishing touch, then dig in — that’s the best way to keep it looking and tasting fresh.
Frequently Asked Questions
Final Thoughts
There’s something so nostalgic about this homemade banana pudding — it’s comfort food that’s easy to make, flexible, and always a hit. Whether you’re making it for a family get-together, a potluck, or just because you crave something sweet that’s still feeling homey, it’s a recipe that never lets me down. Over the years, I’ve played with different ingredients and techniques, but the core of this dessert — creamy pudding, ripe bananas, and a little love — stays the same. I encourage you to customize it with your favorite cookies, toppings, or flavor tweaks. The best part? Watching everyone’s faces light up when they dig into that first spoonful. Happy baking, and I can’t wait to hear how yours turns out! Feel free to leave a comment below with your own twists or questions — I love hearing from fellow banana pudding lovers.
Classic Banana Pudding
Ingredients
Method
- In a large mixing bowl, whisk together the sugar, cornstarch, and egg yolks until well combined. Whisk in 1 cup of the milk to the sugar mixture.
- Place 2 cups of milk into a medium saucepan and bring it up to a boil.
- Slowly whisk the hot milk into the sugar mixture. Transfer the mixture back into the pot and cook over medium heat until it thickens enough to coat the back of a spoon, stirring the whole time. Remove the pot from the stove, stir in the butter, and half the vanilla. Allow the pudding to cool.
- Spread 1/3 of the pudding into the bottom of a 1 1/2 quart casserole pan or an 8x8 pan. Add a layer of vanilla wafers and a layer of sliced bananas. Repeat this another time, ending with an extra layer of pudding.
- In a medium mixing bowl, beat the heavy cream, powdered sugar, and the remaining vanilla until you have medium peaks.
- Spread the whipped cream over the top of the pudding and sprinkle the top with some crushed wafers and banana slices.