Crimson Velvet Cheesecake Bites How to Make
There are some desserts that just *feel* like a hug, you know? The kind that makes you close your eyes and sigh with pure happiness. For me, that’s always been a good slice of red velvet cake. But then, one day, I had an epiphany – what if you could combine the rich, decadent texture of cheesecake with that iconic, slightly mysterious red velvet flavor? The result? This red velvet cheesecake. It’s not just a dessert; it’s an experience. I remember the first time I made it for a potluck, and people were practically fighting over the last piece. It’s become my go-to for holidays, birthdays, or honestly, just those Tuesday nights when you need a little something special. It’s worlds away from a plain old vanilla cheesecake, offering that delightful cocoa whisper and vibrant color that just screams celebration. If you’ve ever loved red velvet cupcakes or a classic New York cheesecake, prepare to have your mind (and taste buds) blown.
What is Red Velvet Cheesecake?
So, what exactly *is* this magical creation? Think of it as the sophisticated love child of a classic red velvet cake and a creamy, dreamy cheesecake. Instead of a traditional cake batter, we’re using the rich, dense base of a cheesecake, but we’re infusing it with all those beloved red velvet flavors: a touch of cocoa powder, that signature tang, and of course, the vibrant red hue. It’s essentially a cheesecake that’s been dressed up in its finest red velvet attire. It’s not about overwhelming sweetness; it’s about a balanced, complex flavor profile that’s both comforting and exciting. It’s a truly special treat, far more intricate and satisfying than just a flavored cream cheese filling.
Why you’ll love this recipe?
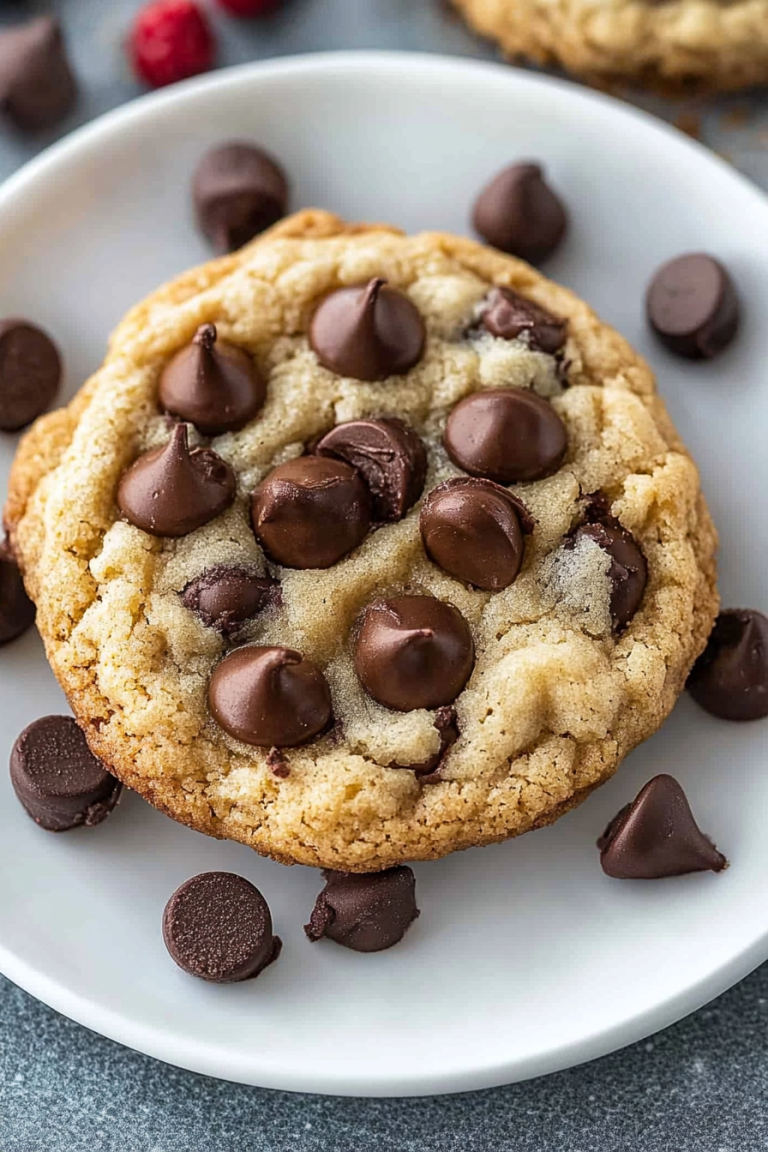
Why is this red velvet cheesecake in my recipe binder?flavor is just out of this world. You get that unmistakable red velvet taste – that subtle cocoa and vanilla combination with a whisper of tang from the buttermilk – all wrapped up in the velvety smooth richness of cheesecake. It’s not too sweet, which I really appreciate. And the simplicity? Don’t let the beautiful appearance fool you. While it looks impressive, it’s surprisingly manageable. I’ve streamlined the process so it’s not intimidating at all. You can totally whip this up, even if you’re not a seasoned baker. Plus, it’s remarkably cost-efficientWhat I love about this recipe is that it’s easy to make and can be easily prepared at any grocery store.versatility. It’s fantastic on its own, but you can easily dress it up with a chocolate ganache drizzle, fresh berries, or a dollop of whipped cream. It’s perfect for a special occasion, but I’ve also made it just because I was craving that unique red velvet zing. It’s truly a crowd-pleaser, and I can guarantee it’ll disappear faster than you can say “red velvet.” If you’re a fan of my classic chocolate chip cookies, you’ll appreciate the care I put into balancing flavors here, ensuring every bite is just right.
How to Make Red Velvet Cheesecake
Quick Overview
Making this red velvet cheesecake is all about layering those delicious flavors and textures. We’ll start with a simple graham cracker crust, then create a super-creamy cheesecake batter infused with red velvet magic, and finish it off with a luscious, complementary glaze. The key is gentle mixing and patient baking, which ensures that signature smooth, dense texture. Trust me, the effort is absolutely worth the stunning result you’ll achieve.
Ingredients
For the Crust:
2 cups graham cracker crumbs (about 14 full sheets)
1/4 cup granulated sugar
1/2 cup unsalted butter, melted
A tiny pinch of salt
For the Red Velvet Cheesecake Filling:
3 (8-ounce) blocks cream cheese, softened to room temperature
1 1/4 cups granulated sugar
3 tablespoons unsweetened cocoa powder
2 tablespoons all-purpose flour
1 teaspoon vanilla extract
1/2 teaspoon red food coloring (gel is best for intensity)
1/4 cup buttermilk
2 large eggs, at room temperature
For the Cream Cheese Glaze:
4 ounces cream cheese, softened
1/2 cup powdered sugar, sifted
1-2 tablespoons milk or heavy cream
1/4 teaspoon vanilla extract
Step-by-Step Instructions
Step 1: Preheat & Prep Pan
First things first, get your oven preheated to 325°F (160°C). This lower temperature is crucial for a cheesecake that bakes evenly without cracking. You’ll need a 9-inch springform pan. I always like to grease mine lightly, just as an extra precaution. Then, wrap the outside of the springform pan tightly with a few layers of heavy-duty aluminum foil. This is for the water bath, which is a game-changer for cheesecake! It keeps the oven humid and the cheesecake moist, preventing those dreaded cracks and ensuring a silky-smooth texture. You’ll thank yourself later for taking this extra step.
Step 2: Mix Dry Ingredients
In a medium bowl, combine your graham cracker crumbs, 1/4 cup granulated sugar, and that tiny pinch of salt. Give it a good stir to make sure everything is well incorporated. Now, pour in the melted butter. Mix it all together until the crumbs are evenly moistened, resembling wet sand. This is what’s going to hold your crust together beautifully.
Step 3: Mix Wet Ingredients
In a separate large bowl, beat the softened cream cheese with an electric mixer on medium speed until it’s completely smooth and creamy – absolutely no lumps! This might take a couple of minutes. Gradually add the 1 1/4 cups granulated sugar and beat until well combined and fluffy. Now, add the cocoa powder and flour and mix until just incorporated. Don’t overmix at this stage; we’re just getting everything together. In a small bowl, whisk together the vanilla extract, red food coloring, and buttermilk. This is where all that gorgeous red color comes from!
Step 4: Combine
Now it’s time to bring it all together. With the mixer on low speed, gradually add the buttermilk mixture to the cream cheese mixture. Mix until just combined. Finally, add the eggs, one at a time, beating on low speed just until each egg is incorporated. Again, the key here is *not* to overmix once the eggs are in. Overmixing can introduce too much air, which leads to cracking. Scrape down the sides and bottom of the bowl with a spatula to make sure everything is evenly blended. The batter should be smooth and a beautiful vibrant red.
Step 5: Prepare Filling
The filling is the heart of our cheesecake! We’ve already mixed the core ingredients: softened cream cheese for that essential creamy base, sugar for sweetness, cocoa powder for depth, flour for a bit of structure, vanilla for aroma, red food coloring for that signature hue, buttermilk for a slight tang and moisture, and eggs to bind it all together. Making sure your cream cheese and eggs are at room temperature is super important here. It helps them emulsify properly, leading to a smoother, more uniform batter. If your cream cheese is cold, you’ll end up with lumps, and nobody wants that in their cheesecake!
Step 6: Layer & Swirl
Pour the red velvet cheesecake batter into your prepared springform pan. Now, here’s where you can get a little creative if you want to add a “swirl” effect, though it’s not strictly necessary. You could dollop a bit of plain cheesecake batter (made by omitting the cocoa and red coloring from a small portion of the batter) on top and then use a toothpick or skewer to gently swirl it in. I often find the beautiful marbling that happens naturally during baking is enough, though! Gently tap the pan on the counter a few times to release any large air bubbles. Place the foil-wrapped springform pan into a larger baking pan (like a roasting pan).
Step 7: Bake
Carefully pour hot water into the larger baking pan, around the springform pan, until it comes about halfway up the sides of the springform. This is your water bath! It creates a steamy environment that helps the cheesecake bake gently and prevents cracks. Transfer the whole setup to your preheated oven. Bake for 55-75 minutes. The edges should be set, but the center should still be slightly jiggly. It’s like a gentle wobble, not a slosh. This is a crucial doneness test. A digital thermometer inserted into the center should read around 150°F (65°C).
Step 8: Cool & Glaze
Once baked, turn off the oven but leave the cheesecake inside with the oven door slightly ajar for about an hour. This gradual cooling process is another secret to preventing cracks. After an hour, carefully remove the springform pan from the water bath and let it cool completely on a wire rack. Once it’s at room temperature, cover it loosely with plastic wrap and refrigerate for at least 6 hours, or preferably overnight. For the glaze: beat the softened cream cheese until smooth. Add the sifted powdered sugar and vanilla, then beat until smooth. Add milk or cream, a tablespoon at a time, until you reach your desired drizzling consistency. Once the cheesecake is chilled and firm, carefully remove the sides of the springform pan and drizzle the glaze over the top.
Step 9: Slice & Serve
The hardest part is waiting for it to chill! But once it’s firm, run a thin knife around the edge before releasing the springform ring to ensure a clean release. Slice with a sharp knife dipped in hot water and wiped dry between cuts for beautiful, clean slices. Serve chilled, maybe with a tiny dollop of whipped cream or a few fresh raspberries. The texture is dense and creamy, the flavor is rich and delightful, and that vibrant red color is simply stunning. It truly is a showstopper.
What to Serve It With
This red velvet cheesecake is so decadent, it honestly stands beautifully on its own. But if you’re feeling a bit fancy or want to create a whole dessert spread, here are some ideas:
For Breakfast: Yes, you can totally have cheesecake for breakfast! A smaller slice is perfect with a hot cup of coffee. I like to serve it with some fresh berries on the side, like strawberries or raspberries, to add a little brightness and cut through the richness. It’s a delightful way to start a special weekend morning.
For Brunch: At brunch, this cheesecake is pure elegance. I love to plate it with a small ramekin of crème fraîche or a spoonful of raspberry coulis. A sprig of mint adds a pop of green and looks gorgeous. Pair it with a mimosa or a sparkling rosé for a celebratory feel.
As Dessert: This is its natural habitat! For an after-dinner treat, a drizzle of dark chocolate ganache over the top takes it to a whole new level. A side of chocolate-covered strawberries or a scoop of vanilla bean ice cream is also divine. The combination of rich chocolate and creamy cheesecake is simply irresistible.
For Cozy Snacks: Sometimes, you just need a delicious treat after a long day. A slice of this red velvet cheesecake alongside a good book and a warm mug of tea is pure comfort. It’s like a warm, cozy blanket for your taste buds. My family loves it as an after-dinner treat, and it’s always the first dessert to go.
I’ve found that fresh berries always complement the richness beautifully, and anything chocolatey is a guaranteed win. It’s all about enhancing that incredible red velvet flavor without overpowering it.
Top Tips for Perfecting Your Red Velvet Cheesecake
Over the years, I’ve picked up a few tricks that help ensure my red velvet cheesecake turns out perfectly every single time. Let me share them with you!
Zucchini Prep: Wait, zucchini? Oh, I think I might have mixed up my recipes in my head for a second there! For this red velvet cheesecake, there’s no zucchini involved, thank goodness! It’s all about the cream cheese and that signature red velvet flavor. My apologies for that little brain hiccup – clearly, I was thinking about another favorite recipe!
Mixing Advice: The absolute golden rule for cheesecake is to avoid overmixing, especially once the eggs are added. You want to incorporate them just until they disappear. Overmixing beats too much air into the batter, which can cause the cheesecake to puff up dramatically during baking and then collapse and crack as it cools. I always use my electric mixer on the lowest speed when adding eggs, and I stop as soon as they’re incorporated, scraping down the bowl just to be sure.
Swirl Customization: While the batter itself has that beautiful red color, if you want to add a visual swirl, use a plain cheesecake batter (without the cocoa and coloring) and dollop it onto the red batter. Then, use a skewer or a thin knife to gently drag through the dollops. Don’t overdo it! A few gentle swirls create a marbled effect without muddying the colors. You can also drizzle a bit of melted chocolate on top and swirl that for a different kind of visual flair.
Ingredient Swaps: For the graham cracker crust, if you can’t find graham crackers, digestive biscuits or even vanilla wafers will work in a pinch! For the red food coloring, gel paste food coloring will give you the most vibrant color without adding too much liquid. If you can only find liquid, you might need a bit more, but be careful not to add too much, as it can alter the texture. I’ve tried using almond milk for the buttermilk substitute in a pinch, and it worked surprisingly well, adding creaminess without changing the flavor much.
Baking Tips: The water bath is non-negotiable for me. It really does make a difference in creating that smooth, even texture and preventing cracks. Ensure your foil wrap is secure to prevent any water from seeping into the pan. Also, oven temperatures can vary, so get to know your oven. If you know it runs hot, you might want to bake it for a few minutes less. The “jiggle test” – a slight wobble in the center – is your best friend when checking for doneness.
Glaze Variations: If cream cheese glaze isn’t your jam, a simple chocolate ganache drizzle is phenomenal. Melt equal parts good quality chocolate and heavy cream, stir until smooth, and let it cool slightly before drizzling. For a lighter option, a dusting of powdered sugar or a dollop of fresh whipped cream works perfectly too. You can also add a touch of cocoa powder or even a tiny bit of espresso powder to the cream cheese glaze for an extra layer of flavor.
Storing and Reheating Tips
Storing cheesecake properly is key to keeping it delicious for days. Because it’s so rich and creamy, it holds up beautifully!
Room Temperature: Honestly, I rarely leave cheesecake at room temperature for long. If you’ve just finished serving and have leftovers, it’s best to get them into the fridge within 2 hours to maintain food safety. It’s not a dessert that benefits from sitting out.
Refrigerator Storage: This is your go-to method. Once the cheesecake has cooled completely and is glazed, cover it loosely with plastic wrap or place it in an airtight container. It will stay perfectly fresh in the refrigerator for up to 3-4 days. I’ve found that the texture actually improves slightly after a day in the fridge as the flavors meld together even more.
Freezer Instructions: If you have a lot of leftover cheesecake (unlikely in my house, but it happens!), you can freeze it. Make sure it’s completely cooled and *un-glazed*. Wrap individual slices or the whole un-glazed cheesecake tightly in plastic wrap, then in aluminum foil, and place in a freezer-safe bag or container. It can be stored in the freezer for up to 1-2 months. To thaw, transfer it to the refrigerator overnight before serving. You can add the glaze or other toppings once it’s thawed.
Glaze Timing Advice: For the best texture and appearance, I always recommend glazing the cheesecake right before you plan to serve it, especially if you’re storing it in the fridge for more than a day. If you glaze it and then refrigerate for a long time, the glaze can sometimes get a little sticky or firm up too much. If you’re freezing, definitely wait to glaze until it’s thawed. For immediate serving after chilling, the glaze is perfect.
Frequently Asked Questions
Final Thoughts
There you have it – my absolute favorite red velvet cheesecake recipe! It’s a dessert that truly brings joy, whether it’s the stunning visual appeal or that incredibly rich, creamy texture with the subtle red velvet flavor. I’ve made this countless times, and it never fails to impress and delight everyone who tries it. It’s proof that you can have something that looks incredibly fancy and tastes gourmet without needing to be a pastry chef.
If you’re a fan of decadent desserts and that unique red velvet magic, this cheesecake is a must-try. I really hope you give it a go. You might find it becomes your new go-to special occasion dessert too! If you enjoy this recipe, you might also love my decadent chocolate lava cakes or my impossibly fudgy brownies for more chocolatey indulgence.
I can’t wait to hear how your red velvet cheesecake turns out! Please feel free to leave a comment below with your thoughts, any variations you tried, or just to share how much you loved it. Happy baking!
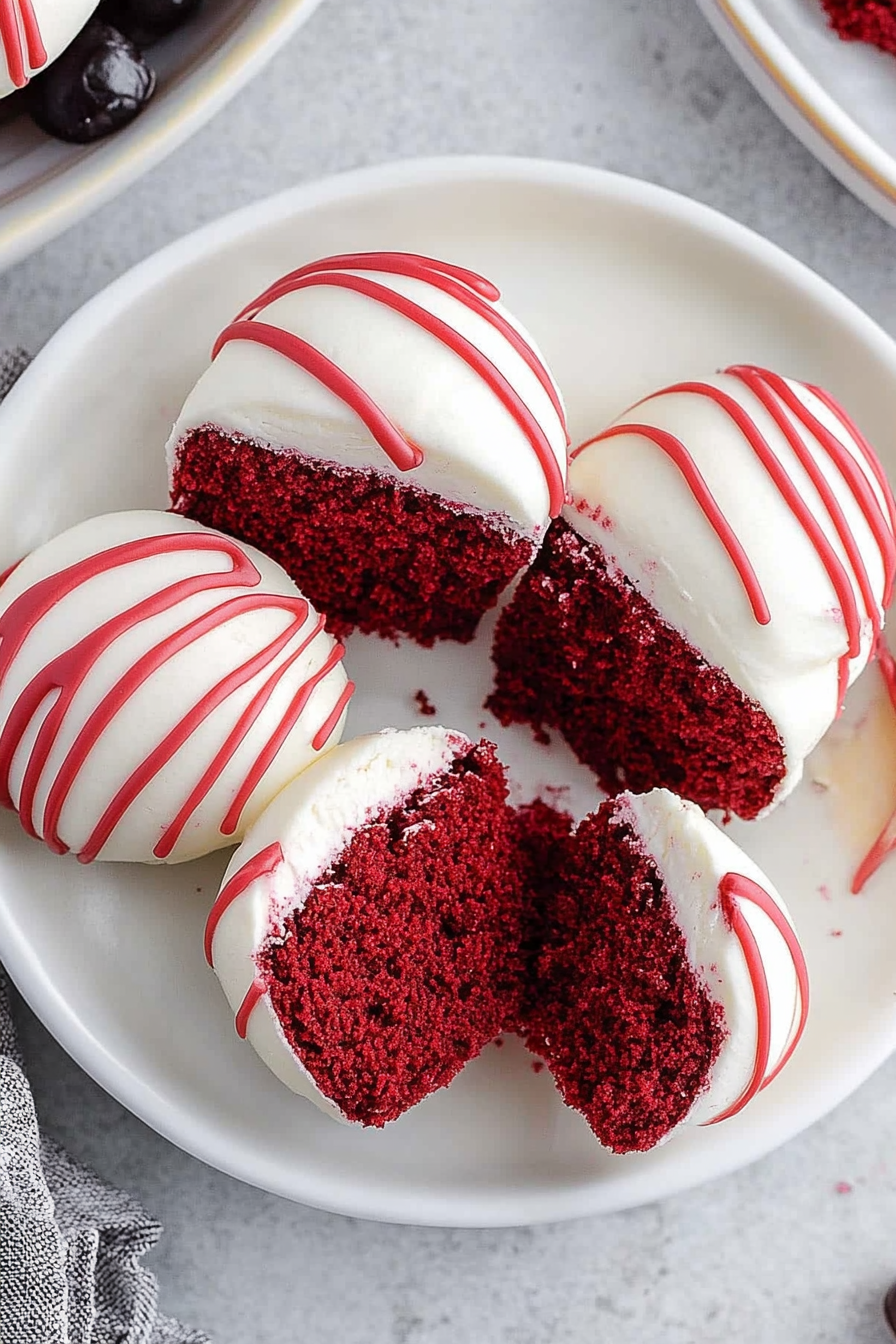
Red Velvet Cheesecake Bites
Ingredients
Method
- Heat treat the dry cake mix by microwaving in two 30-second intervals, stirring well after each, then cool completely before mixing with the cream cheese.
- Beat the softened cream cheese with a handheld mixer on medium-high for 1.5 to 2 minutes until smooth.
- Gradually add the cooled dry cake mix to the cream cheese and mix until well combined.
- Cover the mixture and refrigerate for 2 hours to firm up.
- Line a baking sheet with parchment paper. Using a 1 tablespoon scoop, form the mixture into balls and place on the sheet.
- Melt the white almond bark in a heat-safe bowl microwaving in 30-second intervals and stirring until smooth.
- Dip each cheesecake ball into the melted almond bark, remove with a fork, tap off excess, and place back on the parchment.
- Melt the red candy melts in a separate bowl, then drizzle over the coated balls in stripes. Let harden before serving.