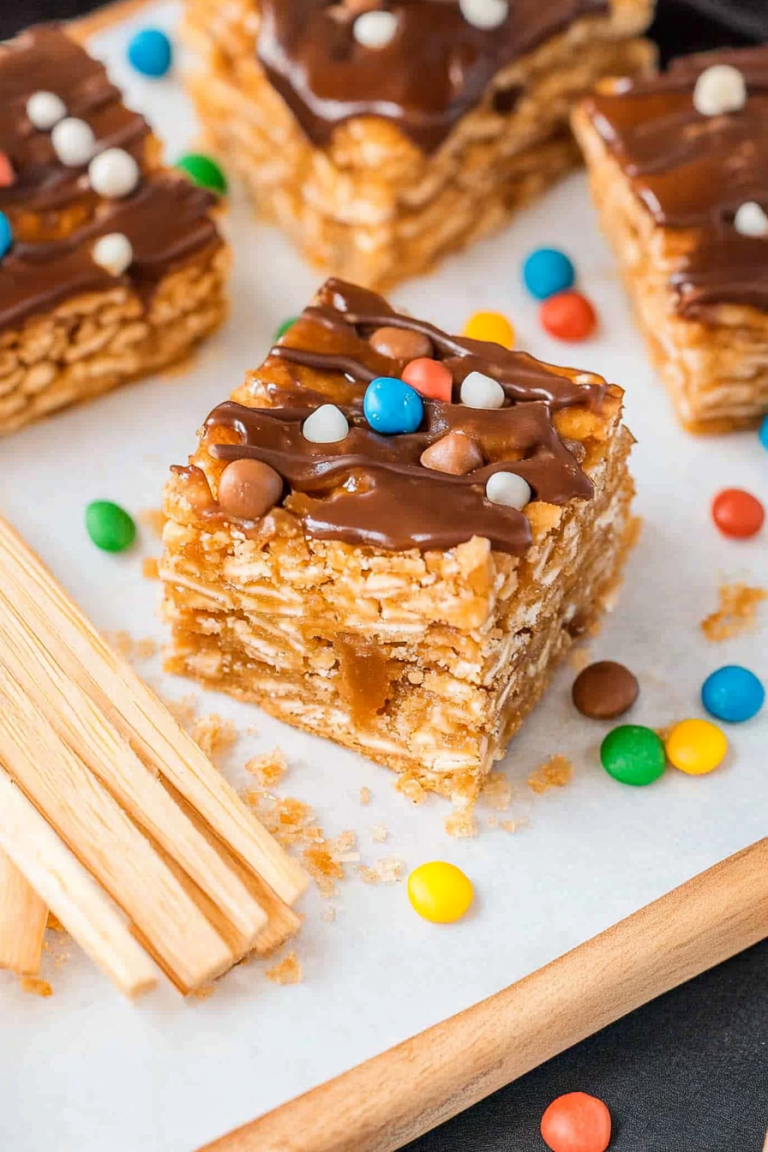
Decadent Mud Pie Bars A Simple Treat
There’s something truly nostalgic about sinking a spoon into a slice of Mississippi Mud Pie. Maybe it’s the rich, velvety chocolate, the hint of coffee that deepens the flavor, or the crunchy, peanut-studded crust that feels like a cozy hug. I remember the very first time I tasted this dessert at my Aunt Martha’s house — she always had a way of making it look so effortless, yet each bite tasted like a symphony of flavors. Since then, it’s been my go-to when I want to impress friends or just satisfy that sweet craving. Honestly, this one’s a lifesaver on busy nights; it’s easy to make, but it looks like you put hours into it. My kids ask for this all the time, and I’ve even tested it with almond milk and a splash of espresso, which made it even creamier. Trust me, once you make Mississippi Mud Pie, you’ll understand why it’s a true Southern classic that’s won hearts for generations.
What is Mississippi Mud Pie?
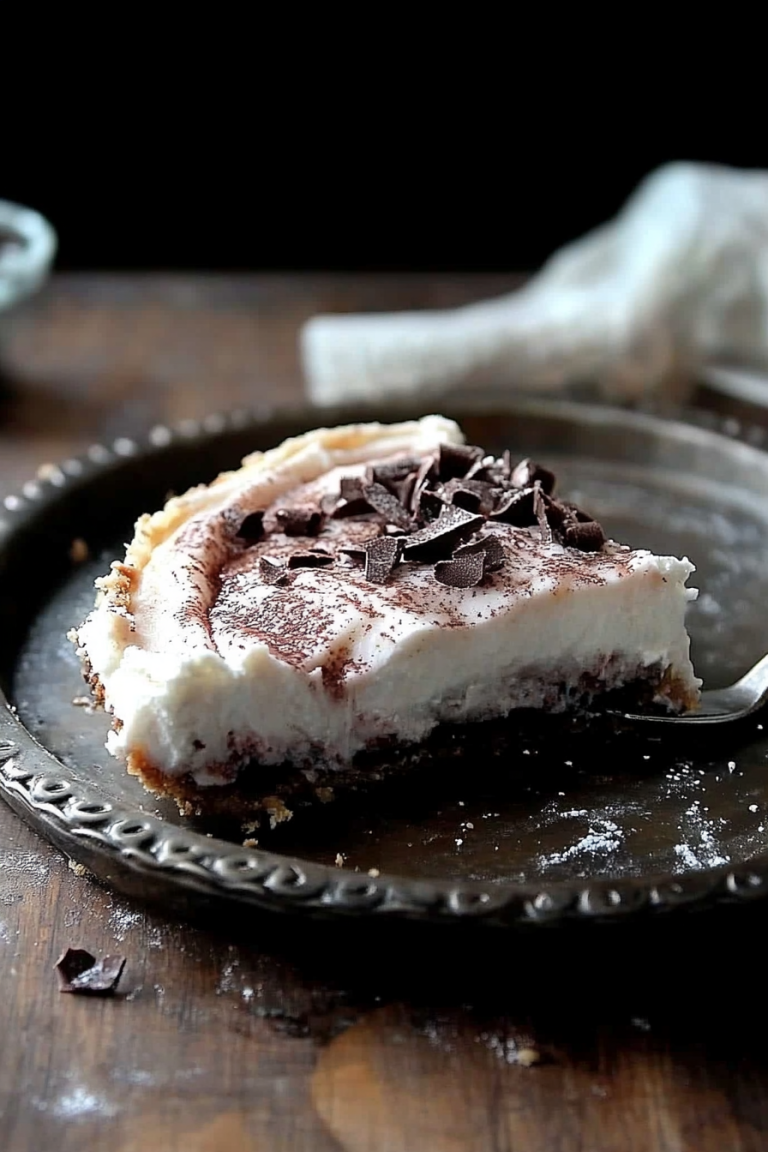
Think of Mississippi Mud Pie as the chocolate lover’s ultimate dream — a decadent dessert that combines a rich, fudgy layer with crunchy, nutty crust, all topped with whipped cream or a shiny glaze. Its name? Well, it’s snowy, dark, and thick like the muddy banks of the Mississippi River, but don’t let that fool you — it’s anything but muddy in flavor! It’s essentially a no-bake or baked pie with a simple, irresistible chocolate filling, often sprinkled with chopped peanuts or even marshmallows for extra texture. The story goes that this dessert originated in the Deep South, where the warmth of family gatherings meets the comforting familiarity of chocolate and nuts. And honestly, it’s one of those desserts that’s just as good on a quiet weeknight as it is on special occasions. Think of it as the lovechild of a rich brownie and a silky mousse — all packed into one heavenly slice.
Why you’ll love this recipe?
What I love most about Mississippi Mud Pie is how versatile and forgiving it is. It’s a dessert that feels super fancy but is actually quite easy to throw together, even if you’re short on time. The flavor? Out of this world. That deep, bittersweet chocolate paired with the crunch of toasted peanuts and the coolness of whipped cream — it’s a matchup made in dessert heaven. Plus, it’s budget-friendly; you probably already have many of these ingredients hiding in your pantry. I’ve made this countless times for family gatherings, potlucks, or just because I needed a little chocolate pick-me-up, and it’s always a hit. What I love most is how customizable it is: you can swap in dark chocolate, add a splash of espresso to amp up the flavor, or even sprinkle in some mini marshmallows to make it a bit more indulgent. Honestly, once you try it, you’ll see why this dessert has stood the test of time. It’s cozy, nostalgic, and downright delicious — a guaranteed crowd-pleaser that never fails.
How do you make Mississippi Mud Pie?
Quick Overview
This Mississippi Mud Pie is all about layers — a crunchy chocolate cookie crust, a rich chocolate filling, and topping that’s whipped to heavens, maybe with a drizzle of melted chocolate or chopped nuts. The best part? You can make it ahead of time, which makes it perfect for entertaining. The process is straightforward: prepare your crust, mix the decadent filling, pour it in, then chill or bake depending on your preference. Once it’s set, just add your favorite toppings and serve. It’s honestly one of those desserts you can assemble in under 30 minutes, then forget about until it’s time to enjoy. Trust me, the flavor deepens with time, so it’s especially delicious if you give it a few hours in the fridge.
Ingredients
For the Main Batter:
– 1 ½ cups crushed chocolate cookies (think Oreos or chocolate graham crackers)
– ½ cup unsalted butter, melted (or coconut oil for a dairy-free version)
– 2 tablespoons sugar (optional, depending on sweetness of your cookies)
For the Filling:
– ¾ cup evaporated milk or heavy cream
– 8 oz good quality semi-sweet or bittersweet chocolate, chopped
– ⅓ cup granulated sugar
– 2 large eggs (or flax eggs if vegan)
– 1 teaspoon vanilla extract
– 1 tablespoon instant coffee or espresso powder (trust me, it amplifies the chocolate!)
– Pinch of salt
– ½ cup chopped peanuts or walnuts (optional but highly recommended)
For the Glaze:
– ¼ cup semi-sweet chocolate chips melted
– 1 tablespoon butter or coconut oil
– Chopped nuts or sprinkles for garnish (optional)
Step-by-Step Instructions
Step 1: Preheat & Prep Pan
Preheat your oven to 350°F (175°C). Lightly grease your pie pan or line it with parchment if you prefer it easier to lift out. In a small bowl, combine the crushed cookies and melted butter until the mixture resembles wet sand. Press this mixture firmly into the bottom of your pan, creating an even crust. Pop it in the fridge or freezer while you prepare the filling to let it set.
Step 2: Mix Dry Ingredients
In a small bowl, whisk together the sugar, coffee powder, and salt. This helps to evenly distribute the flavors and prevent clumping in your filling. Have your chopped chocolate ready — I like to use a combination of bittersweet and semi-sweet for a complex flavor profile.
Step 3: Mix Wet Ingredients
In a medium saucepan, gently heat the cream or evaporated milk until it just starts to simmer. Remove from heat and add the chopped chocolate, stirring until smooth and glossy. This makes your ganache. Meanwhile, in a separate bowl, beat the eggs lightly and add vanilla. After the ganache cools just a bit, whisk it into the eggs to temper them, then pour in the sugar-coffee mixture and stir well.
Step 4: Combine
Once your filling is smooth and shiny, fold in the chopped nuts if using. Pour the filling over the prepared crust, smoothing the top with a spatula. If you’re feeling fancy, swirl with a toothpick or spoon for a marbled effect.
Step 5: Prepare Filling
For a baked version, pop the pie in the oven and bake for about 20-25 minutes, until the edges are set but the center is still slightly soft. If you prefer no-bake, just refrigerate for at least 4 hours, ideally overnight, until firm.
Step 6: Layer & Swirl
If you want a pretty swirl on top, wait until the pie is partially set, then spoon more melted chocolate on top and use a skewer or toothpick to create lovely swirls. Sprinkle with chopped nuts or mini marshmallows for extra texture.
Step 7: Bake
For the baked version, the timing is forgiving — start checking at 20 minutes. The top should be slightly puffed and set, with a deep, rich smell filling your kitchen. Don’t overbake; it’s supposed to be fudgy inside!
Step 8: Cool & Glaze
Once out of the oven, let your Mississippi Mud Pie cool completely on a wire rack. If you’re adding a glaze, melt your chocolate chips with butter, then pour evenly over the chilled pie. The coolness helps it set quickly and gives it that glossy finish you see in bakery photos.
Step 9: Slice & Serve
Use a sharp knife dipped in hot water for clean cuts, and serve chilled or at room temperature. I love a big dollop of whipped cream on top, and maybe a few extra chopped nuts. Slice carefully — this pie is dense, and you want to enjoy each decadent bite!
What to Serve It With
This dessert is a dream on its own, but pairing it with a scoop of vanilla ice cream or a dollop of whipped cream takes it to the next level. For brunch, serve slices with a shot of espresso or a glass of cold milk. During family dinners, I love adding a sprinkle of flaky sea salt on top to cut through the richness. At holiday gatherings or potlucks, nothing beats a big slice with fresh strawberries or a drizzle of caramel. I’ve even served small squares with a cup of strong coffee after dinner — the perfect cozy finish. Honestly, this Mississippi Mud Pie is like a warm hug wrapped up in chocolate, and it always disappears in minutes at my house. It’s one of those desserts that makes people say, “Wow,” even if you kind of winged it.
Top Tips for Perfecting Your Mississippi Mud Pie
After making this a hundred times, I’ve picked up some tricks I swear by. First, don’t skip the coffee powder — it heightens the chocolate aroma and flavor in every bite. I used to forget to prepare my crust early and scramble at the last minute, but trust me, pressing it into the pan and chilling it beforehand is a game-changer. For the filling, tempering the eggs by adding a little of the hot ganache slowly helps prevent curdling — I learned this after a few less-than-pretty lumps. If you want a shinier top, don’t be shy about melting more chocolate and pouring it slowly, then swirling beautifully. I’ve tested swapping the nuts for toasted coconut or even crushed pretzels — all work like a charm, depending on your mood. Baked or no-bake, I’ve found that the key is patience: chill it until it’s fully set, or the layers just meld perfectly. Also, if your pie cracks slightly on top, a quick drizzle of melted chocolate can hide a multitude of sins. Oh, and keep an eye on baking time — every oven is different, so start checking around 20 minutes.
Storing and Reheating Tips
This pie keeps beautifully in the fridge for up to 3 days, so don’t worry if you want to make it in advance. Just cover it tightly with plastic wrap or store it in an airtight container to prevent it from absorbing other fridge odors. If you want to keep leftovers longer, it freezes well — just wrap it thoroughly in plastic wrap, then foil, and it’ll stay good for up to a month. When ready to serve, thaw it overnight in the fridge or let it sit at room temperature for about 30 minutes if you’re in a rush. As for the glaze — honestly, I prefer to add a fresh layer of melted chocolate just before serving so it stays shiny and appetizing. Reheating isn’t necessary, but if you prefer it slightly warmer, a quick 10-second microwave blast on a slice can bring a comforting warmth to every bite. Just keep in mind, the texture might change a bit, but flavor stays just as amazing.
Frequently Asked Questions
Final Thoughts
If you’re anything like me, Mississippi Mud Pie is more than just dessert — it’s a comforting, nostalgic treat that personalizes every gathering. Its layered richness and textures make each bite memorable, and I love that this recipe is forgiving enough for a home cook to make their own tweaks. Whether you’re celebrating a holiday, whipping up something sweet on a weeknight, or just craving that indulgent chocolate fix, this pie never disappoints. I’ve shared it with friends who couldn’t believe how easy it was, and it’s become a staple at my family’s table. So go ahead, give it a try! I promise you’ll love seeing everyone’s face light up with that first bite. And please, come back and tell me how it turned out — I’d love to hear your tweaks or special touches. Happy baking!
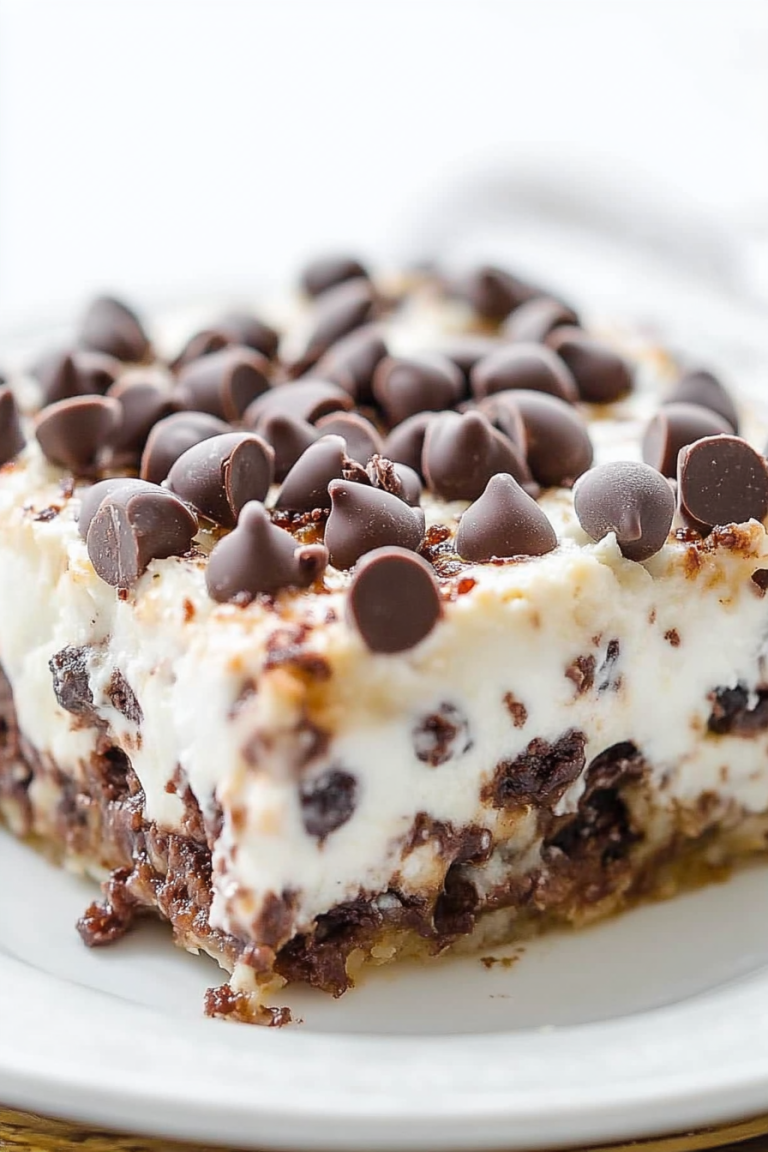
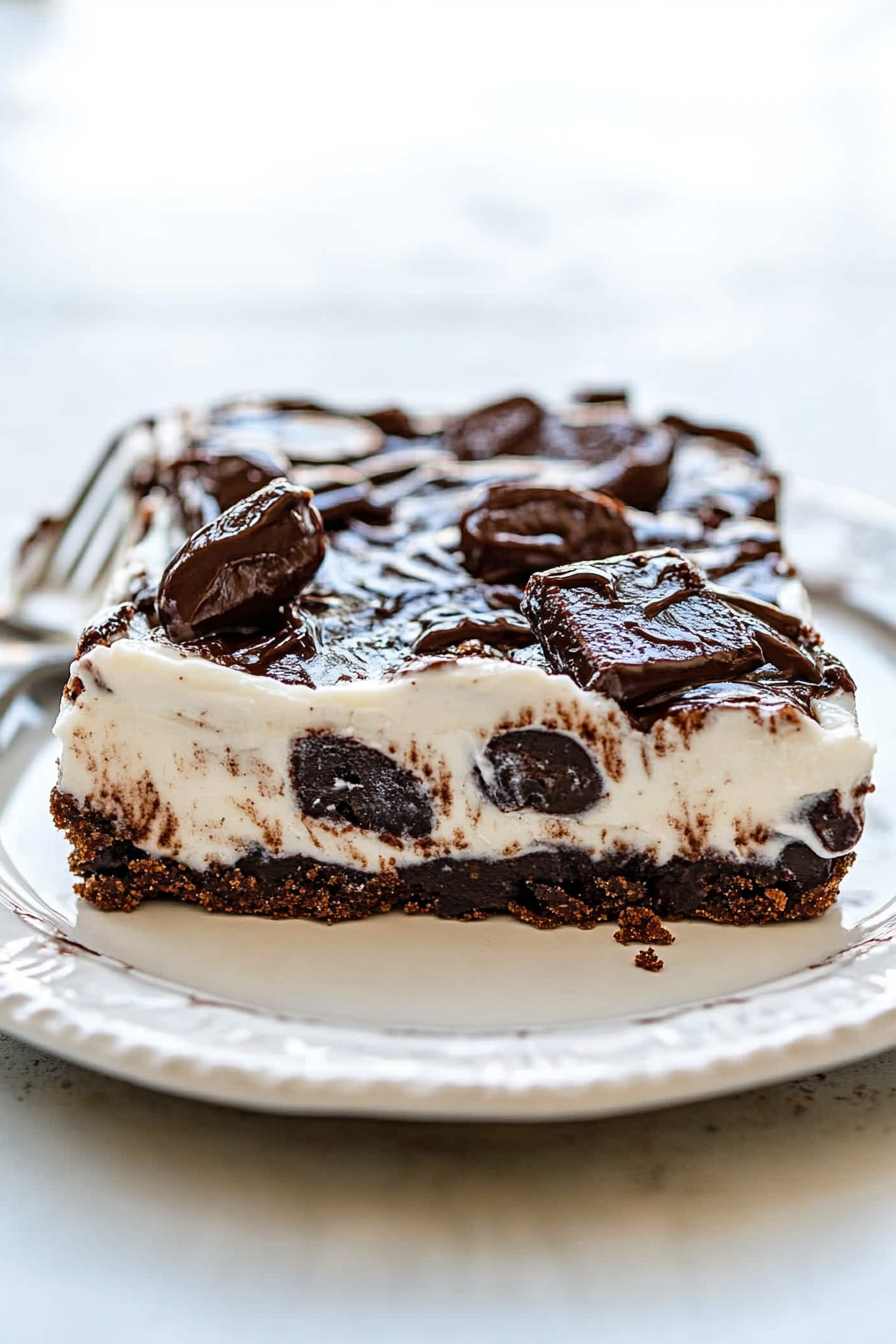
Mississippi Mud Pie
Ingredients
Method
- Preheat oven to 350°F, line a 9x13-inch pan with foil, and spray with non-stick spray.
- Mix cookie dough and cocoa powder until fully incorporated, then press into the prepared pan.
- Bake for 10-12 minutes, then cool for 15 minutes.
- Prepare pudding by mixing the pudding powder with milk and beating until thickened.
- Spread pudding evenly over the cooled cookie crust.
- Beat the softened cream cheese until fluffy, then add marshmallow creme and mix well.
- Fold in Cool Whip until smooth.
- Gently stir in half of the Oreo cookies, then spread the mixture over the pudding layer.
- Sprinkle remaining Oreo cookies on top.
- Cover and refrigerate for at least 4 hours or overnight.
- Just before serving, drizzle hot fudge over the top and serve immediately.