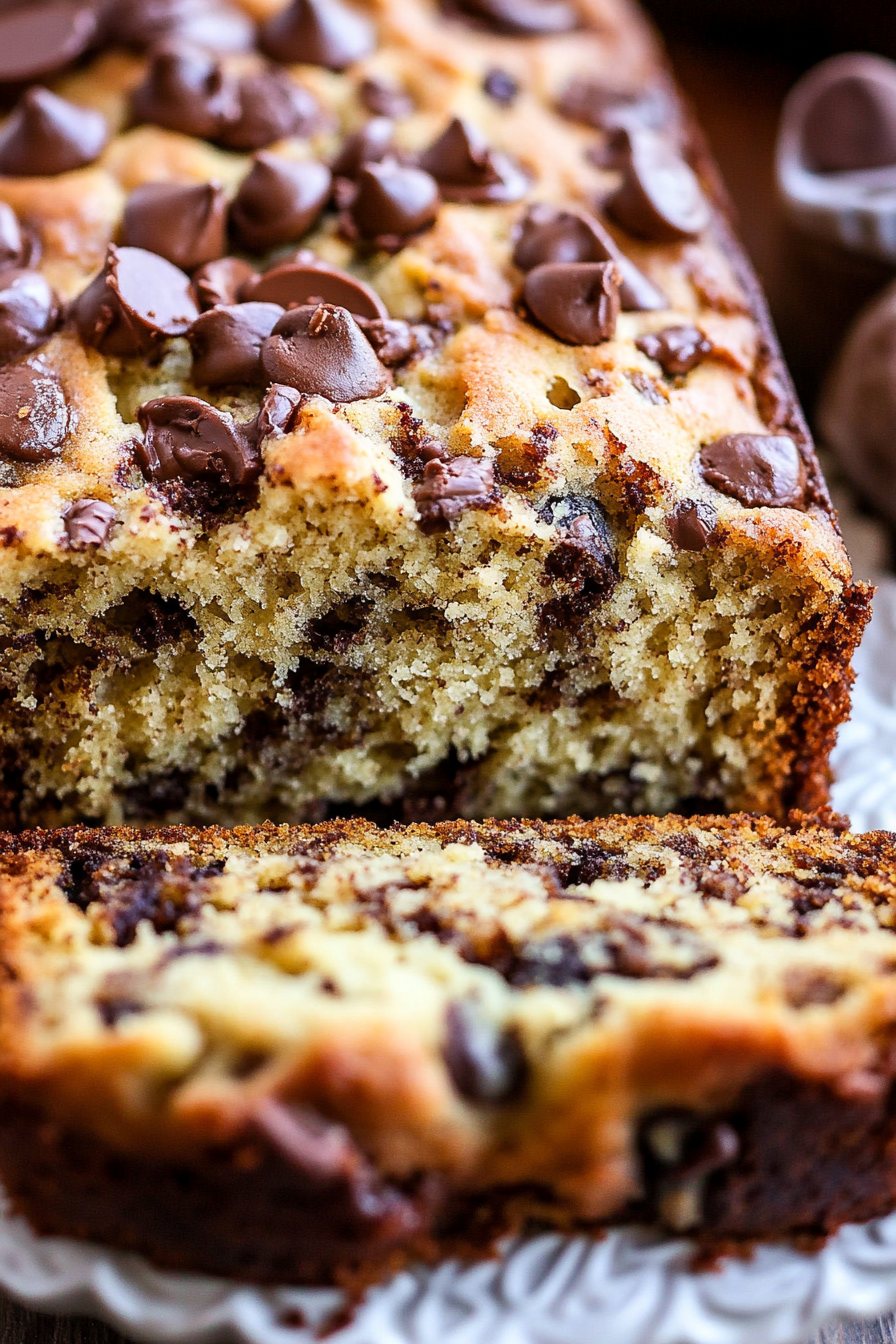
Delicious Banana Bread with Chocolate Chips
Oh, banana bread! Seriously, is there anything more comforting than a slice of perfectly moist, warmly spiced banana bread? For me, it’s pure nostalgia in every bite. I remember my grandma making it on rainy afternoons, the scent filling our whole house and instantly making everything feel cozy. It’s that kind of magic that this recipe brings. It’s not just *a* banana bread, it’s *the* banana bread – the one that always turns out, never disappoints, and disappears faster than you can say “seconds, please!” It’s my absolute favorite because it’s incredibly forgiving, uses up those sad, spotty bananas on the counter, and is just as good, if not better, than any fancy bakery version I’ve ever tried. If you’re looking for something that’s a little bit sweet, a little bit wholesome, and a whole lot delicious, you’ve found your match. It’s the perfect companion to a steaming cup of coffee in the morning, a delightful afternoon pick-me-up, or even a sneaky, satisfying dessert after dinner. Seriously, this is the banana bread recipe you’ll want to have memorized.
What is your go-to banana bread recipe?
So, what exactly makes this banana bread recipe my absolute champion? Well, think of it as the ultimate crowd-pleaser. It’s a classic quick bread, meaning it doesn’t require any yeast or complicated rising times. It’s wonderfully straightforward, relying on the magic of ripe bananas for sweetness and moisture. The “go-to” part comes from its sheer reliability and how adaptable it is. It’s not overly sweet, so you get that lovely banana flavor shining through, complemented by a hint of warm spices that make it feel like a hug in food form. It’s the kind of bread that’s perfect for when you’re craving something homemade but don’t have hours to spend in the kitchen. It’s honestly just my favorite way to transform those overripe bananas into something truly spectacular. It’s the comforting, familiar taste of home, baked into a delicious loaf.
Why you’ll love this recipe?
Honestly, there are so many reasons why I keep coming back to this recipe, and I just know you’ll fall in love with it too. First off, the flavor is just out of this world. We’re talking incredibly moist, tender crumb with those beautiful little pockets of concentrated banana goodness. The spices – a touch of cinnamon, maybe a pinch of nutmeg – they just add this warm, inviting aroma that makes your kitchen smell like a bakery. It’s not just about the taste, though. The simplicity of this banana bread is a game-changer, especially on those busy weeknights when you need a quick win. You probably have most of the ingredients in your pantry right now! And talk about budget-friendly! It’s the perfect way to use up ingredients that might otherwise go to waste. What I love most about this recipe, besides how delicious it is, is its versatility. You can dress it up with chocolate chips, nuts, or a simple glaze, or enjoy it plain. It’s so forgiving, which is a lifesaver for home bakers. I’ve tested this recipe countless times, even experimenting with different milks or fats, and it just keeps on giving. It’s the kind of recipe that makes you feel like a baking pro, even if you’re just starting out. It’s a true keeper, destined to become a family favorite in your home, just like it has in mine. It’s more than just a recipe; it’s a little bit of happiness baked into a loaf.
How do I make banana bread?
Quick Overview
Making this banana bread is wonderfully simple. You’ll mash your ripe bananas, whisk together your wet and dry ingredients separately, then gently combine them. A quick swirl of whatever delicious addition you choose (if any!), and it’s into the oven it goes! The result is a perfectly baked, incredibly moist loaf every single time. It’s honestly foolproof and takes hardly any active time.
Ingredients
For the Main Batter:
You’ll need about 3-4 really ripe bananas. The spottier, the better! They should be practically black on the peel for maximum sweetness and flavor. Make sure they’re mashed well – I like to leave a few little lumps for texture.
* 2 ½ cups all-purpose flour
* 1 teaspoon baking soda
* ½ teaspoon salt
* ½ teaspoon ground cinnamon (or more if you’re a cinnamon fiend like me!)
* ¼ teaspoon ground nutmeg (optional, but adds a lovely warmth)
* ½ cup unsalted butter, softened (or melted if you’re in a hurry, though softened gives a slightly better crumb)
* ¾ cup granulated sugar (you can adjust this down slightly if your bananas are super sweet)
* 2 large eggs, at room temperature
* 1 teaspoon vanilla extract
For the Filling (Optional, but highly recommended!):
This is where you can really have some fun! My kids always beg for chocolate chips, so that’s a frequent addition. But chopped walnuts or pecans are also fantastic.
* 1 cup chocolate chips (semi-sweet or dark work best!)
* ½ cup chopped walnuts or pecans (optional)
For the Glaze (Optional):
A simple glaze takes this from delicious to absolutely decadent. It’s so easy to whip up!
* 1 cup powdered sugar
* 2-3 tablespoons milk (or almond milk for a dairy-free option)
* ½ teaspoon vanilla extract
Step-by-Step Instructions
Step 1: Preheat & Prep Pan
First things first, get that oven preheated to 350°F (175°C). I like to use a standard 9×5 inch loaf pan. Grease it really well with butter or baking spray, and then I always dust it with a little bit of flour. This ensures your beautiful banana bread won’t stick. Some people like to line their pan with parchment paper too – that works wonderfully for easy removal.
Step 2: Mix Dry Ingredients
In a medium bowl, whisk together your flour, baking soda, salt, cinnamon, and nutmeg (if using). Give it a good whisk to make sure everything is evenly distributed. This is important so you don’t get a pocket of baking soda in one bite – trust me, I’ve learned that lesson the hard way!
Step 3: Mix Wet Ingredients
In a large bowl, cream together the softened butter and sugar until it’s light and fluffy. I usually use an electric mixer for this, but you can totally do it by hand if you don’t mind a bit of arm workout! Beat in the eggs one at a time, making sure each is fully incorporated before adding the next. Then, stir in the mashed bananas and the vanilla extract. It’s going to look a little lumpy, and that’s perfectly fine because of the bananas.
Step 4: Combine
Now, it’s time to bring the wet and dry ingredients together. Gradually add the dry ingredients to the wet ingredients, mixing on low speed (or with a spatula) until just combined. You don’t want to overmix this! Overmixing develops the gluten in the flour, which can make your banana bread tough. Stop mixing as soon as you don’t see any more streaks of dry flour. A few small lumps are okay!
Step 5: Prepare Filling
If you’re adding chocolate chips or nuts, gently fold them into the batter now. I like to reserve a few chocolate chips to sprinkle on top before baking for that extra visual appeal.
Step 6: Layer & Swirl
Pour about half of the batter into your prepared loaf pan. If you’re doing a swirl, this is a good time to add your swirl ingredients (like a spoonful of peanut butter or a cinnamon-sugar mixture). Then, add the rest of the batter. If you’re just adding chocolate chips, you can just pour the whole batter in and then sprinkle the reserved chips on top. If you want a really pretty swirl, you can dollop spoonfuls of something decadent on top and then use a knife or skewer to swirl it through the batter. Don’t go crazy, just a few gentle swirls will do.
Step 7: Bake
Bake for 50-65 minutes, or until a wooden skewer or toothpick inserted into the center comes out clean. Oven temperatures can vary, so keep an eye on it after about 50 minutes. If the top is browning too quickly, you can loosely tent it with foil. The smell that fills your kitchen during this time is just heavenly!
Step 8: Cool & Glaze
Once it’s done, let the banana bread cool in the pan for about 10-15 minutes. This helps it firm up. Then, carefully turn it out onto a wire rack to cool completely. If you’re adding a glaze, wait until it’s mostly cooled so the glaze doesn’t melt right off. Whisk together the powdered sugar, a tablespoon of milk at a time, until you get a nice drizzly consistency. Stir in the vanilla, and then drizzle it over the top of the cooled loaf. Let the glaze set for a bit before slicing.
Step 9: Slice & Serve
Once cooled (and glazed, if you’re doing that!), slice it up. I love using a serrated knife for clean slices. It’s delicious served at room temperature, but I have to admit, a slightly warm slice with the glaze still a little gooey is pure bliss.
What to Serve It With
This banana bread is so versatile, it fits into almost any meal or craving! For a simple yet satisfying Breakfast, a thick slice alongside a hot mug of coffee or a glass of cold milk is pure comfort. I sometimes toast it lightly and spread a thin layer of butter or cream cheese – divine! For a more elaborate Brunch, I’ll serve it as part of a spread with fresh fruit salad, maybe some yogurt parfaits, and a nice pot of tea or some mimosas. It adds that lovely homemade touch without much fuss. As a Dessert, it’s fantastic on its own, but a little scoop of vanilla bean ice cream alongside it? Unbeatable. You could also warm it up slightly and serve with a drizzle of caramel sauce or a dollop of whipped cream for a real treat. And for those Cozy Snacks moments, when you just need a little something sweet and comforting, a slice of this banana bread with a warm cup of herbal tea is my go-to. My family also loves it as a little after-school treat with a glass of chocolate milk. It’s just one of those things that makes any occasion feel a little bit special.
Top Tips for Perfecting Your My Go-To Banana Bread
After making this banana bread more times than I can count, I’ve picked up a few tricks that I think make all the difference. First, about Zucchini Prep – wait, did I say zucchini? Oops! I meant BANANA prep! The riper your bananas, the sweeter and more flavorful your bread will be. Don’t be afraid of those black spots! I usually just mash them with a fork in a bowl; you want it mostly smooth but a few little lumps are perfectly fine and add character. Now, for the Mixing Advice: remember my warning about overmixing? It’s crucial! Mix the wet and dry ingredients *just* until they’re combined. A few streaks of flour are better than a tough loaf. A spatula is your best friend here for gentle folding. When it comes to Swirl Customization, if you’re adding things like peanut butter or a cinnamon-sugar mix, don’t over-swirl. You want distinct pockets of flavor and visual appeal, not a muddy mess. Just a few gentle passes with a knife or skewer will do the trick. For Ingredient Swaps, I’ve experimented a lot! If you don’t have buttermilk, a tablespoon of lemon juice or vinegar added to regular milk and left to sit for 5 minutes creates a great substitute. I’ve also used applesauce in place of some of the butter for a slightly healthier twist, though it can change the texture a bit. When it comes to Baking Tips, always trust your oven’s temperature or use an oven thermometer to be sure. If your loaf starts browning too quickly on top, loosely tent it with aluminum foil. This also helps trap steam and keeps it moist. And for Glaze Variations, if you want a thicker glaze, just add less liquid. For a thinner, more translucent glaze, add more liquid. You can also add a pinch of cardamom or even a tiny bit of espresso powder to the glaze for a different flavor profile. These little adjustments make this recipe truly yours!
Storing and Reheating Tips
One of the best things about this banana bread is how well it keeps, making it perfect for baking ahead. For Room Temperature storage, once the loaf is completely cool, wrap it tightly in plastic wrap or aluminum foil, or place it in an airtight container. It should stay fresh and moist for about 2-3 days. This is my preferred way to store it if we’re planning to eat it within that timeframe, as it stays wonderfully tender. If you need to keep it longer, Refrigerator Storage is your best bet. Again, make sure it’s in an airtight container. It will last for about a week in the fridge, though sometimes the texture can change slightly and it might become a little denser. For Freezer Instructions, this banana bread freezes like a dream! Let it cool completely, then wrap it tightly in a layer of plastic wrap, followed by a layer of aluminum foil. You can also freeze individual slices this way. It will keep well in the freezer for up to 3 months. To thaw, simply unwrap it and let it come to room temperature on the counter, or thaw it in the refrigerator overnight. For Glaze Timing Advice, I highly recommend glazing the bread *after* it has cooled completely and just before serving. If you glaze a warm loaf, the glaze will melt and become a sticky mess. If you plan to freeze the bread with glaze, it’s usually best to freeze it *without* the glaze and add it once it’s thawed and you’re ready to serve. This prevents the glaze from cracking or becoming too soft.
Frequently Asked Questions
Final Thoughts
There you have it – my beloved banana bread recipe! It’s truly a labor of love, and by that I mean it’s incredibly easy to make and produces a loaf that just screams comfort and deliciousness. I hope you feel the warmth and joy that I get every time I bake this. It’s perfect for using up those overripe bananas that are just begging for a second life, and the result is always so rewarding. If you love this recipe, you might also enjoy my Fudgy Brownies or my Classic Chocolate Chip Cookies for more home-baked happiness. I can’t wait to hear how your banana bread turns out! Please leave a comment below and let me know what you think, or share any of your fun variations. Happy baking, and enjoy every single bite!
Ingredients
Method
- Preheat your oven to 350°F. Grease and flour a 9x5 inch loaf pan.
- In a large bowl, combine mashed bananas, softened butter, sugar, eggs, and vanilla until well blended.
- In a separate bowl, whisk together flour, baking soda, and salt.
- Gradually add the dry ingredients to the banana mixture, mixing just until combined. Fold in chopped walnuts.
- Pour batter into the prepared loaf pan. Bake for 55 minutes or until a toothpick inserted into the center comes out clean.
- Allow the bread to cool in the pan for 10 minutes, then transfer to a wire rack to cool completely before slicing.