Deviled Strawberries
Cheesecake Deviled Strawberries
There’s something magical about turning a humble berry into pure dessert magic, isn’t there? I still remember the first time I made these cheesecake deviled strawberries—I was hosting a little dinner party and wanted something that looked impressive but didn’t require hours in the kitchen. One quick prep later, my guests were swooning over every bite! These little bites combine the bright sweetness of fresh strawberries with a lusciously smooth cheesecake filling and a crunchy, slightly pink strawberry topping that just melts in your mouth. They’re no-bake, easy to make ahead, and somehow feel both fancy and comforting at the same time. Whether you’re prepping for Valentine’s Day, Easter brunch, or just craving a little indulgence, this recipe never fails to bring joy—and definitely wins points on presentation.
What Is Cheesecake Deviled Strawberries?
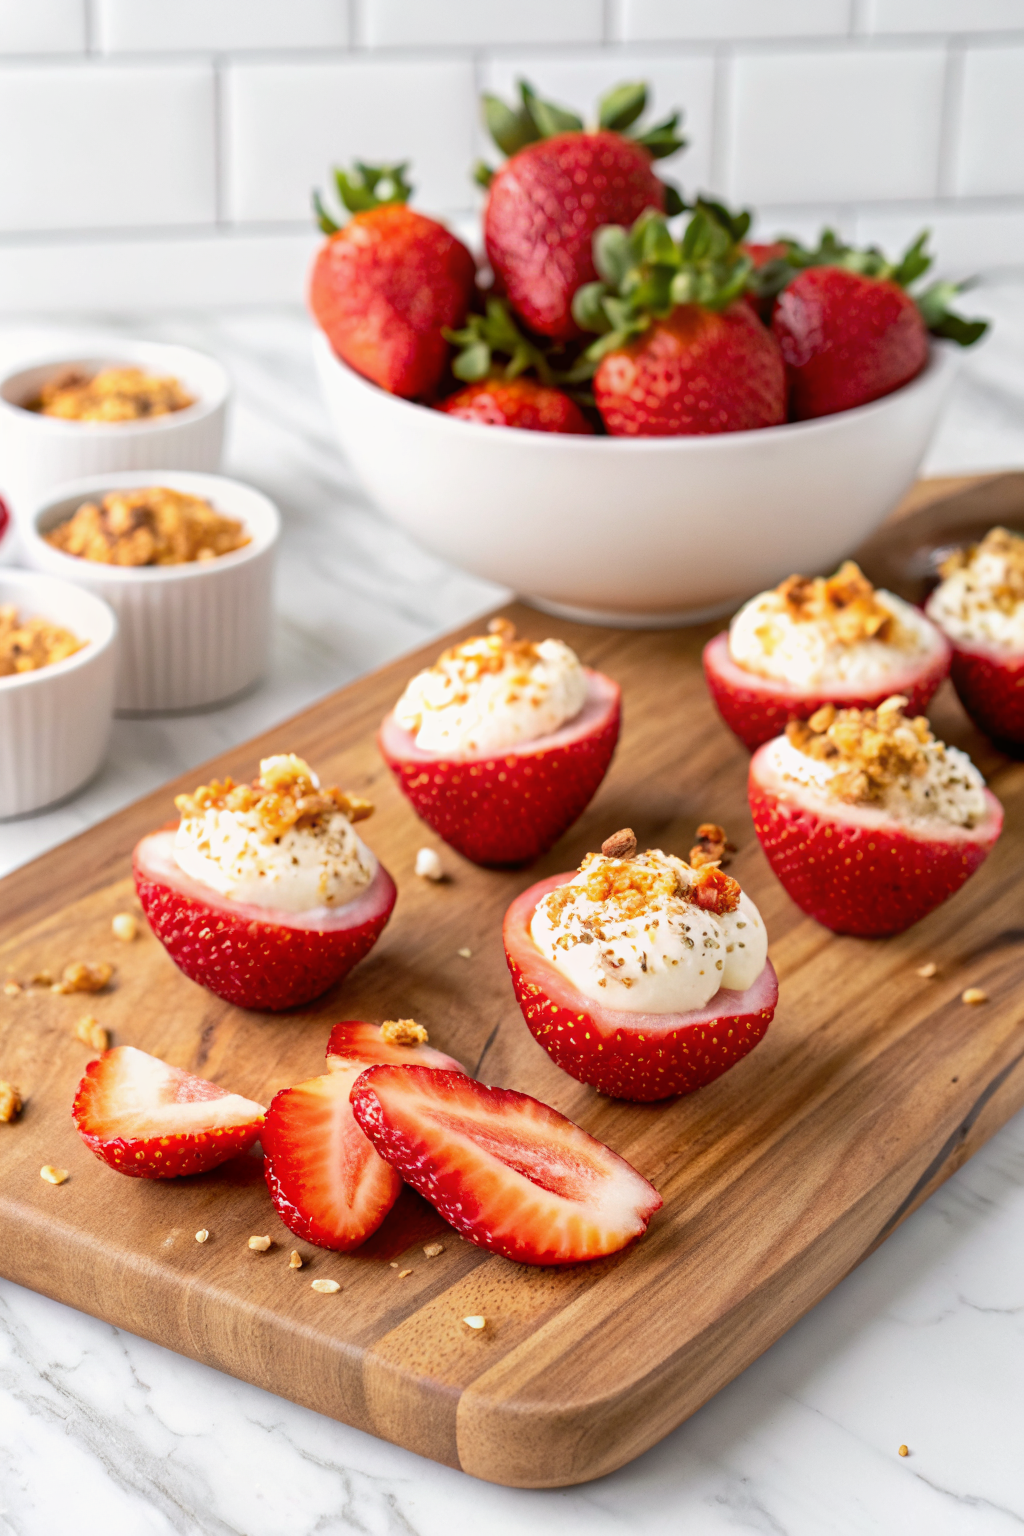
These are basically mini cheesecakes stuffed inside halved strawberries—hence the “deviled” name! You take large, fresh strawberries, slice them lengthwise, scoop out a tiny bit of the center (or not—sometimes I just leave the tip intact), fill each half with a rich cream cheese mixture flavored like real cheesecake, then top it all off with a sweet, crunchy crumble made from crushed Golden Oreos mixed with melted butter and a hint of strawberry gelatin. The result? A bite-sized treat that tastes exactly like summer in a bowl. They’re light, refreshing, and packed with flavor—perfect when you want cheesecake but don’t want to deal with cracking pans or long bake times.
Why You’ll Love This Recipe
If you love classic strawberry cheesecake but dream of something easier to serve at gatherings, these deviled strawberries are calling your name. First off, they’re incredibly versatile—you can dress them up with sprinkles for holidays or keep them simple for everyday treats. Plus, since they’re no-bake, you don’t need any special equipment beyond a hand mixer and maybe a piping bag if you’re feeling fancy. I also adore how they travel well; you can prep everything hours ahead and assemble right before serving, which is a lifesaver during busy entertaining days. And let’s be honest—there’s something undeniably fun about seeing friends’ faces light up when they realize what’s inside those pretty red shells. Whether you’re new to baking or just looking for crowd-pleasing desserts that feel effortless, this recipe hits all the right notes.
How to Make Cheesecake Deviled Strawberries
Quick Overview
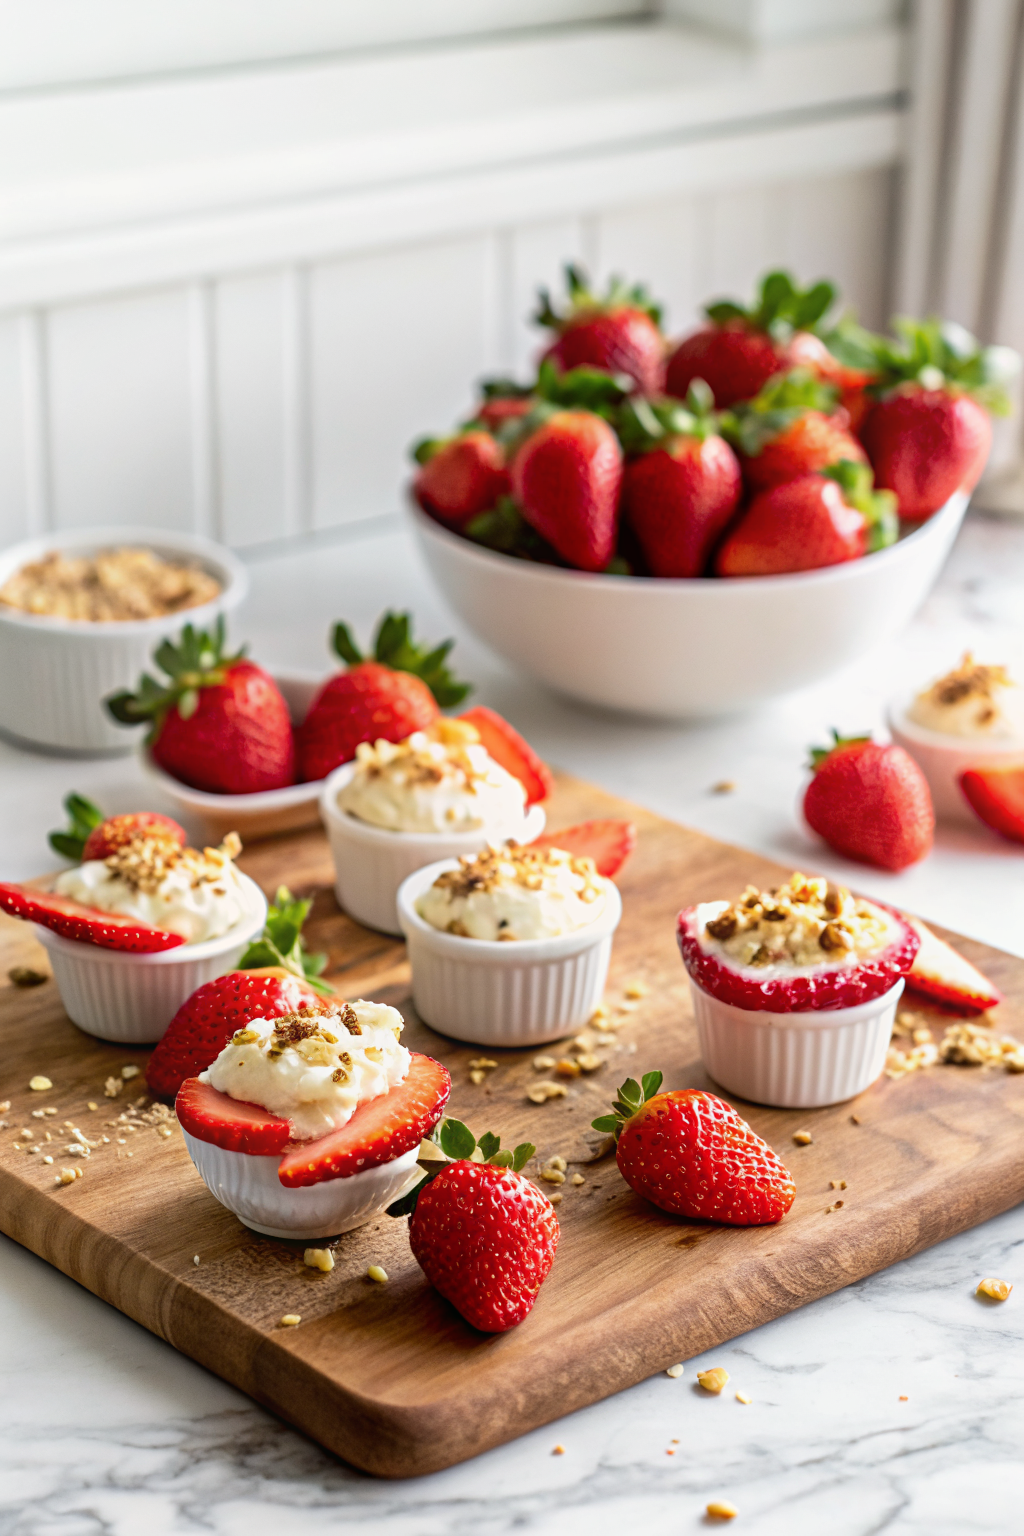
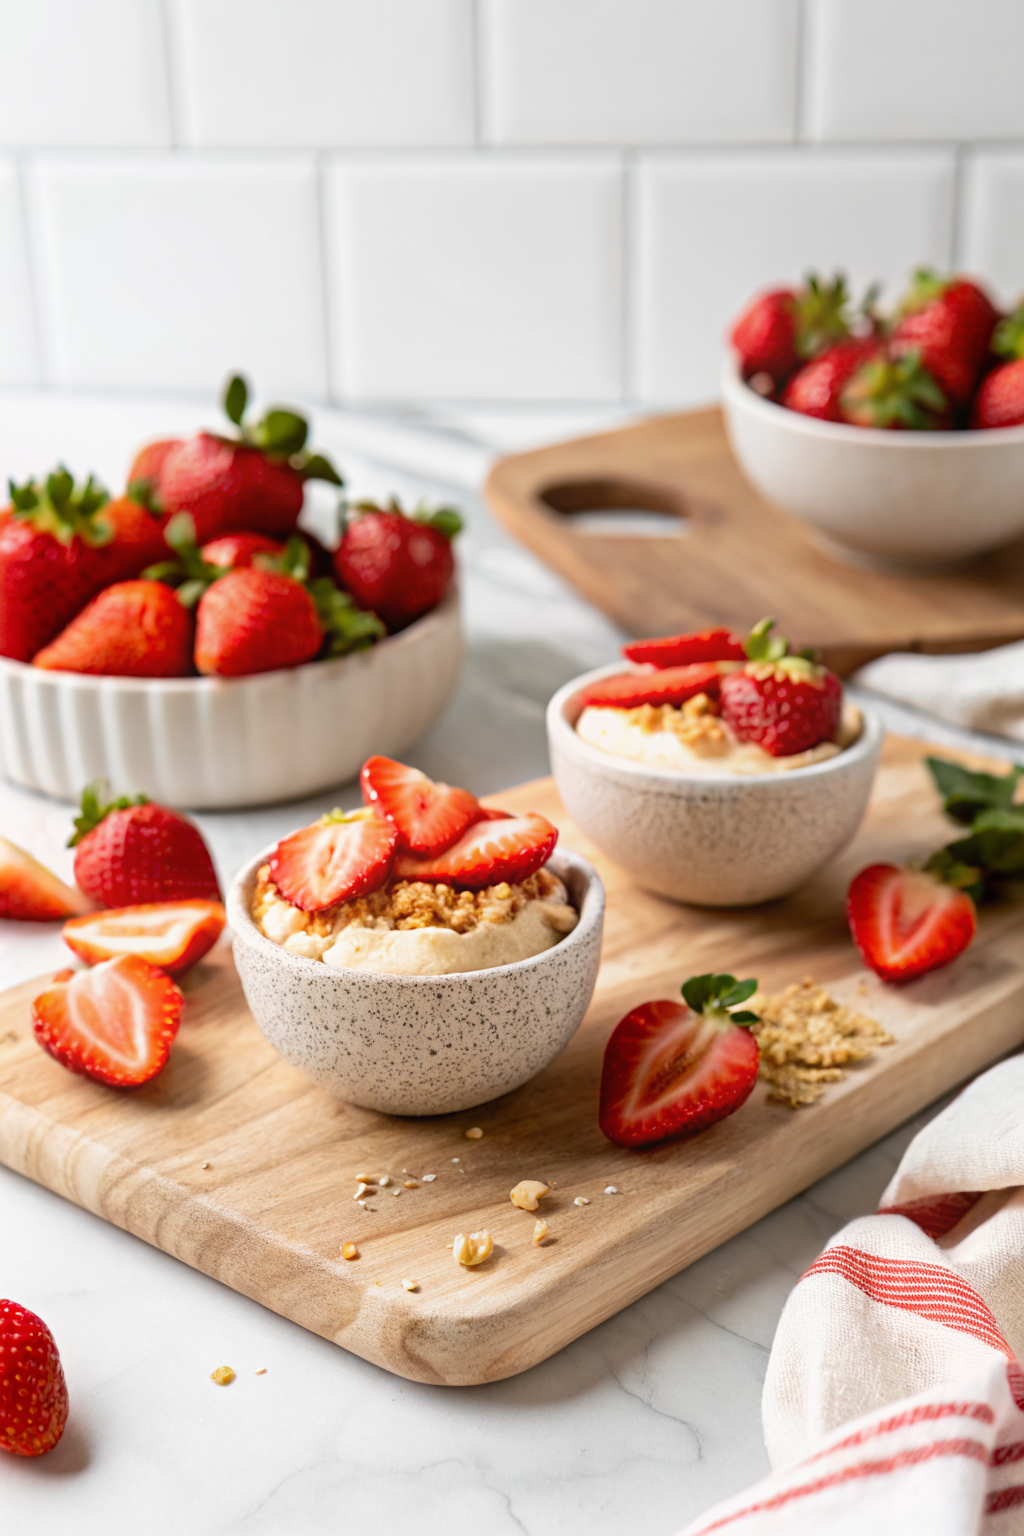
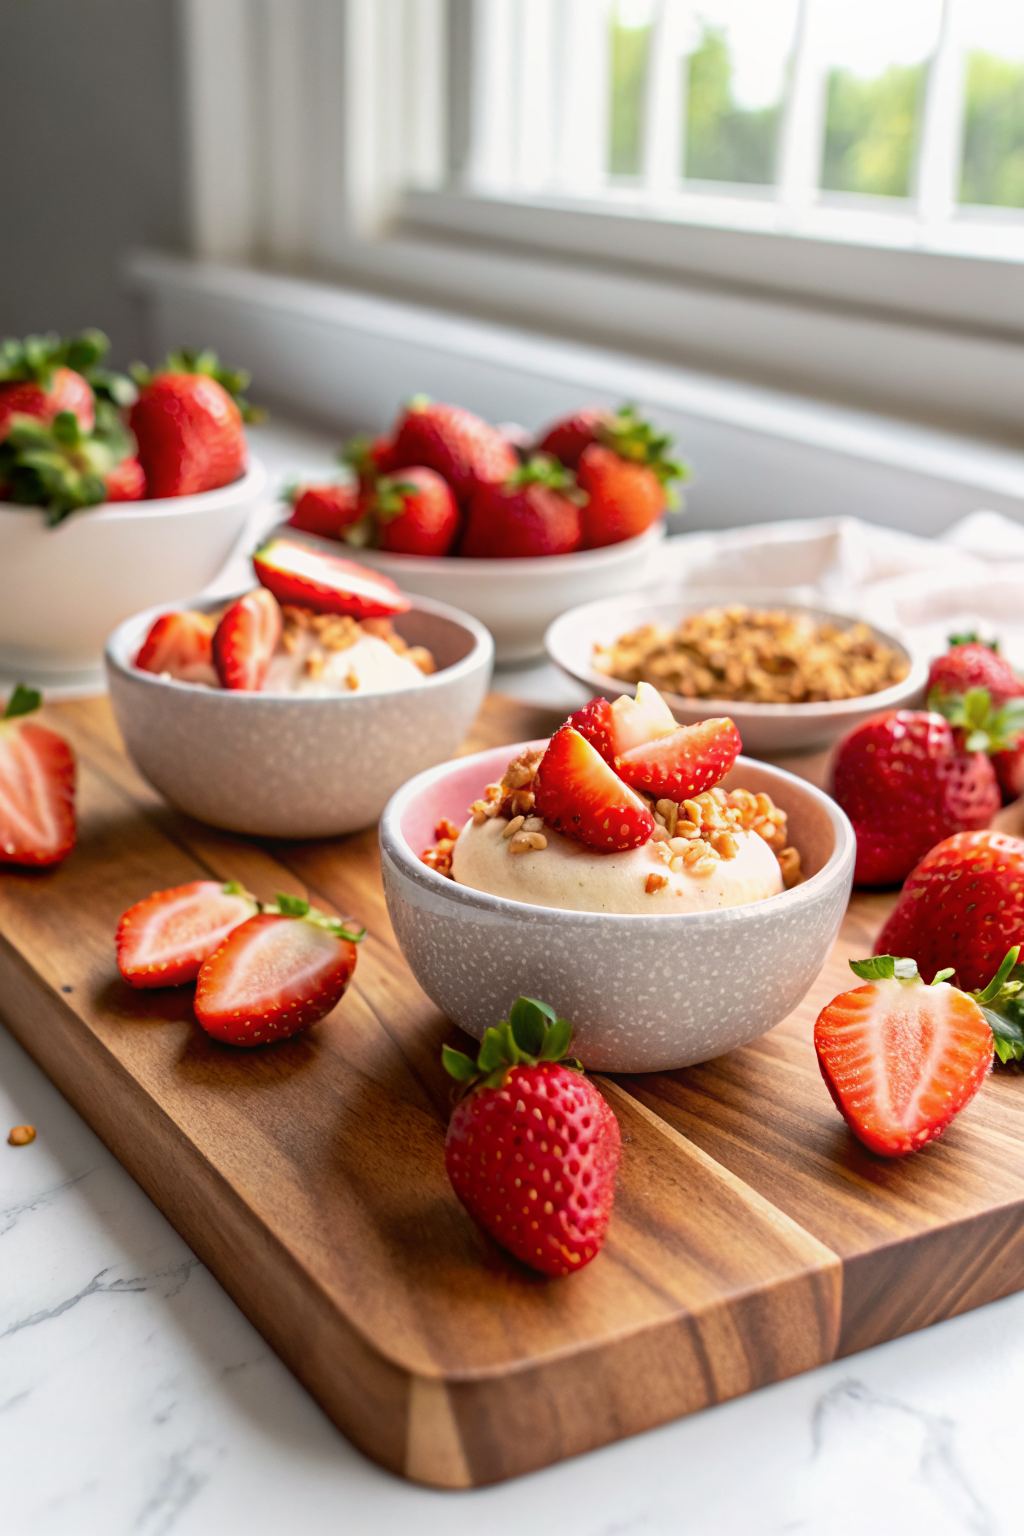
Making these is shockingly simple: start by crushing some cookies into fine crumbs, mix them with melted butter and a touch of strawberry gelatin, then toast the mixture briefly in the oven until golden. Meanwhile, whip together softened cream cheese, powdered sugar, heavy cream, vanilla, and salt until fluffy. Slice your strawberries in half, gently hollow out a small pocket (if desired), and dollop in the cheesecake filling. Finish by sprinkling the crunchy topping over each one. Total active time is under 20 minutes, plus chilling if you make the filling early!
Ingredients
- Strawberry Crunch Topping:
- 6 Golden Oreo cookies, finely crushed
- 1 tablespoon unsalted butter, melted
- 2 teaspoons strawberry-flavored gelatin powder (like Jell-O)
- Cream Cheese Filling:
- 12–15 large fresh strawberries, rinsed and patted very dry, cut into halves
- 8 ounces full-fat block-style cream cheese, softened to room temperature
- ¾ cup sifted powdered sugar
- 2 tablespoons heavy cream (half-and-half works too)
- 1 teaspoon vanilla extract
- ½ teaspoon fine sea salt
Step-by-Step Instructions
- Prep the crunch topping: Pulse the Golden Oreos in a food processor until they’re finely ground—don’t worry if they aren’t fully pink; that’s totally normal. In a separate bowl, whisk together the melted butter and strawberry gelatin until dissolved. Stir this into the cookie crumbs until everything is evenly coated.
- Bake the topping: Line a small baking sheet with parchment paper. Spread the crumb mixture in a thin, even layer and bake at 350°F for 8–10 minutes, or until lightly golden around the edges. Let cool completely while you work on the filling—this step ensures a crisp, not soggy, texture.
- Prepare the berries: Rinse your strawberries just before slicing—never soak them—then pat them absolutely dry with paper towels. Remove stems and cut each berry in half lengthwise. Arrange them on a serving platter with the cut side facing up.
- Make the filling: In a mixing bowl, beat the softened cream cheese on medium speed until smooth and creamy. Gradually add the powdered sugar, followed by the heavy cream, vanilla, and salt. Beat another minute or two until the mixture becomes light and airy—think whipped cheesecake batter.
- Assemble: Using a spoon or a piping bag fitted with a star tip, carefully fill each strawberry half with about 1–1½ teaspoons of the cream cheese mixture. Don’t overfill—they should look elegant, not overflowing.
- Top and serve: Sprinkle generously with the cooled crunch topping. Serve immediately for best texture, though you can chill them briefly if needed. Enjoy within an hour or two to keep that satisfying crunch intact.
What to Serve It With
These deviled strawberries shine as part of a larger spread—imagine pairing them with chocolate-dipped shortbread, fruit salad skewers, or a simple lemon drizzle cake. For brunches or showers, arrange them on a tiered stand alongside macarons or petit fours. If you’re serving them at a spring gathering, add a few edible flowers or mint leaves for a pop of color. They also pair beautifully with sparkling rosé or a cold glass of milk—yes, really, it works!
Top Tips for Perfecting Your Cheesecake Deviled Strawberries
- Choose the right strawberries: Aim for berries that are about 2 to 2½ inches wide—they’ll sit flat and look more like classic deviled eggs.
- Dry thoroughly: Any moisture left on the berries will seep into the filling and soften it. Pat them down with paper towels until squeaky clean.
- Use full-fat cream cheese: Low-fat or whipped varieties won’t hold their shape as well and can make the filling too soft.
- Don’t skip the gelatin: Even though it’s only 2 teaspoons, it adds subtle strawberry flavor and helps bind the crunch topping together.
- Pipe or spoon? Both work! If you’re nervous about mess, a spoon is foolproof—just avoid overfilling so the filling doesn’t ooze out.
Storing and Reheating Tips
These are best enjoyed fresh—ideally within 30 to 60 minutes of assembling. As soon as the berries release their natural juices, the crunch topping starts to soften, and the filling may become runny. If you must save leftovers, store any un-assembled crunch topping in an airtight container at room temperature for up to a week. The cream cheese filling can be made up to 24 hours ahead and kept covered in the fridge—just let it come to room temperature before using. Freezing assembled strawberries is not recommended—the texture will suffer once thawed. Reheating? Not a fan—these are meant to be chilled and crisp.
Frequently Asked Questions
Final Thoughts
There’s something so delightful about biting into a strawberry and discovering that creamy, dreamy surprise inside. These cheesecake deviled strawberries aren’t just delicious—they’re a celebration of simplicity, freshness, and a little bit of dessert magic. Whether you’re making them for a special occasion or just treating yourself, they’ll always taste like a moment worth savoring. So go ahead—crush those cookies, whip that filling, and watch your loved ones smile. Trust me, once you try these, you’ll find yourself reaching for them again and again.
Deviled Strawberries
Ingredients
Method
- Preheat the oven to 350°F. Line a small baking sheet with parchment paper or a silicone mat and set aside.
- Add the golden oreo cookies to a small food processor or high-speed blender and pulse for 30–60 seconds until finely crushed. Transfer the crumbs to a bowl and set aside.
- In a separate bowl, stir together the melted butter and strawberry gelatin powder until dissolved and fully blended.
- Add the strawberry mixture to the cookie crumbs and stir to combine. The cookie crumbs will not turn completely pink—this is expected and creates the desired crunchy two-toned texture.
- Transfer the strawberry crunch mixture to the prepared baking sheet, spread to a thin even layer, and bake for 8–10 minutes or just until lightly golden. Remove from the oven and allow to cool completely while preparing the cream cheese filling.
- Rinse the strawberries under cool water, then pat them dry very well. Cut the strawberries in half lengthwise (removing any green leaves) and place onto a serving platter with the sliced side facing up. Set aside.
- Beat the cream cheese in a large bowl with a handheld mixer on medium speed for 1–2 minutes or until smooth and creamy.
- Add the powdered sugar, beat on low until fully incorporated, followed by the heavy cream, vanilla extract, and salt. Beat for an additional 1–2 minutes or just until light and creamy.
- Dollop a 1½ teaspoon-sized amount of the cream cheese filling onto the cut surface of each strawberry. Alternatively, transfer the filling to a piping bag fitted with a piping tip for decorative dollops.
- Once all strawberries have been topped with the cream cheese filling, sprinkle generously with the reserved strawberry crunch topping and serve immediately.