Easy Asian Rice Recipe Explained
Growing up, there was always something magical about the smell of steamed rice wafting through our house. My mom would toss aromatic jasmine or fragrant basmati, but nothing compared to the comforting simplicity of this Asian rice recipe I’ve fallen in love with over the years. It’s the kind of dish that feels like a warm hug, perfect for weeknights when everyone’s running around and dinner has to be quick but satisfying. Honestly, I always do this when I want a no-fuss, delicious side—especially because it pairs with everything from stir-fries to grilled fish or even a simple fried egg on top. And the best part? It’s surprisingly easy, and I can whip it up without breaking a sweat. Trust me, once you try this, it might just become your go-to, too. My kids actually ask for seconds, and their little faces light up when I serve it—what’s better than that? Let’s get cooking! This one’s a lifesaver on busy nights or whenever I need a comforting, cozy dish at the table.
What is Asian rice?
Think of Asian rice as the backbone of many dishes across Asia—kind of like the soul behind a good stew or the crust in a pizza. It’s essentially plain white rice, but with a few simple tricks, it can be turned into something a little more special. The phrase “Asian rice” covers a whole world of rice varieties—short grain, jasmine, basmati, and more—each bringing its own personality to the table. The name might sound broad, but it’s really just a shorthand for rice cooked with a technique that enhances its natural flavor and texture. Often, it involves rinsing thoroughly to remove excess starchy water, then cooking it so it’s fluffy but sticky enough to pick up with chopsticks or a spoon. Growing up, I always thought of it as “plain rice,” until I realized that the secret was in the cooking method and seasoning. Think of it as a blank canvas—ready for all sorts of savory, sweet, or spicy toppings—and that’s what makes Asian rice so versatile and beloved worldwide.
Why you’ll love this recipe?
What I love most about this Asian rice recipe is how it elevates that humble grain to something really memorable. The amazing flavor starts with just a few ingredients, but the trick is in the technique—perfectly fluffy, subtly fragrant, and with a tender bite every time. It’s also surprisingly simple, especially if you’ve ever wrestled with soggy or unevenly cooked rice before. Once you get the hang of rinsing well and watching your water ratio, you’ll see how fail-proof this method is. Plus, it’s budget-friendly, too—just rice, a little water, and a pinch of salt. I keep this on hand for so many occasions: busy weeknights when I need something fast, when I want a side that matches anything, or even as the base for a stir-fried bowl or rice salad. And honestly, the smell alone is enough to draw everyone to the kitchen—warm, slightly nutty, with a whisper of earthiness. My favorite thing? It stands up beautifully to bold flavors, like sweet soy or spicy chili oil, making it incredibly versatile. Just trust me on this: once you make it once, it’s hard to go back to plain old steamed rice.
How do I make Asian rice?
Quick Overview
This recipe is all about that silky, fluffy texture—no fancy equipment needed, just a simple pot and a little patience. I rinse the rice well to remove excess starch, then cook it in a measured amount of water with a pinch of salt. The secret to perfect Asian rice is careful water ratio and a gentle simmer—no stirring, just set it and forget it. Once it’s cooked, I let it rest off the heat for a few minutes, and then fluff it with a fork or chopsticks until it’s light and airy. If I want to add extra flavor, I sometimes toss in a knob of butter or a splash of soy sauce while fluffing. It’s quick, cost-effective, and yields a consistency that’s just right for any dish. This process results in rice that’s tender but not mushy, sticky enough to hold together, yet fluffy enough to enjoy with every bite.
Ingredients
For the main rice: What is the best way to prepare it?
- 1 cup of long-grain jasmine rice (or your favorite variety, but jasmine gives it that authentic aroma)
- 1 and 1/4 cups of filtered water (adjust slightly based on your rice type and preference)
- Pinch of salt (to enhance the flavor)
Optional Add-ins for Flavor:
- 1 teaspoon of sesame oil or a small pat of butter (for extra richness)
- Soy sauce or tamari (for a savory twist)
- Green onions or chopped herbs (for freshness)
Preparation Tips: Always rinse the rice until the water runs clear. Trust me, this step makes a huge difference in avoiding that gluey texture. Also, measuring water carefully ensures consistency—too much, and it becomes mushy; too little, and it’s undercooked.
Step-by-Step Instructions
Step 1: Preheat & Prep Pan
Start by rinsing your rice thoroughly in cold water until it runs clear—that’s my number one tip. While rinsing, get your pot ready by adding a splash of oil or butter if you like a richer rice. Set your burner to medium-high heat and let’s go!
Step 2: Mix Dry Ingredients
In the pot, add the rinsed rice and sprinkle the salt evenly over it. Rinsing removes excess starch, which keeps the rice from becoming overly sticky—trust me, this difference is noticeable.
Step 3: Mix Wet Ingredients
Measure out your water carefully—1 and 1/4 cups for 1 cup of rice—and pour it over the rice. You can add a splash of soy or a drizzle of sesame oil here if you’re feeling fancy. Bring it to a gentle boil, watching for steam and tiny bubbles forming.
Step 4: Combine
Once boiling, give it a quick stir, then lower the heat to the tiniest simmer. Cover the pot with a tight-fitting lid and let it cook undisturbed for about 15 minutes. No peeking or stirring—this is key for that perfect fluffy texture.
Step 5: Prepare Filling (Optional)
If you’re adding extra ingredients like chopped vegetables, scallions, garlic, or protein, prepare those while the rice cooks. I often throw in frozen peas or shredded carrots during the last few minutes of cooking for some added color and flavor.
Step 6: Layer & Swirl
Once the cooking time is up, turn off the heat and let the rice sit, covered, for another 10 minutes. This rest period helps everything settle and finish steaming. Then, fluff the rice gently with a fork or chopsticks, mixing in any flavor additions.
Step 7: Bake
If you like slightly toasted rice, you can transfer it to a hot skillet and sauté for a few minutes. This step is optional but adds a lovely nutty flavor that I adore.
Step 8: Cool & Glaze
Serve immediately for the best texture, or keep warm. If you’re adding a glaze or drizzle—like honey or soy—do it when the rice is still warm to help it soak in beautifully.
Step 9: Slice & Serve
This rice is best enjoyed fresh, but you can store leftovers in an airtight container. Fluff it up again before serving; it’s perfect alongside stir-fries, grilled veggies, or even as a base for some fried rice!
What to Serve It With
This rice pairs beautifully with so many dishes. For breakfast, I love it with a fried egg and a dash of soy—kind of like a savory breakfast bowl. For lunch or dinner, it’s a natural partner for stir-fried vegetables, grilled chicken, or tofu. Sometimes, I make a big batch and turn it into fried rice with scrambled eggs, scallions, and a splash of soy sauce—my kids adore that. It’s also fantastic topped with shredded beef or a spicy Korean stew. On cozy nights, I serve it with a side of miso soup or fresh spring rolls. Honestly, it’s such a versatile staple, and nothing beats the smell of freshly cooked Asian rice filling the kitchen—my secret weapon for those busy days when I want a home-cooked feeling.
Top Tips for Perfecting Your Asian Rice
After years of experimenting, I’ve learned a few tricks that make my rice turn out perfect every single time. First, always rinse your rice thoroughly; that excess starch can make it gluey. I’ve tested with different water ratios, but 1 and 1/4 cups water per cup of rice is my sweet spot—adjust based on your rice variety or altitude. For extra fragrance, toss in a star anise or a bay leaf during cooking—trust me, subtle aromatics go a long way. When I want a slightly sticky yet fluffy texture, I sometimes swap a little of the water for chicken or vegetable broth—adds flavor without much effort. My biggest lesson? Resist the urge to open the lid during cooking or stirring—this can let out the steam needed for fluffy grains. And if you want that toasty, golden rice with a crispy crust, I suggest stirring in a little oil and sautéing the cooked rice on high heat for a few minutes at the end. Finally, if you’re feeling adventurous, experiment with flavored oils or infused broths. It really elevates your rice and makes it feel just a bit more special.
Storing and Reheating Tips
The best part about Asian rice is that leftovers aren’t just good—they’re great! Keep any extra rice in an airtight container in the fridge for up to 3 days. To reheat, sprinkle a little water over the rice, cover it with a damp paper towel or a microwave-safe lid, and microwave in short bursts until hot and fluffy. I find that this prevents it from drying out or turning hard. If you’re planning to store it for longer, freezing is your friend—just portion it into freezer-safe bags, squeeze out excess air, and it’ll keep for up to a month. When thawing, microwave until steamy or reheat in a covered skillet with a splash of water. I usually add a quick sprinkle of fresh herbs or a dash of soy before serving again to bring back that fresh flavor. Just keep an eye on it—the rice can sometimes get clumpy if it’s been frozen for too long, but a good fluff with a fork usually fixes it right up.
Frequently Asked Questions
Final Thoughts
Honestly, this Asian rice recipe has become a staple in my kitchen because it’s simple, comforting, and endlessly adaptable. I love how a plain grain can carry so many flavors and serve as the foundation for countless meals. From lazy weekend dinners to quick weeknight fixes, it never disappoints. Plus, the smell of it cooking is one of those nostalgic, homey aromas that instantly makes everyone feel at ease. I’ve tested this on friends and family, and it always gets rave reviews—I think it’s because it’s just so honest and humble but with that little touch of love. So next time you need a quick, satisfying side or a base for something more elaborate, give this a try. I can’t wait to hear how yours turns out! Feel free to leave a comment, share your own twists, or ask questions—I’m always happy to chat about rice or any of my favorite dishes. Happy baking (or steaming)!
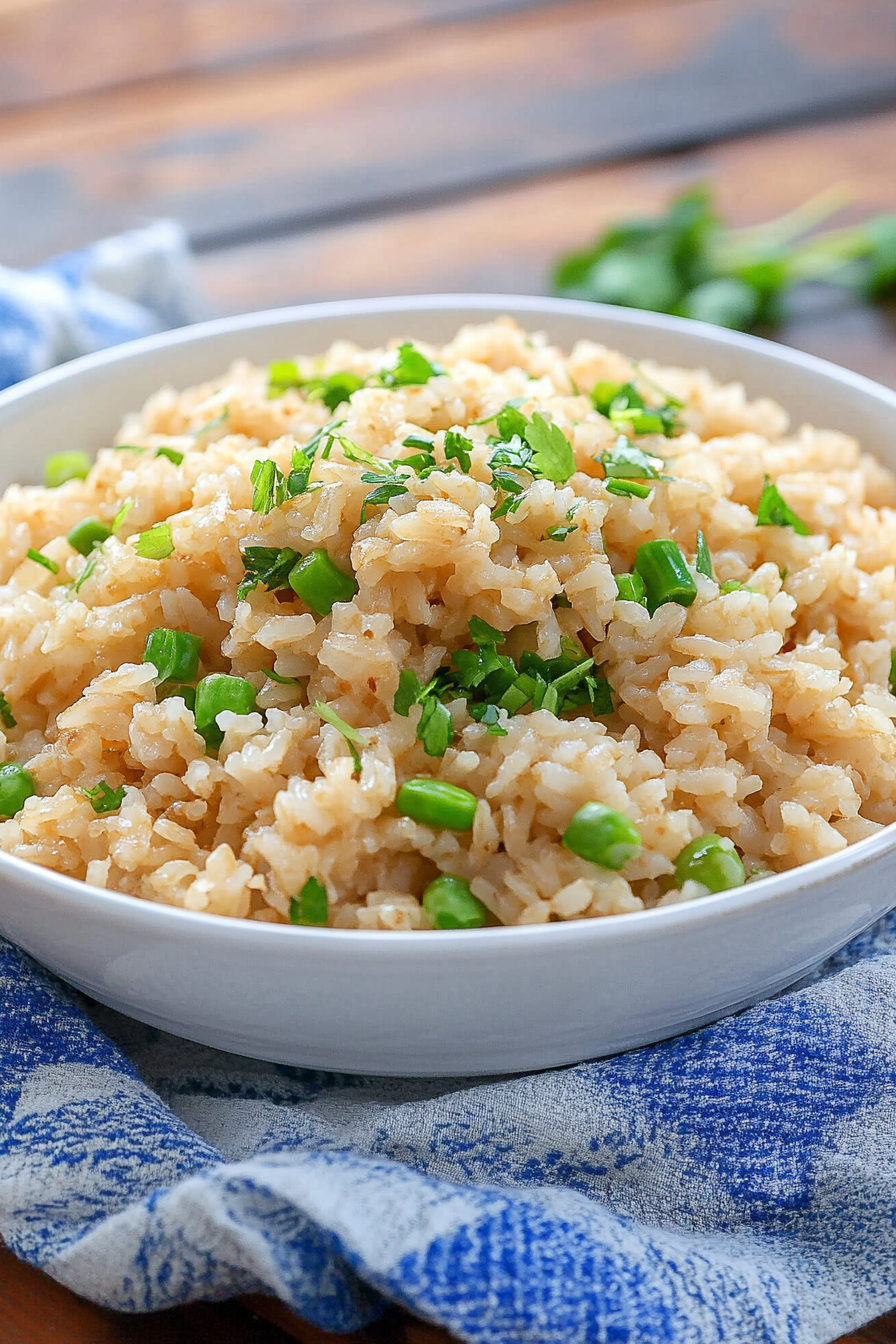
Simple Asian Rice
Ingredients
Method
- Combine the rice and the chicken stock in a large saucepan or skillet, cover with a lid and bring to a boil. Reduce the heat to low and simmer for 18 minutes.
- At the end of the cooking time, stir the rice and check the rice for tenderness. If the liquid has been absorbed, drizzle with the soy sauce and sesame oil and toss well to coat.
- Add frozen peas, if desired, and stir to combine. The heat of the rice will cook them in just a minute or two. Taste the rice, and add salt, only if needed. Add the green onions, stir and keep covered until ready to serve. Enjoy!