Easy Baked Pickles with Herb Flavor
You know those moments, right? The ones where you’re staring into the fridge, and a little voice in your head whispers, “Snack?” But you’re tired, maybe a bit lazy, and the thought of actually *making* something feels like too much effort. I’ve been there, my friends, more times than I can count. And that’s exactly how this absolute gem of a recipe for baked pickles came into my life. Forget those soggy, greasy fried versions you might have tried. This is different. This is… magical. It’s like a flavor explosion waiting to happen, and the texture? Oh, the texture! Crispy on the outside, tender on the inside, and with just the right amount of tangy zing. My kids devour these like they’re going out of style, and honestly, I often sneak one (or three) myself when no one’s looking. If you’re a pickle lover, or even just someone who appreciates a seriously satisfying crunch, you’re going to fall head over heels for these baked pickles.
What is baked pickles?
So, what exactly *are* these wondrous little bites of joy? Think of them as the healthier, oven-baked cousin to your classic fried pickles. Instead of being dunked in greasy batter and deep-fried, these pickles get a glorious coating of seasoned breadcrumbs and a quick bake in the oven until they’re golden brown and wonderfully crisp. The name itself, “baked pickles,” is pretty straightforward, but the experience is anything but. It’s the perfect alchemy of tender, tangy dill pickles transformed into a snack that’s delightfully crunchy, savory, and just a little bit addictive. They’re essentially little flavor bombs that hit all the right notes without weighing you down. It’s a concept that feels so simple, yet the result is surprisingly sophisticated and utterly delicious.
Why you’ll love this recipe?
Let’s get real for a second. There are a million snack recipes out there, so why should you give this one a try? Well, for starters, the flavor is absolutely out of this world. You get that familiar, beloved dill pickle tang, but it’s elevated by the crispy, savory coating. It’s that perfect sweet-salty-tangy combination that just makes your taste buds sing. And the crunch! Oh, the glorious crunch. It’s incredibly satisfying, almost like biting into a perfectly fried onion ring, but with way less fuss. Speaking of fuss, the simplicity of this recipe is a huge win. I can whip these up in under 30 minutes from start to finish, which makes it a lifesaver on busy weeknights when everyone’s suddenly starving. Plus, they’re surprisingly budget-friendly. A jar of pickles and some pantry staples are all you really need. What I love most, though, is their versatility. They’re not just for dipping; they’re fantastic on salads, tucked into sandwiches, or just eaten straight from the baking sheet. Seriously, these baked pickles are so good, they’ll become your go-to whenever that craving strikes.
How do I make Baked Pickles?
Quick Overview
The magic of these baked pickles lies in their straightforward preparation. You’ll simply drain and pat dry your pickles, give them a quick dip in a seasoned batter, coat them generously in panko breadcrumbs, and then pop them in a hot oven until they’re golden and crispy. It’s a three-step wonder that leads to an incredibly satisfying snack. No deep frying, no complicated techniques, just pure, simple deliciousness. This method ensures a beautifully even crispness that you just can’t get any other way. It’s honestly one of the easiest “wow” snacks I know how to make.
Ingredients
For the Pickles:
You’ll want to start with a good quality jar of dill pickles. I personally love the crinkle-cut ones because they have more surface area for that amazing coating, but spears or slices work beautifully too. Make sure they’re not too watery, or your coating might not stick as well. A good, firm pickle is key!
For the Batter:
This is where we get things sticky for the breadcrumbs! It’s a simple mix of all-purpose flour, cornstarch (for extra crispiness!), and some basic seasonings like garlic powder, onion powder, salt, and pepper. I sometimes add a pinch of paprika for a little color and warmth. You’ll also need an egg and some milk – I’ve found that whole milk gives the best consistency, but you can absolutely use 2% or even a non-dairy alternative like almond milk, though it might be slightly thinner. The key here is getting a nice, smooth batter that coats the pickles evenly.
For the Breading:
Panko breadcrumbs are my absolute favorite for this. They’re so light and airy, and they toast up to the most delightful crisp. If you can’t find panko, regular breadcrumbs will work, but you might need to bake them a little longer to get that same crunch. I like to mix a little more salt, pepper, and maybe some dried dill into the panko for extra flavor. It’s all about building those layers of taste!
Step-by-Step Instructions
Step 1: Preheat & Prep Pan
First things first, let’s get that oven nice and hot. We’re going to preheat it to 400°F (200°C). While the oven is doing its thing, grab a large baking sheet and line it with parchment paper. This is a lifesaver for cleanup, trust me! Parchment paper also helps ensure that your baked pickles don’t stick to the pan.
Step 2: Mix Dry Ingredients
In a medium bowl, whisk together the flour, cornstarch, garlic powder, onion powder, salt, and pepper. Make sure everything is well combined. This creates our base for the batter, and having these dry ingredients mixed thoroughly ensures even flavor distribution. You want a nice, powdery blend here.
Step 3: Mix Wet Ingredients
In a separate, shallow bowl, whisk together the egg and the milk until they’re smooth and well combined. Don’t worry if it looks a little frothy; that’s perfectly fine. This liquid mixture is what will help our dry batter stick to the pickles, creating a wonderful foundation for the panko coating.
Step 4: Combine
Now, it’s time to bring those wet and dry ingredients together. Gradually pour the wet ingredients into the dry ingredients while whisking continuously. Keep whisking until you have a smooth, lump-free batter that’s about the consistency of pancake batter. If it seems too thick, add a tablespoon or two more milk. If it’s too thin, add a tablespoon or two more flour. You want it to be thick enough to coat the pickles well, but not so thick that it’s gloopy.
Step 5: Prepare Filling
Drain your pickles really well. Pat them thoroughly dry with paper towels. This is a crucial step! If the pickles are too wet, the batter won’t stick properly, and you won’t get that nice crispy coating. Lay them out on a clean layer of paper towels and gently pat them down. Get them as dry as you possibly can. This might seem tedious, but it makes a world of difference in the final texture!
Step 6: Layer & Swirl
Now for the fun part! Working in batches, dredge each pickle piece in the batter, making sure it’s fully coated. Let any excess batter drip off for a second. Then, transfer the battered pickle to the bowl of panko breadcrumbs. Press the breadcrumbs onto the pickle, ensuring it’s completely covered on all sides. You want a really generous coating. Place the breaded pickles in a single layer on your prepared baking sheet. Make sure they aren’t touching too much, as this helps them crisp up evenly.
Step 7: Bake
Pop that baking sheet into your preheated oven. We’re going to bake these for about 18-22 minutes, or until they’re golden brown and wonderfully crispy. About halfway through the baking time, carefully flip the pickles using tongs so they crisp up evenly on all sides. Keep an eye on them, as oven temperatures can vary.
Step 8: Cool & Glaze
Once they’re beautifully golden and crispy, carefully remove the baking sheet from the oven. Let the baked pickles cool on the baking sheet for a few minutes. They’ll continue to crisp up as they cool. While they’re still warm, I love to serve them immediately. If you want to add a little something extra, a drizzle of ranch or your favorite dipping sauce is always a hit!
Step 9: Slice & Serve
These baked pickles are best served warm, right out of the oven when they’re at their absolute crispiest. Arrange them on a platter and get ready for the applause! They are perfect for dipping into a cool, creamy ranch dressing, a spicy aioli, or even just enjoying on their own. The warmth and crunch are truly divine.
What to Serve It With
Okay, so these baked pickles are fantastic on their own, but they’re also surprisingly versatile. For breakfast? Hear me out! They can be a surprisingly delightful salty counterpoint to something sweet, like a stack of fluffy pancakes or waffles. It’s unexpected, but it works! For a more leisurely brunch, they’re an absolute showstopper on a charcuterie board or alongside some deviled eggs. Imagine them adding that pop of flavor and texture next to some creamy dips and fresh fruit – it’s a winner! If you’re looking for a lighter dessert option that’s still incredibly satisfying, these can work. Pair them with a small bowl of fruit salsa or a light berry compote for a sweet-and-tangy finale. But my absolute favorite time to serve them is for cozy snacks. They’re the perfect accompaniment to movie nights, game days, or just an afternoon pick-me-up. I love serving them with a side of my homemade ranch dip – the coolness of the ranch against the warm, crispy pickle is just pure comfort. They’re also amazing tucked into sandwiches for an extra layer of flavor and crunch, or piled high on a burger!
Top Tips for Perfecting Your Baked Pickles
Over the years of making these baked pickles countless times, I’ve picked up a few tricks that I swear by. First, for the pickles themselves, really give them a good pat-down with paper towels. I mean, really get them dry. I learned this the hard way after a batch that was a little too damp resulted in a less-than-crispy coating. So, don’t skip that step! For the batter, I always aim for a consistency that coats a spoon nicely without being too runny. If it’s too thin, your breadcrumbs might slide off, and if it’s too thick, you’ll get globs. Finding that sweet spot is key, and it’s usually just a matter of adding a splash more milk or a sprinkle more flour. When it comes to breading, be generous with the panko! Really press it on so that every bit of the batter is covered. This is what gives you that amazing crunch. I also like to give the panko a little seasoning boost with some extra salt, pepper, and a pinch of garlic powder. If you’re feeling adventurous, a little smoked paprika or even some chili flakes can add a fun kick. My kids actually prefer it when I don’t add too much spice, so plain panko is a safe bet for them. For baking, I’ve found that flipping them halfway through is crucial for even crisping. They’ll get golden on one side, but flipping them ensures that beautiful, uniform crunch all around. And remember, ovens can be finicky! So, keep an eye on your baked pickles, especially towards the end of the baking time. They can go from perfectly golden to a little too dark in a matter of minutes. If you find your oven tends to bake hotter on one side, rotating the pan halfway through can help too. Lastly, for ingredient swaps, I’ve experimented with gluten-free flour blends, and they work pretty well, though the texture might be slightly different. You might need a little more liquid in the batter to get it to the right consistency. And for the breadcrumbs, almond flour or even crushed cornflakes can be used in a pinch, but panko really is king for that ultimate crispness.
Storing and Reheating Tips
Alright, let’s talk about what happens if, by some miracle, you have leftovers. These baked pickles are definitely best enjoyed fresh, right when they’re hot and crispy from the oven. However, if you do find yourself with a few stray ones, storing them properly is key to salvaging some of that glorious crunch. At room temperature, they’ll start to lose their crispness within an hour or two, so I usually try to serve them right away. If you must store them at room temperature for a short period, make sure they are in an open container so they don’t steam and get soggy. For refrigerator storage, it’s best to let them cool completely first. Then, store them in an airtight container, but here’s the trick: I like to line the container with a paper towel to absorb any excess moisture. They’ll typically keep for 2-3 days in the fridge, but they won’t be as crispy as when they were first baked. Reheating is where the magic happens to bring back some of that crunch! Your best bet is to pop them back into a hot oven (around 375°F or 190°C) for about 5-8 minutes, or until they’re warmed through and have regained some of their crispness. A toaster oven works wonders for this too. You can also try them in an air fryer for a few minutes on a medium heat setting. I don’t recommend microwaving them, as that tends to make them a bit limp and chewy. If you’re planning to freeze them, it’s best to do so *before* baking. Freeze them in a single layer on a baking sheet until solid, then transfer them to a freezer-safe bag or container. You can then bake them directly from frozen, just adding a few extra minutes to the baking time. If you have baked leftovers that you need to freeze, they’ll still be edible after reheating, but the texture might be a bit softer.
Frequently Asked Questions
Final Thoughts
So there you have it – my absolute favorite way to make baked pickles! I truly hope you give this recipe a try. It’s one of those dishes that just brings a smile to everyone’s face, and it’s so incredibly satisfying to make something so delicious with such minimal effort. The crunch, the tang, the savory coating – it’s a flavor and texture party in your mouth, and it’s surprisingly guilt-free compared to its fried cousins. If you enjoy this recipe, you might also love my recipe for Crispy Zucchini Fritters, which share a similar craveable crunch, or perhaps my Spicy Loaded Nachos for another fantastic snack option. I can’t wait to hear how your baked pickles turn out! Please leave a comment below with your thoughts, or share any fun variations you come up with. Happy baking, and enjoy every crispy, tangy bite!
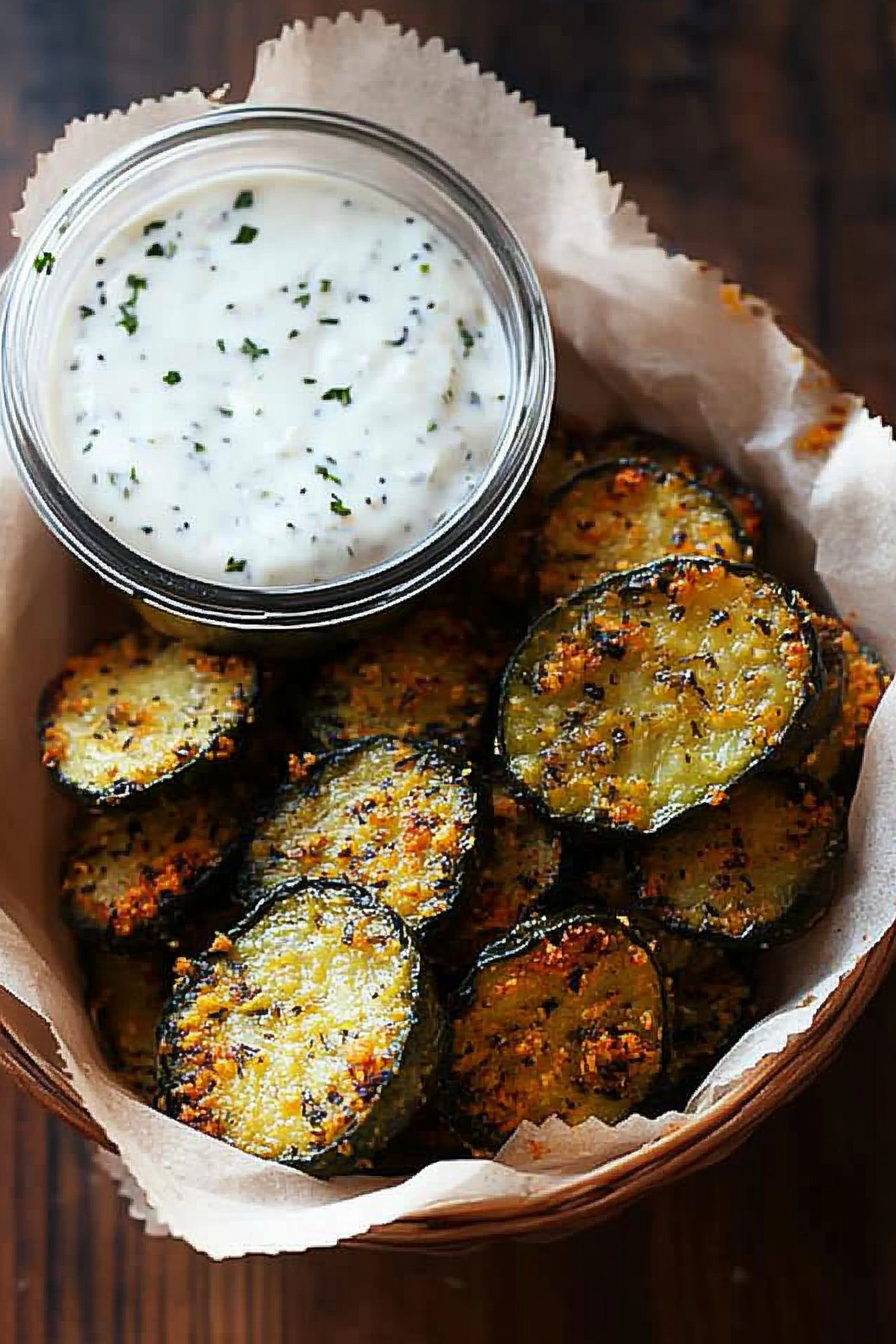
Oven Baked Pickles with Light Ranch Dip
Ingredients
Method
- Preheat your oven to 400°F (200°C). Line a baking sheet with parchment paper and lightly grease it with cooking spray.
- Pat the drained pickle slices very dry with paper towels. This is crucial for the breading to stick and crisp up.
- In a shallow dish, whisk together the flour, garlic powder, onion powder, paprika, salt, and pepper.
- In another shallow dish, whisk the eggs with water to create the egg wash.
- In a third shallow dish, place the Panko breadcrumbs.
- Dip each pickle slice first into the flour mixture, shaking off any excess. Then, dip it into the egg wash, letting any excess drip off. Finally, coat the pickle slice thoroughly in the Panko breadcrumbs, pressing gently to ensure it adheres well.
- Place the coated pickle slices in a single layer on the prepared baking sheet. Lightly spray the tops of the pickles with cooking spray for extra crispness.
- Bake for 10-12 minutes, then carefully flip each pickle slice. Bake for another 8-10 minutes, or until golden brown and crispy.
- While the pickles are baking, prepare the ranch dip. In a small bowl, combine the Greek yogurt, milk, fresh dill, dried parsley, garlic powder, onion powder, salt, and pepper. Stir until smooth and well combined. Taste and adjust seasonings as needed. Chill until ready to serve.
- Remove the baked pickles from the oven and let them cool slightly before serving. Serve hot with the chilled ranch dip.