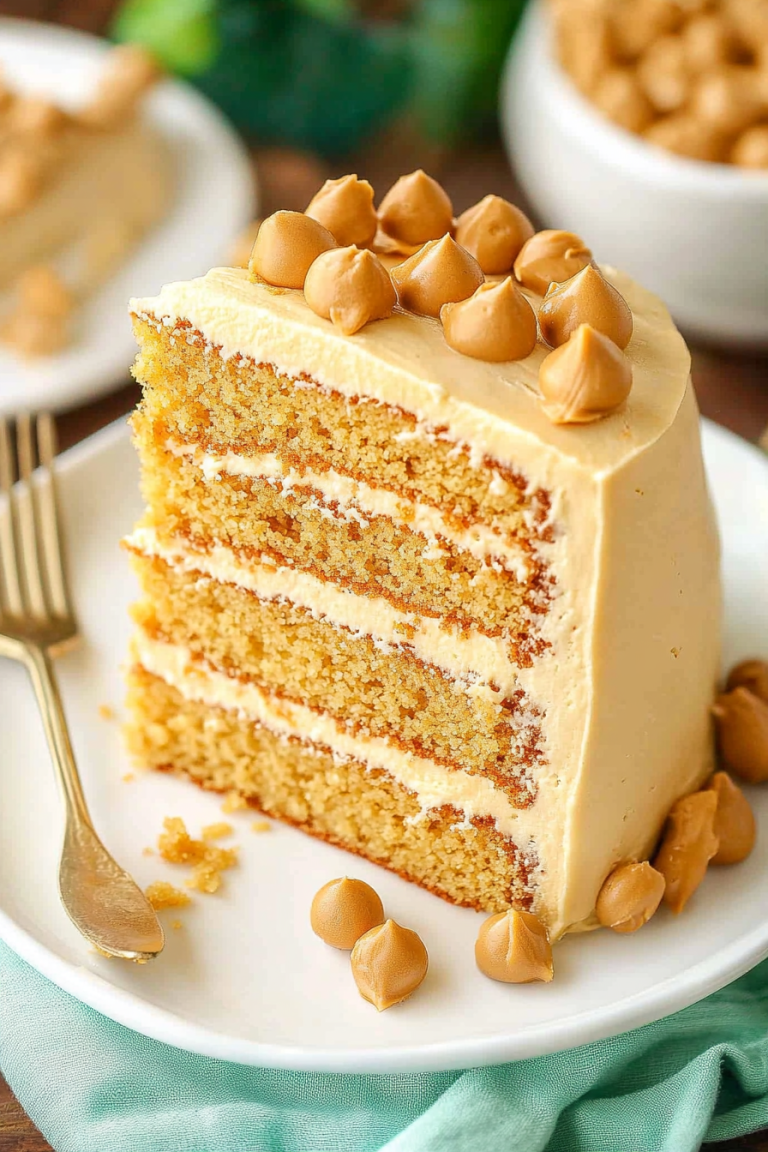
Easy Candy Bowl DIY for the Holidays
Oh, hello there! Come on in and make yourself comfortable. I was just thinking about these incredible peppermint candy bowls and how I absolutely *had* to share them with you. You know, the ones that look like they came straight out of a fancy bakery but are surprisingly simple to whip up? My Grandma used to make these for every holiday, and the smell of them baking would fill our whole house with this warm, spicy-sweet aroma. It’s funny, isn’t it? Some foods just have this magical way of taking you right back to a specific moment, a specific feeling. For me, it’s always been these peppermint candy bowls. They’re not just a treat; they’re a whole memory package, and I think you’ll love them just as much as my family and I do. They’re a bit like a soft gingerbread cookie but with this incredible burst of peppermint that just sings, especially when the weather gets chilly. Honestly, if you’ve ever wondered how to make something that looks impressive with minimal fuss, these are your answer. Think of them as your secret weapon for holiday baking, or, heck, just a really, really good excuse for a delicious treat any day of the week.
What are Peppermint candy bowls?
So, what exactly are these magical peppermint candy bowls? Well, imagine a perfectly tender, slightly spiced cookie base, almost like a wonderfully soft gingerbread but less crumbly and more melt-in-your-mouth. And then, the magic happens: the center is swirled with crushed peppermint candies, which melt into this beautiful, vibrant red-and-white landscape as they bake. It’s not just pretty; it’s a flavor explosion! The warmth of the spices in the cookie, balanced by that cool, refreshing zing of peppermint – it’s just divine. My Grandma always called them “little bowls of Christmas cheer,” and I think that’s just perfect. They’re essentially hand-held little flavor explosions, designed to bring a smile to your face. It’s the kind of thing that makes people say, “Wow, you *made* this?” And you can proudly say yes, because they’re totally achievable at home. It’s a delightful combination of familiar cookie goodness and that festive peppermint punch we all crave, especially around the holidays, but honestly, I find myself craving them year-round.
Why you’ll love this recipe?
Alright, let’s talk about why this recipe is about to become your new best friend in the kitchen. First off, the FLAVOR. Oh my goodness, the flavor! It’s this incredible balance of warm, comforting spices like cinnamon and ginger, softened by the sweetness of brown sugar and molasses, all punctuated by that bright, invigorating burst of peppermint. It’s like a cozy hug with a playful wink. And the TEXTURE! These aren’t hard, crunchy cookies; they’re wonderfully soft and slightly chewy, just melting in your mouth. They’re so comforting. Then there’s the SIMPLICITY. Seriously, if you can stir ingredients together, you can make these. There’s no fancy equipment needed, and the steps are straightforward. I’ve made these on evenings when I’m exhausted, and they still turn out perfectly. They’re also incredibly COST-EFFECTIVE! Most of the ingredients are pantry staples, and the star of the show, the peppermint candies, are super inexpensive. You get a gourmet-looking and tasting treat without breaking the bank. And VERSATILITY! While they’re a holiday superstar, I’ve made them for birthdays, for potlucks, or just because I had a craving for something sweet and special. You can even play around with the spice levels or the amount of peppermint. What I love most about these peppermint candy bowls is that they feel special without being complicated. They’re the kind of cookies that make people feel loved and cared for. They’re like a slightly more sophisticated cousin to a classic chocolate chip cookie, offering a unique flavor profile that’s always a hit.
How do I make Peppermint candy bowls?
Quick Overview
This recipe is all about creating a delicious, soft spiced cookie dough, swirling in crushed peppermint candy, and baking until golden and wonderfully fragrant. The key is not overmixing the dough and letting the peppermint candies melt just right into those beautiful swirls. It’s a straightforward process that yields incredibly impressive results, making it perfect for busy bakers or anyone wanting to impress without the stress. Trust me, the aroma alone will tell you you’re doing something special!
Ingredients
For the Main Batter:
2 ¼ cups all-purpose flour
1 teaspoon baking soda
½ teaspoon salt
1 teaspoon ground cinnamon
½ teaspoon ground ginger
¼ teaspoon ground cloves (optional, but I love it!)
¾ cup (1 ½ sticks) unsalted butter, softened
¾ cup packed light brown sugar
¼ cup granulated sugar
1 large egg
1 teaspoon vanilla extract
¼ cup unsulfured molasses
For the Filling:
1 cup crushed peppermint candies (about 10-15 hard peppermint candies, the classic red and white ones work best!) – make sure they’re finely crushed, almost like a coarse powder, for the best melt.
For the Glaze (Optional, but recommended!):
1 cup powdered sugar
2-3 tablespoons milk (or a dairy-free alternative)
½ teaspoon peppermint extract (optional, for extra zing!)
A few drops of red food coloring (optional, for a festive touch)
Step-by-Step Instructions
Step 1: Preheat & Prep Pan
First things first, get your oven preheating to 350°F (175°C). This is crucial for even baking, so don’t skip it! Then, grab a couple of large baking sheets and line them with parchment paper. Parchment paper is your best friend here; it prevents sticking and makes cleanup a breeze. If you don’t have parchment, you can lightly grease the baking sheets, but parchment is really the way to go for perfect results.
Step 2: Mix Dry Ingredients
In a medium bowl, whisk together the all-purpose flour, baking soda, salt, cinnamon, ginger, and cloves (if you’re using them). Giving these a good whisk ensures that all those lovely spices are evenly distributed throughout the dough, so you don’t get any surprises of just cinnamon in one bite and nothing in another. This step is simple but important for consistent flavor.
Step 3: Mix Wet Ingredients
In a large bowl, using an electric mixer (or a sturdy whisk and some elbow grease!), cream together the softened butter, light brown sugar, and granulated sugar until light and fluffy. This usually takes about 2-3 minutes. Then, beat in the egg and vanilla extract until well combined. Finally, stir in the unsulfured molasses until everything is nicely incorporated. The mixture should be smooth and a lovely caramel color.
Step 4: Combine
Gradually add the dry ingredients to the wet ingredients, mixing on low speed (or stirring with a wooden spoon) just until combined. Be careful not to overmix here! Overmixing can develop the gluten too much, leading to tougher cookies. We’re going for tender and chewy, so stop as soon as you don’t see any dry streaks of flour. The dough will be thick and a little sticky, which is exactly what we want.
Step 5: Prepare Filling
This is where the magic really starts to happen! Take your peppermint candies and crush them. You can do this by putting them in a sturdy zip-top bag and gently tapping them with a rolling pin or the bottom of a heavy pan, or by pulsing them a few times in a food processor. You want a fine, powdery consistency – think coarse sand. This helps them melt beautifully into the cookie dough.
Step 6: Layer & Swirl
Drop rounded tablespoons of dough onto your prepared baking sheets, leaving about 2 inches between them because these cookies do spread a bit. Now, take a generous pinch of your crushed peppermint candy and sprinkle it over the top of each dough ball. Using a toothpick or a skewer, gently swirl the peppermint into the dough. You don’t need to go crazy; just a few swirls will create that beautiful marbled effect. I like to swirl mine just a couple of times to get nice distinct ribbons of red and white.
Step 7: Bake
Bake for 9-12 minutes, or until the edges are lightly golden brown and the centers look set. The exact time will depend on your oven, so keep an eye on them. You don’t want them to get too dark; they should still look soft in the middle when you take them out, as they’ll continue to cook slightly on the hot baking sheet. This is key for that chewy texture!
Step 8: Cool & Glaze
Let the cookies cool on the baking sheets for about 5 minutes before carefully transferring them to a wire rack to cool completely. This is important because they’re quite delicate when they first come out of the oven. Once they’re completely cool, you can make the glaze (if you’re using it!). Whisk together the powdered sugar, milk, and peppermint extract until smooth. If you want that festive pop, stir in a few drops of red food coloring. Drizzle the glaze over the cooled cookies. It hardens to a lovely, slightly crisp finish.
Step 9: Slice & Serve
Once the glaze is set, your beautiful peppermint candy bowls are ready to be enjoyed! Serve them with a cup of hot cocoa or a warm mug of tea. They’re perfect for gifting, sharing at parties, or just enjoying with your favorite beverage. They look so pretty on a holiday cookie platter!
What to Serve It With
These peppermint candy bowls are so versatile, they’re welcome at pretty much any gathering! For a simple Breakfast treat, they pair wonderfully with a strong cup of coffee or a steaming mug of chai tea. Their warmth and spice are just the thing to start your day on a cozy note. If you’re hosting a lovely Brunch, imagine these nestled amongst some fruit salad and perhaps some mini quiches. They add a touch of festive elegance without being too heavy. For a more formal Dessert setting, they’re a fantastic accompaniment to a rich chocolate cake or a scoop of vanilla bean ice cream. The cool peppermint cuts through the richness beautifully. And of course, for those cozy, quiet afternoons or evenings when you just need a little comfort, they’re perfect on their own with a glass of cold milk or, my personal favorite, a mug of hot chocolate. My family tradition is to have them with hot chocolate during our Christmas movie marathon – the flavors just meld so perfectly. They’re also surprisingly good with a glass of eggnog! It’s all about that warm spice meets cool mint combination that just feels so right.
Top Tips for Perfecting Your Peppermint Candy Bowls
Over the years of making these peppermint candy bowls, I’ve picked up a few tricks that I think make a world of difference. Let’s dive into them, shall we?
First, when it comes to the peppermint candies, the FINER you crush them, the better they’ll melt and distribute. If you have large chunks, they might stay hard and create little pockets of intense peppermint, which can be nice, but a fine crush gives you that lovely marbled effect and consistent flavor throughout. I usually pulse them in a food processor for just a few seconds until they resemble coarse sugar.
For the dough, remember my advice about NOT OVERMIXING. Seriously, this is probably the most important tip for achieving that tender, chewy texture we’re after. As soon as the flour is incorporated, stop mixing. A few gentle stirs with a spatula after the mixer is done can help ensure everything is just barely combined without going too far.
When it comes to SWIRLING the peppermint in, less is often more. You don’t need to meticulously mix it in. Just a couple of light swirls with a toothpick will create beautiful patterns. Over-swirling can muddy the colors and make it look less distinct, and we want those pretty red and white ribbons!
Ingredient swaps are always a question. If you’re out of molasses, you can try using dark corn syrup, but you might lose a bit of that deep flavor. You can also adjust the spice levels to your preference. If you love ginger, add a little extra! And for the egg, make sure it’s at room temperature; it incorporates much better into the creamed butter and sugar.
BAKING is key for texture. Keep an eye on your oven. They should be lightly golden on the edges. If your oven runs hot, you might need to reduce the temperature slightly or shorten the baking time. I always recommend baking one cookie on a test sheet first to get a feel for your oven’s quirks.
And finally, for the GLAZE: if you want a thinner glaze for drizzling, add more milk, a teaspoon at a time. For a thicker glaze that you can spread, use less milk. And don’t be afraid to play with the peppermint extract! A little goes a long way, but it really amps up that refreshing minty flavor.
Storing and Reheating Tips
These peppermint candy bowls are quite forgiving when it comes to storage, which is a big win in my book! For best quality, store them at ROOM TEMPERATURE in an airtight container. They’ll stay wonderfully soft and delicious for about 3-4 days. Make sure they’re completely cooled before you seal them up, otherwise, you’ll get condensation inside the container, which can make them soggy. If you’ve glazed them, let the glaze set up completely before packing them away. For REFRIGERATOR STORAGE, you can keep them for up to a week, but they can sometimes dry out a bit more quickly in the fridge. Again, an airtight container is your best friend here. If they do feel a little dry after refrigeration, you can pop one in the microwave for just 5-10 seconds to soften it up. FREEZER INSTRUCTIONS are also a great option if you’ve made a big batch. Wrap them well in plastic wrap, then place them in a freezer-safe bag or container. They’ll keep their quality for up to 2-3 months. To thaw, simply take them out of the freezer and let them come to room temperature, still wrapped, for a few hours. They’ll be just like they were when you baked them! For reheating, as I mentioned, a quick zap in the microwave is perfect for reviving any cookie that feels a bit firm, especially after refrigeration. Just be careful not to overheat them, as they can become tough.
Frequently Asked Questions
Final Thoughts
I really hope you give these peppermint candy bowls a try. They’re more than just a recipe to me; they’re a connection to my Grandma and a reminder of those wonderful, cozy days filled with warmth and delicious smells. They prove that you don’t need to be a master baker to create something truly special and memorable. The simple joy of seeing those swirls of red and white and the burst of festive flavor makes them absolutely worth it. They’re the perfect balance of comforting spice and refreshing mint, and they always bring a smile to my face. If you loved this recipe, you might also enjoy my spiced gingerbread cookies or my festive sugar cookie cutouts – they’re in a similar vein of holiday cheer! I can’t wait to hear how yours turn out, so please leave a comment below and let me know what you think, or share your own family twists! Happy baking, and may your kitchen be filled with wonderful aromas!
Homemade Peppermint Candy Bowls
Ingredients
Method
- Preheat the oven to 300 degrees Fahrenheit.
- Place silicon baking liner or parchment paper on a baking sheet.
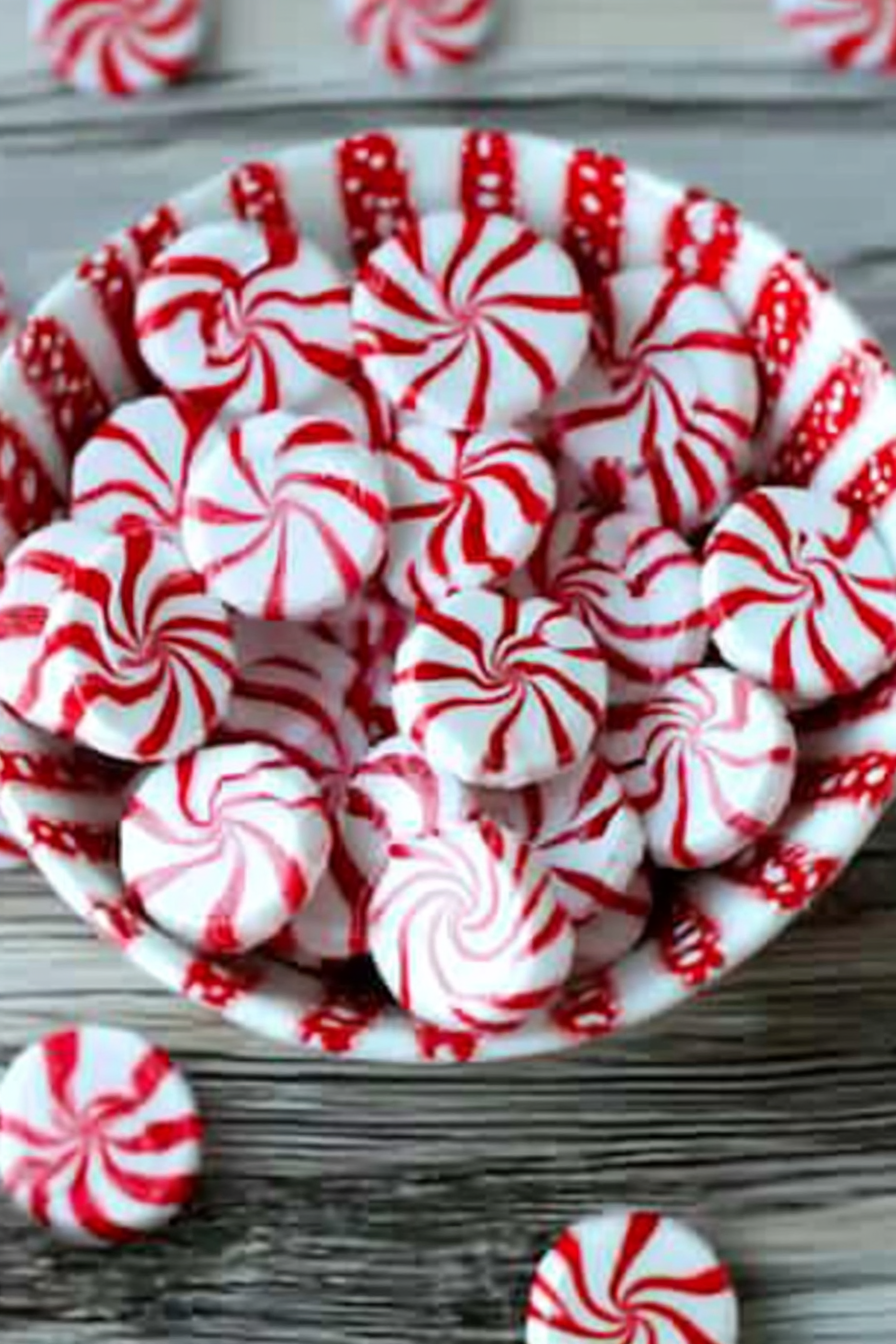
- Lay one peppermint mint in the center of the baking liner. Surround it with six mints, touching and close together, forming a flower shape. Repeat with remaining mints to form a second circle around the first.
- Bake in the oven for approximately 8 minutes. Watch closely; they are done when shiny, spread out, and just beginning to melt.
- Prepare a small upside-down glass bowl to mold the candy into a bowl shape.
- Remove the baked mints from the oven and allow them to cool for about 30 seconds until manageable.
- Carefully flip the silicon liner with the mints onto the upside-down glass bowl, pressing gently to shape the candy into a bowl form. Use oven mitts to avoid burns. Work quickly before the mints harden.
- Allow the formed candy bowl to sit until completely set.
- Gently remove the candy bowl from the mold and let it cool completely.
- Fill the peppermint candy bowl with holiday treats or candies.