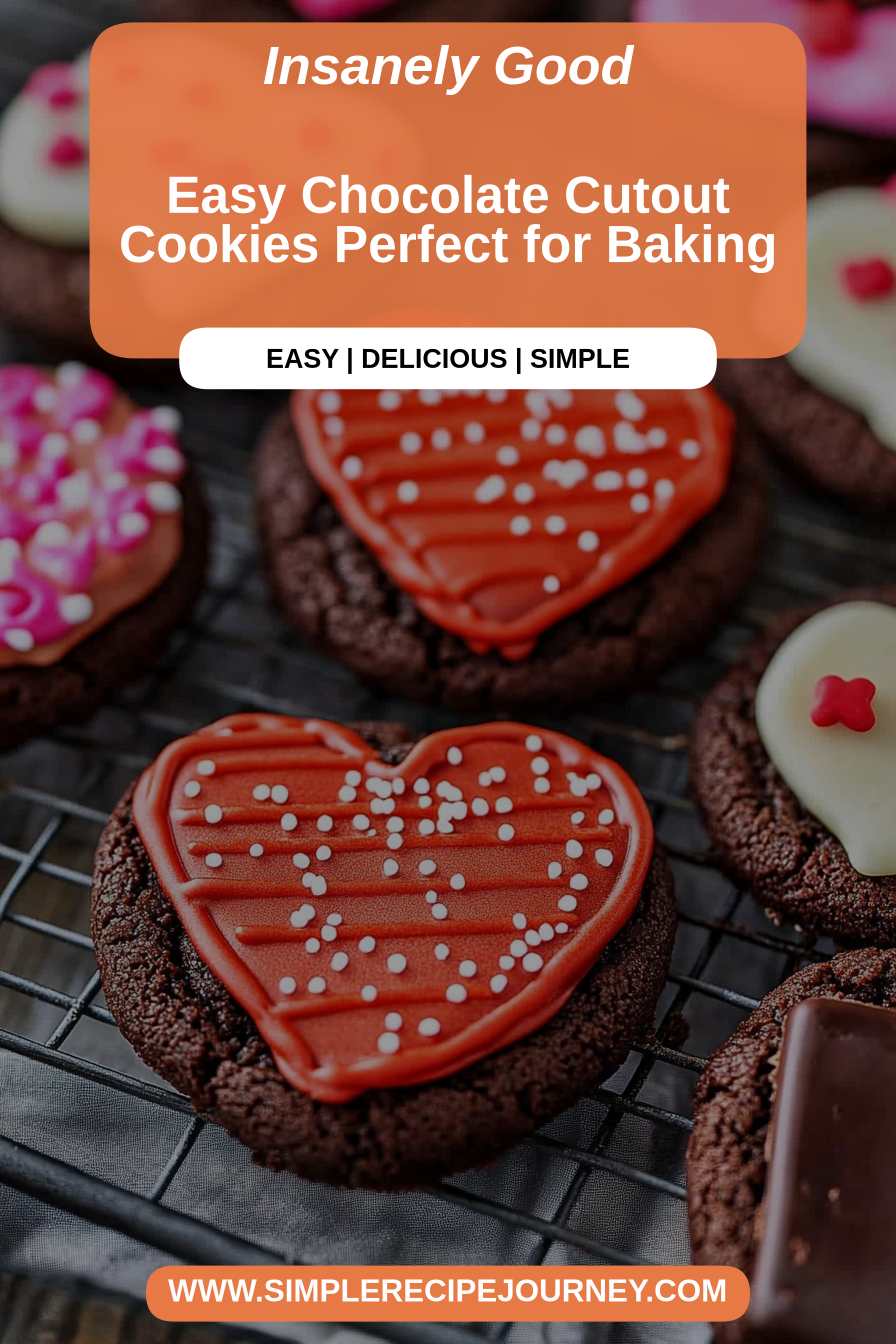
Easy Chocolate Cutout Cookies Perfect for Baking
There are certain smells that just instantly transport me back to my childhood kitchen. The scent of sugar and butter creaming together, the faint whisper of vanilla, and then, the deep, rich aroma of chocolate – that’s pure magic. For years, my mom’s chocolate cutout cookies were the undisputed champions of our holiday baking. They weren’t just cookies; they were edible works of art, carefully decorated and shared with everyone we knew. But honestly, as much as I loved them, they could be a *little* finicky. Sometimes they spread too much, sometimes they were too crumbly. Over the years, I’ve tinkered, tweaked, and experimented like a mad scientist in my own kitchen, and I’ve finally landed on a chocolate cutout cookie recipe that’s not only incredibly delicious but also surprisingly forgiving. These are the cookies I reach for when I want something truly special without the usual baking drama. Forget those store-bought versions that taste like cardboard; these are the real deal, the kind that make you close your eyes and savor every bite. They’re honestly a game-changer, especially when the chocolate craving hits hard and fast.
What are chocolate cutout cookies?
So, what exactly are chocolate cutout cookies? Think of them as the sophisticated cousins to your basic sugar cookies, but with a glorious chocolatey twist! They’re designed to be rolled out, cut into fun shapes using cookie cutters, and then baked to a delightful crisp-chewy perfection. The beauty of them is that they hold their shape beautifully, making them ideal for intricate designs or just classic holiday figures. The “cutout” part just means they’re meant to be decorated – and oh boy, do we love decorating them! It’s that satisfying process of rolling, cutting, baking, and then the ultimate joy of frosting and sprinkling. They’re essentially a blank canvas for your creativity, but the cookie itself is already a star, with a rich, deep chocolate flavor that isn’t too sweet. They’re a bit sturdier than a melt-in-your-mouth cookie, which is perfect for handling when you’re trying to get them from the baking sheet to the cooling rack, or when you’re stacking them for gifting.
Why you’ll love this recipe?
Okay, I know I’m biased, but seriously, you are going to fall head over heels for these chocolate cutout cookies. Let me tell you why. First off, the flavor is just… *chef’s kiss*. It’s that perfect balance of deep cocoa and sweet richness, without being overwhelmingly sweet. It’s the kind of chocolate flavor that makes you want to lick the frosting right off your fingers. And the texture? Oh, it’s divine. They have a slight crispness around the edges but are wonderfully soft and chewy in the center. It’s that perfect textural play that makes you go back for another bite.
Then there’s the simplicity. I know baking from scratch can sometimes sound daunting, but I promise you, this recipe is a lifesaver. I’ve streamlined the process so you’re not spending hours slaving away. The dough comes together like a dream, it’s easy to handle, and it bakes up beautifully. You don’t need any fancy equipment, just your basic kitchen staples. And let’s talk about cost-efficiency! The ingredients are all readily available and super affordable, which is always a win, especially when you want to bake a big batch for a party or for school treats.
But what truly sets these apart, in my humble opinion, is their versatility. You can make them for literally any occasion! Christmas, Easter, Halloween, birthdays, or just because it’s Tuesday and you need a pick-me-up. They’re fantastic with a simple buttercream frosting, but they’re also stunning with a rich chocolate ganache or even just a dusting of powdered sugar. If you love my Vanilla Sugar Cookies: Classic Vanilla Sugar Cookies., you’ll adore these. They offer a similar wonderful cut-out experience but with that irresistible chocolate punch. This recipe is my secret weapon for feeling like a baking superstar without all the stress. What I love most about this is that even my kids can help out with the rolling and cutting, making it a fun family activity, and they always ask for these when they want “fancy cookies.”
How do I make chocolate cutout cookies?
Quick Overview
Making these incredible chocolate cutout cookies is a straightforward process, and I’ve honed it over years to make it as foolproof as possible. We’ll start by creaming butter and sugar, then add eggs and vanilla, followed by our dry ingredients. The dough chills briefly to make it easy to handle, then it’s rolled, cut into shapes, and baked to perfection. Finally, we’ll whip up a simple glaze to top them off. It’s a method that guarantees beautiful, delicious cookies every single time. Trust me, you’ll be amazed at how easily these come together and how professional they look!
Ingredients
For the Main Batter:
Let’s talk ingredients for the cookies themselves. Quality matters here, but you don’t need anything exotic. I always opt for unsalted butter – it gives you more control over the saltiness of the cookies. Make sure it’s softened, but not melted; you want it pliable, not greasy. For the sugar, granulated white sugar is best for structure and that classic sweetness. Now, for the chocolatey goodness, I swear by unsweetened cocoa powder. Dutch-processed cocoa gives a deeper, smoother flavor and a richer color, so if you can find it, go for it! All-purpose flour is perfectly fine for this recipe. Just make sure you measure it correctly – spoon it into your measuring cup and level it off with a straight edge, rather than scooping directly from the bag, which can pack it too tightly. And don’t forget a good quality vanilla extract; it really rounds out that chocolate flavor. Baking soda helps with a slight lift and spread, and a pinch of salt balances all the sweetness.
For the Filling:
Now, these are *cutout* cookies, so traditionally, they don’t have a filling, but I’ve found that a *very* thin layer of chocolate ganache or even a simple chocolate buttercream between two cookies takes them to a whole new level. If you’re going that route, you’ll just need some good quality dark chocolate (chips work too, but a bar melts smoother) and heavy cream for a simple ganache. For a chocolate buttercream, you’ll need more butter, powdered sugar, a splash of milk or cream, and more cocoa powder. Honestly though, they are absolutely fantastic on their own, especially when frosted!
For the Glaze:
The glaze is where we get to play with color and extra flavor! For a basic, foolproof glaze, you just need powdered sugar (also known as confectioners’ sugar or icing sugar). This is key for a smooth texture. Then, a liquid is needed to thin it out. Milk works wonderfully for a creamy white glaze, but I often use water for a slightly crisper finish. For chocolate glaze, you can use melted chocolate mixed with a bit of butter or coconut oil, or simply whisk in cocoa powder into a basic powdered sugar glaze. A tiny splash of vanilla extract or even a bit of espresso powder can really enhance the chocolate flavor here. The trick to a good glaze is getting the consistency just right – thick enough to coat, but thin enough to spread easily without leaving streaks.
Step-by-Step Instructions
Step 1: Preheat & Prep Pan
First things first, let’s get our oven ready! Preheat it to 350°F (175°C). It’s so important to have your oven at the correct, stable temperature before your cookies even think about going in. If your oven runs hot or cold, an oven thermometer is a total lifesaver. While the oven heats up, line your baking sheets with parchment paper. This is non-negotiable for me. It prevents sticking, makes for super easy cleanup, and ensures the bottoms of your cookies don’t brown too quickly. You don’t need to grease the parchment; it’s not necessary and can sometimes lead to extra spreading. Just lay it smooth on the baking sheet, and you’re golden!
Step 2: Mix Dry Ingredients
In a medium-sized bowl, whisk together your all-purpose flour, unsweetened cocoa powder, baking soda, and salt. Give it a good whisking – you want to make sure everything is evenly distributed. This step is crucial because it prevents pockets of baking soda or cocoa in your finished cookies. Think of it as setting the stage for an even bake. Make sure there are no lumps of cocoa powder hiding in there. If you’re using Dutch-processed cocoa, it’s usually pretty fine, but it’s always good to be thorough.
Step 3: Mix Wet Ingredients
In a separate, larger bowl (preferably your stand mixer bowl if you have one, but a hand mixer or even a sturdy whisk will do!), cream together your softened unsalted butter and granulated sugar. Beat them on medium speed until the mixture is light and fluffy, usually about 3-5 minutes. It should look pale yellow and airy. This process incorporates air, which contributes to the cookie’s texture. Next, beat in your egg(s) one at a time, making sure each is fully incorporated before adding the next. Then, stir in your vanilla extract. Make sure your egg is at room temperature for better emulsification with the butter and sugar mixture.
Step 4: Combine
Now it’s time to bring it all together! Gradually add the dry ingredients to the wet ingredients, mixing on low speed (or by hand) until *just* combined. This is where many people go wrong – overmixing! Overmixing develops the gluten in the flour too much, which can lead to tough cookies. Stop mixing as soon as you no longer see streaks of dry flour. A few little flecks are okay; they’ll disappear during the chilling and rolling. The dough should be thick and somewhat crumbly but hold together when you squeeze it. If it seems too dry and won’t come together, you can add a teaspoon or two of milk or water. If it seems too wet, a tablespoon of flour might help, but be careful not to add too much!
Step 5: Prepare Filling (Optional)
If you’re opting for a filled cookie, this is where you’d prepare your filling. For a simple chocolate ganache, gently heat about 1/2 cup of heavy cream until it’s simmering (not boiling). Pour it over 1 cup of chopped dark chocolate in a heatproof bowl. Let it sit for 5 minutes, then whisk until smooth and glossy. Let it cool at room temperature until it’s thick enough to spread but not solid. For a chocolate buttercream, you’d typically cream softened butter, add powdered sugar and cocoa powder alternately with milk, and beat until smooth. Set aside and let it cool slightly if it’s too warm to pipe or spread.
Step 6: Chill and Roll Dough
This is a really important step for easy handling! Turn the dough out onto a lightly floured surface and gently bring it together into a disc. Wrap it tightly in plastic wrap and refrigerate for at least 30 minutes, or up to 2 days. Chilling solidifies the fat, making the dough much easier to roll out without sticking or tearing. Once chilled, unwrap the dough and place it on a lightly floured surface. Roll it out to about 1/4-inch thickness. If the dough starts to get too soft while you’re working, pop it back in the fridge for a few minutes. Use your favorite cookie cutters to cut out shapes. Re-roll scraps *only once* to avoid tough cookies.
Step 7: Bake
Carefully transfer your cutouts to the prepared baking sheets, leaving about 1-2 inches between them. Bake for 8-12 minutes, depending on the size and thickness of your cookies. You’re looking for the edges to be set and just slightly firm to the touch. They shouldn’t look wet in the center. A little bit of visual cue is your best friend here; they won’t necessarily turn golden brown like other cookies due to the cocoa. For perfectly uniform baking, rotate your pans halfway through. I always keep a close eye on them in the last few minutes, as ovens can be a bit unpredictable!
Step 8: Cool & Glaze
Once baked, let the cookies cool on the baking sheets for about 5 minutes. This allows them to firm up enough to be moved without breaking. Then, carefully transfer them to a wire rack to cool completely. This is crucial! Trying to glaze warm cookies is a recipe for disaster; the glaze will melt right off. Once completely cool, it’s time for the fun part – decorating! Whisk together your glaze ingredients until smooth and pourable but not too thin. Dip your cookies or use a piping bag for more intricate designs. Let the glaze set completely before stacking or serving. If you’re filling them, spread a thin layer of your prepared filling on the flat side of one cookie and gently press another cookie on top.
Step 9: Slice & Serve
These are best served at room temperature, where their texture and flavor truly shine. They’re wonderful on their own, with a tall glass of cold milk, or a hot cup of coffee. If you’ve filled them, they’re practically a mini-dessert! For a beautiful presentation, arrange them on a platter, perhaps with a few sprigs of greenery or some festive berries. They look gorgeous stacked in a cookie tin, too. The aroma alone is enough to make anyone happy!
What to Serve It With
These chocolate cutout cookies are so versatile, they fit into almost any occasion. For breakfast, imagine a couple of these alongside a steaming mug of coffee or a rich hot chocolate. They’re a little indulgence that makes even a Monday morning feel special. The deep chocolate flavor pairs beautifully with the robust notes of a dark roast coffee.
For a more elegant brunch spread, they add a sophisticated touch. You could arrange them on a tiered stand with fresh berries and perhaps a small dish of whipped cream. They’re fantastic with a mimosa or even a sparkling rosé. They look so pretty dusted with a little powdered sugar or with a delicate piped icing design.
As a dessert, these are a guaranteed hit. Serve them after dinner with a scoop of vanilla bean ice cream or alongside a warm brownie. They’re also perfect for a cookie exchange or a potluck dessert table. The rich chocolate flavor is universally loved, and their festive look makes them a welcome addition anywhere.
And for those cozy, unexpected cravings? These are your go-to. I love having a batch on hand for an afternoon pick-me-up with a glass of milk, or even a late-night treat after everyone else is in bed. They’re comforting and satisfying without being too heavy. My family has a tradition of making a big batch for movie nights, and they always disappear within the hour!
Top Tips for Perfecting Your Chocolate Cutout Cookies
Over the years, I’ve definitely learned a few tricks that help these cookies turn out spectacularly every single time. So, listen up, because these are the secrets to cookie success!
Dough Handling: The absolute most important thing is not to overwork the dough. Once you add the flour, mix *just* until it comes together. Overmixing leads to tough cookies, and nobody wants that! Also, chilling the dough is non-negotiable. It makes it so much easier to roll and cut without sticking or tearing. If your dough gets too warm and sticky while you’re rolling, don’t hesitate to pop it back in the fridge for 10-15 minutes. It makes a world of difference.
Rolling Technique: Aim for an even thickness, about 1/4-inch. If your cookies are different thicknesses, they’ll bake unevenly. Use a rolling pin with guides if you have one, or just be mindful. When you cut your shapes, press straight down and then lift straight up. Avoid twisting your cookie cutters, as this can seal the edges and prevent them from spreading properly. Re-roll your scraps only once; a second time can toughen the dough considerably.
Baking Nuances: Oven temperature is key! Make sure your oven is fully preheated. Since cocoa powder can mask browning, don’t rely solely on color to tell you when they’re done. The edges should look set and slightly firm. If you’re baking a lot of cookies, try to bake them in batches, as overcrowding the oven can affect temperature and baking time. Rotating your pans halfway through also helps ensure even baking, especially if your oven has hot spots.
Glaze Consistency: The secret to a smooth, beautiful glaze is the right ratio of powdered sugar to liquid. Start with a little liquid and add more a teaspoon at a time until you reach your desired consistency. If it’s too thick, it will be hard to spread. If it’s too thin, it will run off the cookies. For a vibrant color, you can add gel food coloring, which is more concentrated than liquid. Remember to let the glaze set completely before stacking or storing; this usually takes at least an hour, sometimes longer depending on humidity.
Ingredient Swaps: I’ve tested this recipe extensively, but I know some of you like to experiment! For a dairy-free version, you can use a vegan butter substitute (like Miyoko’s Kitchen or Earth Balance sticks) and a plant-based milk (like almond or oat milk) for the glaze. The texture might be slightly different, but it’s usually still delicious. For a slightly richer chocolate flavor, you can add a tablespoon of instant espresso powder to the dry ingredients – it doesn’t make them taste like coffee, but it really amplifies the chocolate. Be cautious with swapping out the type of cocoa powder; Dutch-processed is generally preferred for its smoother flavor and color.
Storing and Reheating Tips
One of the best things about these chocolate cutout cookies is how well they store, meaning you can enjoy them for days! Once they’re completely cooled and the glaze is set, you can store them at room temperature in an airtight container. I usually layer them with parchment paper in between to prevent sticking, especially if they’re heavily decorated. They’ll stay fresh and delicious for about 3-5 days this way. This makes them perfect for making ahead for parties or holidays.
If you need to store them for longer, the refrigerator is your friend. Place them in an airtight container, and they should keep well for up to a week. Just be aware that refrigeration can sometimes slightly alter the texture, making them a bit firmer. When you want to enjoy them, you can let them come to room temperature on the counter for about 30 minutes. They don’t really need reheating, as they’re best enjoyed at room temperature.
For long-term storage, freezing is an excellent option! You can freeze unfrosted cookies very successfully. Wrap them tightly in plastic wrap, then place them in a freezer-safe bag or container. They’ll keep in the freezer for up to 2-3 months. When you’re ready to enjoy them, thaw them overnight in the refrigerator, then let them come to room temperature. If you want to freeze frosted cookies, it’s best to let the frosting set completely first. You can also freeze them before frosting and glaze them after thawing – that way, they’ll taste extra fresh!
Regarding glaze timing, if you plan to store your cookies for more than a day or two, I highly recommend glazing them right before you plan to serve them, or at least within 24 hours of them being stored. This ensures the glaze stays fresh and doesn’t get sticky or dull. If you’re freezing unfrosted cookies, the best approach is to glaze them after they’ve thawed. This keeps the frosting looking its best!
Frequently Asked Questions
- Dust them with powdered sugar using a fine-mesh sieve for a snowy effect.
- Dust them with unsweetened cocoa powder for an extra chocolate boost.
- Drizzle them with melted dark chocolate or white chocolate.
- Spread a thin layer of chocolate ganache or buttercream between two cookies for a filled treat.
- Dip the edges in sprinkles for a festive touch.
- Leave them plain! They are delicious on their own, especially with a beautiful cut shape.
Final Thoughts
There you have it – my absolute favorite recipe for chocolate cutout cookies! I genuinely believe these are the best you’ll ever make, not just because they taste incredible, but because they’re achievable. They’re a wonderful balance of rich chocolate flavor and a texture that’s perfect for decorating. Whether you’re a seasoned baker or just starting out, I promise you can make these with confidence. They’re a fantastic way to create sweet memories, whether you’re baking for holidays, birthdays, or just a regular Tuesday. They bring a little bit of joy and a whole lot of deliciousness to any table.
If you enjoyed this recipe, you might also want to check out my Chewy Chocolate Chip Cookies for another chocolatey delight, or my Classic Gingerbread Cutout Cookies for more festive fun. Don’t forget to let me know how your chocolate cutout cookies turn out in the comments below! I’d love to hear about your decorating adventures and any personal twists you add. Happy baking, my friends!
Chocolate Cut Out Cookies
Ingredients
Method
- In a large mixing bowl, cream together the softened butter and granulated sugar until light and fluffy, about 1-2 minutes.
- Add the egg, vanilla extract, salt, baking powder, and cocoa powder. Mix until combined, then add the all-purpose flour and mix until smooth.
- Lay a sheet of wax or parchment paper on a work surface. Place half of the cookie dough in the center and press it into a disk. Cover with another sheet of paper and roll to between 1/4 to 1/2 inch thickness, as desired. Repeat with the second half of the dough.
- Chill the dough until firm, at least 30 minutes.
- Preheat oven to 350°F (175°C). Line cookie sheets with parchment paper or silicone baking mats.
- Remove half of the dough from the refrigerator and use cookie cutters to cut desired shapes. Place the cut-out cookies about 2 inches apart on the prepared cookie sheets. Chill for another 15 minutes before baking. Bake cookies until they no longer look glossy, approximately 10-15 minutes, depending on thickness and size.
- Reroll any leftover dough and chill while you cut shapes from the second half. Continue until all the cookie dough has been used.
- Once the cookies are baked, let them cool completely on the baking sheets before transferring them to a wire rack to cool further.
- To make the frosting: Beat the softened butter and powdered sugar with a stand mixer until crumbly. Add the salt and vanilla extract. Gradually add the milk, 1 tablespoon at a time, mixing until smooth. Add more milk, a teaspoon at a time, if needed to reach a piping consistency.
- If desired, divide the frosting and color it with food coloring. Frost the cooled cookies as desired. Let the frosting set at room temperature until it hardens slightly, then you can stack the cookies.