Easy Chocolate Sticks for Cozy Moments
You know those days? The ones where the wind is howling outside, your to-do list feels a mile long, and all you want is a hug in a mug? Yeah, me too. And that’s exactly when this hot chocolate recipe swoops in like a superhero. Forget those dusty packets you used to gulp down as a kid, or the watery stuff from the fancy coffee shops. This is the real deal. It’s rich, it’s creamy, it’s got this deep, comforting chocolate flavor that just wraps around you. I’ve spent years tinkering, trying different kinds of cocoa, debating the milk-to-chocolate ratio, and I’m finally ready to spill the beans. This isn’t just good hot chocolate; it’s the kind of hot chocolate that makes you pause, take a deep breath, and just feel… content. It’s my go-to when I need a little bit of magic, and honestly, it’s a lifesaver on busy nights when the kids are asking for something special but I don’t have the energy to bake cookies.
What is the best hot chocolate?
So, what makes this hot chocolate so darn special? Think of it as the ultimate comfort drink, elevated. It’s essentially a warm hug made with simple ingredients that create an impossibly decadent result. We’re talking real chocolate, not just cocoa powder, melted into velvety milk, with just a whisper of sweetness and maybe a hint of something extra to really make those chocolate notes sing. It’s not complicated; it’s just done *right*. It’s the kind of drink that silences the world for a few minutes, letting you savor every single sip. It’s the anti-stress potion, the cozy companion, the luxurious treat that doesn’t require a trip to the store for obscure ingredients. It’s pure, unadulterated happiness in a cup, and it’s way easier to make than you might think.
Why you’ll love this recipe?
Why is hot chocolate my favorite?flavorIs it bitter?simplicity? You won’t believe it. I can whip this up in less time than it takes to find a decent movie to watch. Seriously, a few minutes on the stove and you’re in hot chocolate heaven. Plus, it’s surprisingly cost-effective. Using good quality chocolate and milk is way more budget-friendly than you might imagine, especially when you compare it to buying fancy drinks. And the versatility! This recipe is a fantastic base. You can easily add a pinch of cinnamon, a dash of chili powder for a Mexican hot chocolate kick, or even a splash of your favorite liqueur for an adult treat. It’s perfect on its own, but it also pairs beautifully with a dollop of whipped cream, a sprinkle of chocolate shavings, or even a mini marshmallow or two. What I love most about this is that it feels incredibly special without being fussy. It’s the perfect antidote to a chilly evening, a delightful addition to a weekend brunch, or just a little pick-me-up when you need it most. It’s the kind of recipe that makes you feel like a kitchen wizard, even if you’re just stirring a pot on the stove.
How to Make My Ultimate Hot Chocolate
Quick Overview
Making this hot chocolate is a breeze. You’ll gently melt some good quality chocolate into warm milk, whisking until it’s smooth and creamy. A little pinch of salt enhances the chocolate flavor, and a tiny bit of sugar balances it perfectly. The key is to use good ingredients and to not let it boil furiously – a gentle simmer is all you need to bring everything together into a velvety smooth dream. It’s a simple, stovetop method that yields incredibly delicious results in just minutes. Trust me, once you make it this way, you won’t go back to the instant stuff.
Ingredients
For the Luxurious Chocolate Base:
Here’s where the magic happens. Using a good quality dark or semi-sweet chocolate is crucial. I prefer a 60-70% cacao content for that perfect balance of rich chocolate flavor without being too bitter. You can chop up a chocolate bar or use high-quality chocolate chips – just make sure they’re the good kind! I usually go for about 4 ounces for a standard batch, which makes about 2-3 generous mugs.
For the Creamy Liquid:
Whole milk is my absolute favorite here because it gives the richest, creamiest texture. But I’ve tested this with 2% milk, and it’s still wonderful. If you’re dairy-free, almond milk or oat milk work surprisingly well, though they might be a tiny bit less rich. About 2 cups is usually perfect for the amount of chocolate.
For Sweetness and Depth:
Just a tablespoon or two of sugar, usually granulated or brown sugar. Brown sugar adds a lovely caramel note. And a tiny pinch of salt – this is non-negotiable! It really makes the chocolate flavor pop. Some people like a little vanilla extract stirred in at the end, and I do too, about a teaspoon, just to round out the flavors.
Step-by-Step Instructions
Step 1: Warm the Milk Gently
Grab a medium saucepan. Pour in your milk (about 2 cups). Place it over medium-low heat. You want to warm it up until it’s steaming and tiny bubbles start to form around the edges, but you absolutely do not want it to boil. Boiling can scald the milk and affect the texture. Stir it occasionally to make sure it heats evenly. This usually takes about 3-5 minutes.
Step 2: Chop Your Chocolate (if using a bar)
While the milk is warming, if you’re using a chocolate bar, give it a good chop into small, even pieces. This helps it melt more smoothly and quickly. If you’re using chocolate chips, you can skip this step!
Step 3: Add Chocolate to Warm Milk
Once the milk is steaming nicely, reduce the heat to the lowest setting, or even turn it off for a moment. Add your chopped chocolate or chocolate chips to the warm milk. Let it sit undisturbed for about a minute to start melting.
Step 4: Whisk Until Smooth and Velvety
Now, grab a whisk! Gently start whisking the chocolate into the milk. Keep whisking until all the chocolate is completely melted and the mixture is smooth, glossy, and uniform in color. Don’t rush this part; slow and steady wins the race to a perfect texture. If the mixture seems too thick, you can add a tiny splash more milk and whisk again.
Step 5: Add Sweetener and Salt
Stir in your sugar (start with a tablespoon and add more if you prefer it sweeter) and that crucial pinch of salt. If you like, stir in the vanilla extract now too. Continue whisking until everything is fully incorporated and the sugar has dissolved.
Step 6: Gentle Simmer (Optional, for extra richness)
If you want an even richer, slightly thicker hot chocolate, you can let it *gently* simmer for another minute or two, whisking constantly. Again, no boiling! This helps to slightly thicken the mixture and meld the flavors. If you prefer a lighter style, you can skip this step and move on to serving.
Step 7: Taste and Adjust
Give it a quick taste. Need it sweeter? Add another half tablespoon of sugar. Want more chocolate intensity? Sometimes a tiny bit more salt can amplify it. This is your moment to perfect it!
Step 8: Serve Immediately
Pour your glorious hot chocolate into your favorite mugs. The aroma alone is enough to make you happy!
Step 9: Garnish (Optional, but highly recommended!)
Top with a generous swirl of whipped cream, a dusting of cocoa powder, some chocolate shavings, or a few fluffy marshmallows. Enjoy every single warm, comforting sip!
What to Serve It With
This isn’t just a drink; it’s an experience! I love pairing my hot chocolate with all sorts of things, depending on the mood and the occasion. For breakfast, it’s a revelation alongside some fluffy pancakes or crispy bacon. Imagine dipping a piece of perfectly cooked bacon into warm, rich hot chocolate – it’s surprisingly divine! If you want something a bit more refined for breakfast, a light, buttery croissant or a simple fruit salad also works beautifully. For brunch, this hot chocolate can be a star attraction. Serve it in pretty teacups with a tiny biscotti on the side for dipping. It’s elegant and comforting all at once. A slice of lemon poppy seed bread or a light yogurt parfait would also be lovely companions. As dessert, well, it’s already a dessert in itself, but it truly shines alongside something a little richer. Think a dense chocolate cake, a slice of cheesecake, or even some homemade shortbread cookies. The hot chocolate cuts through the richness of the dessert perfectly. For those moments when you just need a simple, cozy snack, I often pair it with a good book and a comfy blanket. Sometimes, a simple slice of banana bread or a few good quality chocolate chip cookies is all you need to make an afternoon perfect. My family has a tradition of having this after we watch a holiday movie, and it just makes the whole evening feel extra special. It’s truly versatile and always a crowd-pleaser.
Top Tips for Perfecting Your Hot Chocolate
Over the years, I’ve learned a few tricks that take this hot chocolate from good to absolutely spectacular. For the Chocolate Base, really pay attention to the quality of the chocolate you use. A good dark chocolate (60-70% cacao) is my absolute favorite because it has depth without being bitter, and it melts beautifully. If you’re using chocolate chips, make sure they’re the good kind that melt well, not the waxy ones. When it comes to Creamy Liquid, whole milk is king for richness. However, I’ve made this with 2% and it’s still delicious, just a little less decadent. For a dairy-free option, unsweetened almond milk or oat milk work wonders; they might not be quite as creamy but the chocolate flavor still shines through. For Sweetness and Depth, the pinch of salt is non-negotiable for me; it balances the sweetness and makes the chocolate flavor sing. I usually start with about a tablespoon of sugar and adjust from there, depending on how sweet my chocolate is. A teaspoon of vanilla extract at the end really ties everything together. For Mixing Advice, the key is gentle heat and constant whisking. You don’t want to scorch the milk or seize the chocolate. Low and slow is the mantra here. Whisk until it’s perfectly smooth and glossy. If it looks a bit too thick, a splash more milk will loosen it up right away. For Gentle Simmering, if you want it a bit thicker, let it *barely* simmer for a minute or two while whisking. This concentrates the flavors and thickens it slightly. Again, no vigorous boiling! For Taste and Adjustments, always have a little taste before serving. Everyone’s preference for sweetness is different, and your chocolate’s bitterness can vary. Adjust the sugar, salt, or vanilla until it’s just right for you. For Garnishes, while not essential, they elevate the experience. Freshly whipped cream is classic, but a dusting of cocoa powder, some fancy chocolate shavings, or even a sprinkle of cinnamon can be lovely. I learned the hard way early on that not all chocolate chips melt the same way, so stick to good quality ones or finely chop a good chocolate bar for the smoothest result!
Storing and Reheating Tips
This hot chocolate is best enjoyed fresh, but if you happen to have any leftovers (which is rare in my house!), you can absolutely store and reheat it. For Room Temperature Storage, it’s really best not to leave it out for more than a couple of hours, especially if it has dairy or whipped cream. The flavor and texture can degrade over time. If you’ve made a big batch and plan to drink it within a few hours, you can keep it in the pot on very low heat, stirring occasionally, but it’s much better to let it cool down completely before refrigerating. For Refrigerator Storage, once completely cooled, transfer your hot chocolate to an airtight container or jar. It should stay fresh in the fridge for about 2-3 days. The texture might thicken a bit as it cools, which is perfectly normal. For Freezer Instructions, this is a great option if you want to make a big batch ahead of time. Let it cool completely, then pour it into freezer-safe containers or even ice cube trays (for single servings!). It can be stored in the freezer for up to 2 months. When you’re ready to enjoy it, thaw it overnight in the refrigerator. For Reheating, the stovetop is your best friend. Pour the cooled or thawed hot chocolate into a saucepan over medium-low heat. Whisk gently and frequently until it’s warmed through. You might need to add a tiny splash of milk or water if it’s thickened too much. Avoid microwaving if possible, as it can sometimes lead to uneven heating or a slightly different texture. If you must microwave, do it in short bursts, stirring in between.
Frequently Asked Questions
Final Thoughts
There you have it – my absolute favorite hot chocolate recipe. It’s simple, it’s decadent, and it always hits the spot. It’s the kind of recipe that makes you feel good from the inside out, and it’s proof that sometimes, the best things in life are the most straightforward. Whether you’re looking for a comforting treat on a cold day, a special addition to a weekend gathering, or just a moment of pure, unadulterated bliss, this hot chocolate is your answer. I truly believe it’s the best hot chocolate you’ll make at home, and I can’t wait for you to try it and make it your own. Don’t be afraid to experiment with spices or toppings – that’s part of the fun! If you give this a go, I would absolutely love to hear about it in the comments below. Let me know how yours turned out, or share your favorite way to enjoy it! Happy sipping!
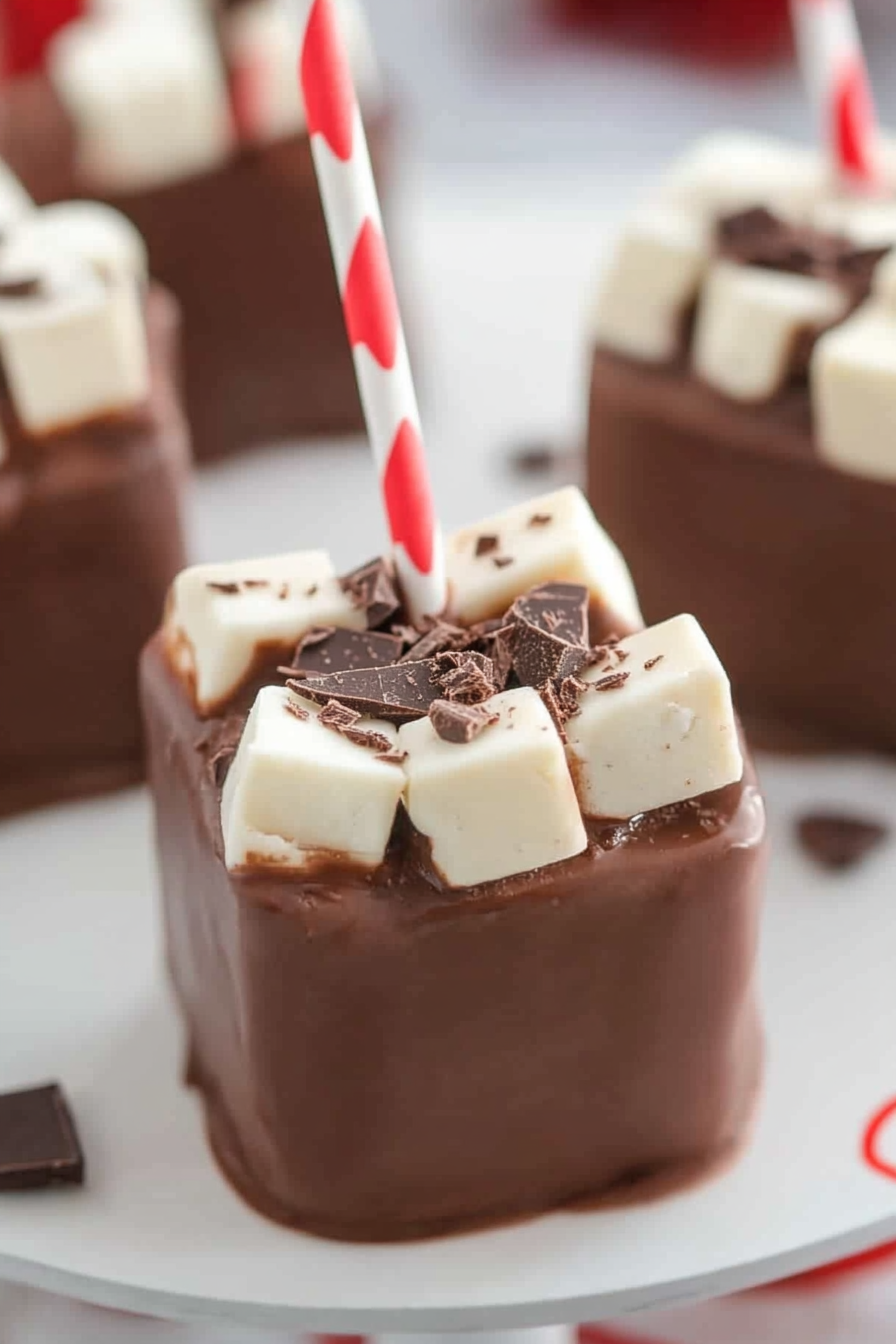
Rich Homemade Hot Chocolate
Ingredients
Method
- Place silicone molds onto a rimmed baking sheet.
- In a large bowl, combine semi-sweet chocolate chips and bittersweet baking bar.
- Heat sweetened condensed milk and heavy cream in a saucepan until 120-130°F.
- Pour hot milk mixture over chocolates and let sit for 3-4 minutes, then whisk until smooth.
- Transfer melted chocolate to piping bag and pipe into molds, leaving space for marshmallows.
- Press 4-5 mini marshmallows into each chocolate square, then insert a lollipop stick.
- Chill in refrigerator for 3 hours or overnight.
- Remove two squares per mug, place in hot milk, and stir until melted.