Easy Emerald Curry Recipe
There’s something about a good green curry that feels like a warm hug from halfway across the world. I remember the first time I tasted it — my friend Sarah cooked it when we were camping in Thailand, and I was hooked. The vibrant green color, the fragrant smell of fresh herbs, and that incredible, creamy kick — it’s honestly addictive. I always do this when I need comfort food that’s quick to throw together but tastes like I’ve spent hours simmering it. This green curry recipe has become a staple in my kitchen; my kids ask for it all the time, and it’s perfect for weeknights when I don’t want to spend forever in front of the stove. You’ll notice I love to pack mine with veggie goodness, but it’s super flexible — add chicken, tofu, or even shrimp if you’re feeling fancy. Trust me, once you master this, it will become your go-to for cozy nights or impressing friends over dinner. And don’t worry — it’s easier than you think! This one’s a lifesaver on busy nights, and it always gets rave reviews from everyone at the table.
What is green curry?
Think of green curry as Thailand’s answer to comfort food — but with a fresh, lively twist. It’s essentially a fragrant, spicy, and rich coconut milk-based sauce infused with green chilies, herbs, and spices. The name “green” comes from the signature color of the fresh green chilies, basil, and herbs blended into the paste. It’s kind of like a harmonious flavor dance in your bowl—herbaceous, spicy, sweet, and savory all at once. At its core, green curry is about balancing bold flavors with a creamy, velvety texture. It’s a one-pot wonder that’s as good served over rice as it is spooned straight from the bowl. The best part? It’s often made with simple ingredients you already have in your pantry or market aisle — like fresh basil, lime, and coconut milk. So, in a nutshell, it’s comfort food with an exotic punch, a cheerful splash of color, and a lot of love.
Why you’ll love this recipe?
Honestly, what I love most about this green curry is how it manages to be both quick and deeply satisfying. The flavor is next-level — that perfect combination of spicy, sweet, and herbal notes — and it’s just so fragrant. My kitchen smells like a tropical spa when I’m simmering it, which always makes me smile. Plus, this recipe is budget-friendly — you mostly use everyday ingredients like coconut milk, fresh herbs, and whatever veggies you have lying around. It’s a lifesaver when I want something exciting but don’t feel like running to the store. And I adore how versatile it is. You can throw in chicken thighs, tofu, shrimp, or just load it with vegetables for a veggie-packed version your family will love. It’s also endlessly adaptable: Want it milder? Adjust the chili. Need it spicier? Double up on the green curry paste. I’ve made this countless times, swapping ingredients here and there, and it still never fails to impress. This dish is honestly my “go-to” for cozy nights, quick weeknight dinners, or even impressing friends at a casual dinner party. Once you get the hang of the flavors, I promise it becomes an instant favorite — like comfort food with a bright, lively twist.
How do I make green curry?
Quick Overview
This green curry comes together in just about 30 minutes, making it perfect for busy weeknights or lazy weekends. You start with a fragrant green curry paste, sauté it to release all those lovely spices, then simmer it in coconut milk with your choice of protein and fresh veggies. The magic is in balancing the heat of the chilies with the sweetness of the coconut cream and the freshness of herbs. What makes this recipe special is how straightforward it is — no complicated steps, just a handful of ingredients and a bit of stirring. And if you’ve got a bit of leftover rice or some frozen shrimp, you’re basically done! It’s honestly one of those dishes that tastes like you’ve spent hours in the kitchen, but it’s ready faster than takeout. Plus, it’s super forgiving — I’ve added extra lime, more basil, or even a splash of fish sauce to tweak the flavor exactly how I want it. It’s a piece of cake to make, and the results are totally restaurant-worthy.
Ingredients
For the Main Curry: What is the best way to prepare it?
- 2 tablespoons green curry paste (store-bought or homemade, I love a good homemade one for even more flavor)
- 1 can (13.5 oz) coconut milk (full fat for creaminess)
- 1 tablespoon oil (vegetable or coconut for extra flavor)
- 1 pound chicken thighs or tofu, cut into bite-sized pieces
- 1 cup mixed vegetables (bell peppers, zucchini, snap peas, or carrots work beautifully)
- 1 tablespoon fish sauce or soy sauce (for depth and umami)
- Juice of 1 lime (adds that zesty brightness)
- Fresh basil and cilantro for garnish (don’t skip! Fresh herbs are everything)
- Cooked jasmine or basmati rice for serving
Optional Extras:
- Red chili flakes for extra heat
- A splash of brown sugar if you like a touch of sweetness
- Baby spinach or bok choy for extra greens
Step-by-Step Instructions
Step 1: Preheat & Prep Pan
Start by heating your pan over medium heat and adding the oil. I like to use a wide skillet or a wok — really anything that allows for easy stirring. Once the oil gets shimmering but not smoking, you’re ready to cook. Preparing your ingredients beforehand makes all the difference, so have your chicken or tofu, veggies, and herbs chopped and ready. It’s a quick process, so being organized helps everything come together smoothly.
Step 2: Mix Dry Ingredients
In a small bowl, stir your curry paste with a splash of coconut milk. This helps loosen it up and releases all those complex flavors right away. Trust me, this extra step makes the whole curry more fragrant and evenly spicy. It also prevents the paste from clumping when you add it to the hot pan.
Step 3: Mix Wet Ingredients
Pour the remaining coconut milk into the pan, stirring gently to combine with the paste. Bring it up to a simmer, and you’ll see the color deepen and that beautiful aroma fill your kitchen. This is when the magic starts — you’ll notice the sauce thickening slightly and becoming incredibly fragrant.
Step 4: Combine
Add your protein (chicken or tofu) to the simmering sauce. Make sure it’s coated well and cook until the chicken is just cooked through or the tofu is heated and slightly browned. Then toss in your veggies — I like bell peppers and zucchini because they cook quickly and add color.
Step 5: Prepare Filling
If you want to jazz things up, now’s the time to add a splash of fish sauce, soy sauce, or a pinch of sugar. Taste and adjust — I always do a quick tasting here to make sure the balance is just right. If it’s too spicy, a little more coconut milk or a squeeze of lime can help mellow things out. Fresh herbs are vital — chop up your basil and cilantro and keep them nearby.
Step 6: Layer & Swirl
Once your protein and veggies are cooked, give everything a gentle swirl. If you want to create a pretty marbled effect, sprinkle some extra curry paste on top and use a skewer or fork to swirl it through. This step isn’t necessary but makes the dish look extra professional on the plate.
Step 7: Bake
No oven needed here! Just let everything simmer uncovered for about 10-15 minutes, stirring occasionally. You want the flavors to meld and the sauce to thicken a bit. If it gets too thick, a splash of coconut milk or water keeps it nice and saucy.
Step 8: Cool & Glaze
Once you’re happy with the thickness and flavor, turn off the heat. Squeeze in fresh lime juice for brightness, and sprinkle your herbs right on top. If you love a glossy finish, you can add a quick drizzle of coconut cream or a light glaze of honey mixed with lime — but honestly, it tastes divine as is!
Step 9: Slice & Serve
Serve your green curry piping hot over fluffy rice. Garnish with extra herbs and a squeeze of lime. This dish is even better the next day — leftovers gently reheat in the microwave or on the stove. My kids love to spoon it onto warm bowls with a side of steamed rice for a relaxed family dinner. Trust me, once you’ve made this yourself, you’ll never want to order takeout again — it’s just too good and so satisfying!
What to Serve It With
Beyond just plain rice, I love serving green curry with lots of fun toppings or sides. For a cozy breakfast, I sometimes add a fried egg on top, letting the runny yolk mix into the spicy sauce — it’s a game changer. At brunch, you can serve it with fresh mango slices or a simple cucumber salad, and maybe a chilled iced tea on the side. As a dinner, it pairs beautifully with a glass of crisp white wine or a cold coconut water cocktail. And for those lazy weekend nights, I toss in extra veggies or seafood to make it a feast. My family has a tradition of adding crispy toasted peanuts and a sprinkle of chili flakes for a little crunch and heat — it makes each bowl feel extra special. Honestly, this green curry is so versatile; it’s like a blank canvas for whatever mood strikes — spicy, sweet, herbaceous or all three!
Top Tips for Perfecting Your Green Curry
Making curry is as much about the little details as it is about the ingredients. Over years of experimenting, I’ve learned a few tricks to make it showstopper every time. First, don’t skimp on fresh herbs — basil and cilantro really elevate the flavors. I always buy fresh and keep bunches in water on my counter, just like flowers. Second, when preparing your curry paste, I recommend toasting the spices lightly in the dry pan before blending; it enhances aroma and depth. For the veggies, I suggest adding quick-cooking ones like snap peas last, so they stay crisp and vibrant, not mushy. A common mistake I made early on was overcooking the vegetables, so now I add my greens at the very end and give it just a minute to wilt. If you like a spicier kick, throw in a sliced chili at the beginning — but start small! I’ve tested swapping coconut milk with almond milk, and surprisingly, it made it even creamier, though the flavor was slightly different. Bumping up the lime juice right before serving really brightens the dish and cuts through the richness. When baking or simmering, keep a close eye — every oven and stove varies, so I do a quick taste test once the flavors meld. And if you want to customize the heat level, adding a dash of chili oil at the end is my secret trick — gives it a beautiful glossy finish and just enough spice. Overall, it’s all about taste-testing as you go, adjusting ingredients until it sings. Believe me, the more you practice, the more confident you’ll become. And don’t be afraid to experiment with proteins and veggies — green curry is all about personal touch, and that’s what makes it truly yours.
Storing and Reheating Tips
This green curry keeps lovely in the fridge for up to 3 days. I always store it in an airtight container, and it’s just as good reheated — I prefer to do it gently on the stove over medium-low heat so it doesn’t lose that silky texture. For storage, I recommend storing the curry and rice separately; rice tends to soak up leftover sauce and can get mushy if stored together. If you want to freeze leftovers, it’s best to freeze the curry without the herbs — fresh herbs don’t freeze well and tend to lose their brightness. Wrap the curry tightly in a freezer-safe container or bag for up to 2 months. To reheat, thaw overnight in the fridge if frozen, then warm on the stove, stirring occasionally. I always add a splash of coconut milk or water during reheating to loosen the sauce and keep it creamy. The glaze or fresh herbs are best added just before serving to keep everything looking fresh and vibrant. This curry is forgiving — you can reheat it multiple times without sacrificing flavor or texture, as long as you handle it carefully. Just remember: taste as you go when reheating and adjust seasoning if needed — a squeeze of lime or a pinch of salt can make all the difference.
Frequently Asked Questions
Final Thoughts
If you’ve been looking for that one go-to dish to brighten up your dinner lineup, this green curry is it. It’s warm, comforting, and packed with flavor — all in under 40 minutes! From the first whiff of cooking spices to the vibrant green look and the perfect balance of heat and freshness, I guarantee it’ll make your kitchen smell incredible. Over the years, I’ve tweaked this recipe to suit my family’s taste, and I love how flexible it is — you can make it vegan, add extra bold ingredients, or keep it simple. One of my favorite moments is seeing my kids gobble it up and asking for seconds — totally worth every effort. So go ahead, gather your ingredients, and make yourself a pot of this magic. Once you do, I’d love to hear how you liked it or how you customized it! Feel free to share your own tips and twists in the comments. Happy cooking!
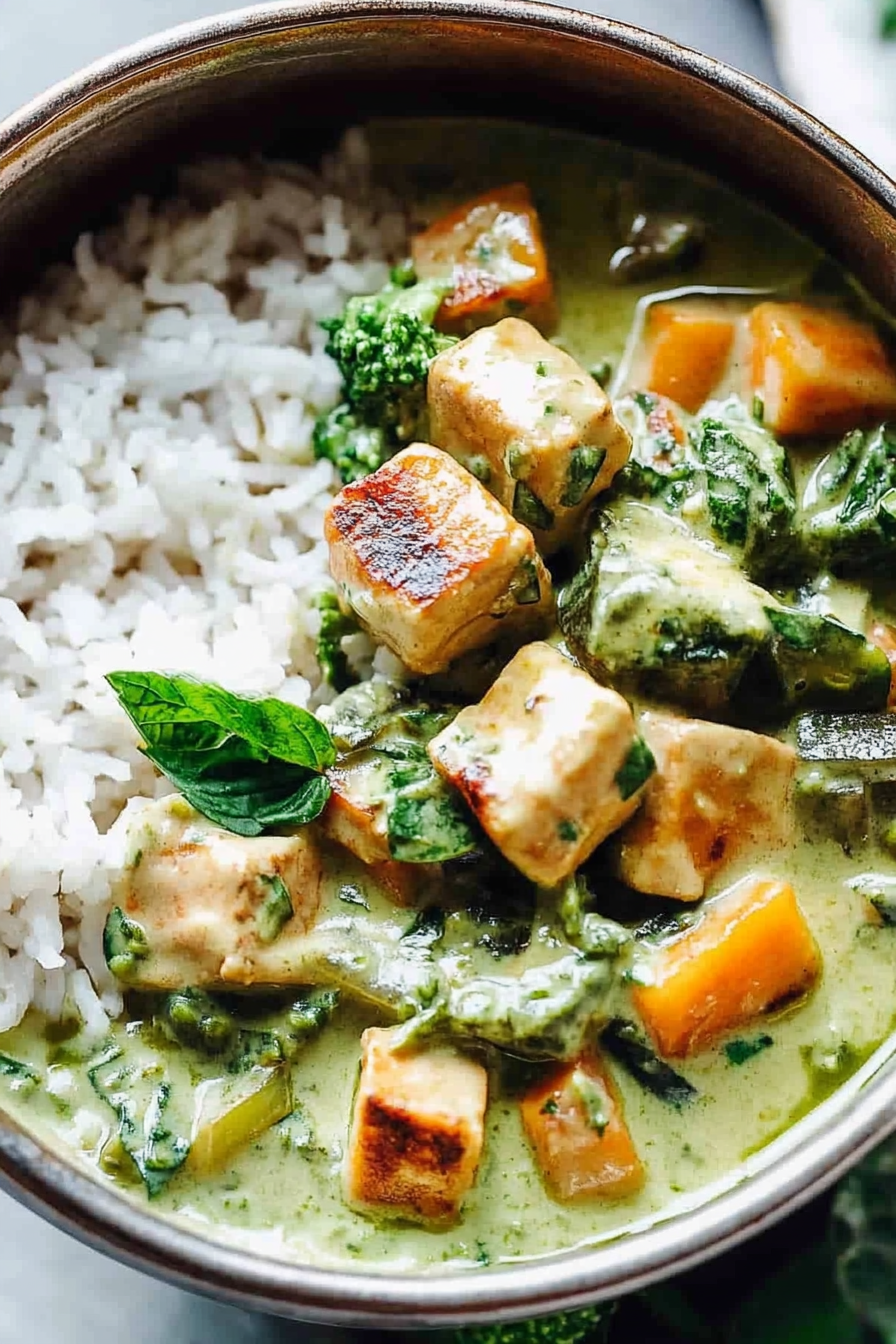
Delicious Thai Green Curry
Ingredients
Method
- Press the tofu with paper towels to remove water. Cut tofu into cubes. In a large skillet, heat olive oil over medium heat. Add tofu, sprinkle with salt, and fry until golden, about 10-15 minutes. Remove and set aside.
- Cook the white rice according to package instructions.
- In a large pot, add coconut milk, green curry paste, sweet potatoes, and bring to a simmer. Cook for 10 minutes until potatoes are tender.
- Add broccoli florets and fried tofu to the pot. Cook for an additional 5 minutes until broccoli is bright green.
- Stir in golden raisins, chopped cilantro, fish sauce, and brown sugar. Simmer for 2 minutes to meld flavors.
- Serve the curry over cooked white rice, garnished with extra cilantro if desired.