Easy Homemade Ice Cream Made Simple
You know those days, right? The ones where the sun is just a little too bright, the kids are bouncing off the walls, and you’re suddenly hit with this overwhelming craving for something cold, sweet, and utterly comforting. For me, that craving screams for homemade ice cream. Not the complicated, churn-all-day kind, but the magical, ridiculously simple version that tastes like it came from a fancy parlor. I remember the first time I stumbled upon this method – it was a sweltering summer afternoon, and I was desperate. I needed dessert, and I needed it fast. I’d always thought making ice cream from scratch was a whole ordeal, involving thermometers and fancy machines, but this? This is the recipe that changed my mind forever. It’s so easy, so creamy, and honestly, it’s become my go-to when I want something truly special without spending hours in the kitchen. It’s the kind of dessert that makes everyone around the table sigh with pure happiness, and the best part is, you probably have most of the ingredients in your pantry right now.
What is my “No-Churn” Dream Ice Cream?
So, what exactly *is* this magical creation we’re talking about? Think of it as your ultimate shortcut to creamy, dreamy homemade ice cream. It’s essentially a base made from just a few pantry staples that magically transforms into a rich, smooth frozen delight without needing an ice cream maker. No churning, no complicated custard-making – just pure, unadulterated ice cream goodness. The name “no-churn” really says it all, but I like to call it my “Dreamy Vanilla Bean Swirl” because, well, it’s dreamy, and I usually can’t resist swirling in a little something extra. It’s less about a rigid set of rules and more about a feeling – that feeling of pure, unadulterated joy you get from a perfect scoop. It’s the essence of ice cream, distilled into its simplest, most delicious form. It’s your happy place in a bowl.
Why you’ll love this recipe?
What is your favorite homemade ice cream recipe?flavor is just out of this world. We’re talking rich, creamy, with that perfect hint of vanilla that just sings. It’s not overly sweet, so you get that pure, clean taste that makes you want scoop after scoop. Then there’s the simplicity. Seriously, this is the easiest dessert I’ve ever made. It takes maybe 10-15 minutes of active time, and then you just let the freezer do its magic. It’s the kind of recipe that’s a lifesaver on busy nights or when unexpected guests pop over. And speaking of guests, they always rave about it! You’ll get asked for the recipe, and you can wink and say, “Oh, it’s just a little something I whipped up.” Plus, it’s incredibly cost-efficient. Forget those expensive pints from the grocery store; this homemade ice cream uses basic ingredients that are so much kinder to your walletversatility is another huge win. While I adore my classic vanilla bean, this base is a blank canvas for all your favorite mix-ins. Chocolate chips? Swirl in some caramel? Fold in fresh berries? You name it, this ice cream can handle it. It’s a fantastic base, much like a classic pound cake recipe is a foundation for so many variations. What I love most about this is that it delivers that incredible, satisfying ice cream experience without any of the fuss. It’s truly the best of all worlds.
How to Make Dreamy Vanilla Bean Swirl Ice Cream
Quick Overview
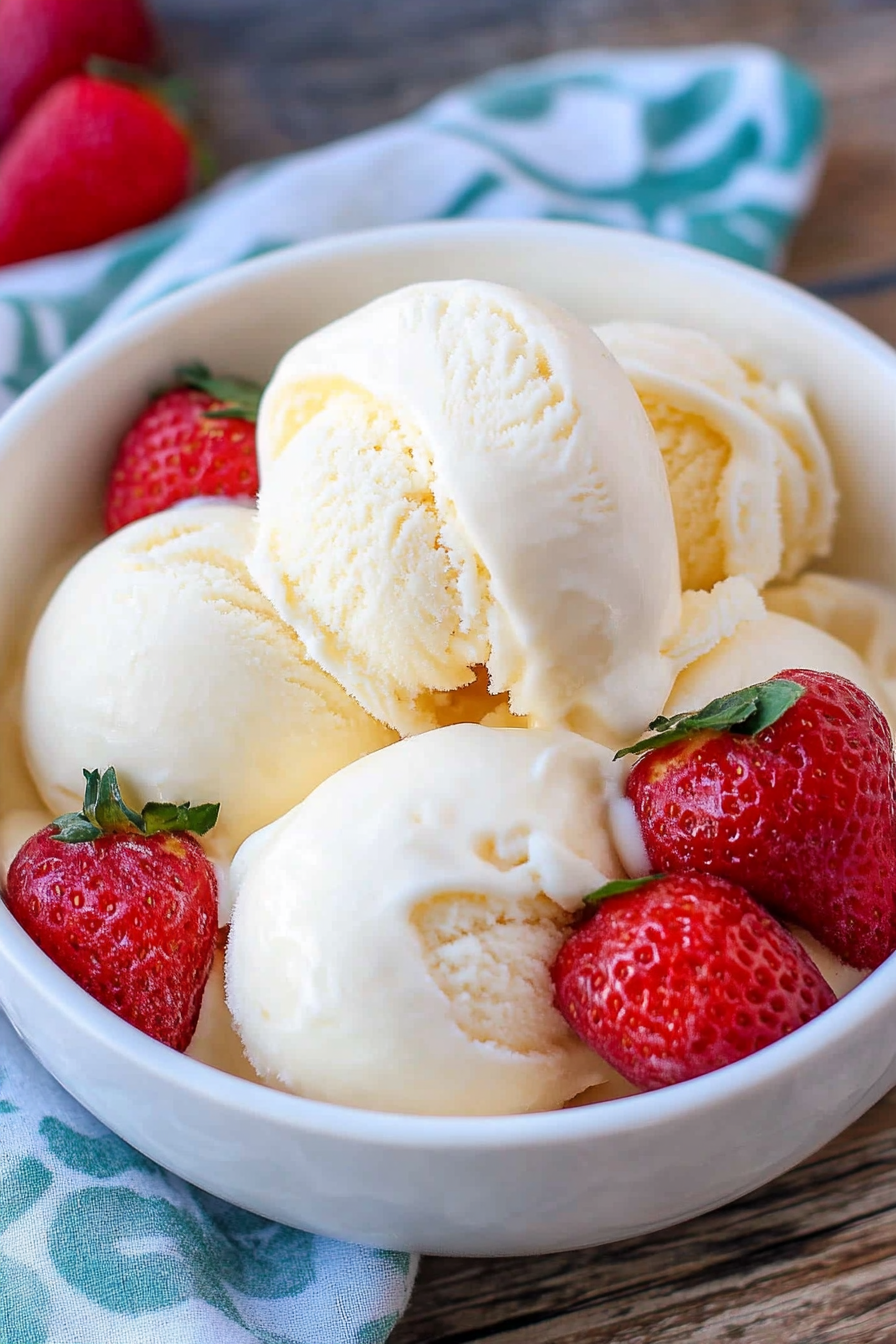
The magic of this homemade ice cream lies in its sheer simplicity. You’ll whip up a base of sweetened condensed milk and heavy cream, infusing it with vanilla. This mixture is then poured into a loaf pan and frozen until firm. The result? A luxuriously smooth, creamy ice cream that requires absolutely no special equipment. It’s foolproof, fast, and frankly, makes you feel like a kitchen wizard. The texture you achieve without churning is truly astonishing, and it’s all thanks to the magic of condensed milk.
Ingredients
For the Main Base:
* 2 cups heavy whipping cream, very cold: This is the secret to that unbelievable creaminess. Make sure it’s super cold; it whips up better that way. I always put my bowl and whisk in the freezer for about 15 minutes beforehand.
* 1 can (14 ounces) sweetened condensed milk: This provides the sweetness and that incredible smooth texture that you just can’t get any other way without a machine. Don’t skimp on the quality here; a good brand makes a difference.
* 2 teaspoons pure vanilla extract: You can absolutely use vanilla bean paste for more flecks and a more intense flavor. I sometimes do this when I want to feel extra fancy, but the extract is perfect too.
* Pinch of salt: This just helps to balance out the sweetness and enhance all the other flavors. Don’t skip it!
For the Swirl (Optional but Highly Recommended!):
* 1/2 cup caramel sauce (store-bought or homemade): For that irresistible gooey swirl. If it’s too thick, warm it up slightly.
* 1/2 cup chocolate ganache or melted chocolate chips: For a rich, decadent chocolatey moment.
* 1/4 cup cookie crumbles (Oreos, graham crackers, etc.): For a delightful crunch and flavor burst.
* Or any other favorite additions like fruit compotes, peanut butter sauce, or chopped nuts!
Step-by-Step Instructions
Step 1: Chill Everything
This is a crucial step for achieving the perfect texture. Make sure your heavy cream is very cold. I also like to chill my mixing bowl and whisk attachment (if you’re using a stand mixer) for at least 15 minutes in the freezer. This helps the cream whip up to its fullest volume.
Step 2: Whip the Cream
In your chilled bowl, whip the cold heavy cream on medium-high speed until stiff peaks form. This means when you lift the whisk, the cream holds its shape without drooping. Be careful not to over-whip, or you’ll end up with butter!
Step 3: Gently Fold in Sweetness
In a separate, larger bowl, combine the sweetened condensed milk, pure vanilla extract, and the pinch of salt. Give it a gentle whisk to combine everything smoothly. Now, carefully fold about a third of the whipped cream into the condensed milk mixture. This lightens the condensed milk base. Then, gently fold in the remaining whipped cream until just combined. You want to keep as much air in the mixture as possible, so don’t stir vigorously; use a spatula and fold it in from the bottom up.
Step 4: Prepare Your Pan
Lightly grease a standard loaf pan (about 9×5 inches). You can also line it with parchment paper, leaving some overhang on the sides. This makes it easier to lift the ice cream out later. I usually opt for parchment paper because it’s a lifesaver when trying to get the finished product out cleanly.
Step 5: Assemble for Freezing
Pour about half of the ice cream base into the prepared loaf pan and spread it evenly. If you’re adding a swirl, now’s the time. Drizzle about half of your chosen swirl ingredient (caramel, chocolate, etc.) over the base. Then, gently swirl it in with a knife or skewer. You don’t want to overmix; just a few gentle passes to create ribbons. Pour the remaining ice cream base over the top, and repeat with the remaining swirl ingredient, swirling again. You’re aiming for beautiful marbling, not a uniform color.
Step 6: Freeze Until Firm
Cover the loaf pan tightly with plastic wrap, making sure it’s pressed down onto the surface of the ice cream to prevent ice crystals from forming. Then, wrap the entire pan with aluminum foil. Pop it into the freezer for at least 6-8 hours, or preferably overnight, until it’s completely firm.
Step 7: Scoop and Enjoy!
Once firm, let the ice cream sit at room temperature for about 5-10 minutes to soften slightly, making it easier to scoop. Use a warm scoop (dip it in hot water and dry it) to get perfect, creamy scoops. Serve immediately and bask in the glory of your homemade ice cream!
What to Serve It With
This homemade ice cream is so versatile, it fits into almost any meal or occasion! For Breakfast, I sometimes like to do a smaller scoop of my vanilla bean version alongside some fluffy pancakes or waffles. It feels like such a decadent start to the day, especially on a lazy weekend. For Brunch, it’s fantastic served with a warm fruit compote spooned over the top, maybe alongside some freshly baked scones. It adds that perfect touch of sweetness and elegance. As Dessert, well, that’s its natural habitat! It’s divine on its own, of course, but I also love it with a warm slice of apple pie, a rich chocolate cake, or even just a drizzle of hot fudge sauce. The contrast of warm and cold is always a winner. And for those Cozy Snacks – think movie nights or just a little pick-me-up – a bowl of this is pure comfort. I’ve even seen my kids sneak a small scoop before bed when they’ve been particularly good! My family’s favorite way to have it is with a sprinkle of chopped toasted pecans and a little extra caramel drizzle. It’s simple, but oh-so-satisfying. Another hit is pairing it with fresh berries – the tartness of the berries cuts through the sweetness of the ice cream beautifully.
Top Tips for Perfecting Your Homemade Ice Cream
I’ve made this quite a few times now, and I’ve picked up a few tricks that I think make all the difference. First, when it comes to whipping the cream, making sure it’s super cold is non-negotiable. I even put my metal mixing bowl and whisk attachment in the freezer for at least 15 minutes beforehand. It really helps the cream achieve those stiff peaks without taking forever. Second, about the mixing: when you fold the whipped cream into the condensed milk, be gentle! You want to preserve all that lovely airiness. Think of it as lifting and folding, not stirring. Overmixing will result in a denser, less fluffy ice cream, and nobody wants that. For the swirls, less is often more. You want distinct ribbons, not a muddy mess. Drizzle your sauces or toppings strategically, and use a knife or skewer for just a few gentle passes to create those beautiful patterns. Don’t go crazy swirling; you want to see the contrast. When it comes to ingredient swaps, I’ve experimented a bit! For a dairy-free version, I’ve had success using full-fat coconut cream (the thick part from a chilled can) instead of heavy cream. It has a slightly different flavor profile but still yields a wonderfully creamy result. For sweetness, if you find condensed milk a bit too much, you can try reducing the amount slightly and adding a touch of honey or maple syrup, but be aware this can affect the final texture. For baking, the loaf pan is key. A wider, shallower pan might freeze a bit faster but can sometimes lead to a slightly icier texture if not covered well. A standard loaf pan gives you that classic ice cream block that’s easy to scoop from. Always, always cover it tightly to prevent freezer burn. Finally, for glaze variations, don’t be afraid to get creative! A berry coulis swirled in looks stunning and tastes amazing. Even simple chocolate chips folded in add a fantastic texture. Trust me on the toasted nuts, though; they add a wonderful nutty depth that’s just divine.
Storing and Reheating Tips
This homemade ice cream is best enjoyed fresh, but it does store quite well if you follow a few simple rules. For room temperature storage, it’s not really recommended as it will melt very quickly. It’s meant to be kept frozen! When it comes to refrigerator storage, again, ice cream really doesn’t belong in the fridge – it just melts! The freezer is your best friend here. For freezer instructions, the key is airtightness. Once it’s firm, I like to wrap the entire loaf pan tightly with a layer of plastic wrap, pressing it down to minimize air contact, and then cover it again with aluminum foil. This double layer helps prevent ice crystals. It should stay delicious for up to 2-3 weeks. After that, the texture can start to get a bit less ideal, but it’s still perfectly edible! Thawing is simple: just let it sit on the counter for about 5-10 minutes before scooping. Don’t try to thaw it in the microwave; it will melt unevenly and make a mess. The glaze timing is important too. If you’re planning to freeze it for a long time, I recommend swirling in the toppings just before the final freeze. If you’re serving it soon, you can always add extra swirls or toppings right before scooping. Sometimes, a little extra caramel drizzled on top just before serving makes it extra special!
Frequently Asked Questions
Final Thoughts
There you have it – my absolute favorite way to make incredible homemade ice cream with hardly any effort. This recipe truly changed the game for me, showing that gourmet-level desserts don’t always need complicated steps or special equipment. It’s the perfect blend of creamy, sweet, and satisfying, and it’s so easy to customize with your favorite flavors. Whether you’re looking for a quick dessert for a weeknight treat, a showstopper for a party, or just a way to beat the heat, this no-churn ice cream is your answer. I really hope you give it a try. The smell that fills your kitchen as it churns (well, not really churns, but you know what I mean!) is just divine, and that first bite? Pure bliss. If you love this recipe, you might also enjoy my recipes for homemade brownies or my easy no-bake cheesecake – they’re all about simple, delicious comfort. Let me know in the comments below how yours turns out, and what delicious swirls you decide to add! Happy making!
The Best Homemade Vanilla Ice Cream
Ingredients
Method
- In a saucepan, combine 1 cup of heavy cream, granulated sugar, and fine sea salt. Warm over medium heat, stirring until the sugar is dissolved. Do not boil.
- Remove the saucepan from the heat. Stir in the remaining heavy cream, whole milk, and vanilla extract. Whisk to combine.
- Chill the mixture thoroughly in the refrigerator (at least 2-3 hours, or overnight).
- Once chilled, pour the mixture into your ice cream maker and churn according to the manufacturer's instructions.
- Serve immediately for a soft-serve consistency, or transfer to an airtight container and freeze until firm.