Easy Italian Chicken Francese Recipe
There’s a smell that lights up my whole house when I make Chicken Francese — that warm, garlic-infused aroma mixed with a hint of lemon tang. It’s one of those recipes that instantly transports me back to Sunday family dinners, with everyone eagerly waiting around the table. I’ve always described it as a fancy comfort dish because it’s simple enough for a weeknight but feels special enough for company. Honestly, I was introduced to Chicken Francese by my Italian grandma — she used to make it on lazy Saturday afternoons, and the way everyone’s face lit up at the first bite is a memory I cherish. I remember trying to recreate it myself, nervously flipping the chicken, worried I’d mess up the lemon sauce or overcook the delicate meat. But trust me, once you get the hang of it, this dish becomes your secret weapon — it’s incredibly forgiving and ridiculously tasty. It’s perfect when you’re craving something rich and flavorful, but you don’t want to spend hours in the kitchen. And the best part? It’s a total crowd-pleaser, whether you’re serving your kids or impressing friends. If you’ve never tried making it at home, get ready to fall in love — because this dish is a total game-changer in my kitchen.
What is chicken Francese?
Think of Chicken Francese as an elegant take on a classic, where tender chicken cutlets are coated in a light, crispy batter, then coated in a flavorful lemon-white wine sauce. The name “Francese” actually means “French style” in Italian, which is fitting because it’s a marriage of French and Italian cooking traditions. The dish is essentially a thinly pounded chicken breast, dipped in egg and flour, then sautéed until golden, and finally drizzled with a bright, tangy sauce that’s packed with lemon juice and a splash of white wine. It’s a simple recipe, but with a classy, sophisticated touch that makes it perfect for everything from weeknight dinners to weekend gatherings. I love how the lemon cuts through the richness of the chicken, creating a perfect balance of flavors. Plus, it’s super adaptable — you can tweak the sauce or serve it with your favorite sides. It’s comfort food with an elegant twist, and I promise once you try it, it’ll become a staple in your recipe arsenal.
Why you’ll love this recipe?
There are so many reasons why I keep coming back to making Chicken Francese. First off, the flavor is just incredible — that zesty lemon sauce paired with the crispy, juicy chicken is a match made in heaven. It’s sweet, tangy, savory, and light all at once. What I love most about this dish is how straightforward it is; the ingredients are simple pantry staples, and the steps are pretty foolproof once you get your technique down. Plus, it’s a real budget-friendly option because you don’t need fancy ingredients — just some good quality chicken breasts, eggs, flour, lemon, and a splash of wine if you have it. The versatility is another big win. I’ve served this with everything from roasted vegetables to buttery mashed potatoes, and it’s always a hit. It’s a lifesaver on busy nights because you can assemble everything quickly and then focus on perfecting that beautiful, golden crust. And let’s be honest — serving a dish that looks fancy but is actually so easy to make feels pretty darn satisfying. My kids ask for this all the time; it’s become a family favorite that’s as much about memories and comfort as it is about flavor. Trust me, once you master this, it’ll be a go-to for impressing friends, romantic dinners, or just treating yourself.
How do I make chicken Francese?
Quick Overview
This dish is surprisingly simple — it all starts with thin, pounded chicken breasts dipped in egg and flour, then lightly sautéed until crispy. The magic happens when you whip up a quick lemon-white wine sauce in the same pan, which soaks into the chicken and makes every bite bursting with flavor. The best part? You don’t need fancy techniques or complicated ingredients. Just some good quality chicken, fresh lemons, and a splash of wine (or chicken broth if you prefer.) The process is straightforward: prep, cook, sauce, and serve. Just a few minutes of active cooking, and you’re done. It’s such a comforting, hearty meal that tastes restaurant-quality but with zero fuss. I always do this when I want something cozy yet elegant, and honestly, once you do, you’ll wonder why you haven’t made this dish sooner.
Ingredients
For the Main Batter:
- 4 boneless, skinless chicken breasts, sliced in half horizontally to make thin cutlets
- 2 large eggs
- 1 cup all-purpose flour (or gluten-free flour if needed)
- Salt and freshly ground black pepper, to taste
- Optional: garlic powder or paprika for extra flavor
For the Sauce:
- 2 tablespoons olive oil or butter for sautéing
- 2 cloves garlic, minced
- 1/2 cup dry white wine (or chicken broth for a non-alcoholic version)
- Juice of 2 large lemons (about 1/4 cup)
- Zest of 1 lemon (for extra punch)
- 1 tablespoon honey or sugar (optional, balances the acidity)
- Salt and pepper, to taste
- Fresh parsley, chopped (for garnish)
Step-by-Step Instructions
Step 1: Preheat & Prep Pan
Set your oven to warm if you want to keep the cooked chicken warm. Then, heat a large skillet over medium heat and add a few tablespoons of olive oil or butter. Make sure the oil gets hot but not smoking — you want that perfect sizzle when the chicken hits the pan. While that’s heating, flatten your chicken cutlets between two sheets of plastic wrap using a meat mallet or rolling pin until they’re about 1/4 inch thick. This helps them cook evenly and stays tender. Season your chicken with a little salt and pepper, ready for the dip.
Step 2: Mix Dry Ingredients
Pour the flour onto a plate or shallow dish, mixing in a pinch of salt and pepper — this is what gives your chicken that gorgeous crust. I’ve learned to season the flour generously because it adds flavor right at the start. If you like a little extra spice, sprinkle in some garlic powder or paprika. This step is simple but crucial for that crispy exterior you’re aiming for.
Step 3: Mix Wet Ingredients
In a bowl, beat the eggs with a little salt. That’s all it takes! Some recipes add a splash of milk or cream, but honestly, I tested with almond milk once, and it made the coating even creamier — experiment with what you have. Keep the egg mixture near the flour for easy dipping.
Step 4: Combine
Dip each chicken piece into the beaten egg, letting the excess drip off, then coat it thoroughly in the seasoned flour. Press lightly to make sure it sticks. Be careful not to overhandle — the goal is a light, even coating. Place the coated chicken on a plate and repeat. Don’t rush this step — a good coating means better crispness and flavor.
Step 5: Prepare Filling
For the sauce, mince your garlic and zest your lemons while the chicken is cooking. This helps keep everything flowing smoothly. The fresh lemon zest is a game changer — it adds brightness that really elevates the dish.
Step 6: Layer & Swirl
Place the chicken in the hot pan carefully; it should sizzle nicely. Cook for about 3-4 minutes per side until golden brown. Don’t move them too often — patience pays off here. Once cooked, remove the chicken from the pan and keep warm on a plate. In the same pan, add garlic and cook until fragrant, then pour in the wine or chicken broth, scraping up all those tasty bits. Add lemon juice, zest, and honey, simmering for a few minutes until it slightly thickens.
Step 7: Bake
Or, if you like, finish the chicken in the oven at 375°F (190°C) for about 10 minutes if you want extra tenderness. Usually, I serve it right from the stove to keep all those crispy bits alive, but baking is great if you’re making a big batch.
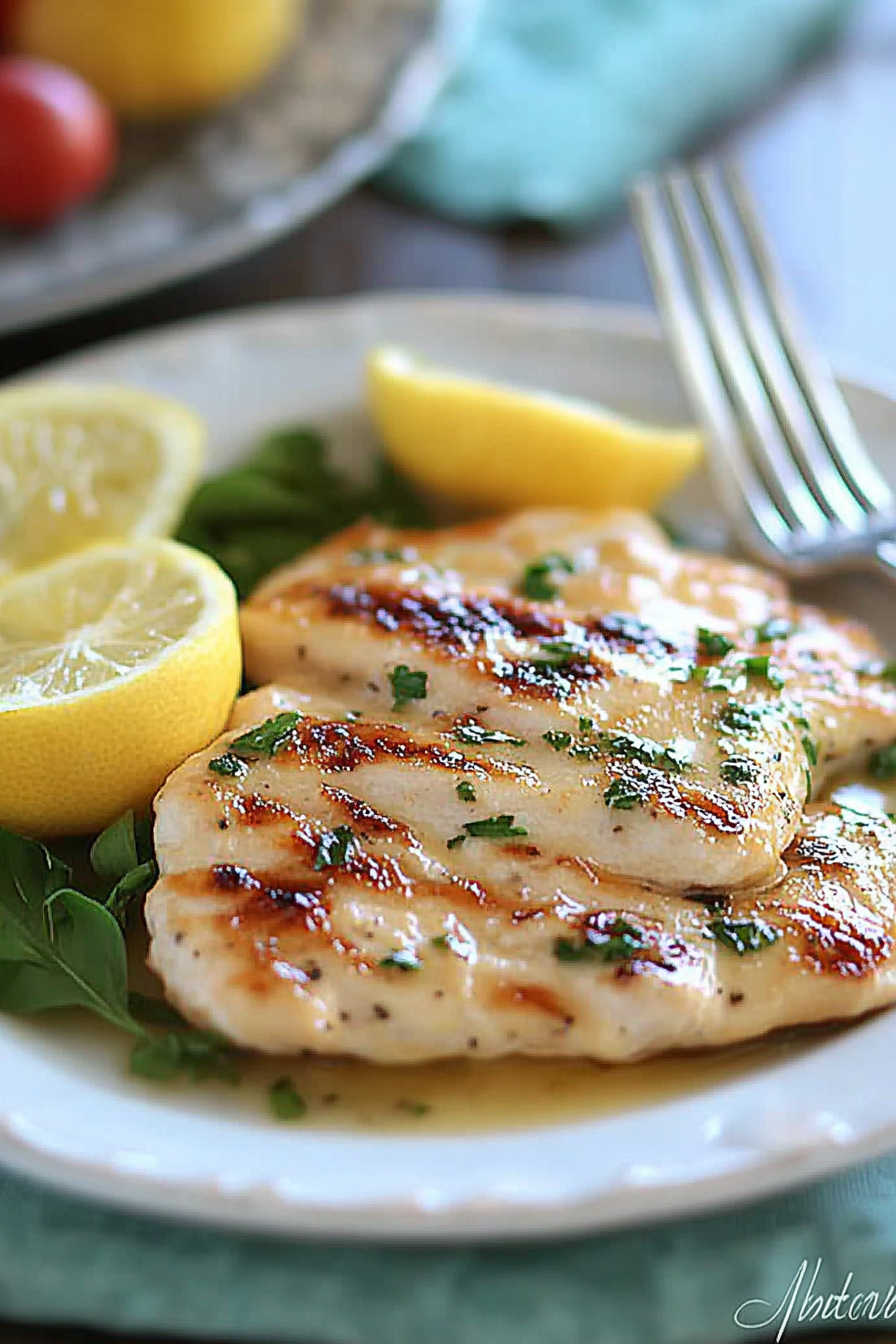
Step 8: Cool & Glaze
Once the sauce has thickened just right, pour it over the chicken. If you’re adding a glaze or extra lemon, do it now. For a glossy finish, simply spoon the sauce generously over each piece, letting it soak up all those flavors.
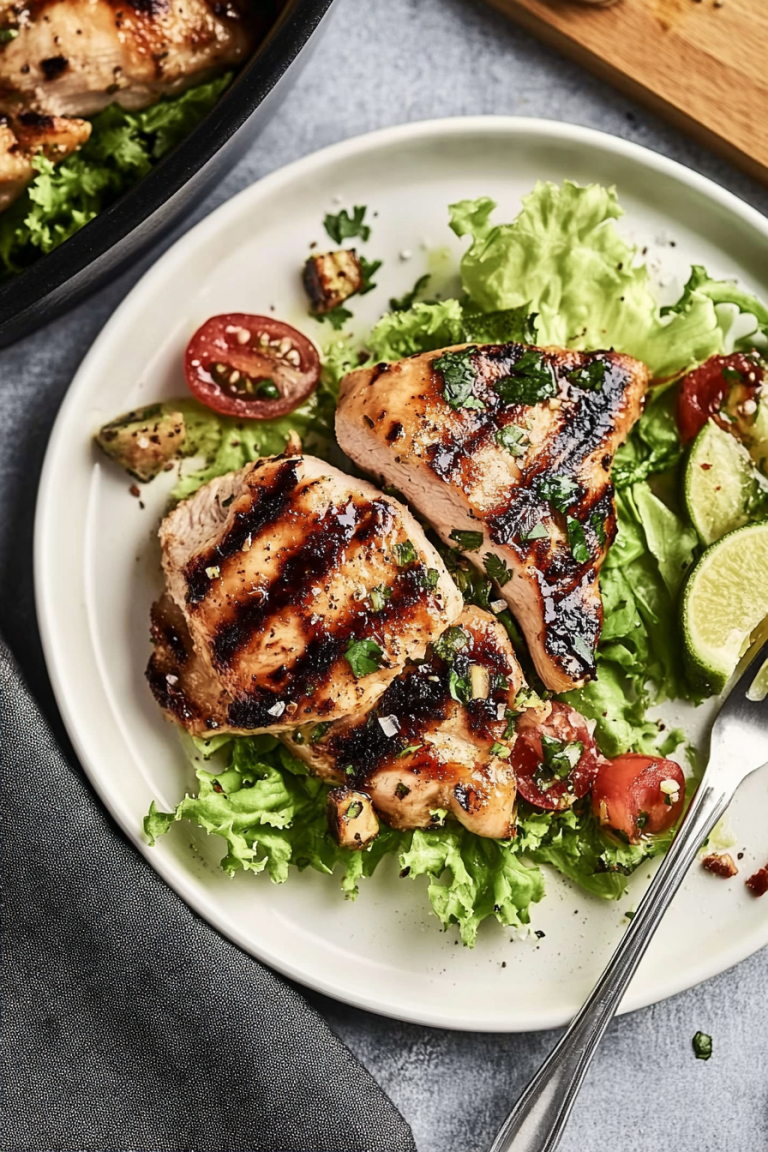
Step 9: Slice & Serve
Slice the chicken diagonally for a pretty presentation. Serve hot with a sprinkle of fresh parsley. I love pairing this with roasted vegetables, creamy mashed potatoes, or even a crisp side salad if I want something lighter. The flavors are lively enough to brighten up any meal, and the leftovers? They reheat beautifully — perfect for a quick lunch the next day.
What to Serve It With
When I make Chicken Francese, I like to keep things simple but elegant. For breakfast or brunch, a side of toasted baguette slices is perfect for scooping up that luscious sauce, paired with a strong coffee or fresh orange juice. At dinner, I serve it alongside buttery mashed potatoes or roasted garlic potatoes — the lemony sauce drizzled over, soaking into the potatoes, is divine. I sometimes throw in a side of sautéed spinach or roasted asparagus for that burst of green and a little freshness. And if I want to turn it into a cozy, family-style meal, a simple pasta tossed lightly in olive oil and garlic complements it beautifully — I love how the sauce soaks into the pasta, making every bite flavorful. For dessert, a light lemon sorbet echoes the bright citrus flavors. This dish is so versatile, and I’ve even made it for a casual weeknight dinner — trust me, it disappears in minutes at my house. It’s the kind of meal where everyone leaves the table with a satisfied stomach and a happy heart, remembering those flavors long after.
Top Tips for Perfecting Your Chicken Francese
I’ve made this recipe countless times, learning little tricks that make all the difference. First, make sure your chicken is sliced thin — this helps it cook evenly and stay tender. If your chicken is too thick, it can end up dry inside or take longer to cook through. I always pound it gently between two sheets of plastic wrap or parchment paper; it’s oddly therapeutic, and it guarantees a perfect thinness. When it comes to coating, I’ve found that using a shallow dish for flour and a separate one for eggs keeps things tidy; it makes the coating process smoother and less messy. Overmixing your batter will make the chicken dense, so handle it lightly. As for the sauce, balancing the lemon and wine is everything — I suggest tasting as you go and adjusting the lemon or honey to suit your palate. A tip I love: If the sauce thickens too much, just splash in a little warm water or more wine to loosen it up. For the glaze or finishing touches, I like to add a dash of red pepper flakes or fresh herbs for extra flair. Trust me on this — a little practice and these tips turn an already delicious dish into an absolute showstopper.
Storing and Reheating Tips
This dish is just as good the next day — I often make it ahead for busy weeknights or leftovers. Store the chicken in an airtight container in the fridge for up to 3 days. I prefer keeping the sauce separate; I just pour it over the chicken when reheating to keep the coating crispy. To reheat, microwave on medium power or gently warm it in a skillet over low heat, covering to keep it moist. If you have leftover sauce, transfer it to a jar or container — it keeps beautifully, and I like spooning it over grilled chicken or fish later on. If you want to freeze it, wrap the cooked chicken tightly in plastic wrap and store it in a freezer-safe bag for up to 2 months. Thaw in the fridge overnight, then reheat gently. When it comes to glazing, I recommend adding a fresh squeeze of lemon or a drizzle of olive oil before serving to revive the flavors. Trust me, you’ll find that this dish is just as delightful a day or two later, and it’s a lifesaver when you’re short on time but craving a satisfying meal.
Frequently Asked Questions
Final Thoughts
If there’s one recipe to keep in your back pocket, let it be Chicken Francese. It’s one of those dishes that looks fancy but is incredibly approachable — perfect for impressing guests, satisfying picky eaters, or just treating yourself after a long day. With its crisp coating, bright lemon sauce, and juicy chicken, it hits all the right notes of comfort and elegance. Plus, it’s flexible so you can customize it to your tastes and what’s in your pantry. I’ve tested this countless times, tweaking the amount of lemon, adjusting the sauce consistency, and experimenting with different sides. Every version turns out delicious, and I promise you’ll get a little thrill each time you watch that sauce swirl around the chicken and turn glossy and inviting. So, go ahead — give this recipe a shot. It’s easy, flavorful, and a little bit nostalgic — the kind of meal that makes you feel at home no matter where you are. I can’t wait to hear how yours turns out — leave a comment or share your variations!
Easy Lemon Chicken Piccata
Ingredients
Method
- Season chicken breasts with salt and pepper, then dredge in flour.
- Heat olive oil in a skillet over medium heat. Add chicken and cook until golden, about 4-5 minutes per side. Remove and set aside.
- In the same skillet, add garlic and cook until fragrant. Pour in white wine, scraping up any brown bits from the bottom.
- Add chicken broth and lemon juice, bringing to a simmer. Let reduce by half, then stir in butter and capers.
- Return chicken to the skillet and cook for an additional 2-3 minutes to heat through.
- Garnish with chopped parsley and serve immediately.