Easy Kids Lunch Routine Organic Style
There’s something truly nostalgic about packing a lunch for my kids and watching their little faces light up when they open it. I remember those busy mornings when I’d scramble to throw together something quick yet nourishing—feeling like I was pulling off a mini miracle to keep everyone happy and well-fed. Over the years, I’ve learned that the best kids lunch is the one that hits all the right notes: tasty, colorful, easy to make, and something my kids ask for again and again. Honestly, I was skeptical at first about whether I could get them to eat anything other than chicken nuggets and PB&J, but this kids lunch recipe? It’s a total game-changer. It’s simple enough for me to prep in the morning, fun enough for my little ones to enjoy, and versatile enough to change up week to week. Plus, the flavors are so good that I genuinely find myself stealing bites when they aren’t looking. Trust me—I think you’ll love this as much as my family does!>
What is a kids lunch?
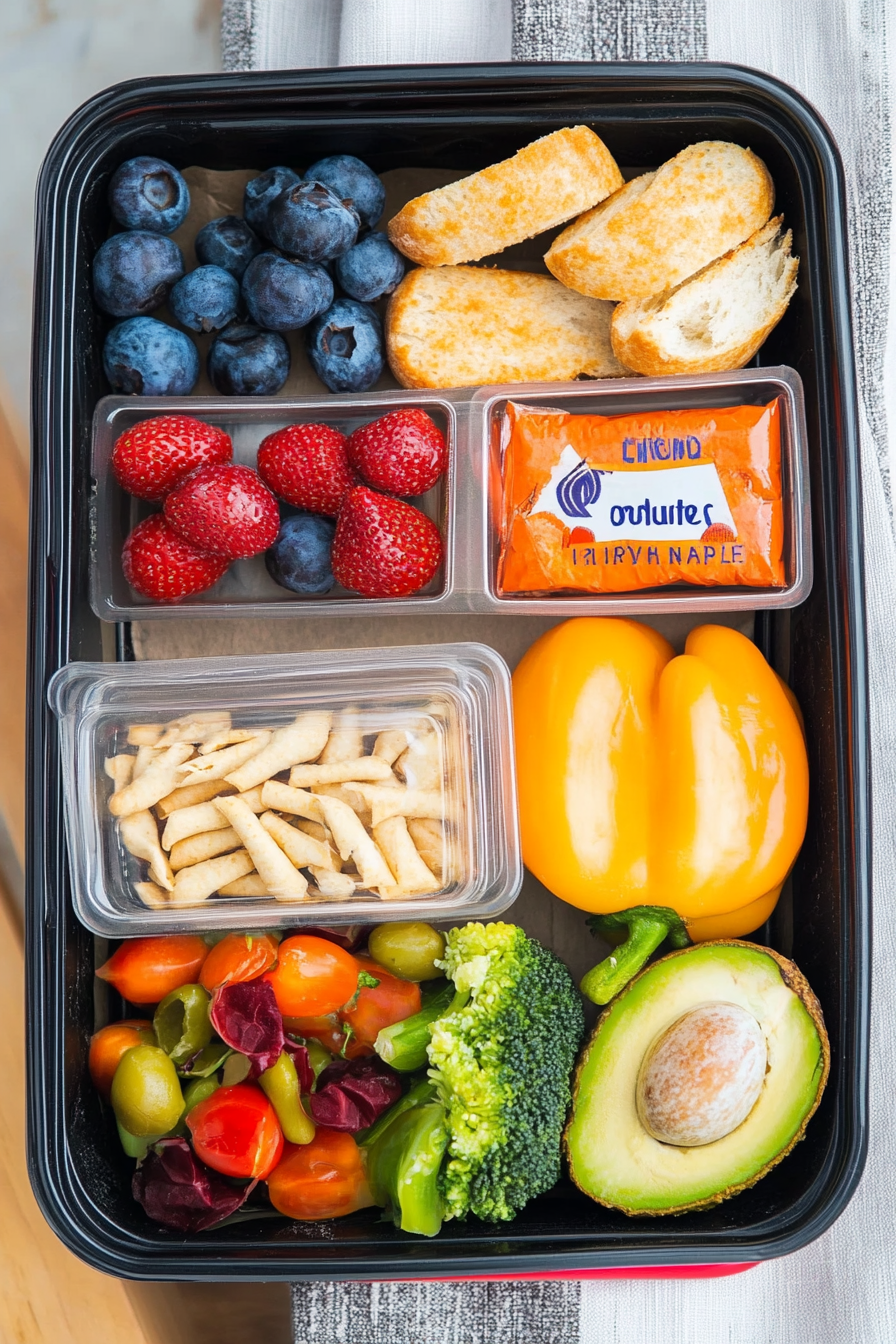
Think of this kids lunch as a playful, wholesome twist on traditional lunchboxes—think of it as a little keepsake of childhood flavors, wrapped up in a container. It’s essentially a balanced yet exciting meal that combines carbs, protein, veggies, and a sweet surprise, all in one. It’s not just about nutrition (though that’s super important), but about creating a meal that sparks joy and curiosity—something that feels like a treat but still keeps your little ones energized and full. This particular kids lunch is inspired by those favorite school snacks but with a homemade, wholesome edge. I like to make it colorful, with familiar flavors kids love, but packed with enough nutrients to fuel their busy days. It’s perfect for packed school lunches, picnic days, or even a quick midweek dinner on the go. Honestly, once you start making this, it’ll disappear faster than you think! The best part? You probably already have most of the ingredients in your pantry and fridge—no stress, no fuss.>
Why you’ll love this recipe?
What I love most about this kids lunch is how effortlessly it combines flavor with fun. The moment I pack it, I can practically hear the happy chatter of kids opening their lunchboxes, discovering their favorite treats. The secret? It’s truly versatile. I’ve made tiny tweaks—swap out the veggies, changing up the cheese, or adding a dash of honey—and each version feels like a new adventure. My kids ask for this all the time, and honestly, it’s a relief in the middle of hectic mornings. The flavor profile is simple but satisfying: a little savory, a touch sweet, and totally crave-worthy. Plus, it’s budget-friendly. Most of the ingredients are staples I already keep on hand, so I can whip this up even on my busiest days. The beauty of it? You can totally customize it for picky eaters or adventurous taste buds. If you want something that’s super nourishing, easy to pack, and always gets raves from your kids, this kids lunch is your new go-to. It’s the kind of recipe that turns a mundane meal into a small moment of happiness—yep, that’s what makes it a family favorite around here.
How do I make my kids lunch?
Quick Overview
This kids lunch is as simple as layering a few fresh ingredients in a container, adding a sweet or savory surprise, and packing it all up neatly. You’ll prepare a crunchy, cheesy quesadilla, stuff it with some fresh veggies, and include a little fruit or treat on the side. The key is to keep everything colorful and bite-sized, so it’s easy for little hands to manage. I love to make it in advance and store it in the fridge, so mornings are a breeze—just grab, pack, and go. What makes this special? I’ve tested it with different fillings, and it’s always a hit. Plus, the ingredients are flexible and forgiving—so don’t stress if you’re missing something. It’s perfect for busy weekdays or picnic adventures, and honestly, I think your kids will ask for it again and again!>
Ingredients
For the main layer:
– 2 large whole wheat tortillas or bread slices (choose your favorite!)
– 1 cup shredded cheese (cheddar, mozzarella, or a blend)
– ½ cup cooked chicken, shredded (or ham, turkey, or plant-based protein)
– ¼ cup finely chopped bell peppers or carrots for crunch and color
– A handful of baby spinach or kale, chopped (for extra greens, if your kids will go for it!)
– Butter or oil for frying or toasting
For the Side & Surprise:
– Sliced fresh fruit (apple slices, grapes, berries)
– Yogurt or a small dip like hummus
– A mini sweet treat—like a homemade muffin or a small cookie
For the Optional Sweet Glaze or Drizzle:
– Honey or maple syrup (for a light drizzle over the fruit or inside the wrap)
– A dash of cinnamon or vanilla for extra flavor
Step-by-Step Instructions
Step 1: Preheat & Prep Pan
Warm up your non-stick skillet over medium heat. If you’re planning to toast the wrap, lightly butter the skillet or brush with oil—trust me, that little bit of crispy goodness makes all the difference. While it’s heating, lay out your tortilla or bread slices, and get your fillings ready.
Step 2: Mix Dry Ingredients
If you’re using shredded cheese or chopped vegetables, set them aside in small bowls. I always recommend grating the cheese fresh if you can—melts better and tastes so much better. Lay out your cooked protein, chopped veggies, and greens so everything’s within arm’s reach.
Step 3: Mix Wet Ingredients
Not much here, just a quick brush of a light bit of butter or a drizzle of oil on the bread or tortilla. If you’re adding any seasoning or herbs, sprinkle them now. It keeps everything flavorful without making it soggy.
Step 4: Combine
Layer your cheese, protein, and veggies on half of the tortilla or bread. Fold it over carefully, pressing lightly to hold everything together. If you want a little extra crunch, you can brush the outside with butter or oil before toasting.
Step 5: Prepare Filling
If you like, you can add a small dollop of sour cream, cream cheese, or hummus inside for extra creaminess. Or keep it simple—this is all about that cheesy, veggie goodness inside.
Step 6: Layer & Swirl
Place your assembled wrap in the skillet. Cook for about 3-4 minutes on each side or until golden brown and the cheese is gooey. Use tongs or a spatula to flip carefully—patience is key here! I love to watch it turn a beautiful amber color, the smell alone draws everyone to the kitchen.
Step 7: Bake
If you prefer softer, less crispy, you can also bake these wrapped up at 375°F (190°C) for about 15 minutes—ideal if you’re making a batch ahead of time. Just place them on a baking sheet lined with parchment paper.
Step 8: Cool & Glaze
Let the wraps rest for a few minutes—hot cheese can be tricky! When slightly cooled, slice them into kid-friendly pieces, and if you want to add a little extra sweetness, drizzle with honey or vanilla then. Keep the glaze light, so it doesn’t overpower those fresh flavors.
Step 9: Slice & Serve
Use a sharp, serrated knife to cut into fun triangles or strips. Serve them with fruit, a small side, or a dip—whatever your kids love most. I find that presentation makes all the difference, so feel free to add a few colorful napkins or mini skewers for a cute touch!
What to Serve It With
This kids lunch is versatile enough to pair with so many sides. For breakfast or a snack, serve with a glass of milk or a cup of hot cocoa. I love packing these with some fresh fruit—sliced strawberries, crunchy apple slices, or a small handful of grapes always disappear quickly. For a more adult twist on the same concept, add a side of veggie sticks with hummus or a mini salad in a tiny jar. It’s also fantastic for picnics—just keep everything in a well-insulated container, and you’re good to go. And hey, if you want to make it extra special for a celebration or sleepover, include a homemade cookie or a little chocolate chip muffin on the side. I’ve found that presentation and variety really excite little appetites, turning an ordinary lunch into a tiny feast they’ll look forward to all week. Plus, this is a perfect way to sneak in a few extra veggies—my secret weapon for happy, healthy eaters! Trust me, once you see how much your kids enjoy it, you’ll be sticking to this one forever.
Top Tips for Perfecting Your Kids Lunch
Like with all good recipes, the magic is in the little details. Here are my tried-and-true tips to make sure your kids lunch is always a hit:
- Zucchini prep: Grate it finely, then squeeze out excess moisture with a clean towel. It helps avoid soggy wraps and adds a little nutrition.
- Mixing advice: Don’t overstuff your wraps—less is more. Keep ingredients balanced and evenly distributed to prevent leaks or soggy spots.
- Swirl customization: Want a more colorful effect? Drop small spoonfuls of different colored hummus or yogurt inside before folding. It’s almost like edible art!
- Ingredient swaps: Substitute turkey bacon, roasted sweet potatoes, or even cooked quinoa for variety. Trust me; it’s fun to experiment!
- Baking tips: Oven racks in the middle work best, and keep an eye on the first batch—baking time can vary depending on your oven and your wrap thickness.
- Glaze variations: A little honey topped with crushed nuts, or a sprinkle of cinnamon with powdered sugar, can add a delightful twist. Just keep these toppings light to not overpower the main flavors.
From my years of making this, I’ve learned to keep things simple but with little surprises inside. Sometimes, less truly is more, especially when it comes to kid-friendly flavors. Also, don’t stress if it doesn’t turn out perfect every time—what matters most is that your kids love it, and that’s always a guarantee with this tried-and-true recipe!
Storing and Reheating Tips
Keeping kids lunches fresh and tasty is an art—trust me, I’ve tested all the methods. Here’s what works best:
- Room temperature: If you’re packing it in the morning, these wraps are safe for a few hours (about 2-3), especially if kept in a cool, insulated lunchbox. Just avoid leaving perishable fillings out all day.
- Refrigerator storage: Store in an airtight container, ideally eaten within 24 hours for peak freshness. I usually wrap them tightly in foil or beeswax wraps first—less mess, more flavor.
- Freezer instructions: These can freeze well if you wrap them tightly. Thaw in the fridge overnight, then warm slightly in a skillet or microwave before serving. Keep the glaze or drizzle for freshening up just before eating.
- Glaze timing: Add the honey or syrup right before serving for maximum freshness, unless you prefer a slightly softer, sweeter wrap that’s been refrigerated for a bit.
It’s amazing how leftovers transform with a quick reheat—cheese melts, flavors meld, and it’s almost like having a new dish. Personally, I love making these in a batch on Sunday and having ready-to-go lunches all week. They still taste fresh, and everyone wins!
Frequently Asked Questions
Final Thoughts
This kids lunch recipe has truly become a staple in my household. It’s simple, nutritious, and always seems to bring a little joy to my children’s faces. The best part? It’s flexible enough to adapt to whatever ingredients I have on hand, and I can customize the fillings or sides based on what’s in season or what my kids are craving. Plus, it’s a breath of fresh air from the usual sandwich monotony. When I see my kids devour their lunch with excited chatter, I realize that good food doesn’t have to be complicated—sometimes, just a few thoughtful ingredients, a splash of creativity, and a whole lot of love make all the difference. I hope you give this a try and enjoy creating happy mealtime moments with your little ones. If you try it, I’d love to hear how it turns out—leave a comment or share your favorite twists. Happy baking (and packing)!
Healthy Kid's Lunch Box
Ingredients
Method
- Spread hummus evenly inside each pita bread.
- Fill each pita with cooked chicken, cherry tomatoes, and shredded cheese.
- Wrap the pita tightly in foil and bake at 375°F for 10 minutes.
- Prepare baby carrots as a side snack.