Easy Minty Puppy Chow Recipe
If there’s one treat that instantly takes me back to lazy Saturday mornings or cozy family movie nights, it’s puppy chow. That crunchy, sweet, slightly salty snack that’s totally addictive in the best way. I remember sneaking spoonfuls from the mixing bowl as a kid—living dangerously because I just couldn’t resist—until my mom caught me giggling with a mouthful. Over the years, I’ve played around with this classic, tweaking ingredients here and there, and honestly, it’s one of those recipes that’s just impossible to improve on because it’s already perfect in its simplicity. Whether you’re craving something sweet at 10 p.m. or need a fun, bring-it-to-a-party snack, puppy chow always comes through. Seriously, this one’s a lifesaver on busy nights—you pop it together in minutes, and it disappears even faster than you made it. Let me walk you through my favorite version—I promise, it’s so good, once you try it, you’ll be making it weekly! And yes, your kids will ask for it all the time too. Let’s dive into all the reasons why puppy chow should be your new go-to!
What is a puppy chow?
Puppy chow isn’t some fancy gourmet snack—think of it as a playful, irresistible twist on a classic chocolate-coated treat. It’s essentially a hearty combination of crispy cereal, like Chex or cornflakes, coated in a rich chocolate and peanut butter mixture, then tossed in powdered sugar until every piece is coated in snowy, sweet goodness. The name ‘puppy chow’ might sound a little funny, but it’s all about that playful, messy vibe—the kind of snack you can’t help but munch on with your fingers, leaving trails of powdered sugar on your lips. It’s kind of like a sweet, crunchy trail mix but with a smooth, decadent coating that makes each handful feel like a special little gift. And because it’s so simple to make, with only a handful of ingredients, I always do this when I need a no-fuss treat that’s guaranteed to make everyone smile. Think of it as the chocolate-covered strawberries of party snacks—delicious, cheerful, and impossible to resist.
Why you’ll love this recipe?
What I love most about puppy chow is how it hits all the right notes—sweet, salty, crunchy, and just a little bit indulgent. The aroma alone when you’re mixing the melted chocolate and peanut butter is enough to draw everyone to the kitchen. Plus, it’s deeply nostalgic; I have memories of my childhood when my mom used to package individual portions for school lunches, and I sneakily snatched a handful before she could wrap them up. It’s such a versatile treat too—perfect for potlucks, family movie nights, or just when you need a quick pick-me-up. And trust me, it’s genius because the ingredients are super budget-friendly. You probably already have everything in your pantry—cheerful cereal, chocolate chips, peanut butter, and powdered sugar. My favorite part? It’s a no-bake, one-bowl wonder—no complicated steps, no fancy equipment needed. Just melt, stir, toss, and enjoy. I’ve tested this with almond butter, too, and it actually made it even creamier and tastier! If you’re into crunchy snacks with a sweet punch, you’ll find puppy chow always satisfies that craving. Plus, it’s a guaranteed crowd-pleaser—I’ve served it at kids’ birthday parties, casual get-togethers, and family movie nights, and it’s always gone in minutes. What I love most about this is how forgiving it is—once you get the hang of mixing and coating, it’s smooth sailing. And honestly, there’s something so comforting about the smell wafting through the kitchen while it’s baking—like a warm blanket for your senses. Once you make it, you’re going to want to keep a big batch on hand for whenever that sweet tooth strikes. Trust me on this one: puppy chow isn’t just a snack—it’s a mood booster!
How do I make a Puppy Chow?
Quick Overview
This recipe is everything I love in a snack—simple, quick, and totally delicious. You start with crispy cereal, melt down some chocolate chips and peanut butter until silky smooth, then pour over the cereal and toss gently to coat. Once coated, you toss the cereal in powdered sugar until it’s a snowy, crunchy candy that’s almost too pretty to eat. The best part? You only need a handful of ingredients that are probably already in your pantry. It comes together in about 20 minutes, and the cleanup is minimal. Once it cools, you’ve got a luscious, crunchy treat that’s perfect for sharing—or sneaking bites of when no one’s looking!
Ingredients
For the Main Batter:
– 9 cups of crispy cereal (Chex, cornflakes, or even Cheerios—they all work perfectly)
– 1 cup semi-sweet chocolate chips—trust me, the tiny ones melt faster and evenly
– 1/2 cup creamy peanut butter—smooth is best and adds that classic flavor
– 1 teaspoon vanilla extract—that little splash for depth
For the Coating:
– 1 1/2 cups powdered sugar—sifted if you want to avoid clumps
Extra tips: I recommend good-quality chocolate chips and natural peanut butter if you’re feeling a bit fancy. But honestly, even store-brand works great. The key is melting everything slowly to avoid burning the chocolate. Also, I love tossing in a pinch of sea salt or a sprinkle of cinnamon for a little extra flair—trust me on this one!
Step-by-Step Instructions
Step 1: Preheat & Prep Pan
Nothing fancy here—just get a large mixing bowl ready and line a baking sheet with parchment paper. Because this snack is all about quick assembly, you don’t need to preheat your oven, but having everything within reach makes the process seamless. I always measure out my cereal first—9 cups—so I don’t spill a single piece when I toss everything together.
Step 2: Mix Dry Ingredients
I like to keep my cereal separate until the coating is ready. That way, I can pour the melted chocolate mixture right over the cereal and toss evenly without breaking the cereal too much. It’s all about gentle handling here—you want a light touch so your cereal stays crispy.
Step 3: Mix Wet Ingredients
Pour the chocolate chips into a microwave-safe bowl, add the peanut butter, and melt in short bursts, stirring between each, until silky smooth. I tested this with almond butter, too—who knew that almond butter makes it extra creamy? Once melted, stir in the vanilla for a little sweet aroma.
Step 4: Combine
Pour the melted chocolate mixture over the cereal and gently fold with a spatula until everything is evenly coated. If your mixture seems a little thick, a splash of warm milk helps loosen it up. Do not overmix; you want every piece coated but still crisp.
Step 5: Prepare Filling
You can skip this if you’re feeling classic, but I like to add a little something extra—sometimes mini M&Ms or crushed pretzels stirred into the coating for a salty contrast. If you want to keep it simple, just stick with the coated cereal.
Step 6: Layer & Swirl
Transfer the coated cereal to your big bowl or onto the baking sheet and gently toss with powdered sugar. I prefer to do this in two batches—pour in half, toss, then the second half. For a marbled effect, I sometimes add a drizzle of white chocolate or caramel over half and swirl lightly with a toothpick.
Step 7: Bake
Honestly, baking isn’t required for classic puppy chow. You can just let it cool and enjoy! But if you want a slightly baked, denser crunch, pop it in a 350°F oven for about 10 minutes, stirring once or twice. Timing can vary, so look for a slightly firmer coating. Just don’t overdo it—you want that crunchy texture to remain intact.
Step 8: Cool & Glaze
Spread the puppy chow on a parchment-lined tray and let it cool completely—about 15 minutes. Mixing in additional toppings like sprinkles or edible glitter right after glazing adds a fun, festive touch. I always do this step outside—trust me, powdered sugar and melted chocolate do not mix well with a messy kitchen.
Step 9: Slice & Serve
Once cooled, break into chunks if you baked it, or serve straight from the bowl if not. I love putting it in cute jars or tieing up little gift bags for friends. Honestly, the best part? Watching everyone’s face light up when they get their first bite. This snack is so addictive—it’s like getting a hug in every handful.
What to Serve It With
Puppy chow is the ultimate party snack, and it plays nicely with many settings. For breakfast, I love serving it with a big mug of coffee or hot cocoa—the salty-sweet combo is just perfect to start your day. It’s also a showstopper at brunch tables with mimosas or milkshakes in hand. As a dessert, I like to pair it with vanilla ice cream or fresh berries; it’s almost like a crunchy topping on a sundae. And for casual movie nights? Nothing beats puppy chow alongside popcorn, making a sweet, salty duo that keeps everyone reaching for more. My kids ask for this all the time, especially during holiday seasons—you’d think it’s candy the way they devour it. I also love making small gift jars of puppy chow for friends—that nostalgic touch always gets appreciated. Whatever your occasion, this treat brings smiles and satisfaction in every bite.
Top Tips for Perfecting Your Puppy Chow
Over the years, I’ve picked up a few secrets to making this snack absolutely fail-proof. First, don’t rush melting your chocolate—low and slow is key. I always do this in short 20-second bursts in the microwave, stirring in between. This prevents burning and keeps everything silky. When mixing the melted chocolate with cereal, be gentle—overzealous stirring can crush your cereal and ruin that crunch. I learned this the hard way after a few broken pieces! For a prettier, more uniform coating, I toss the cereal gently using a spatula and the folding technique—patience really pays off. Want to customize your puppy chow? Feel free to swap in white chocolate, but just be aware it melts faster, so keep a close eye. Adding some extra flavor—like a pinch of sea salt or cinnamon—really enhances the overall taste. Also, don’t skip sifting your powdered sugar—it keeps everything from turning into a lumpy mess. One personal trick I swear by: once coated and sprinkled with powdered sugar, I pop the tray in the fridge for 10 minutes to set and firm everything up. This little step makes a difference—your puppy chow will stay crunchier longer. And honestly, don’t be afraid to experiment with different cereals or mix-ins—this snack is forgiving and always delicious no matter what you throw in!
Storing and Reheating Tips
To keep your puppy chow fresh and crunchy, storage is key. If you plan to share or keep it for more than a day, store it in an airtight container—preferably glass or a good-sealing plastic one. At room temperature, it stays fresh for about 2-3 days, but I recommend keeping it in a cool, dry spot away from direct sunlight. For longer storage, pop it into the fridge—this works especially well if you added any fillings or toppings that might melt or get gooey. It’s good for up to a week, though the crunch might diminish slightly. Freezing? Totally doable! Just transfer the puppy chow into a freezer-safe bag, squeeze out the air, and lay flat. I’ve even frozen it in portions for on-the-go snacking. When you’re ready to serve, let it thaw for 10 minutes at room temp for best results—no sogginess, just crispiness. As for glazing, I like to add the final chocolate drizzle or powdered sugar right before serving rather than in advance—it adds that fresh, just-made feel. Trust me, a little planning makes all the difference in keeping this treat tasting its absolute best!
Frequently Asked Questions
Final Thoughts
Seriously, if you’re craving something sweet, crunchy, and just a little bit messy, puppy chow is your new best friend. It’s one of those rare recipes that taste like a special treat but come together in half the time it takes to order takeout. Over the years, I’ve made countless batches—some for holiday parties, others just because I needed a quick pick-me-up during busy weekdays—and it’s always been a hit. It’s incredible how a few simple ingredients—chocolate, peanut butter, cereal—can combine into something so comforting and fun. Plus, it’s a fantastic way to get the kids involved; they love pouring in the goodies and shaking the bag filled with powdered sugar. Trust me, once you make puppy chow, it’ll become a staple in your recipe box, too. So, go ahead—mix up a batch, gather your family, and enjoy a snack that’s guaranteed to make everyone smile. I can’t wait to hear how yours turns out! Drop a comment, share your variations, or just tell me how much you loved it—I always love hearing from fellow puppy chow fans! Happy baking, and may your kitchen be filled with the irresistible smell of melting chocolate and powdered sugar joy!
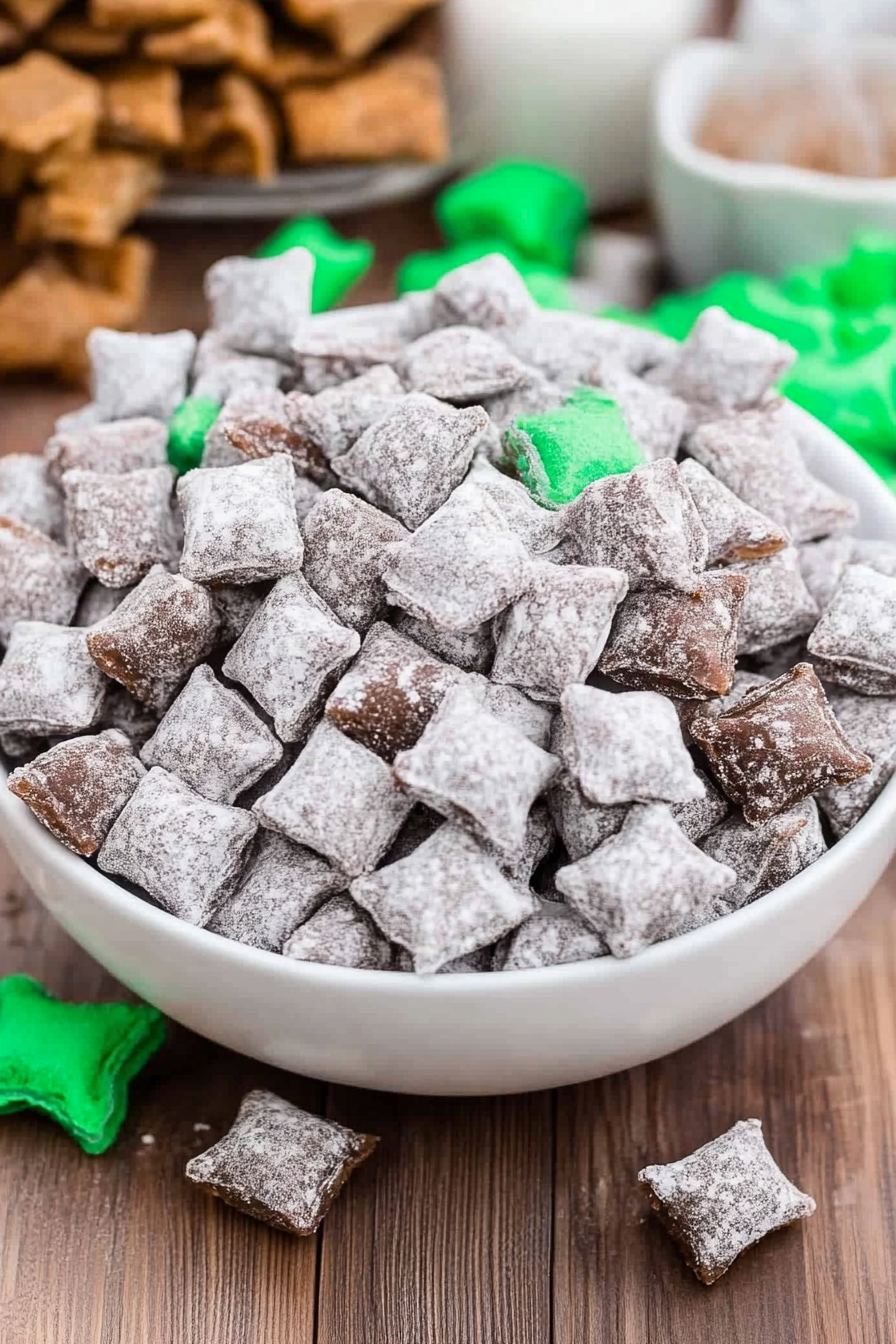
Mint Chocolate Puppy Chow
Ingredients
Method
- Microwave the chocolate wafers and Andes mint candies together for one minute, stir, then microwave in 30-second intervals until smooth, about 2 minutes total.
- In a large mixing bowl, combine the Rice Chex cereal with the melted chocolate mixture. Fold until all cereal is coated.
- Transfer the coated cereal into a large Ziploc bag, add the powdered sugar, seal, and shake until evenly coated.
- Pour the mixture onto wax paper and let set for about 20 minutes. Then, stir in the mint M&Ms. Store in an airtight container.