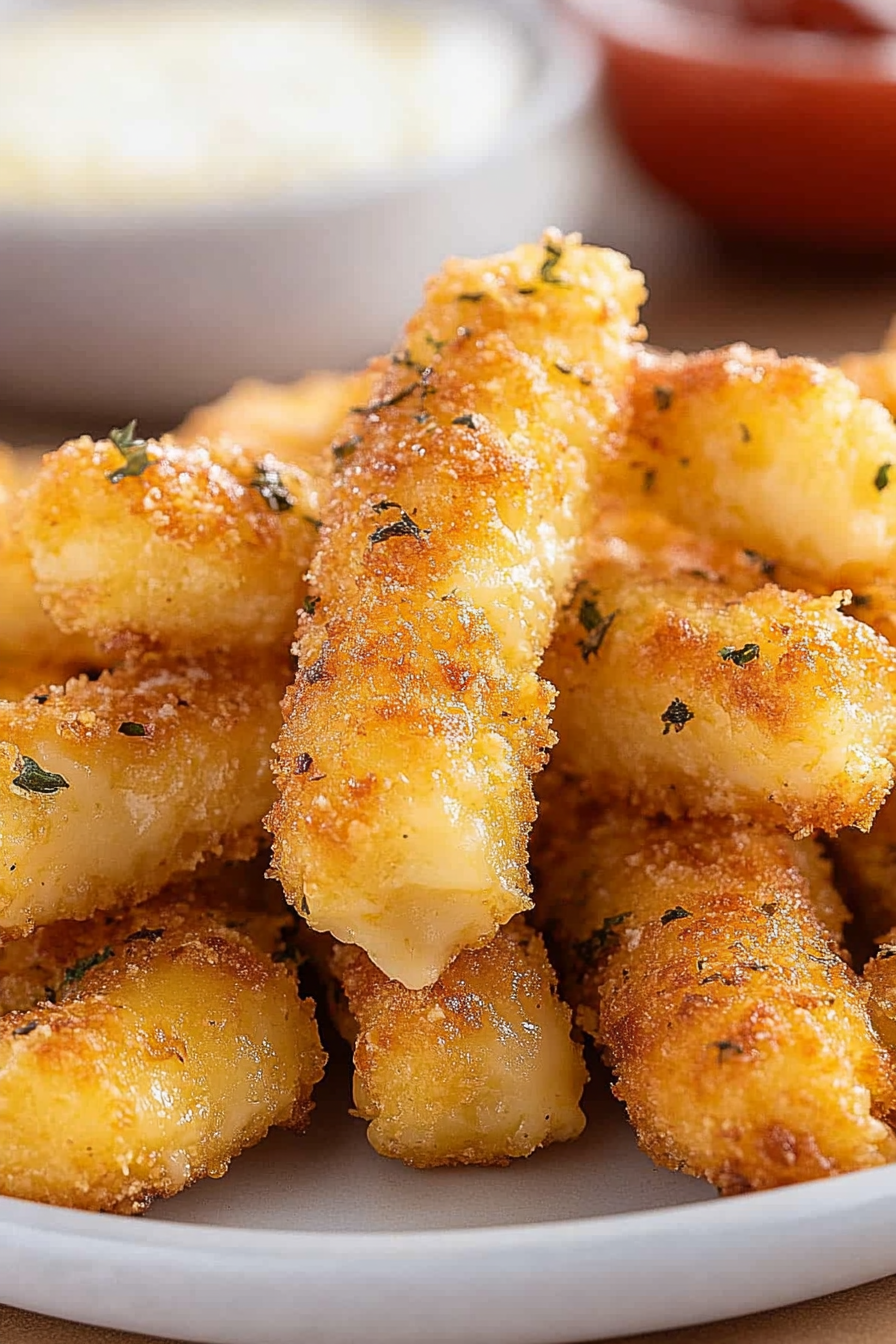
Easy Mozzarella Bites Recipe
There’s something about cheese sticks that just takes me back. Maybe it’s the crispy, gooey goodness that’s perfect for munching on during movie nights, or the way the cheese stretches and pulls with every bite—like a warm hug in snack form. Honestly, I’ve lost track of how many times my kids have asked for these after school, or how they disappear in minutes at our house during weekend get-togethers. They’re so straightforward to make, yet they feel fancy enough for a family dinner appetizer or a party platter. I always do this when I want something comforting but still crave a little bit of indulgence—trust me, once you try making these at home, you’ll never want those frozen, store-bought cheese sticks again. Plus, they’re incredibly customizable—add some herbs, spice them up, or dip them in different sauces to keep things interesting. This recipe is honestly a lifesaver on busy nights when you need a quick, crowd-pleasing snack. So, grab your cheese and let’s get started—your taste buds are in for a real treat!
What is cheese stick?
Think of cheese sticks as the ultimate crispy, cheesy treat—almost like a grown-up mozzarella stick’s little sibling. They’re basically crunchy, golden-brown breaded cheese logs or sticks that pack a punch of flavor. The name “cheese sticks” is pretty straightforward because, well, they’re sticks of cheese coated in a crispy exterior. This dish has been around in various forms—some folks bake them, others fry, but the goal is the same: a melty cheese center wrapped in a crunchy, flavorful coating. It’s essentially comfort food that’s easy enough to whip up in your own kitchen whenever a craving hits. Think of it as a more grown-up, homemade version of those frozen snacks you see in grocery stores, but with way better texture and flavor. My favorite part? Watching the cheese stretch endlessly as I pull apart a freshly baked cheese stick, feeling like a kid again. This recipe is all about combining simple ingredients into something unexpectedly addictive—and pretty much guaranteed to disappear fast!
Why you’ll love this recipe?
What I love most about these cheese sticks is how versatile and foolproof they are. First off, they taste incredible—crispy outside with that gooey, cheesy center that melts in your mouth. The flavor hits all the right notes—savory, cheesy, a hint of herbs or spices if you want—and it just makes you happy. Plus, they’re ridiculously easy to make, even on a weeknight when I’m juggling a million things. I’ve tested these with different cheeses, and honestly, a sharp cheddar or melty mozzarella both work beautifully. The best part? They’re budget-friendly too, especially if you keep a block of cheese on hand for snacking anyway. I also love how adaptable they are—great as a quick appetizer, a fun party snack, or even a game-day treat. My kids actually ask for these all the time, and I’ve even made a batch for a friends’ movie night that disappeared in no time. They’re perfect when you need something warm, cheesy, and satisfying in under 30 minutes. Trust me, once you’ve tried this recipe, it’s going to become a staple in your snack arsenal. I’ve made this countless times, and it never fails to bring a smile!
How do you make cheese sticks?
Quick Overview
Making cheese sticks at home is surprisingly simple and quick. Essentially, you prepare a flavorful breading mixture, dip your cheese sticks, then fry or bake them until golden and crispy. The secret is in the double-coating—dip, coat, repeat—to get that perfect crunch. Once cooked, you let them cool just enough so the cheese doesn’t spill out, then serve with your favorite dips. This method guarantees a crispy exterior and melty interior every time. It’s an easy process that’s perfect for anyone, from beginner cooks to seasoned foodies. The batter doesn’t require any fancy ingredients—just staples most of us already have in the pantry. And the best part? You get to enjoy that irresistible scent of fried or baked cheese that will make your kitchen smell amazing. Whether you do these in the oven or fry them, the results are equally impressive. Once you’ve got the technique down, you’ll find yourself making cheese sticks weekly—because they’re just that good.
Ingredients
For the Main Battering:
– 1 cup all-purpose flour (or gluten-free flour blend)
– 1 teaspoon baking powder
– ½ teaspoon paprika or smoked paprika (for flavor)
– Salt and pepper to taste
– 1 large egg
– ½ cup milk (dairy or plant-based like almond or oat milk)
– 1 teaspoon Dijon mustard (optional, for a little tang)
For the Filling:
– 8 oz of your favorite cheese—mozzarella, cheddar, or a mix
– Cut into sticks about 3 inches long and ½ inch wide
For the Glaze or Coating:
– 1½ cups panko breadcrumbs (or regular breadcrumbs)
– ½ cup grated Parmesan (optional, for extra flavor)
– 1 teaspoon garlic powder or Italian seasoning
– Salt to taste
– Oil for frying (vegetable or canola) or baking spray if roasting
Step-by-Step Instructions
Step 1: Preheat & Prep Pan
If frying, heat about 2 inches of oil to 350°F in a deep pan or fryer. For baking, preheat your oven to 400°F and line a baking sheet with parchment paper or a silicone mat. Have your cheese sticks pre-cut, and set up your dipping stations: flour mixture, egg wash, and breadcrumb mixture—all within arm’s reach for a smooth assembly line.
Step 2: Mix Dry Ingredients
In a shallow bowl, whisk together the flour, baking powder, paprika, salt, and pepper. This seasoned flour blend will give the coating a nice flavor and help it stick better. I always do this first—it’s my secret to a tasty craggy crust that holds up during frying or baking.
Step 3: Mix Wet Ingredients
In another bowl, beat the egg with the milk and Dijon mustard if using. The mixture should be smooth and slightly frothy, ready to envelop the cheese sticks. This step helps create that perfect crispy exterior that’s not greasy.
Step 4: Combine
Now, the fun part—assemble your coating station. Dip each cheese stick first into the seasoned flour, making sure it’s evenly coated. Then, dunk it into the egg wash, and finally roll it in the breadcrumb mixture. For an even crunch, repeat this entire process once more—dipping again into the egg and coating with breadcrumbs. Trust me, this extra layer makes all the difference.
Step 5: Prepare Filling
If you’re making your own cheese sticks, cut your cheese into sticks about 3 inches long and half an inch wide. You want them to be firm enough to hold their shape but soft enough to melt slightly during baking or frying. Feel free to sprinkle some herbs or spices onto the cheese before coating for extra flavor. I love adding a pinch of chili flakes or some chopped herbs—gives it a nice zing.
Step 6: Layer & Swirl
Place the coated cheese sticks onto your prepared baking sheet or carefully lower them into the hot oil. If you’re frying, don’t overcrowd the pan—give each stick enough room to turn golden. If baking, space them out evenly so the heat circulates properly. My trick? I like to gently shake the pan or turn the sticks halfway through the bake to get an even, crispy crust.
Step 7: Bake or Fry
For frying, cook in small batches for about 2-3 minutes until golden and crispy. Remove with a slotted spoon and drain on paper towels. For baking, bake for 12-15 minutes or until the outside is golden brown. Keep an eye on them—every oven varies. I prefer baking because it’s less mess, but fried cheese sticks are undeniably more decadent and crispy.
Step 8: Cool & Glaze
Allow the cheese sticks to cool for a few minutes—they’ll be piping hot and gooey right out of the oil or oven. If you’re adding a glaze, now’s the time. A little honey mustard dip or spicy marinara enhances the flavor, but honestly, just a sprinkle of Parmesan or herbs on top while they’re still warm makes them extra special.
Step 9: Slice & Serve
These are best enjoyed warm, with melted cheese pulling and stretching with each bite. Slice them diagonally for a nice presentation, and serve with dipping sauces—think marinara, ranch, or a spicy aioli. They’re perfect as an appetizer, snack, or even a quick meal with a side salad. My kids love these with a side of fruit or crispy veggies—they’re always a hit!
What to Serve It With
Cheese sticks are pretty versatile, so here’s how I love to serve them in different situations:
For Breakfast: Serve alongside scrambled eggs or a fresh fruit platter for a savory twist on morning favorites. They’re surprisingly good dipped in a runny egg or even a dollop of sour cream on the side.
For Brunch: Turn them into part of a spreading board with cheeses, cold cuts, and some crusty bread. Pair with a sparkling cider or mimosa and watch everyone dig in.
As Dessert: Okay, it sounds odd, but a sweet version dipped in honey or drizzled with chocolate sauce? Absolutely divine. Just swap out the savory spices for cinnamon or nutmeg, and you’ve got a fun, savory-sweet treat.
For Cozy Snacks: They’re perfect on a movie night or game day, served with ranch, spicy salsa, or even a tangy yogurt dip. My kids ask for these all the time—they’re the snack that gets everyone gathered around with big grins.
This is one of those recipes that feels like a little celebration every time I make it. The smell alone brings everyone to the kitchen, and I love how flexible it is—you make a big batch, and everyone’s happy. No matter how many times I’ve made these, I still get excited to see that golden crust and gooey center emerge from the oven or fryer. They’re a simple joy in my kitchen, and I hope they become a favorite in yours too!
Top Tips for Perfecting Your Cheese Sticks
Over the years, I’ve learned some tricks that make all the difference in getting these cheese sticks just right:
Zucchini Prep: Honestly, I’ve tried swapping zucchini for cheese—don’t do it! But I do love adding finely grated zucchini to the breadcrumb mixture for a veggie boost and extra moisture. Just squeeze out any excess moisture from the zucchini before mixing, or you risk soggy coating.
Mixing Advice: Overmixing can make the batter tough, so I always fold gently until just combined. It’s all about that delicate touch—especially with the egg wash. When coating the cheese sticks, use one hand for the flour, one for the egg, and one for the breadcrumbs to keep things neat and prevent clumping.
Swirl Customization: When layering or swirling the filling, don’t be afraid to get creative. For instance, use a skewer to create pretty marbled patterns with herbs or hot sauce inside before baking. Visual appeal is half the fun!
Ingredient Swaps: I’ve experimented with different cheeses—provolone, gouda, even pepper jack—for unique flavors. Just remember, softer cheeses melt faster, so you might want to adjust baking time slightly. And plant-based cheese isn’t quite as gooey but still gives a nice flavor.
Baking Tips: Always preheat your oven or oil. An oven that’s not hot enough can make the coating soggy, while oil that’s too hot will burn the outside before the cheese melts inside. Use a thermometer if you’re unsure—precision helps. When baking, turn the cheese sticks halfway through to ensure even crispiness.
Glaze Variations: For a sweet-spin, mix honey with a dash of cinnamon, or create a spicy topping by blending hot sauce into your glaze. For a dairy-free option, try brushing with olive oil and sprinkling with herbs before baking for extra flavor and crunch.
Trust me, these little tweaks and tricks come from many rounds of trial-and-error—each batch a little better than the last. The secret is to keep experimenting until you find your perfect combo. Once, I added a splash of balsamic vinegar to the breadcrumb mixture, and it gave an unexpectedly delicious tang. Get creative, have fun, and don’t be afraid to make mistakes—these cheese sticks are forgiving and always delicious!
Storing and Reheating Tips
If you happen to have leftovers (which, let’s be honest, never happens at my house), here’s how I handle storage and reheating:
Room Temperature: These are best eaten fresh, but if you need to hold them for a short period, keep them in an airtight container and consume within a few hours to maintain crispness.
Refrigerator Storage: Store in a sealed container for up to 3 days. To keep them crispy when reheating, spread on a baking sheet and warm in a 350°F oven for about 10 minutes. Skip the microwave unless you love soggy coating—that’s a no-go in my book!
Freezer Instructions: Freeze unbaked or cooked cheese sticks on a baking sheet, then transfer to a zip-top bag. They’ll keep for up to a month. When ready, bake from frozen at 400°F for 15-20 minutes or fry, adding a few extra minutes for even heating. Just make sure to let them cool slightly before serving to enjoy that perfect meltiness.
Glaze Timing: If you’re adding a glaze or sauce, I recommend doing it right after baking, while the sticks are still warm. If you store them glazed, the topping can become too soggy in the fridge, so best to add it fresh for maximum crunch and flavor.
These tips always help me enjoy my cheese sticks at their best, whether fresh out of the oven or reheated later. Once you master the storage hacks, you’ll find yourself making a double batch just so you can enjoy leftovers the next day—no shame in that!
Frequently Asked Questions
Final Thoughts
If you love cheesy, crispy snacks that are both satisfying and fun to make, then these cheese sticks are going to become a regular in your kitchen. There’s something so gratifying about watching that golden crust turn perfectly crispy, while the cheese inside is gooey and inviting. Plus, they’re endlessly versatile—serve them as a quick appetizer, a party snack, or a comforting treat to indulge on a lazy weekend. Over the years, I’ve experimented with various cheeses, coatings, and baking methods, and each tweak made these even better. Once you master the basic technique, you can get creative—try adding herbs or spice blends, or dipping sauces—you’ll come up with your own signature style. Honestly, I’ve made these so many times, and I still get that excited feeling when I pull them out of the oven. They’re simple, cheerful, and just downright delicious. Happy baking, and I can’t wait to hear how yours turn out! Feel free to leave a comment below with your tweaks or tips—I’d love to hear your stories. Enjoy every cheesy, crispy bite!
Homemade Cheese Sticks
Ingredients
Method
- Add the eggs and milk to a small mixing bowl. Use a fork to beat the eggs and milk together until completely incorporated. Set it aside.
- Add the all-purpose flour and cornstarch to a pie plate or shallow bowl. Whisk to combine. Set it aside.
- Add the plain bread crumbs, panko bread crumbs, Italian seasoning, onion powder, kosher salt, black pepper, and smoked paprika to a pie plate or shallow bowl. Whisk to combine. Set it aside.
- Add vegetable oil to a 3 to 4-quart heavy-bottomed saucepan and heat over medium-high heat to 350°F.
- While the oil is heating, dredge the halved cheese sticks in the egg mixture.
- Next, dredge in the flour mixture.
- Dip the cheese sticks back in the egg mixture before dredging in the bread mixture.
- Once the oil reaches 350°F, using tongs, carefully place 4-5 coated cheese sticks in the heated oil. Turn them and cook for 30 seconds to 1 minute until golden brown. Adjust heat as needed.
- Place cooked cheese sticks on paper towels to drain excess oil. Serve hot with marinara or your favorite dipping sauce.