Easy Peanut Chocolate Buckeye Cupcakes
Oh, I remember the first time I tasted this peanut chocolate delight—it was at my grandma’s house, tucked into her cozy kitchen on a breezy Sunday afternoon. The smell of melting chocolate mixed with toasted peanuts wafted through the air, wrapping us all in a warm hug. Ever since, I’ve been obsessed with creating my own version, especially when I need that perfect little pick-me-up after a long day. Honestly, if you’re someone who loves the combo of rich chocolate and crunchy peanuts, this recipe might just become your new favorite too. It’s surprisingly simple, quick to whip up, and tastes like a little bit of heaven in every bite. Perfect for sharing, or keeping all to yourself—you know I won’t judge! I love how this peanut chocolate treat strikes that perfect balance: sweet, salty, and totally satisfying. Trust me, once you make this, your friends will be begging for the secret. And honestly, I always do this when I want something sweet but don’t want to bake a whole cake—this one’s a lifesaver on busy nights or last-minute cravings.
What is peanut chocolate?
Think of peanut chocolate as a lovable mash-up of two classics—smooth, melt-in-your-mouth chocolate paired with the irresistible crunch of roasted peanuts. It’s essentially a no-fuss, homemade version of those candy bars you buy at the store, but with a personal twist. The name is pretty straightforward: it’s a delicious blend where peanuts and chocolate dance together in perfect harmony. The concept is simple—rich, silky chocolate envelops crunchy, buttery peanuts, creating a treat that’s both satisfying and nostalgic. My take on peanut chocolate is a little more homemade, a little more wholesome, and definitely more addictive. It’s the kind of thing I keep in the freezer and secretly sneak bites of during a stressful day. The recipe itself is versatile—think of it as a base you can tweak to match your mood or pantry. Whether you like yours extra peanutty or with a hint of sea salt, there’s room for customization. And don’t worry—this isn’t complicated; I promise it’s foolproof even if you’re a beginner in the kitchen.
Why you’ll love this recipe?
What I love most about this peanut chocolate recipe is how effortlessly it comes together—seriously, it’s one of those life hacks for busy folks who still want to indulge their sweet tooth. The flavor? Rich, decadent, and topped with that perfect salty crunch from the peanuts. The chocolate melts beautifully, coating every bit of peanut goodness with just the right amount of sweetness. Plus, it’s surprisingly budget-friendly—most of the ingredients are pantry staples I always keep on hand. No fancy ingredients required! Another thing I adore is its versatility. You can cut it into small squares for an elegant dessert, or go big with chunky bars to really savor each bite. Kids love it, adults love it, and it’s a total crowd-pleaser at parties or family get-togethers. And, what’s more satisfying than creating something from scratch that you can customize? I’ve tested this with dark chocolate, milk chocolate, and even a sprinkle of flaky sea salt on top, and each version turns out stellar. Honestly, this peanut chocolate is my little secret weapon when I want something homemade that feels indulgent but doesn’t take all afternoon to make. The best part? It’s perfect for those moments when you crave something sweet at 10 p.m. but don’t want to turn on the oven—trust me on this one.
How do I make chocolate peanuts?
Quick Overview
This treat is basically a layered assembly. You melt your chocolate, mix in some roasted peanuts, pour it into a pan, add a few toppings if you like, and chill until firm. It’s honestly so simple—once you’ve melted the chocolate, the hardest part is just waiting for it to set! I love how flexible this is: you can make it in a rectangular dish for bars or press it into a silicone mold for individual servings. The result is a crunchy, melt-in-your-mouth chocolate peanut bar that’s impossible to resist. The trick is to use good-quality chocolate and roast your peanuts just until golden—the aroma alone makes the process so worth it. In under an hour, you’ve got a homemade knockout that tastes just like a candy, but with a personal touch you can’t get from store-bought.
Ingredients
For the main layer:
– 1 ½ cups semi-sweet or dark chocolate chips (trust me, good quality chocolate makes a difference!)
– ¾ cup roasted peanuts (unsalted or lightly salted, depending on your preference)
– 1 tablespoon coconut oil (for that silky shine and easier melting)
For the Filling (Optional, but fun):
– ¼ cup peanut butter (creamy or chunky, your call)
– 2 tablespoons honey or maple syrup (for a touch of sweetness and sticking power)
– Pinch of sea salt (to enhance the flavor)
For the Glaze (Optional):
– Extra chocolate or white chocolate for drizzling
– Flaky sea salt or crushed peanuts for topping
– A spoonful of coconut oil for a glossy finish
Step-by-Step Instructions
Step 1: Preheat & Prep Pan
Start by lining a small baking dish or a silicone mold with parchment paper—this will make removing the treats super easy. Set your oven to 350°F (175°C), and toss your peanuts onto a baking sheet. Roast them for 8-10 minutes, shaking halfway through, until fragrant and golden. That aroma totally transforms the peanuts and adds a nutty depth to your treats. Let them cool slightly while you prepare your chocolate.
Step 2: Mix Dry Ingredients
In a small bowl, combine your roasted peanuts with a pinch of sea salt if you’re using unsalted peanuts. Trust me, this little sprinkle amplifies the flavor and balances the sweetness of the chocolate perfectly. Set aside—these will be the crunchy, salty surprise in each bite.
Step 3: Mix Wet Ingredients
In a microwave-safe bowl or double boiler, melt your chocolate chips along with the coconut oil, stirring every 30 seconds until smooth and glossy. I always do this gently—overheating can cause the chocolate to seize up. Once melted, stir in the peanut butter and honey if you’re making a layered or more filling-focused version. The texture should be velvety and pourable. If it’s too thick, add a tiny splash of warm milk or coconut oil.
Step 4: Combine
Pour your melted chocolate mixture into the prepared pan, spreading it out evenly. If you want a peanut butter swirl or layered look, drop spoonfuls of peanut butter on top and use a toothpick or skewer to swirl gently. Don’t overmix—this is how you get beautiful, marbled patterns instead of a uniform block. Sprinkle your toasted peanuts evenly across the top, pressing them gently into the warm chocolate so they stick well.
Step 5: Prepare Filling
If you’re adding a peanut butter layer or filling, spread it gently over the cooled chocolate base after it has set for about 15 minutes. Then, pour more melted chocolate over the top to seal everything in. The key is to work in layers and give each part a chance to firm up a bit, so your treats don’t get messy.
Step 6: Layer & Swirl
This is where the fun starts! Drop spoonfuls of peanut butter on the surface of your melted chocolate and use a toothpick or skewer to create swirls—think of it as a little abstract art project. The swirl pattern makes each piece look handmade and unique, and it’s just prettier when served.
Step 7: Bake? Nope, Chill!
This no-bake treat actually sets best in the fridge. Place your pan in the fridge for at least 30 minutes or until the chocolate is firm. Patience here pays off—rushing this step can result in melting or uneven pieces. If you want that shiny glaze, you can melt a little more chocolate with a splash of coconut oil for topping, then drizzle it on once everything is cooled.
Step 8: Cool & Glaze
When the chocolate is firm and set, lift it out of the pan using the parchment paper edges. Slice into squares or rectangles with a sharp knife, wiping it clean between cuts for neat edges. If you want a glossy finish, melt some white or dark chocolate, add a teaspoon of coconut oil, and drizzle over the top. Sprinkle with flaky sea salt or extra peanuts for the finishing touch. Trust me, presentation is everything—and this step makes it look store-bought, but totally homemade.
Step 9: Slice & Serve
Let your peanut chocolate sit at room temperature for a few minutes before serving. The flavors truly shine when slightly warm but not melted. These treats disappear in minutes at my house—be prepared for some serious demand. I like to store leftovers in an airtight container in the fridge or freezer—more on that in the storage section below. Serve them as a little treat after dinner, a snack with your afternoon coffee, or even as a sweet gift wrapped in a pretty box. They’re versatile and always a hit!
What to Serve It With
This peanut chocolate thing is pretty much a chameleon—it’s equally at home on a breakfast table, a cozy afternoon snack, or a fancy dessert platter. For breakfast, I love pairing a small square with a strong cup of coffee or a creamy latte—adds a little indulgence to an otherwise normal morning. If I’m serving these at brunch, I’ll cut them into dainty pieces and arrange them on a nice platter, with a side of fresh berries and maybe a drizzle of caramel. As an after-dinner dessert, I sometimes melt a bit more chocolate and drizzle it on top, then sprinkle with flaky sea salt or crushed pretzels for that perfect sweet-salty contrast. When I want something casual, I just grab a square, a cold glass of milk, and settle in with a good movie. Family tradition? Oh yes—my kids actually ask for seconds, especially when I add a handful of mini marshmallows or sprinkle extra peanuts on top before the chocolate sets. It’s a guaranteed crowd-pleaser and the kind of treat that feels special but is super simple to make. And honestly, it’s one of those recipes that’s become a real comfort food in my kitchen—like a little hug in every bite.
Top Tips for Perfecting Your Peanut Chocolate
Over the years, I’ve picked up a few tricks that make this recipe even better. First, always roast your peanuts fresh—you’ll be amazed at how much flavor that roasting releases. When melting your chocolate, do it slowly and gently—overheating is the enemy here. I learned this the hard way after a few burnt batches! For that beautiful marbled swirl effect, drop spoonfuls of peanut butter onto the chocolate before swirling. If you want a thicker, more fudge-like consistency, just increase the amount of peanut butter in the filling or frost layer. As for ingredient swaps, I’ve tested coconut sugar instead of honey, which gives it a slightly caramel note—delicious! Want to make it dairy-free? Use dairy-free chocolate chips and almond or coconut butter instead of peanut butter. The key is to keep experimenting until you get your signature touch. I’ve also found that placing the dish on the middle rack of the oven on a very low setting for just 5 minutes can help melt everything smoothly—then cool down quickly in the fridge. Oh, and for those who like extra crunch, toss in some crushed pretzels or crispy rice cereal. Just a few little tweaks can really elevate this treat to a whole new level. After all, baking is really about making it your own, right?
Storing and Reheating Tips
My favorite part about this peanut chocolate is that it keeps well, and I can make it ahead of time—huge win! For short-term storage, I keep the squares in an airtight container at room temperature for up to two days (if they last that long!), covered with a paper towel to prevent condensation. If I want them to stay fresh longer, I pop them in the refrigerator—tightly wrapped or in a sturdy container—where they’ll last for up to a week. When stored properly, the chocolate stays firm and glossy, just like when it was fresh. For even longer storage, I usually wrap individual pieces in plastic wrap or foil and freeze them—these can last up to three months! Just be sure to let them thaw at room temperature before serving—chilling can cause condensation that dulls the shine. And if I’ve added a glaze or drizzle, I prefer to add that right before serving so it looks perfect and fresh. Reheating isn’t really necessary—if I do want that gooey, just-left-the-oven feel, I’ll give a quick 10-second microwave blast—just enough to soften, not melt completely. This recipe is flexible, forgiving, and perfect for making ahead, which makes it one of those staples I always keep in my freezer for last-minute guests or craving emergencies.
Frequently Asked Questions
Final Thoughts
I can’t tell you how many times I’ve turned to this peanut chocolate recipe when I needed a quick, satisfying treat that’s still special enough to serve guests. Every single batch turns out deliciously consistent because I’ve learned a few tricks over the years—like roasting the peanuts for that unbeatable aroma or melting the chocolate slowly so it’s silky smooth. Honestly, it’s one of those recipes that feels like a warm hug—rich, crunchy, and just a little bit salty—all wrapped into one. Whether you’re making it for a cozy night in, a holiday gift, or just because you deserve a little indulgence, I promise it won’t disappoint. And if you happen to tweak it and make it your own, I’d love to hear! Happy baking, friends—may your kitchen always smell as inviting as mine when I’m making this little treasure. Enjoy every bite and don’t forget to share your creations—because life’s sweeter when shared.

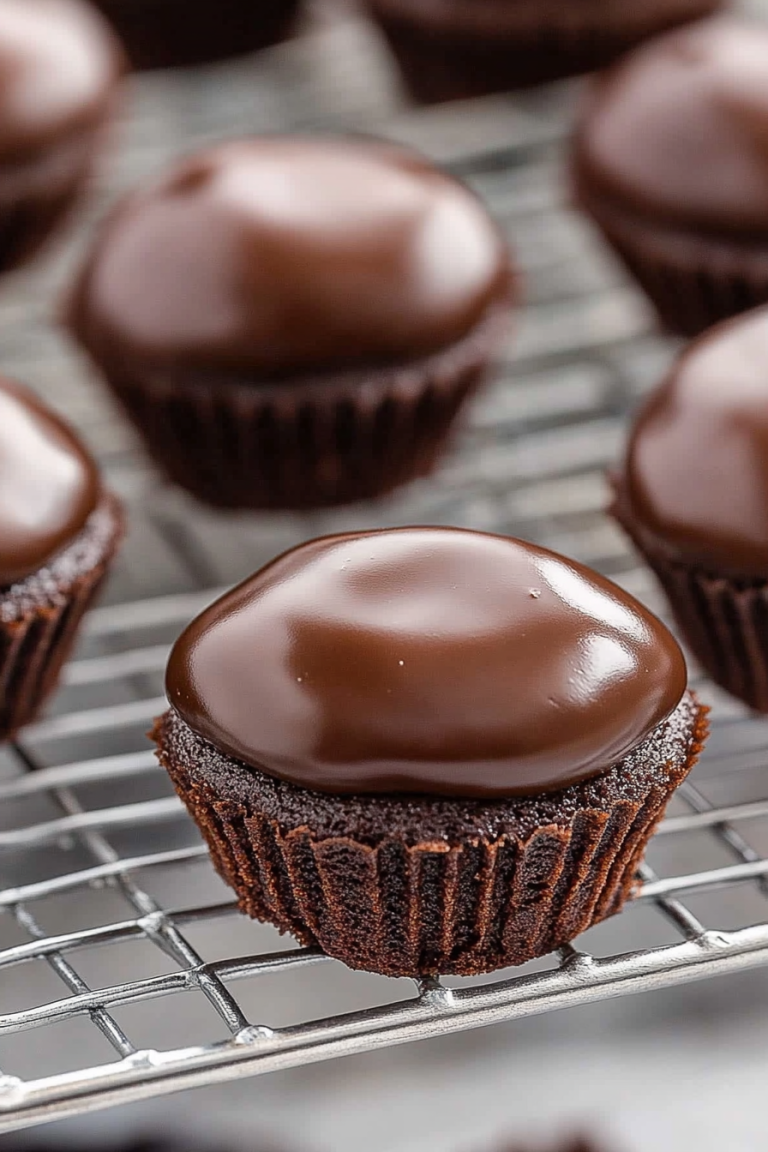
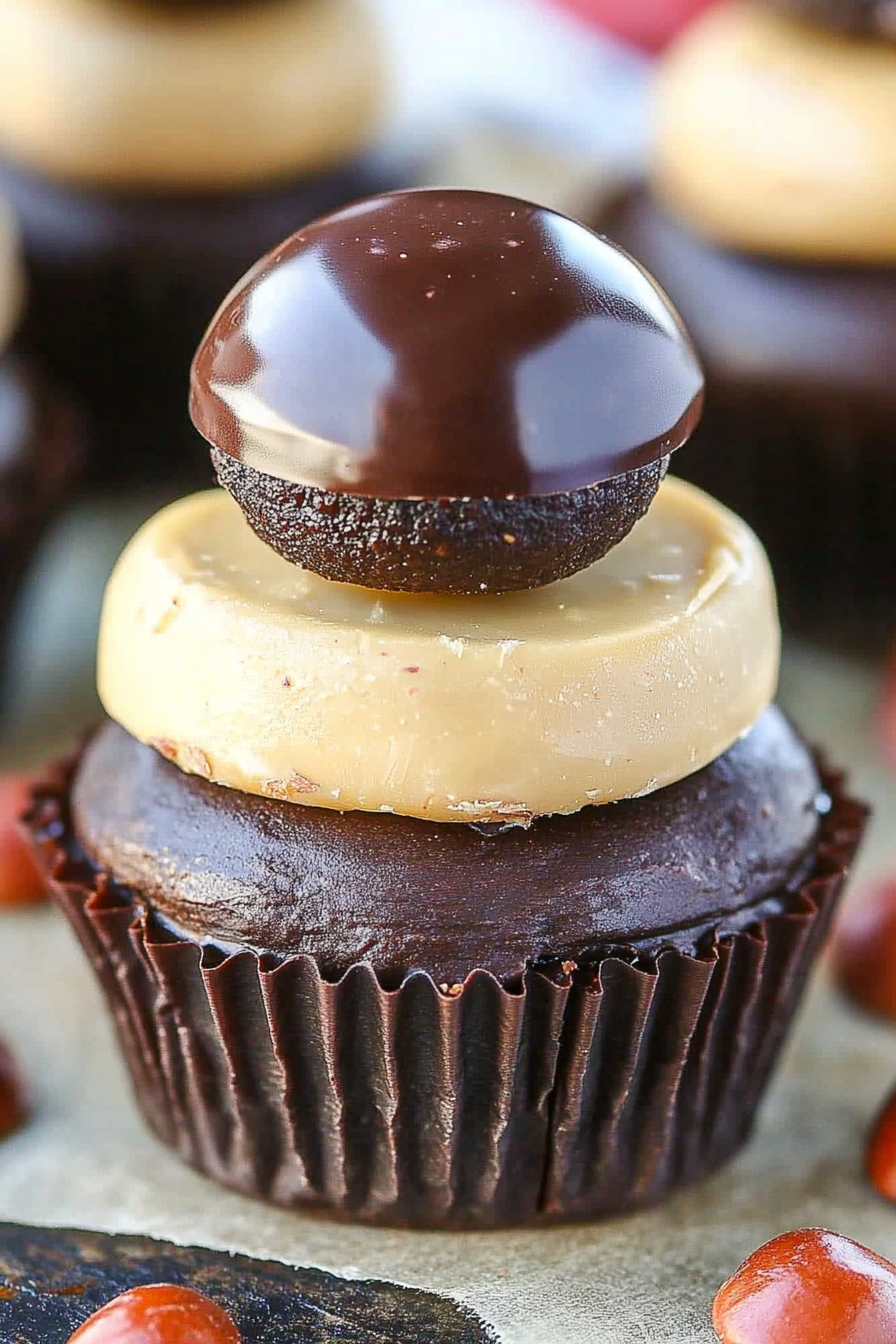
Peanut Butter Chocolate Buckeye Cupcakes
Ingredients
Method
- Combine the peanut butter, butter and vanilla extract with a mixer until combined. Add 1 cup of the powdered sugar and mix until well combined. Add additional powdered sugar until the mixture is at a consistency where you can create balls that hold their shape. Create about 16 balls, melt the chocolate and dip each peanut butter ball into the chocolate. Set aside to dry and refrigerate.
- Preheat oven to 300°F. Whisk together dry ingredients in a large bowl. Mix wet ingredients in another bowl. Combine wet and dry, then add hot water and mix until thinned. Fill cupcake liners halfway and bake for 18-23 minutes. Cool completely.
- Beat butter and peanut butter until smooth. Add powdered sugar, vanilla, salt, and milk to reach desired consistency. Pipe onto cooled cupcakes. Refrigerate until frosting is firm.
- Make ganache by heating heavy cream, pouring over chocolate chips, and whisking until smooth. Dip the tops of frosted cupcakes into ganache. Top each with a peanut butter buckeye. Chill before serving.