Easy Vegan Caramel Sauce Magic
There’s something almost magical about a rich, smooth caramel sauce, isn’t there? I remember the first time I made this vegan caramel sauce — it was late at night, and I was craving something sweet but didn’t want to turn on the oven. The smell alone brought everyone to the kitchen, expecting a full-blown dessert. I still get this warm, fuzzy feeling every time I drizzle it over ice cream or my favorite apple slices. Honestly, it’s one of the simplest things I’ve ever whipped up, and I always keep a jar in the fridge for those spontaneous sweet cravings. Plus, it’s secretly healthier than the store-bought stuff, with no animal products or weird preservatives. My kids ask for this all the time — they call it “the magic caramel.” Trust me on this one — once you try making your own, store-bought just won’t compare. Plus, it’s so versatile—you’ll find yourself drizzling it on everything from breakfast pancakes to evening popcorn. You’re going to love how easy and addictive this vegan caramel sauce is!
What is vegan caramel sauce?
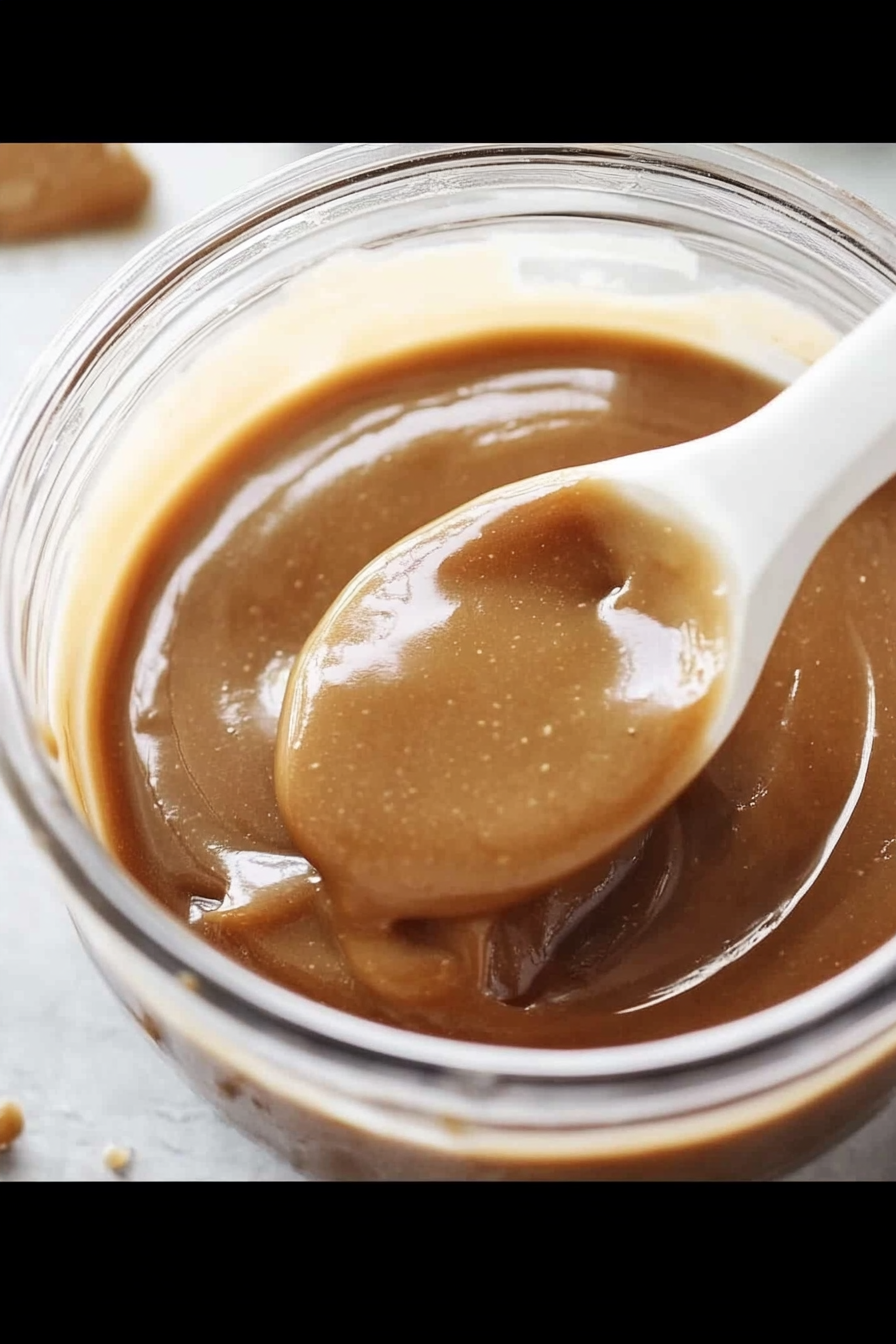
Think of vegan caramel sauce as a silky, decadent topping that’s entirely plant-based. It’s essentially a sweet, buttery-looking, and heavenly-tasting syrup made without dairy or animal ingredients. The name might evoke classic caramel, but this version uses coconut milk, maple syrup, and coconut sugar — ingredients I always keep in my pantry because they’re so versatile. It’s similar to traditional caramel in appearance and texture but has its own unique, slightly tropical twist thanks to those coconut notes. This sauce is perfect for drizzling over ice cream, mixing into coffee, or even swirling into oatmeal for a sweet wake-up call. What I love most about this is how forgiving it is — with simple ingredients, a little patience, and a gentle watch, you’ll have that perfect, gooey consistency every time. It’s a homemade favorite that makes everything feel a little more special without any fuss or extra cost.
Why you’ll love this recipe?
Oh gosh, where do I even start? First, the flavor — rich, buttery, with just the right hint of caramelized sweetness. It’s like a warm hug in a jar. What truly steals my heart about this vegan caramel sauce is how insanely easy it is to make. Honestly, I’ve whipped this up in under 15 minutes, and I can’t count how many times it’s saved me on those busy weeknights. Plus, it’s budget-friendly because all the ingredients are pantry staples—no fancy or hard-to-find bits. I’ve tested this with all sorts of substitutions and found it works beautifully every time. And the best part? It’s remarkably versatile. Drizzle it over pancakes, dip apple slices into it for a quick snack, or stir a splash into my morning coffee for that cozy, sweet boost. This sauce is a total game-changer — it’s so much better when you make it yourself, and it smells incredible while cooking. Plus, my kids actually ask for seconds — that’s how good it is!
How do I make vegan caramel sauce?
Quick Overview
This vegan caramel sauce is a simple stovetop project that’s perfect for busy nights or those lazy weekends. The trick is to slowly simmer coconut milk, coconut sugar, and maple syrup until they thicken into a smooth, pourable sauce. The whole process takes less than 15 minutes and involves little more than stirring and patience. The key is to use full-fat coconut milk for creaminess, and don’t rush the simmering — that’s where the magic happens and the sauce deepens into that gorgeous caramel color. Once it hits that perfect consistency, you’ll want to pour it into a jar, let it cool just slightly, and enjoy the divine aroma!
Ingredients
What is the main sauce?
- 1 can (13.5 oz) full-fat coconut milk — I love the creamy kind for richness
- 1/2 cup maple syrup — natural sweetness with depth
- 1/2 cup coconut sugar — adds that caramel flavor and depth
- 1 teaspoon vanilla extract — for that warm, inviting aroma
- pinch of sea salt — to balance the sweetness and enhance flavor
Optional Add-ins:
- 1 tablespoon coconut oil — for extra silkiness
- Pinch of cinnamon — a cozy spice twist
Step-by-Step Instructions
Step 1: Preheat & Prepare
Start by gathering your ingredients, and grab a medium-sized saucepan. No need to butter the pan—just make sure it’s clean and dry. Turn the heat to medium-low. You want gentle simmering, not a boil that’s too aggressive. This will give you control over the thickening process and prevent burning.
Step 2: Mix Dry Ingredients
In a small bowl, whisk together the coconut sugar with the sea salt. This prevents clumps and ensures even sweetness. I do this so the sugar dissolves smoothly into the liquids later on, giving that perfect glossy finish.
Step 3: Mix Wet Ingredients
Pour the full-fat coconut milk into your saucepan. Add the maple syrup, vanilla extract, and your pre-mixed coconut sugar. Stir everything well, breaking up any lumps of coconut sugar, until combined. The mixture will look a bit cloudy but that’s normal. Warm it gently, but don’t let it boil yet.
Step 4: Combine & Simmer
Bring the mixture to a gentle simmer, stirring often. Keep an eye on it — you’ll start to notice it thickening after about 8-10 minutes. Be patient, this slow simmer is key for developing that lovely caramel flavor. If it suddenly bubbles up too vigorously, turn down the heat — low is best.
Step 5: Prepare the Filling
If you like, you can add a tablespoon of coconut oil here for extra silkiness or a dash of cinnamon for warmth. Whisk it in until smooth and the sauce is glossy. Note that the sauce will thicken more as it cools, so don’t worry if it seems runny at first. That’s totally normal!
Step 6: Layer & Swirl
Not applicable here—this sauce is for pouring, not layering. But I love drizzling it in a zigzag pattern over my brownies or swirling into my evening latte for a decadent twist.
Step 7: Bake (or Chill & Thicken)
Unlike a cake, this doesn’t need baking. Instead, you’ll turn off the heat and let it cool in the pan for about 10 minutes. If you want it thicker, just refrigerate for an hour — it firms up beautifully without losing flavor. To serve warm, gently reheat in the microwave or on the stovetop.
Step 8: Cool & Glaze
Pour into a jar or bottle, let it cool completely at room temp, then seal and refrigerate. When ready to serve, heat slightly if you prefer drizzling warm. It’s thick enough to hold its shape when cooled but pourable when warmed.
Step 9: Slice & Serve
This sauce is best enjoyed at room temperature or warmed. Drizzle generously over ice cream, pancakes, or fresh fruit. My favorite? A simple apple slice dipped into hot caramel — the perfect afternoon treat. Keep some in the fridge for whenever those sweet cravings hit. I promise, once you taste how rich and satisfying it is, you’ll be making this over and over again.
What to Serve It With
Oh, the possibilities! First, it’s a game-changer on breakfast pancakes or waffles — drizzled with fresh berries and a dollop of coconut whipped cream. My kids love it stirred into their oatmeal, giving it a caramelized twist. For a cozy brunch, serve it alongside toasted banana bread with a side of coffee. As a dessert, it’s divine poured over vanilla ice cream, warm apple crisp, or even a slice of chocolate cake. When I want a more casual vibe, I just warm some up and dip crispy apple slices or roasted nuts into it. This sauce has become my secret ingredient for everything sweet and comforting — I even add a splash into my hot chocolate for a festive touch. Honestly, once you’ve got this in your fridge, you’ll find dozens of ways to enjoy it, and your family will be asking for it nonstop.
Top Tips for Perfecting Your Vegan Caramel Sauce
After making this dozens of times, I’ve picked up a few tricks to get that perfect consistency and flavor every single time. Here are my insider tips:
- Zucchini prep: Not applicable here, but always peel or grate zucchini finely when adding to baked goods — moisture can throw off your texture.
- Mixing advice: Always stir constantly during simmering to prevent burning or sticking, especially as the mixture thickens. Overmixing dried ingredients early on can cause graininess, so be gentle when combining everything.
- Swirl customization: If you want to add visual flair, try swirling in a bit of cocoa powder or a dash of cinnamon just before removing from heat. It creates beautiful marbled effects.
- Ingredient swaps: I’ve tested this with brown sugar instead of coconut sugar — it’s delicious but a tad darker in color, so keep that in mind.
- Baking & cooking tips: Always use full-fat coconut milk for richness. If the sauce gets too thick after refrigeration, gently reheat on low heat, stirring constantly, until it loosens up.
- Glaze variations: For extra flavor, add a splash of bourbon or vegan caramel liqueur during the simmer — it’s a game-changer for adult desserts.
This recipe has been a labor of love — I’ve learned that patience really pays off, especially when trying to get that perfect, velvety finish. Trust your senses and don’t rush; the aroma alone is worth savoring. If you find your sauce isn’t quite as thick as you wanted, just give it a few more minutes of gentle simmering. And a few drops of coconut oil stirred in at the end make it even silkier. Oh, and always taste as you go — it’s amazing how a tiny pinch more salt can elevate the whole sauce!
Storing and Reheating Tips
This caramel sauce is a fridge staple for me. When stored in an airtight container, it stays fresh for about two weeks, which is saying something because I always end up sneaking spoonfuls during the day. To store, pour into a glass jar or a squeeze bottle for easy drizzling. When you’re ready to reheat, just warm it gently in the microwave — 20 seconds at a time — or set the jar in a bowl of hot water until it’s liquefied again. If it thickens too much after refrigerating, stir in a tiny splash of coconut milk or water to loosen it up. Want it super-silky? Reheat slowly on low heat, whisking constantly until the consistency is just right. This way, you get that glossy, luxurious texture every time. Also, avoid leaving it at room temperature for too long — humidity can cause it to spoil or develop mold, so refrigeration is best if you’re not using it immediately.
Frequently Asked Questions
Final Thoughts
There’s something so comforting about homemade caramel — it feels like a little bit of luxury you can treat yourself to anytime. Once you’ve made this vegan caramel sauce, I guarantee you’ll find tons of ways to enjoy it. It’s rich, versatile, and surprisingly simple to toss together, even on your busiest days. I love how it elevates even the simplest treats, transforming ordinary apples or pancakes into something truly special. My biggest tip? Keep a jar in the fridge, and you’ll have a secret weapon for dessert, breakfast, or just a quick spoonful when the sweet tooth strikes. I hope you have as much fun making this as I do — and don’t forget to share your creations with me in the comments! Happy caramel making — your taste buds are in for a treat!
Vegan Caramel Sauce
Ingredients
Method
- Melt the coconut oil and maple syrup together in a glass container for 1 minute.
- Whisk in the almond butter for about 30 seconds until fully incorporated and very smooth.