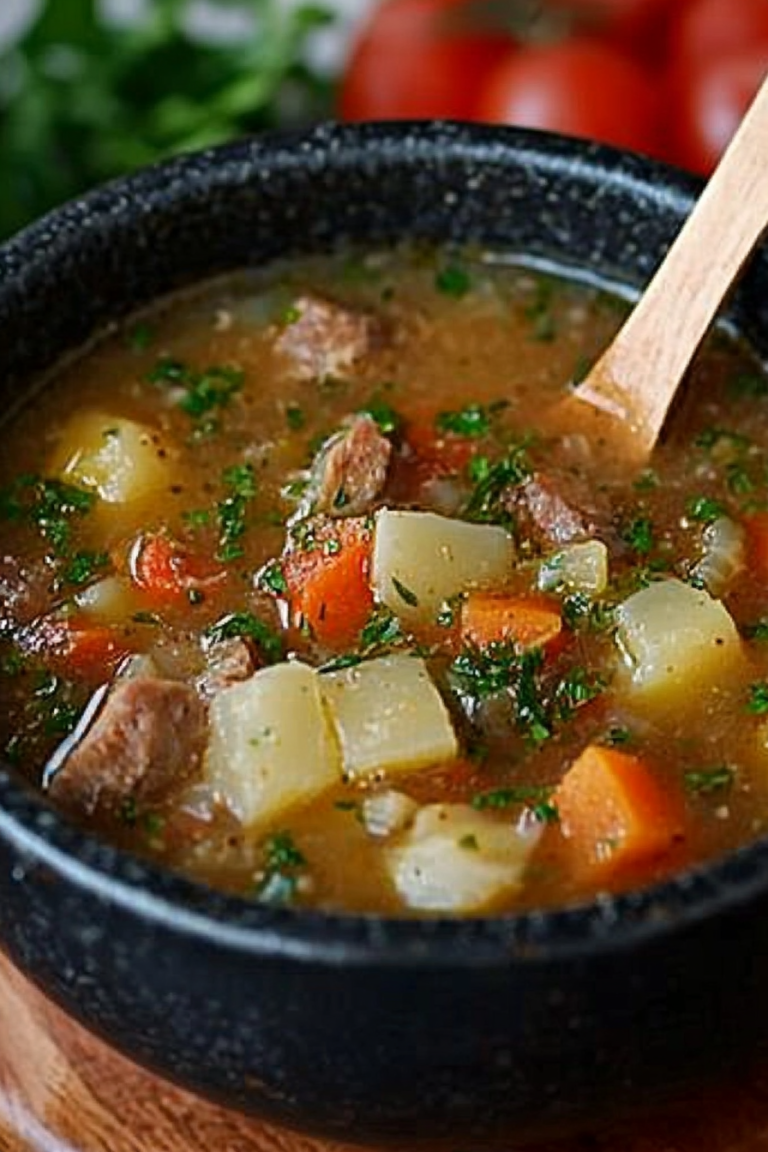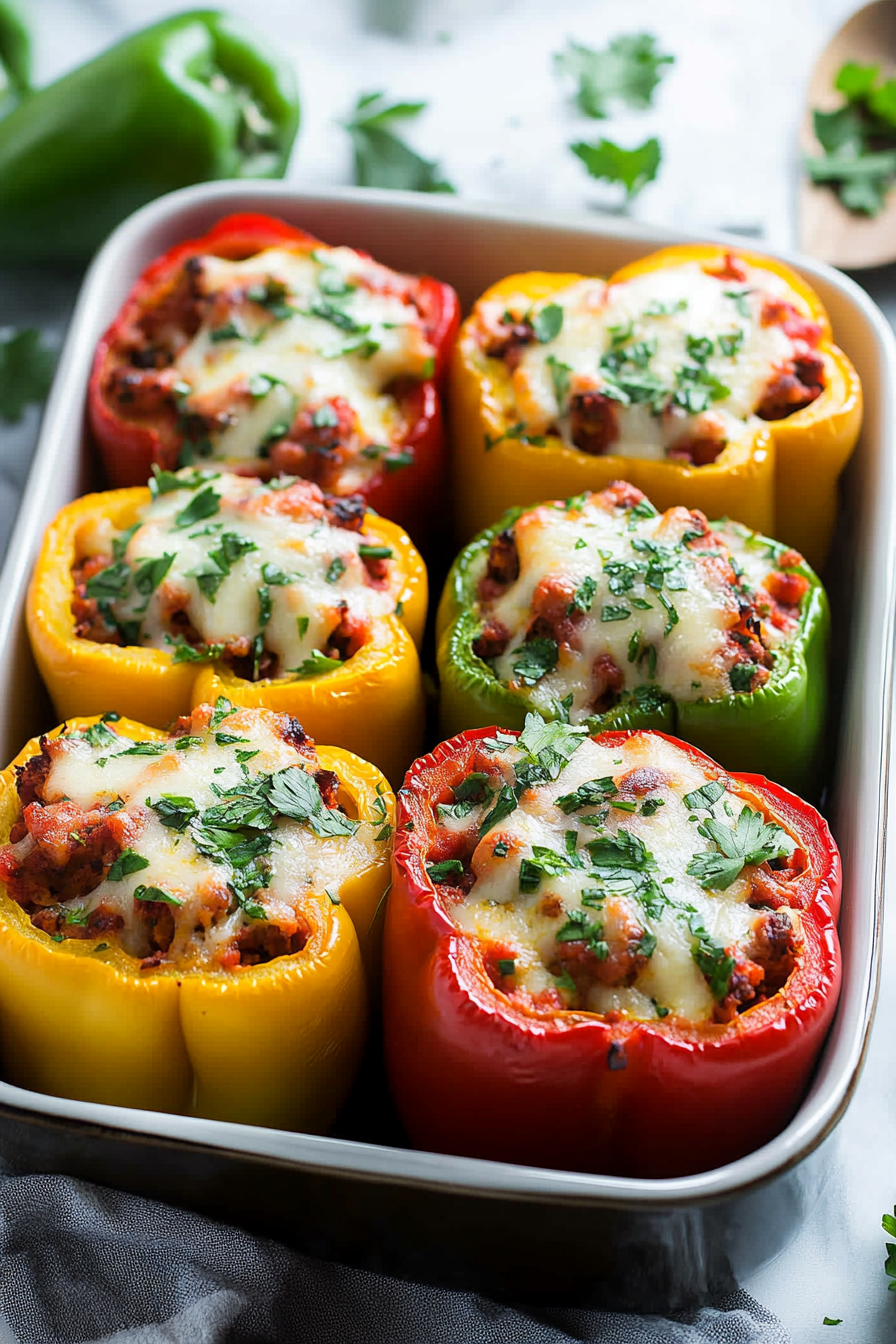
Flavor-Packed Peppers A Simple Dinner
There’s something about stuffed peppers that instantly takes me back to Sunday dinners at Grandma’s house. Maybe it’s the warm, savory aroma that wafts through the kitchen, or the way the melted cheese oozes out when you cut into them — whatever it is, this dish makes me feel right at home. I always do this when I want something wholesome but utterly delicious: I make stuffed peppers. This one’s a lifesaver on busy nights or when I want to impress family without spending hours in the kitchen. My kids ask for these all the time, and honestly, I don’t mind. They’re simple, cozy, and the perfect way to get a veggie in. Plus, the flavors are so incredible—think spiced meat, melty cheese, and tender peppers—that it’s like a flavor-packed hug. If you haven’t tried this classic yet, trust me on this: it’s one of those recipes you’ll keep coming back to, year after year. Let me show you how easy and rewarding it really is!
What is stuffed peppers?
Think of stuffed peppers as a kind of edible bowl—bright, bell-shaped peppers filled with a savory mixture that’s basically comfort food in vegetable form. They originate from many cuisines, but the most popular version here in the States is the cheesy, meat-filled kind we love for its hearty goodness. The concept’s simple: you hollow out the peppers, stuff them with a flavorful filling—usually seasoned ground meat, rice, vegetables, or a combination—and bake until the peppers are tender and the filling is bubbly and browned. It’s essentially a one-dish wonder that balances nutrition and flavor in every bite. I like to think of it as a meal that’s both elegant enough for a dinner guest and easy enough for a weeknight dinner when you just want something satisfying without the fuss. It’s the kind of dish that makes everyone ask, “Can I have seconds?” — even the pickiest eaters. Plus, once you get the hang of customizing the filling, it’s endlessly versatile.
Why you’ll love this recipe?
What I love most about stuffed peppers is how adaptable and forgiving they are. You can swap ingredients, tweak seasonings, and still end up with something amazing. The flavor profile? Oh, it’s complex and comforting—soft, sweet peppers paired with savory, seasoned meat, and often a touch of cheese or herbs. The smell alone will make your kitchen smell like a cozy restaurant. Plus, these are so straightforward to make—a few simple steps, and you’ve got an impressive dish. And let’s talk budget for a sec: most of these ingredients are staples in my pantry—rice, cans of tomatoes, ground beef, cheese—and you probably already have everything you need. The best part? They’re family-friendly. My kids ask for these all the time, and it’s a win because I know they’re getting veggies too. They’re also super versatile—you can make vegetarian versions with beans or grains, gluten-free with the right bread crumbs, and even stuff mini peppers for an appetizer twist. Honestly, I’ve made stuffed peppers so many times, I’ve lost count, but every single time, they turn out just as delicious, and I fall in love all over again.
How do you make stuffed peppers?
Quick Overview
This recipe is pretty straightforward—hollow out the peppers, whip up a tasty filling, stuff, and bake. What makes this method special is how easily you can customize the stuffing to suit your tastes or what you have in the fridge. I like to prepare the peppers in advance by roasting them slightly to get rid of their raw crunch, then fill them with a savory mixture of ground meat, rice, and spices. A quick bake until everything is bubbling and the cheese on top melts—done and dusted! The result? Juicy, flavorful peppers with a slightly caramelized top that’s just irresistible. It’s honestly one of those dishes I can put together in under an hour but feels so gourmet. Plus, the leftovers reheat beautifully, making it perfect for busy mornings or next-day lunches. Trust me—once you try this, it’s top of your “favorite meals” list forever!
Ingredients
For the Main Filling:
– 4 large bell peppers (any color, but red or yellow are sweeter!)
– 1 pound ground beef, turkey, or plant-based protein
– 1 cup cooked rice or quinoa
– 1 small onion, finely chopped
– 2 cloves garlic, minced
– 1 can diced tomatoes (14 oz), drained
– 1 teaspoon smoked paprika
– 1 teaspoon dried oregano
– Salt and pepper to taste
– 1 cup shredded cheese (cheddar, Monterey Jack, or mozzarella)
For the Topping & Glaze:
– Extra cheese for topping
– Fresh herbs like parsley or basil for garnish
– Optional: a drizzle of hot sauce or balsamic glaze for a punch of flavor
Step-by-Step Instructions
Step 1: Preheat & Prep Pan
Set your oven to 375°F (190°C). While it heats, line a baking dish with a little olive oil or parchment paper—just enough to keep things from sticking. Slice the tops off your peppers and remove the seeds and membranes. I always do this with a small spoon or a paring knife—it’s a little messy but so worth the effort for clean, neat peppers. If you want, you can cut the peppers in half lengthwise for a different presentation, but whole peppers are traditional and oh-so-cute.
Step 2: Roast the Peppers Slightly
Pop the peppers cut side down on a baking sheet and roast them for about 10 minutes. This step softens them up a little, making sure they’re perfectly tender after baking with the filling inside. Trust me, raw peppers can be a little tough once baked, so a quick roast makes all the difference—and the smell fills your kitchen with sweet, smoky aroma that’s hard to resist.
Step 3: Mix Dry Ingredients
While the peppers are roasting, in a large bowl, combine your cooked rice, diced tomatoes, spices, and seasoning. I like to do this step first so that the flavors mingle a bit before adding the meat. It’s also a good chance to taste and adjust the seasoning — I usually add a little more salt or smoked paprika to give it a smoky kick.
Step 4: Mix Wet Ingredients
In a separate bowl, gently beat your egg if you’re using one (trust me, it helps everything stick together nicely). Mix in your ground meat, onion, garlic, and a splash of Worcestershire sauce if you have it. I always test a tiny bit of the mixture by frying a small patty in a skillet—if it tastes good, then the filling’s ready to go. I’ve made the mistake of rushing this step and ending up with bland filling, so I take my time here.
Step 5: Combine
Bring the wet and dry mixtures together in the big bowl, folding gently until well combined. Be careful not to overmix—just enough to distribute everything evenly. Overmixing can make the filling tough, and nobody wants that!
Step 6: Prepare Filling
Fill each roasted pepper with the meat mixture—don’t overstuff, but do press it in so it’s nice and full. If you’re adding cheese, sprinkle some inside with the filling or on top for that gooey goodness. For a fun twist, you can add a little chopped spinach or olives into the filling for extra flavor and color.
Step 7: Layer & Swirl
Place the stuffed peppers upright in your baking dish. If you like, dot the top with extra cheese or sprinkle herbs for extra flavor. A little swirl of tomato sauce or salsa over the top before baking adds a nice touch of moisture and color too.
Step 8: Bake
Bake for about 25-30 minutes, until the peppers are tender and the cheese is bubbling and golden brown. If you like a crisp topping, broil them for a minute or two—just keep an eye on it so nothing burns! The smell that wafts through your kitchen during this step is pure comfort.
Step 9: Cool & Glaze
Let the peppers sit for 5 minutes after coming out of the oven—trust me, they’re hot! Then, garnish with fresh herbs and your favorite drizzle like balsamic glaze or hot sauce. It’s just the little finishing touch that makes the dish pop visually and flavor-wise.
Step 10: Slice & Serve
Use a sharp knife to slice into the peppers, revealing layers of filling and melted cheese. I love serving these with a simple side salad or some crusty bread. They’re fantastic warm, but honestly, leftovers taste just as good the next day—if you have any left that is! Nothing beats the smell of these reheated with their cheesy, savory aroma, making your leftovers just as tempting as freshly cooked.
What to Serve It With
This dish is pretty much a complete meal on its own, but it also pairs beautifully with a few side dishes. For breakfast-time leftovers, imagine chopped-up stuffed peppers topped with a fried egg and a sprinkle of fresh herbs—delicious! For a brunch vibe, serve these alongside a crisp green salad and a cold glass of sparkling water or white wine. If you’re saving them for dinner, a dollop of sour cream or a squeeze of fresh lime over the top boosts the flavors even more.
As a snack, I sometimes cut them into smaller pieces, pack them in a box, and take them on picnics—trust me, they disappear in minutes at my house! My family loves to eat these with a side of roasted potatoes or even simple garlic bread. I’ve also turned the leftovers into tacos—just heat, scoop into tortillas, and top with salsa and sour cream. The possibilities are endless, and that’s what makes stuffed peppers so special in my kitchen. I’ve made this dish so many times that I’ve got my own little ritual — I set up a “stuffing station,” and everyone gets to customize their peppers with their favorite fillings and toppings.
Top Tips for Perfecting Your Stuffed Peppers
Over the years, I’ve learned a few tricks to elevate this humble dish into something truly spectacular. First, when prepping the peppers, I always remove the seeds carefully and give them a quick roast—I swear, pre-roasting softens them up and reduces the baking time. Also, if you want your filling to stay moist and flavorful, don’t skip the egg or cheese—these act as binders and give it that luscious texture. For the swirl of color, I like to layer slices of roasted vegetables like zucchini or eggplant between the peppers—they look pretty and add a subtle flavor twist.
When mixing your filling, gently fold everything together; overmixing can lead to dense, tough meat. Use fresh herbs if possible—basil, parsley, or cilantro brighten up the whole dish. I prefer to keep my rice or grains slightly al dente so they don’t turn mushy during baking. For wraps and side dishes, I absolutely love serving with a tangy tomato salad or a creamy cucumber yogurt dip. Little tweaks here and there help the dish go from good to unforgettable. Honestly, I’ve tested a bunch of substitutions—like using cauliflower rice or vegetarian crumbles—and I’ve found that with a few flavor adjustments, the dish still shines. Plus, I’ve learned to bake in the middle rack for even heat—no uneven cooking! And if you like a little spice, add a pinch of crushed red pepper to the filling or a dash of hot sauce on top. The key is to make it your own and enjoy every step of the process—trust me, your taste buds will thank you.
Storing and Reheating Tips
If you ever have leftovers — which is rare at my house because these disappear so fast — here’s how I store them: I place the leftovers in an airtight container and keep them in the fridge. They’re good for about 3 days, though they rarely last that long! To reheat, I pop them in the microwave for about 1-2 minutes, or until heated through, adding a sprinkle of cheese and letting it melt again. If you want to keep the peppers soft, reheat covered with a damp paper towel. For freezing, I wrap each stuffed pepper tightly in plastic wrap and store in a freezer-safe bag. They hold up well for up to 3 months, though I recommend eating them sooner for maximum flavor. When reheating from frozen, I recommend oven baking at 350°F for about 20 minutes, covered with foil, until hot and bubbly. The trick is to avoid overcooking or drying them out; a little extra cheese on top before reheating helps keep them moist and cheesy. As for the glaze—if you want that glossy finish, wait until they’re completely cooled before adding it to avoid melting or running.
Frequently Asked Questions
Final Thoughts
Honestly, stuffed peppers have become one of my go-to comfort foods. They’re delicious, versatile, and really customizable—plus, they make the house smell incredible. Whether I’m feeding my family on a busy weeknight or impressing friends at a casual dinner, this recipe never fails to get rave reviews. I love how you can adapt the fillings to suit your mood or dietary needs, and it’s such a wholesome, satisfying dish that everyone leaves the table happy. For me, the best part is the whole process—hollowing out peppers, tossing ingredients together, and then watching them bake into something magic. If you haven’t tried making stuffed peppers yet, I encourage you to give this a go. It’s a real ‘kitchen hug’ in every bite. Can’t wait to hear how your version turns out! Don’t forget to share your tweaks and pics—that’s what makes cooking so much fun. Happy baking!
Stuffed Bell Peppers
Ingredients
Method
- Preheat oven to 400 degrees. Cook rice according to package instructions.
- Trim about 1/4 inch from tops of bell peppers, remove stems, ribs, and seeds. Fill a baking dish with 1/2 inch of water and place peppers upside down. Bake for 20 minutes covered with foil.
- Meanwhile, heat olive oil in a large skillet over medium-high heat. Add chopped onion and sauté for 3-4 minutes. Add ground beef, season with salt and pepper, and sear until browned, about 3 minutes.
- Break up the beef, toss with onions, cook 2 minutes. Add minced garlic and cook an additional minute. Remove from heat and drain excess fat.
- Stir in diced tomatoes, half of the tomato sauce, cooked rice, parsley, Italian seasoning, salt, and pepper.
- Reduce oven temperature to 350°F. Turn peppers upright, sprinkle lightly with salt inside, and fill with beef mixture. Pour remaining tomato sauce over top, cover with foil, and bake for 20 minutes.
- Remove from oven, sprinkle with mozzarella cheese, and bake uncovered until cheese melts and peppers are tender, about 10-20 minutes. Garnish with parsley and serve warm.