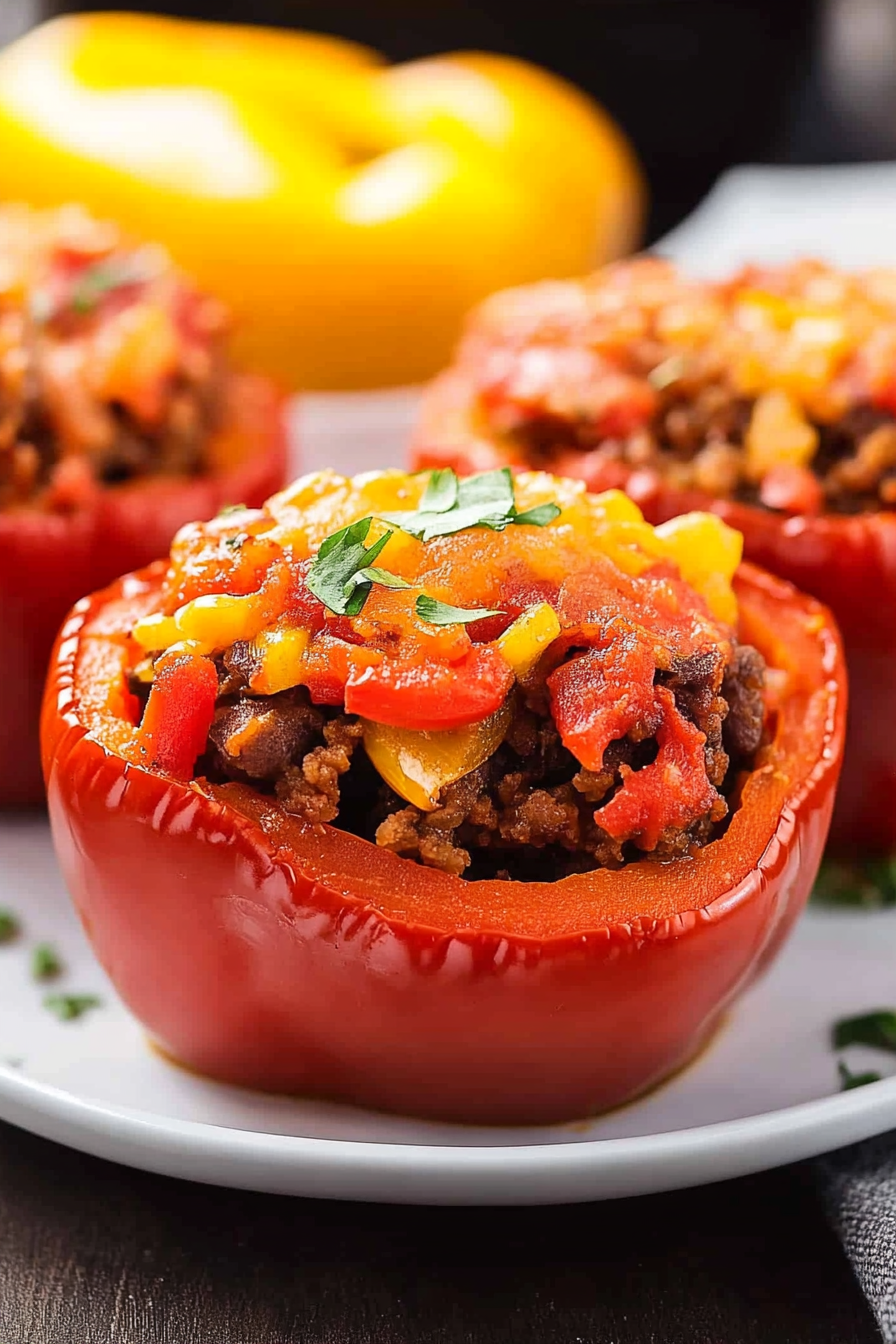
How to Make Delicious Santa Fe Peppers
There’s something about the aroma of bell peppers bubbling in the oven that instantly transports me back to my childhood kitchen. Maybe it’s the way the sweet, roasted peppers mingle with the savory, cheesy filling—like a warm hug in food form. Honestly, I’ve made this recipe countless times, and each time it disappears in minutes at my house. My kids ask for this all the time, saying it’s like comfort food coated in a colorful, edible package. It’s a surprisingly simple dish that looks impressive, yet you only need a handful of ingredients and about 40 minutes. Trust me, once you try making stuffed peppers from scratch, you’ll never want to buy those frozen, overstuffed varieties again! It’s one of those recipes that feels special without requiring too much effort, perfect for weeknight dinners or even a nice weekend brunch. Plus, it’s super flexible—you can swap out ingredients based on what you have in the fridge. That’s why I love sharing this recipe—it’s become a family classic around here, and I genuinely hope it becomes yours too.
What is stuffed peppers?
Think of stuffed peppers as a colorful, edible boat holding a flavorful filling inside—kind of like a portable, savory cup. The dish actually dates back ages, with variations appearing all over the world, from Middle Eastern stuffed peppers to Mediterranean-style recipes. It’s essentially a bell pepper cut in half, hollowed out, and filled with a mixture of grains, meat, vegetables, cheese, or all the above. The name pretty much says it: peppers stuffed with goodness. In my version, I keep things simple with a hearty mixture of seasoned ground meat, rice, and melted cheese—kind of like a deconstructed stuffed pepper, but in a portable, baked form. It’s a dish that feels so familiar but still feels like a treat, especially when it’s bubbling hot out of the oven, topped with a drizzle of fresh herbs or a splash of tangy yogurt. Think of it as comfort food with a colorful twist, perfect for sharing with family and friends.
Why you’ll love this recipe?
What I love most about this is how versatile and forgiving it is—plus, it tastes absolutely incredible. The flavors meld together as the peppers roast, becoming tender and sweet, while the filling is savory, cheesy, and a little bit spicy if you want to spice it up. The smell alone is enough to draw everyone to the table—kind of like a pot of chili bubbling away, but with all the vibrant colors of summer. It’s also surprisingly easy to make, even on busy weeknights, because most of the work is just mixing ingredients and waiting for the magic to happen in the oven. Budget-wise, it’s fantastic because the ingredients are humble—think ground beef or turkey, rice, some cheese, and bright, fresh herbs. And the best part? You can customize it endlessly. Prefer vegetarian? Swap in lentils or mushrooms. Want extra cheesy? Double up! I honestly think this is one of those recipes that gets better every time you make it, especially because you can make it your own with different fillings. What I love most about this dish is how it’s a small amount of effort for a big flavor payoff. It’s cozy, hearty, and beautiful on the plate—a dish I always look forward to making again and again.
How do you make stuffed peppers?
Quick Overview
This dish is a breeze—you basically prepare your filling while the peppers are softening in the oven, stuff them up, and bake until everything is hot and bubbly. I like to prep everything ahead of time because I find that the flavors really come together when the filling sits for just a little while, then popping the peppers in the oven is super straightforward. The real trick is to choose the right peppers—big, thick-walled ones are best—and to get your filling just right so it’s not too wet or too dry. In about 40 minutes, you’ll have a colorful, family-friendly meal that feels fancy but is totally doable even on the busiest nights. This method keeps the process simple but adds just enough flair to impress anyone at your dinner table.
Ingredients
For the Main Filling:
– 4 large bell peppers (preferably two red, two yellow for color)
– 1 pound ground beef or turkey
– 1 cup cooked rice (white, brown, or even cauliflower rice for low carb)
– 1 small onion, finely chopped
– 2 cloves garlic, minced
– 1 can diced tomatoes (undrained for extra flavor)
– 1 teaspoon dried oregano or Italian herbs
– Salt and pepper to taste
– 1 cup shredded cheese (cheddar, Monterey Jack, or mozzarella)
For the Filling Variation:
– For a vegetarian twist, use lentils or sautéed mushrooms instead of meat.
– Add chopped spinach or kale for extra greens. Just fold in after sautéing the greens until wilted.
For the Topping or Glaze:
– Extra cheese for topping
– Fresh herbs like parsley or cilantro for garnish
– A drizzle of balsamic glaze or a splash of hot sauce for zing
Step-by-Step Instructions
Step 1: Preheat & Prep Pan
First things first, set your oven to 375°F (190°C). Lightly grease a baking dish with a little olive oil or non-stick spray. While it heats up, slice off the tops of the peppers and scoop out the seeds and membranes—try to keep the peppers intact and not too uneven to make stuffing easier. If your peppers are very rounded or uneven, you can slice a tiny bit off the bottom—just enough to sit flat. Place the hollowed peppers cut-side up in your prepared dish. Set aside while you get your filling ready.
Step 2: Mix Dry Ingredients
In a large bowl, combine your cooked rice, chopped onion, garlic, diced tomatoes, herbs, salt, and pepper. Mix well—this mixture is the flavor base and should be slightly creamy but not soupy. If your mixture looks too wet, it’s okay—just add a tiny bit more rice or bread crumbs to thicken it up. I always do this when I find my mixture too runny because otherwise, the filling might leak or slide out when baking.
Step 3: Mix Wet Ingredients
If you’re using meat, cook your ground beef or turkey in a skillet until browned and fully cooked, breaking it apart as it cooks. Drain excess fat, then pour it into your bowl with the rice mixture. If you’re going vegetarian, sauté mushrooms or lentils separately until tender—then add them to your filling. Always taste your filling at this stage and adjust the seasoning—you want it flavorful enough to stand out after baking.
Step 4: Combine
Mix everything gently but thoroughly. Be careful not to overmix—this keeps your filling light. You can fold in half of your shredded cheese now to give it extra gooeyness or sprinkle it on top later. The goal is a well-blended but not overworked mixture that holds together nicely when you stuff the peppers.
Step 5: Prepare Filling
Now, fill each pepper generously—don’t be shy! Use a spoon or scoop to mound the filling into each hollow, pressing down slightly to pack it in. If you like, sprinkle some extra cheese on top of each pepper for that cheesy gooey crust. Feel free to add chopped fresh herbs or a dash of chili flakes for a little extra flavor now if you’re feeling adventurous.
Step 6: Layer & Swirl
If you want a pretty swirl or pattern on top, you can add dollops of extra filling, then gently swirl with a toothpick or the back of a spoon—this creates a marbled effect that’s as beautiful as it is tasty. It’s purely optional but makes your dish look chef-worthy.
Step 7: Bake
Cover the dish loosely with foil and bake for about 30 minutes. Then, remove the foil, sprinkle with a little more cheese if you like, and bake uncovered for another 10 minutes until the cheese is melted and bubbly. The peppers should be tender when pierced with a fork—don’t overbake or they might get mushy. If your peppers are thick or your oven runs hot, keep an eye on them after the 30-minute mark and adjust accordingly.
Step 8: Cool & Glaze
Let the peppers cool for a few minutes—they’ll be hot! A few fresh herbs or a drizzle of balsamic glaze adds a pretty finishing touch. I love adding a splash of chopped cilantro for a fresh note, or even a dollop of sour cream or Greek yogurt for creaminess. This is the moment where everything comes together—smells divine, and the cheese is just starting to ooze out. Don’t skip the cooling stage; it helps everything set up and makes slicing way easier.
Step 9: Slice & Serve
Using a sharp knife, carefully slice each stuffed pepper in half or in thirds for sharing. Serve hot, maybe with a side salad or crusty bread. My family loves to squeeze fresh lemon juice over the top just before digging in—it brightens the flavors so beautifully. These stuffed peppers look stunning on a dinner plate or even arranged on a brunch platter. Trust me, a little patience with presentation makes all the difference.
What to Serve It With
These stuffed peppers are incredibly versatile. For breakfast or brunch, I like to pair them with crispy bacon or roasted breakfast potatoes, along with a big mug of coffee or fresh juice. For a leisurely weekend lunch, serve alongside a tangy cucumber salad or some crusty bread rubbed with garlic. In the evening, they make a hearty main course, but you can also serve small halves as part of a tapas spread with hummus, olives, and roasted vegetables. My family has a tradition of drizzling a bit of chili oil or balsamic reduction for extra flavor, especially during cozy fall dinners. Sometimes I serve them with a side of sautéed greens or a cucumber yogurt salad—kind of like a Mediterranean feast. The leftover filling also makes a quick snack the next day—just spoon it onto toast or stuff it into a pita for an easy lunch. Honestly, once you get the hang of it, you’ll see how adaptable and delightful these stuffed peppers are for any meal or occasion.
Top Tips for Perfecting Your Stuffed Peppers
Over the years, I’ve learned a few tricks to make this dish even better. First, when preparing your peppers, always remove the seeds and membranes thoroughly—this not only helps with flavor but also makes stuffing so much easier. I do a quick rinse and pat them dry before stuffing because moisture can make the filling slippery. To prevent your filling from sinking or leaking, make sure your rice or grain is cooked just right—not too mushy, but fully tender. Adding a bit of breadcrumbs or grated cheese helps the filling stay together during baking. Speaking of cheese, I often mix some into the filling for a gooey interior—then sprinkle more on top for that bubbly crust. As for the filling, I like bold flavors—paprika, cumin, fresh herbs—so feel free to experiment. When it comes to baking, positioning your rack in the middle ensures even heat distribution. Keep an eye on the peppers after 30 minutes; if your oven runs hot, they may cook faster. A little foil covering prevents the tops from over-browning while the insides finish cooking. And don’t forget about the glaze! A balsamic or honey drizzle at the end can transform a good dish into a wow-factor presentation. I’ve made these countless times and each turn teaches me something new, like how using less cheese on top prevents it from burning or how adding chopped olives gives a lovely salty kick. It’s all part of my kitchen adventures—and I promise, your family will love the results!
Storing and Reheating Tips
Leftover stuffed peppers are my secret weapon for quick lunches during busy weekdays. To store them, I keep them in an airtight container in the refrigerator for up to 3 days. They reheat really well in the microwave—just pop them on a plate, cover loosely with a paper towel, and heat for about 1-2 minutes, depending on your microwave’s strength. If the filling looks a little dry after reheating, sprinkle a tiny bit of broth or water over the top to refresh their juiciness. For freezer storage, wrap each stuffed pepper tightly in plastic wrap, then put them in a zip-top bag. They’ll last in the freezer for up to 3 months. When you’re ready to eat, thaw in the fridge overnight and reheat as above. A little tip: if you want the cheese topping to stay melty and bubbly, add it fresh after reheating, then stick it back in the oven for a quick 5-minute bake. I’ve tested different storage methods and can say that this dish keeps its flavor and texture really well. The only thing I avoid is adding the glaze until just before serving—frozen or refrigerated leftovers taste better with fresh toppings. Plus, the aroma of reheated peppers still makes me smile, proving that a good dish is worth the effort of planning ahead.
Frequently Asked Questions
Final Thoughts
If you’re searching for a meal that combines vibrant colors, comforting flavors, and easy prep, these stuffed peppers are it. They remind me of lazy summer dinners and family Sunday nights—the kind where everyone gathers around the table, plates in hand, smiling and exchanging stories. Over the years, I’ve experimented with different fillings, and each variation turns out delicious—sometimes spicy, sometimes savory, always satisfying. This recipe is versatile enough to adapt to whatever you have on hand, making it a perfect candidate for your weekly rotation. I encourage you to play with herbs, spices, or even add a splash of hot sauce if you like it fiery. The best part? The moment you pull these out of the oven and see that melty cheese stretch with every slice, you’ll know all the effort was worth it. Happy baking! Please let me know in the comments how yours turned out or share your own twist—I love hearing your stories. Enjoy!
Stuffed Bell Peppers
Ingredients
Method
- Wash the red bell peppers, slice off the tops, and remove the seeds. Stand each pepper upright in a baking dish.
- In a large skillet, cook the ground turkey until fully browned. Drain excess fat if necessary. Add cumin and salt, then stir in the crushed tomatoes, black beans, and corn. Simmer for 15 minutes.
- Meanwhile, cook jasmine rice according to package instructions.
- Combine the cooked rice with the turkey mixture. Stuff each pepper with the mixture. Cover the dish with foil and bake at 350°F for about 40 minutes.
- Remove the foil, sprinkle cheese on top of each pepper, and bake for an additional 5 minutes until cheese melts.
- Garnish with sliced green onions before serving.