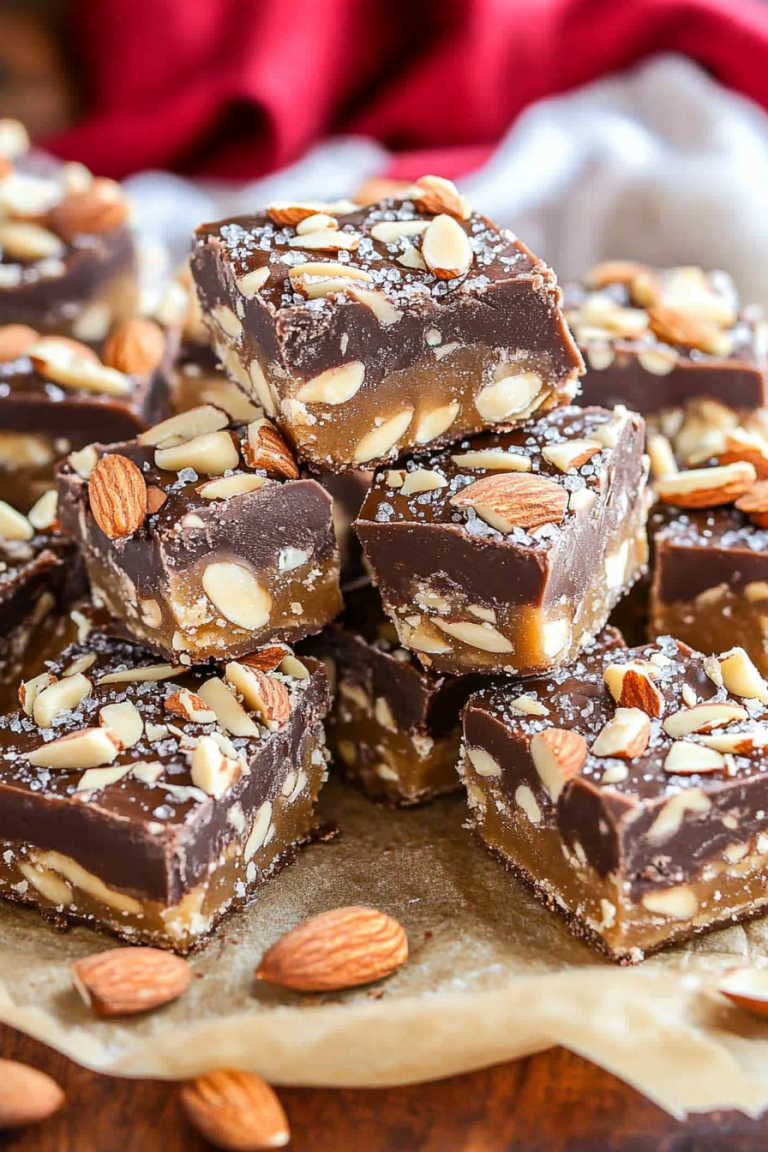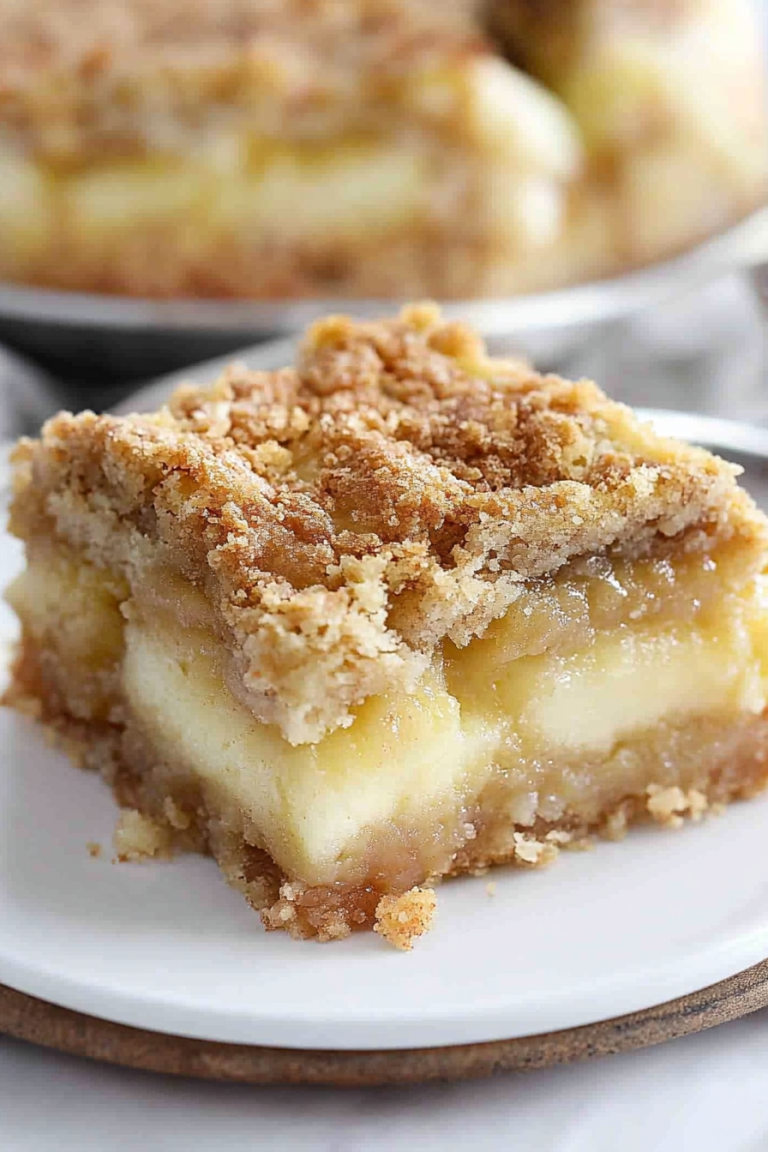
How to Make Delicious Toffee Almond Treats
There’s just something about a piece of *toffee* that transports me back to lazy childhood afternoons, sitting at the kitchen table, sniffing the warm smell of caramel and butter. My grandma’s version was the gold standard — crisp on the outside, chewy inside, with that perfect burnt sugar aroma. I’ve tested countless recipes of my own over the years, but I still come back to this one whenever I want something sweet, sticky, and totally addictive. Honestly, I think toffee is one of those treats that’s surprisingly simple to make, yet feels a little fancy — like you’ve got a secret ingredient that makes everyone’s eyes widen. Trust me, once you get the hang of it, you’ll be making batch after batch. It’s the kind of recipe that disappears in minutes at my house, especially when I cut it into tiny, caramel-packed squares. And the best part? It’s a lifesaver on busy nights when I need a quick dessert that loves to impress.
What is toffee?
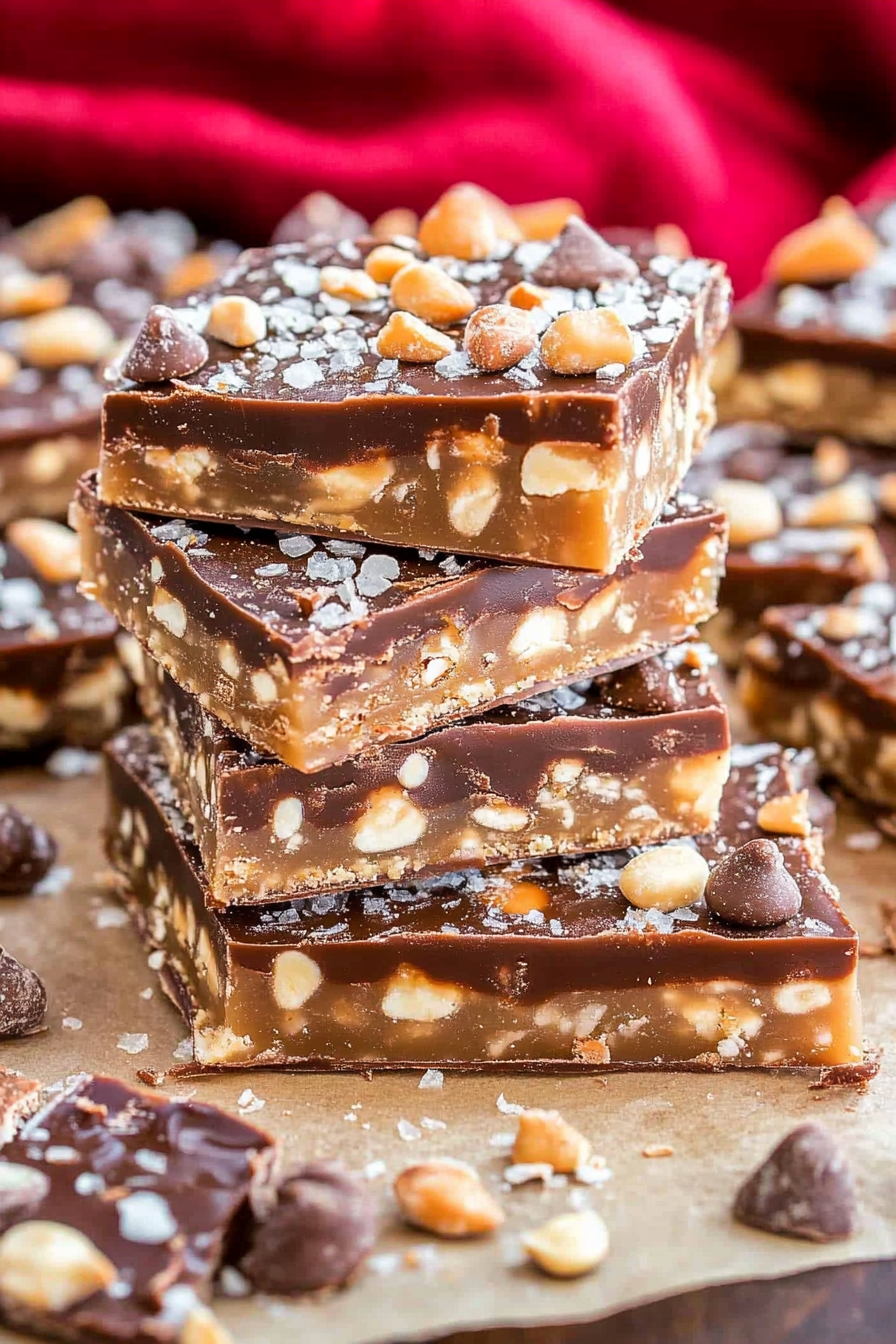
Think of toffee as the lovechild between caramel and brittle — a candy you make by cooking sugar, butter, and sometimes cream or condensed milk until they reach a gorgeous, deep amber hue. It’s essentially a sugar syrup that’s cooked down to perfection, then poured into a tray to cool and harden. The result? A snappy, yet chewy treat with a rich, buttery flavor and caramel depth. The word itself probably comes from the old English “toffe,” which means a sweet, rich cake or pudding, but today we most often refer to the crunchy-to-chewy candy made from caramelized sugar. My favorite way to enjoy toffee is straight from the fridge — chewy and cool — but I also love breaking it apart and tossing it into a bowl of popcorn, or melting it over ice cream for an extra special touch. It’s truly one of those recipes you can tweak, customize, and make your own over time.
Why do you love this movie?
What I love most about this toffee recipe is how incredibly forgiving and versatile it is. The flavor? Absolutely divine. Think rich, buttery caramel with just the right touch of sweetness — no artificial flavors or weird additives needed. And the texture? It’s got that perfect crunch on the edges and a slight chewiness in the middle, which keeps everyone coming back for more. Plus, it’s super straightforward to make, even if you’re a beginner in the kitchen. I’ve made toffee with just a handful of pantry staples, and it’s consistently satisfying every single time. The cost? Barely more than a few dollars for a batch that lasts forever. And what I love most is, you can dress it up or down — sprinkle sea salt on top for that classy salted caramel vibe, toss in chopped nuts for crunch, or keep it simple and just enjoy it on its own.
This one’s a lifesaver on busy nights when I need a quick dessert — just melt, pour, chill, and voila! It’s also perfect for gifting; wrapping a few pieces in adorable packaging, my friends always ask for the recipe. Honestly, once you try making your own toffee, it’s hard to go back to store-bought — trust me on this one. The aroma alone is worth every bit of effort, filling my kitchen with that warm, buttery scent that already feels like a hug. Plus, it’s a really fun project to do with kids, who love watching the bubbling sugar turn golden. It’s one of those treats that keeps giving, whether you’re craving something sweet at midnight or want to impress guests with your homemade caramel skills.
How do you make toffee?
Quick Overview
This toffee recipe is about as simple as it gets — cook sugar and butter together until they reach that perfect golden, amber color, pour onto a prepared tray, then add toppings or let it cool plain. What makes this method special is how you can control the doneness with a simple thermometer or color cues, making it fail-proof. It’s a method I’ve perfected over years, and honestly, once you get the hang of stirring the sugar, it becomes almost meditative. When done right, the toffee snaps easily but also has a little chew in the middle. It’s basically foolproof, and cleanup is minimal. I like to line my baking sheet with parchment paper for easy removal, and I always keep some ice water nearby — just in case I want to test the temp and avoid burning my fingers. Yes, it can be a little popcorn on the stovetop moment, but I promise, once you see that deep amber stage, you’ll be hooked.
Ingredients
For the Main Toffee:
- 1 cup (200 g) granulated sugar — choose a good quality, pure white sugar for the best caramel color.
- ½ cup (115 g) unsalted butter — I always use real butter, but in a pinch, you can try browned butter for extra depth.
- ¼ cup (60 ml) heavy cream or sweetened condensed milk — both work well; condensed adds creaminess.
- ½ teaspoon sea salt — for that perfect salty-sweet balance (trust me, it’s a game-changer!)
- ½ teaspoon vanilla extract — optional but adds a lovely aroma.
For the Toppings and Variations:
- Chopped nuts (almonds, pecans, or walnuts) — optional but adds a lovely crunch.
- Coarse sea salt — for finishing.
- Chocolate chips or melted chocolate — for drizzling or topping.
My biggest tip is to use quality ingredients; cheap butter or sugar can sometimes tweak the final texture or color. Also, have your pan ready before you start — this stuff moves fast once it hits the perfect temperature!
Step-by-Step Instructions
Step 1: Preheat & Prep Pan
Line an 8×8-inch baking dish with parchment paper or a silicone mat. Lightly grease if needed. Once that’s done, set your oven mitts nearby — you’ll need them in a minute. Preheat your oven to 350°F (175°C) if you plan to toast nuts or just to keep your workspace warm. Honestly, I do this sometimes because a warm kitchen makes the process feel just a little more cozy. Keep some extra ingredients within reach; confidence is everything here!
Step 2: Mix Dry Ingredients
Since our main ingredients are pretty straightforward, I skip any dry mixing. Instead, I focus on ensuring my sugar is free of clumps — I give it a quick sift if needed. That way, it melts smoothly without graininess.
Step 3: Mix Wet Ingredients
In a heavy-bottomed saucepan, melt the butter over medium heat. Once melted, add the sugar and stir gently with a silicone spatula or wooden spoon. Keep stirring constantly — the sugar starts to dissolve and bubble away. When it thickens and turns a lovely amber, you want to watch like a hawk. I actually test the temperature with a candy thermometer, aiming for around 300°F (149°C). Don’t rush this—patience makes perfect caramel!
Step 4: Combine
Once your sugar mixture hits that ideal color and temperature, carefully pour in the cream or condensed milk. The mixture will bubble up fiercely — that’s normal. Keep stirring, and you’ll see it turn glossy and smooth. This is where all your stirring pays off. If it looks grainy, keep stirring gently; it usually smooths out. A quick note: avoid stirring too vigorously once the cream’s in — it can cause splatters or burning spots.
Step 5: Prepare Filling
If you’re adding nuts, now’s the time to chop them finely and set aside. You can also sprinkle a pinch of sea salt into the caramel or dessert-style toppings like crushed cookies or chocolate chips. I like adding chopped pecans — they soak up some of that buttery caramel and add crunch in every bite. Be creative here — I’ve even experimented with crushed pretzels for chunks of sweet and salty.
Step 6: Layer & Swirl
Pour the hot caramel into your prepared pan. If you’re adding swirls of chocolate or nut butter, gently drop spoonfuls on top, then use a skewer or toothpick to swirl them in. For a layered look, pour the caramel first, then sprinkle nuts or toppings before it cools completely. This is the part where your artistic streak shines — no two batches are ever the same, and that’s part of the fun!
Step 7: Bake or Chill
Actually, most toffee recipes are just cooled, not baked. I sometimes pop it in the fridge for about an hour for a quick set, especially if I care about a super shiny finish. If you prefer it crispier, you can bake it at 350°F (175°C) for 10-15 minutes, but I usually skip this step for that classic, chewy texture. Keep an eye on it — once bubbling stops and it turns a deep amber, it’s ready.
Step 8: Cool & Glaze
Transfer the pan to a wire rack and let it cool completely — patience here is key. I let mine sit at room temperature for at least an hour, then pop it in the fridge for a little extra firmness. If you’re adding a glaze, do it once the toffee is cooled and set. A chocolate drizzle or a sprinkle of sea salt just before cutting make all the difference.
Step 9: Slice & Serve
Once cooled and firm, lift the toffee out of the pan using the edges of parchment paper. Use a sharp knife — I prefer a serrated one for clean cuts — and slice into small squares or rectangles. Be gentle — it’s fragile yet wonderfully chewy. Serve on a pretty plate, or pack in cute boxes for gifts. This stuff is best enjoyed within a week, but honestly, it tends to disappear way faster!
What to Serve It With
This toffee is so flexible, I almost feel guilty calling it a “serve with” item. It’s the star on its own, but here are a few ideas to elevate your snacking experience:
For Breakfast: Pair it with a cup of robust coffee or chai — the sweetness balances out the bitterness of a morning brew. Honestly, I sometimes break tiny pieces into my oatmeal for a sweet surprise.
For Brunch: Serve alongside fresh fruit like sliced pears or apple slices. A dollop of whipped cream or mascarpone and a sprinkling of chopped nuts turn it into a fancy treat.
As Dessert: Crumble small pieces over vanilla ice cream or dip apple slices into melted toffee for a quick caramel apple experience. Drizzle melted chocolate on top for a more decadent finish. My kids ask for “toffee ice cream topping” all the time!
For Cozy Snacks: Grab a handful during movie night or pack some in a small container for lunches. The sticky-sweet flavor makes even a mundane afternoon feel indulgent. I love wrapping a few pieces in wax paper and gifting them to friends during the holidays — everyone loves a homemade sweet!
Top Tips for Perfecting Your Toffee
Over the years, I’ve learned a few tricks that make this toffee thrill every time:
Zucchini Prep: (Oops, I meant sugar!) Make sure your sugar is dry and free from clumps — it melts more evenly that way. Trust me, I once added too much moisture and ended up with grainy caramel. Now, I carefully sift if needed and watch the heat like a hawk.
Mixing Advice: Keep your heat medium and steady; high heat can burn the sugar before it reaches that rich color. Once the caramel is golden, don’t walk away — it can turn from perfect to burnt in seconds. When adding cream, do it slowly — that bubbling is dramatic but totally normal.
Swirl Customization: For a marbled look, add dollops of melted chocolate or nut butters before pouring the caramel. Use a skewer or toothpick to swirl gently. It’s like creating a tiny piece of edible art!
Ingredient Swaps: Want a dairy-free version? Try coconut oil instead of butter, and some coconut milk instead of cream. The flavor shifts slightly but still delicious. Or switch out the vanilla for a splash of bourbon or almond extract for a grown-up twist.
Baking Tips: For a crisp finish, you can bake the caramel for a few minutes, but I prefer the chewy, snap-perfect style. Keep an eye on your oven temperature, and if your toffee gets too dark, it’s best to start over rather than risk bitter flavor.
Glaze Variations: Instead of chocolate, sprinkle chopped dried fruit or crushed cookies on top. Or dust with cocoa powder for a more sophisticated finish. The glaze should be just thick enough to spread in a smooth layer — add a bit of butter or cream to thin it out if needed.
This recipe has been such a hit in my family because I’ve learned from my happy accidents. For example, I once overcooked it and ended up with a caramel brittle that cracked all over — but it still tasted amazing! Now I see that patience and small adjustments make all the difference. It’s those little lessons that make baking fun and rewarding.
Storing and Reheating Tips
This toffee keeps remarkably well if stored properly. I usually wrap pieces individually in wax paper or keep them in an airtight container lined with parchment. At room temperature, it’ll stay fresh for up to a week — but honestly, it rarely lasts that long. If you like it firmer or crunchier, store it in the fridge, where it keeps for about two weeks, but bring it out a few minutes before serving so it’s not too hard. You can also freeze toffee — wrap tightly in plastic wrap, then foil, and it’ll keep for up to three months. When ready to enjoy, just thaw at room temperature, and it’s good as new. A little tip: if you’re adding a glaze or toppings, do it after it’s fully cooled for the best look and flavor.
For a super shiny finish, wait until the toffee is fully cooled before swirling melted chocolate on top. Heat can cause melting or uneven coating during storage. I’ve learned to be patient with this part, because the end result makes all the difference — glossy, rich, and inviting. Plus, if you’re taking it to friends or gifting, it stays delicious even after a little reheating in a warm oven for a few minutes.
Frequently Asked Questions
Final Thoughts
If you’re anything like me, making your own toffee feels like a small victory — a way to indulge yourself and share a little bit of joy. I’ve made this recipe countless times, tweaking it here and there, and every batch reminds me why I fell in love with caramel candy. It’s surprisingly forgiving, endlessly customizable, and always a hit. Whether you’re looking for a quick treat, a thoughtful gift, or just something to satisfy that sweet tooth, this toffee covers all bases. I truly hope you try it — the smell alone will make your entire house feel warmer. And I’d love to hear how yours turns out, so don’t forget to leave a comment or share your own ideas! Happy baking, and enjoy every caramel-y bite!