Jiggly Cookie Delights Easy Recipe
Oh, you guys, I am SO excited to share this recipe with you today. It’s one of those gems that, when I first stumbled upon it, I honestly thought it was too good to be true. You know that feeling? Like you’ve discovered a secret? Well, this is it. Imagine a cookie that’s perfectly chewy in the middle, with just the slightest, most delightful bounce to it – hence, the jiggly cookie! It’s not quite a traditional cookie, and it’s definitely not a brownie, but it’s that magical in-between space that makes your taste buds sing. My kids have officially dubbed them “magic cookies” because, well, they disappear like magic! I’ve tried countless cookie recipes over the years, from classic chocolate chip to fancy macarons, but this jiggly cookie has earned a permanent spot in my recipe binder. It’s the perfect treat when you’re craving something sweet but don’t want the fuss of a complicated bake. Seriously, if you’ve ever dreamt of a cookie with a unique texture that’s both comforting and exciting, this is your moment.
What is a Jiggly Cookie?
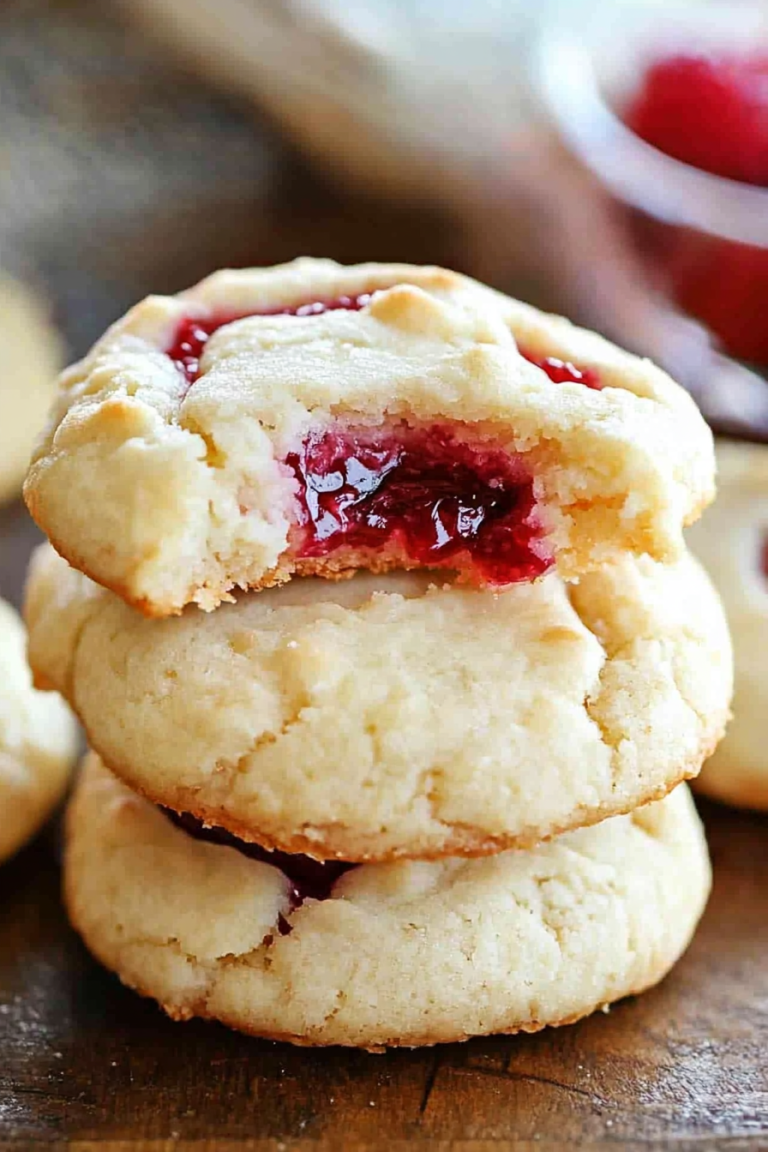
So, what exactly IS a jiggly cookie? At its heart, it’s a cookie designed to achieve a specific, irresistible texture: soft, fudgy, and with that signature slight wobble when you gently tap it. Think of it as the cookie equivalent of a perfectly set panna cotta, but way more casual and, you know, cookie-shaped! It’s not about being underbaked in a way that makes it raw; it’s about getting that perfect balance of chewiness and softness that’s incredibly satisfying. The “jiggle” comes from a precise combination of ingredients and baking time, which we’ll get into, but it’s that unique mouthfeel that sets it apart. I’ve heard some people compare it to a blondie, but honestly, a good blondie is fudgy, not necessarily jiggly. This jiggly cookie has its own personality. It’s playful, it’s delicious, and it’s surprisingly simple to create right in your own kitchen.
Why you’ll love this recipe?
There are so many reasons why this jiggly cookie recipe has become a staple in my home, and I just know you’re going to fall in love with it too. First off, the FLAVOR is just incredible. It’s got this rich, buttery base that’s not overly sweet, allowing the star of the show – usually chocolate, but we’ll get to variations – to really shine. It’s that perfect balance that makes you want another bite, and another! Then there’s the SIMPLICITY. Honestly, I can whip up a batch of these even on a chaotic weeknight. The ingredient list is pretty standard, and the steps are straightforward. You don’t need any fancy equipment, just your basic bowls, a whisk, and a spatula. And speaking of ingredients, this recipe is surprisingly COST-EFFECTIVE. Most of what you need is probably already in your pantry, which is always a huge win. But the real magic? Its VERSATILITY. While I adore mine with dark chocolate chips, I’ve experimented with white chocolate, a swirl of caramel, or even a sprinkle of sea salt on top, and each time it’s a winner. What I love most about this recipe is how it delivers maximum deliciousness with minimum fuss. It’s a crowd-pleaser, it’s reliable, and it always brings smiles to faces. It’s the kind of cookie that feels special enough for guests but is also perfect for a quiet afternoon with a cup of tea. Plus, it’s a fantastic base for adding your own personal flair – seriously, let your creativity run wild!
How do I make a Jiggly Cookie?
Quick Overview
This recipe is all about achieving that signature soft, chewy texture with a delightful jiggle. We’ll start by creaming butter and sugar, then incorporating eggs and vanilla for richness. The dry ingredients are gently folded in, and the key is not to overmix. We then add our delicious mix-ins, portion the dough onto a baking sheet, and bake just until the edges are set but the center still looks ever-so-slightly underdone. The cooling process is crucial for that perfect jiggly texture to set in. It’s a straightforward process that yields incredibly rewarding results.
Ingredients
For the Main Batter:
1 cup (2 sticks) unsalted butter, softened – This is crucial! Make sure it’s softened, not melted. I learned this the hard way once, and the cookies ended up way too flat. I like using a good quality butter for the best flavor.
1 ½ cups granulated sugar – You can slightly reduce this if you’re using very sweet chocolate chips, but this amount is perfect for that classic cookie flavor.
2 large eggs – Room temperature eggs incorporate much better. Just pop them in a bowl of warm water for 5-10 minutes if you forget to take them out ahead of time.
2 teaspoons pure vanilla extract – Don’t skimp on this! Good vanilla makes a huge difference.
2 ½ cups all-purpose flour – Spooned and leveled, not scooped! Scooping can pack too much flour in, making the cookies dry.
1 teaspoon baking soda – For lift and chewiness.
½ teaspoon salt – Enhances all the other flavors, especially the chocolate.
For the Mix-ins (The “Jiggle” Makers!):
1 ½ cups chocolate chips (dark, semi-sweet, or milk chocolate work wonderfully) – I’m a dark chocolate lover myself, but use what you love! You could also do a mix.
Optional: ½ cup chopped nuts, or a swirl of caramel sauce – This is where you can get creative! Just make sure whatever you add doesn’t make the batter too wet.
For the Optional Finishing Touch:
Flaky sea salt (like Maldon) – A little sprinkle on top before baking adds a lovely salty-sweet contrast and looks gorgeous.
Step-by-Step Instructions
Step 1: Preheat & Prep Pan
First things first, let’s get your oven preheated to 350°F (175°C). Line your baking sheets with parchment paper or silicone baking mats. This is a lifesaver for easy cleanup and prevents the cookies from sticking. I usually get about 10-12 cookies on a standard baking sheet, leaving a bit of space between them as they will spread slightly.
Step 2: Mix Dry Ingredients
In a medium bowl, whisk together the flour, baking soda, and salt. Just give it a good whisk until everything is well combined. This ensures the leavening and salt are evenly distributed, which is key for consistent cookies. Set this aside for now.
Step 3: Mix Wet Ingredients
In a large bowl, cream together the softened butter and granulated sugar. You can use an electric mixer for this, or a sturdy whisk and some elbow grease. Beat them together until the mixture is light and fluffy, pale yellow in color, and looks like creamy clouds. This usually takes about 3-5 minutes with a mixer. Then, beat in the eggs one at a time, making sure each one is fully incorporated before adding the next. Finally, stir in the vanilla extract. The mixture should be smooth and fragrant.
Step 4: Combine
Now, it’s time to bring the wet and dry ingredients together. Gradually add the dry ingredient mixture to the wet ingredient mixture. Mix on low speed or fold with a spatula just until *barely* combined. Seriously, stop mixing as soon as you no longer see streaks of flour. Overmixing develops the gluten too much, which can make your cookies tough instead of tender and jiggly. A few small streaks of flour are okay at this stage!
Step 5: Prepare Filling
Gently fold in your chosen mix-ins – whether it’s chocolate chips, nuts, or a combination. Again, be careful not to overmix. You just want them distributed throughout the dough.
Step 6: Layer & Swirl
This step is less about layering and more about portioning. Drop rounded tablespoons of dough onto your prepared baking sheets. I like to use a cookie scoop for consistent size. If you’re adding caramel swirls, you might dollop a bit of caramel in the center and gently swirl it in with a toothpick or the back of a spoon. Don’t go crazy with the swirling; a little goes a long way.
Step 7: Bake
Bake for 10-13 minutes, or until the edges are lightly golden brown and the centers still look soft and slightly underbaked. This is where the “jiggle” magic happens! Don’t overbake them. They will continue to cook a bit on the hot baking sheet after you take them out of the oven. I usually aim for a center that still looks just a touch wet.
Step 8: Cool & Glaze
Let the cookies cool on the baking sheets for about 5-10 minutes. This allows them to set up properly. Then, carefully transfer them to a wire rack to cool completely. If you’re adding flaky sea salt, now’s the time to sprinkle it on top while they’re still warm. Resist the urge to try them immediately – the texture is best once they’ve cooled a bit and the centers have fully set into that delightful jiggle.
Step 9: Slice & Serve
Once completely cool, your jiggly cookies are ready to be devoured! They’re delicious as is, or you can even serve them slightly warm if you can’t wait. They slice beautifully if you want to share, but honestly, I usually just grab one (or three!).
What to Serve It With
These jiggly cookies are so versatile, they fit in at almost any occasion, which is one of the things I adore about them! Here are some of my favorite ways to serve them, from a casual morning treat to an elegant dessert:
For Breakfast: Believe it or not, a jiggly cookie can be a surprisingly delightful breakfast treat, especially on weekends. Pair it with a strong cup of coffee or a creamy latte. The rich chocolate and buttery cookie are a wonderful start to the day, especially if you haven’t had time for a full breakfast. They’re not overly sweet, so they don’t feel like an indulgent dessert first thing.
For Brunch: If you’re hosting a brunch, these cookies add a touch of homemade charm without any stress. Arrange them on a pretty platter alongside fresh fruit, pastries, and perhaps some mimosas or sparkling cider. They look sophisticated enough for guests but are wonderfully unfussy. Their unique texture also makes them a talking point!
As Dessert: This is where they truly shine! Serve them warm with a scoop of vanilla bean ice cream for a classic combination that’s out of this world. Or, for a more refined dessert, place one on a small plate with a dollop of whipped cream and a few fresh berries. A small glass of milk is, of course, always a classic pairing. They’re also fantastic alongside a rich chocolate mousse or a fruit tart.
For Cozy Snacks: This is probably how we eat them most often in my house! They’re the perfect companion to an afternoon cup of tea, a glass of cold milk, or even a rich hot chocolate. They’re incredibly comforting and satisfying, especially on a chilly day or when you just need a little pick-me-up. My kids love them after school with a glass of milk. I’ve also found they’re great for packing into lunchboxes for a special treat – though they rarely make it home!
Top Tips for Perfecting Your Jiggly Cookie
Over the years, I’ve learned a few tricks that really help ensure these jiggly cookies turn out perfectly every single time. It’s all about understanding the little nuances!
Zucchini Prep: Now, I know what you’re thinking – zucchini in a cookie? Trust me on this one! The zucchini adds moisture, which is key to that tender, jiggly texture. The trick is to grate it finely and then squeeze out as much excess moisture as possible. I usually use a cheesecloth or a clean kitchen towel for this. You want the zucchini moist enough to add tenderness, but not so wet that it makes your dough soupy. Fresh zucchini works best, so avoid anything that’s starting to look a bit tired.
Mixing Advice: This is hands-down the MOST important tip for jiggly cookies. Do NOT overmix the batter once you add the flour. Seriously, mix *just* until the flour streaks disappear. Overmixing develops gluten, which will result in a tough, cakey cookie, not the soft, chewy, jiggly masterpiece we’re after. A few tiny streaks of flour are perfectly fine; they’ll disappear during baking. Think gentle folding, not vigorous beating, when combining wet and dry ingredients.
Swirl Customization: If you’re adding swirls of caramel or even a different kind of ganache, don’t go overboard. A little bit is enough to add a beautiful visual appeal and an extra layer of flavor. Too much liquid can throw off the cookie’s structure. I usually just do a few gentle swirls with a toothpick. You want ribbons, not a completely mixed-in sauce.
Ingredient Swaps: While the recipe is fantastic as is, feel free to experiment! For a dairy-free version, you can use a good quality vegan butter substitute and dairy-free chocolate chips. I’ve tested this with almond milk in place of regular milk in some other recipes, and it often works well, though for this particular cookie, relying on the butter and eggs for richness is pretty key. If you want to reduce the sugar slightly, it’s doable, but it might affect the texture a bit, making them less “jiggly.” For gluten-free, I’ve had success using a 1-to-1 gluten-free flour blend, but the texture can be a little different – usually a bit more crumbly.
Baking Tips: Pay close attention to your oven. Every oven is different! The visual cues – golden edges and a soft, slightly wet-looking center – are your best guides. Don’t rely solely on the timer. Pull them out when they look *just* set. They will firm up as they cool. If you find your cookies are spreading too much, chilling the dough for about 30 minutes before baking can help. Also, make sure your baking sheets are cool before you place new dollops of dough on them if you’re baking in batches.
Glaze Variations: While I usually love a sprinkle of sea salt, a simple glaze can be lovely too. A basic powdered sugar and milk or lemon juice glaze works well. Just mix powdered sugar with a tiny bit of liquid until you get a pourable consistency. Add it *after* the cookies have completely cooled to prevent it from melting off or becoming sticky.
Storing and Reheating Tips
One of the best things about these jiggly cookies is how well they keep their wonderful texture, making them perfect for making ahead. Here’s how I store them to maintain that delicious softness:
Room Temperature: For immediate enjoyment, I store them in an airtight container at room temperature. They stay wonderfully soft and chewy for about 2-3 days. Just make sure they’re completely cool before you seal the container, otherwise, you might end up with condensation, which no one wants!
Refrigerator Storage: If you want them to last a bit longer, the refrigerator is your friend. Store them in an airtight container for up to a week. They will become a little firmer in the fridge, but don’t worry – they’re easily revived. I find they’re still delicious straight from the fridge if you like a firmer cookie, or you can quickly reheat them.
Freezer Instructions: These cookies freeze beautifully! I like to freeze them before baking for the freshest cookies whenever the craving strikes. Place the unbaked dough balls on a baking sheet and freeze until solid, then transfer them to a freezer-safe bag or container. They’ll keep for up to 2-3 months. To bake, just place the frozen dough balls on a lined baking sheet and add a few extra minutes to the baking time. You can also freeze baked cookies the same way; let them cool completely, then freeze in an airtight container with parchment paper between layers to prevent sticking. Thaw them at room temperature.
Glaze Timing Advice: If you’ve added a glaze, it’s best to store the cookies at room temperature. Glazed cookies can get a bit sticky in the fridge. If you plan to freeze them with glaze, make sure the glaze is fully set before freezing. For best results, I often prefer to glaze them right before serving if they’ve been stored or reheated.
Frequently Asked Questions
Final Thoughts
I really hope you give this jiggly cookie recipe a try. It’s one of those recipes that has brought so much joy to my kitchen, and I’m so happy to share it with you. It’s the perfect example of how simple ingredients and a little bit of know-how can create something truly special. The unique texture, the comforting flavors, and the sheer ease of making them make them a winner in my book. They’re proof that sometimes, the most magical treats are the ones that are a little bit unexpected. If you love this recipe, you might also enjoy my Chewy Chocolate Chip Cookie Bars or my Perfectly Fudgy Brownies, which share a similar love for texture and intense flavor. Give this jiggly cookie a go, and I promise you won’t be disappointed. I can’t wait to hear how yours turn out! Please leave a comment below and tell me your favorite mix-ins or any fun variations you try. Happy baking, friends!
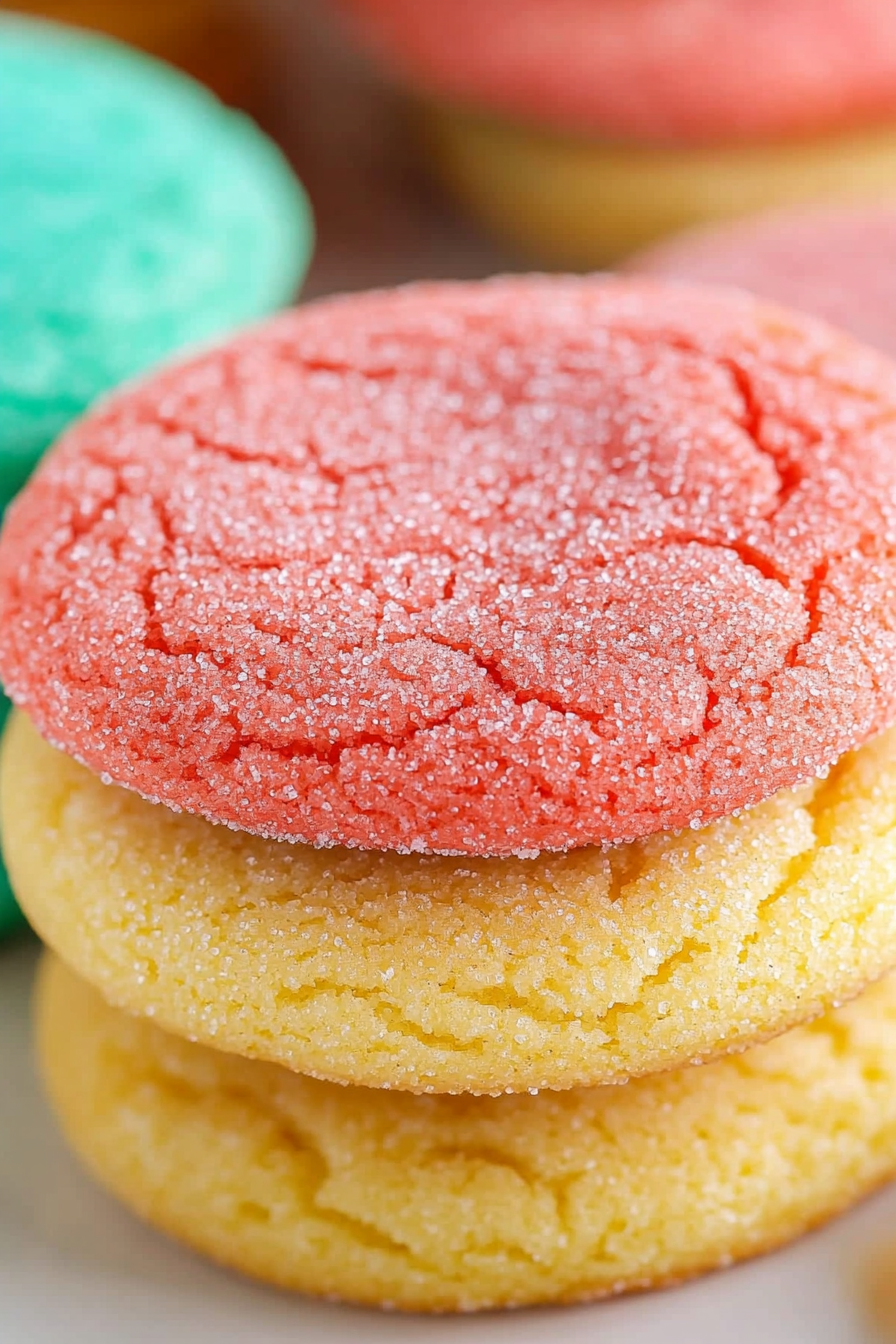
Jello Cookies
Ingredients
Method
- Preheat the oven to 350 degrees Fahrenheit and prepare a sheet pan by lining it with parchment paper or a silicone baking mat.
- In a large bowl, stir together the cookie mix, melted butter, and egg until fully combined.
- Separate the cookie dough evenly into four small mixing bowls.
- To each bowl, knead in 3 Tablespoons of each color of flavored gelatin. You should have four different colored doughs when you finish. (I found it was easier to use my hands for this part)
- Place the sugar in a shallow bowl, you will be rolling your cookies in it as you prepare them.
- Scoop out the cookies using a 2 Tablespoon cookie scoop and roll them into balls. Roll them in the sugar until completely covered.
- Place the balls on the prepared sheet pan with 2 inches between each cookie. Bake in the oven for 10-13 minutes or until the tops of the cookies get firm to the touch. You may begin to see a golden color on the tops of the cookies, if so take them out so that they don’t overcook.
- Let cool on the baking sheet for 3-5 minutes and enjoy warm or cooled!