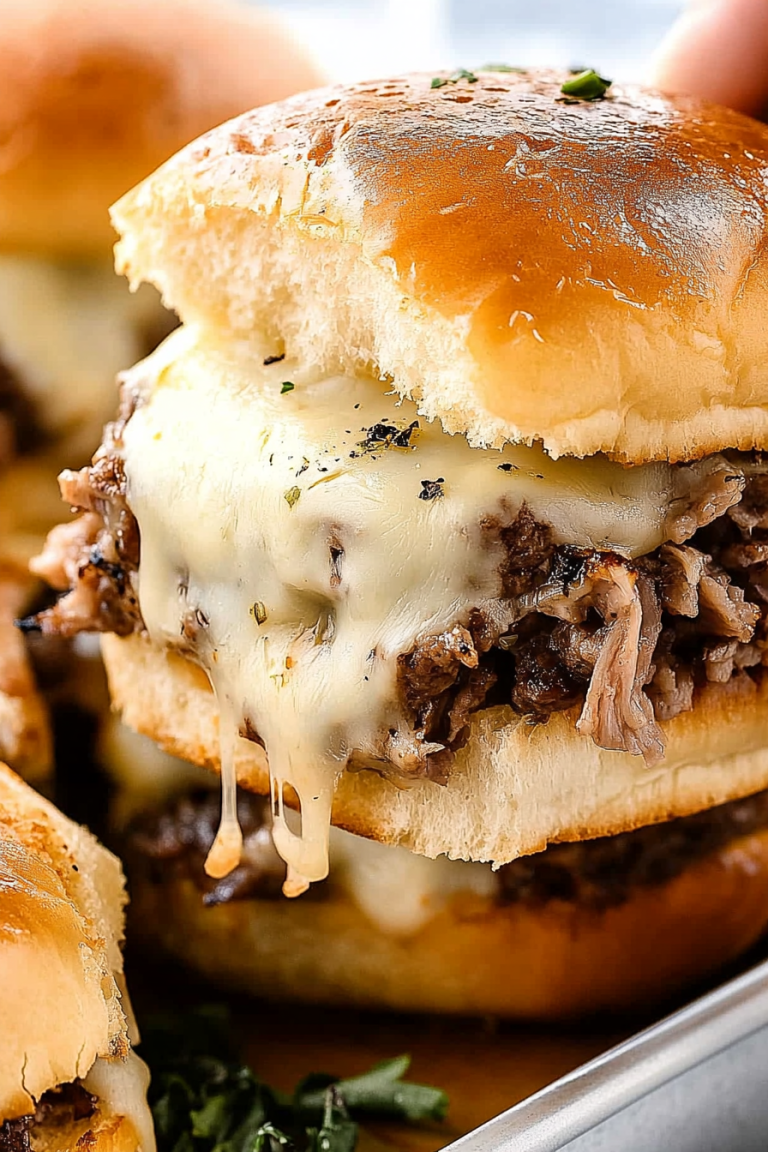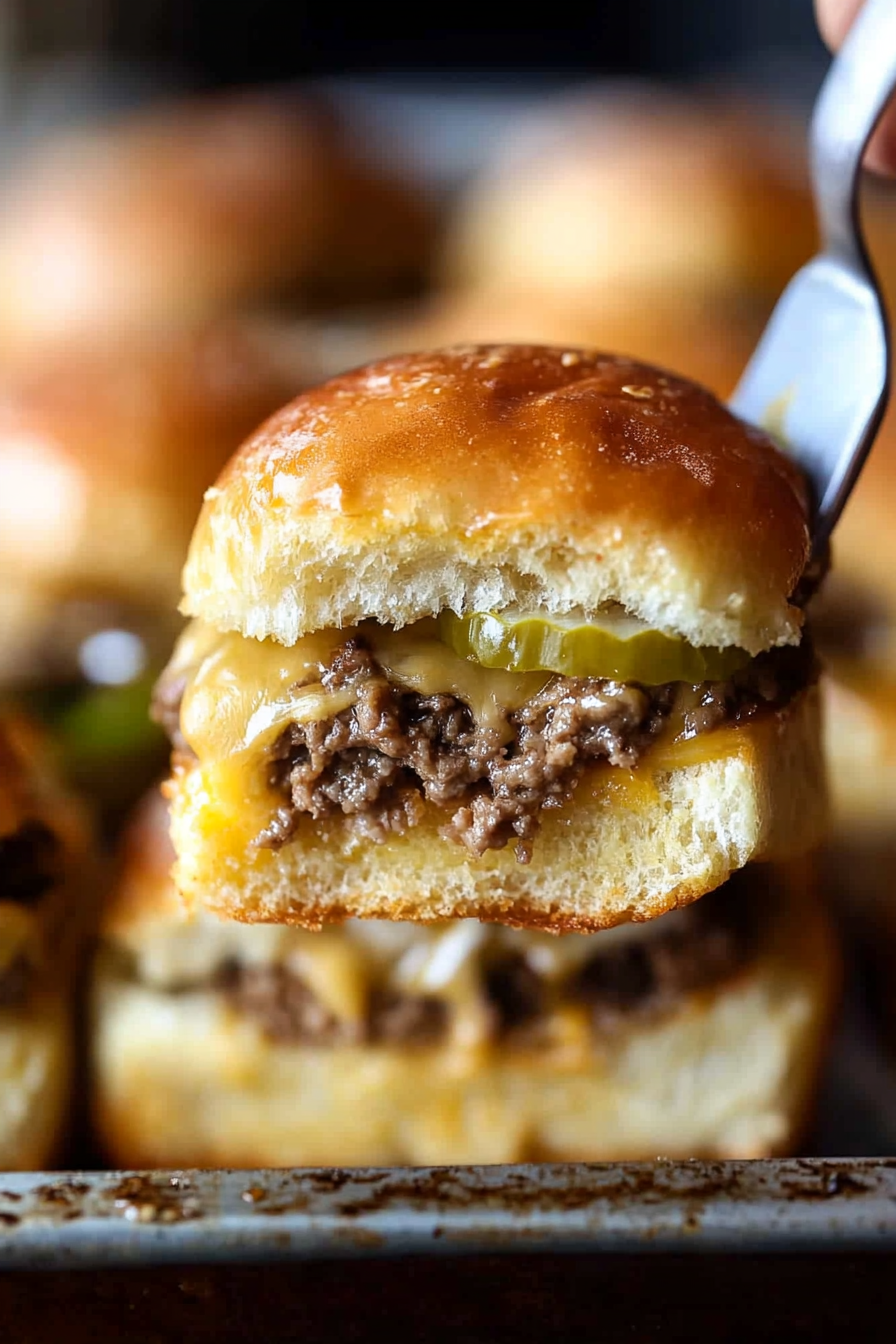
Mini Cheeseburgers How to Make Easy Sliders
Okay, gather ’round, because I’m about to share something truly special. You know how sometimes you just crave that perfect bite? That melty, savory, slightly crispy, utterly satisfying flavor explosion? Well, that’s exactly what these cheeseburger sliders deliver, and then some. I swear, the first time I made these for a get-together, people practically swarmed the kitchen, not even waiting for me to put them down. They’re not just good; they’re *legendary*. Think of your favorite classic cheeseburger, but miniaturized into these adorable, craveable little bites. They’re like a hug for your taste buds, and honestly, they’re my secret weapon for when I need to impress without breaking a sweat. Forget complicated appetizers; these cheeseburger sliders are the real deal, and they’ve become an absolute staple in my entertaining rotation. My kids even ask for them by name now!
What are cheeseburger sliders?
So, what exactly are these magical little things? At their heart, cheeseburger sliders are just miniature versions of a classic cheeseburger, usually served on smaller buns. But the way I make them? Oh, it’s a little different. Instead of just stacking individual mini burgers, we’re talking about a casserole-style approach that bakes all these delicious flavors together in one pan. Imagine layers of juicy, seasoned ground beef, melty cheese, and all those familiar burger fixings, all nestled together and baked until golden and bubbly. It’s essentially a deconstructed cheeseburger that’s been elevated into a crowd-pleasing, shareable dish. Think of it like a super-fancy, incredibly flavorful burger dip that you can scoop up with a slider bun, or just eat with a fork straight from the dish. They’re approachable, familiar, and just ridiculously tasty.
Why you’ll love this recipe?
Honestly, I could go on and on about why I adore these cheeseburger sliders, but let’s break down the highlights. First, the flavor. Oh my goodness, the flavor! It’s that perfect symphony of savory beef, creamy cheese, a hint of tang from pickles or relish, and a touch of sweetness from onions and maybe even a secret ingredient I’ll share. It tastes *exactly* like your favorite burger, but somehow more concentrated and utterly addictive. Then there’s the simplicity. This is not a recipe that requires a culinary degree or hours of your time. I can whip this up on a weeknight when we’re all starving, or for a last-minute party. It’s a lifesaver! And let’s talk about cost-efficiency. Ground beef and cheese are usually pretty budget-friendly, making these sliders a fantastic option when you want to feed a crowd without spending a fortune. Plus, they’re so versatile! I serve them for game nights, potlucks, holiday parties, or even just as a fun dinner. What I love most, though, is the reaction. People’s eyes light up when they try them, and that’s always the best feeling in the kitchen. They’re so much easier than making individual mini patties and trying to get them all cooked perfectly. This method truly bakes all the deliciousness into one glorious dish.
How do you make cheeseburger sliders?
Quick Overview
The beauty of these cheeseburger sliders is their straightforward assembly. We’ll start by cooking the ground beef with some aromatics to build a flavor base. Then, we’ll mix in your favorite burger condiments and, of course, lots of cheese! This glorious mixture gets layered into a baking dish, often with a layer of something special like melted butter or even a puff pastry base (more on that later!), topped with more cheese, and baked until it’s all melty and golden brown. The final step is just slicing it up and serving it with those perfect little slider buns. It’s ridiculously easy, and the results are always spectacular. You get all the amazing cheeseburger flavor in every single bite.
Ingredients
For the Beef Mixture:
1.5 lbs ground beef (80/20 is my go-to for flavor)
1 medium yellow onion, finely chopped
2 cloves garlic, minced
1/2 cup ketchup
2 tablespoons yellow mustard
1 tablespoon Worcestershire sauce (this is key for that umami punch!)
1 tablespoon dill pickle relish (or finely chopped dill pickles)
1 teaspoon smoked paprika
1/2 teaspoon black pepper
Salt to taste
For the Cheese Layer:
2 cups shredded cheddar cheese (a sharp cheddar is fantastic here)
1 cup shredded Monterey Jack cheese (for extra creaminess)
For the Buns & Topping:
12-18 slider buns (like Hawaiian rolls or Martin’s Potato Rolls – they’re the best!)
4 tablespoons unsalted butter, melted
1 teaspoon garlic powder (optional, but highly recommended)
Step-by-Step Instructions
Step 1: Preheat & Prep Pan
First things first, preheat your oven to 375°F (190°C). Grab an 8×8 inch baking dish. If you want an extra layer of deliciousness and easier cleanup, you can lightly grease the dish or line it with parchment paper. I sometimes like to place a layer of puff pastry on the bottom if I’m feeling fancy, but it’s totally optional and still amazing without it.
Step 2: Cook the Beef & Onions
In a large skillet over medium-high heat, brown the ground beef. Break it up as it cooks. Once it’s mostly browned, drain off any excess grease. Add the finely chopped yellow onion to the skillet with the beef. Cook, stirring occasionally, until the onions are softened and translucent, about 5-7 minutes. If you love garlic, you can add the minced garlic in the last minute of cooking to prevent it from burning.
Step 3: Mix in the Flavor Boosters
Now for the magic! Reduce the heat to medium-low. Stir in the ketchup, yellow mustard, Worcestershire sauce, dill pickle relish, smoked paprika, black pepper, and salt to taste. Cook for another 2-3 minutes, stirring to combine everything. This is where you start tasting that amazing burger flavor developing. Taste it and adjust salt and pepper if needed. It should be rich and savory.
Step 4: Add the Cheese
Remove the skillet from the heat. Sprinkle in the shredded cheddar and Monterey Jack cheeses. Stir gently until the cheese is mostly melted and incorporated into the beef mixture. It’s going to look incredibly gooey and delicious. This is the heart of our cheeseburger sliders!
Step 5: Prepare the Buns
Slice your slider buns in half horizontally. I find it easiest to do this by gently sawing through all of them at once. If you’re using Hawaiian rolls, you can often slice the whole sheet in half, which is a real time-saver. Arrange the bottom halves of the buns in a single layer in your prepared baking dish. Don’t worry if they’re a little squished; they’ll puff up.
Step 6: Layer the Beef Mixture
Evenly spread the cheesy beef mixture over the bottom halves of the slider buns in the baking dish. Make sure you get all that deliciousness distributed! Try to get it as close to the edges as you can.
Step 7: Top with the Bun Lids
Place the top halves of the slider buns over the beef mixture, creating little sandwiches. Gently press down.
Step 8: Make the Butter Topping
In a small bowl, whisk together the melted butter and the optional garlic powder. Pour this mixture evenly over the tops of the slider buns. You want to make sure each bun gets a good dose of that buttery goodness. This step is crucial for getting that lovely golden-brown crust.
Step 9: Bake Until Golden
Cover the baking dish loosely with aluminum foil. Bake for 15 minutes. Then, remove the foil and bake for another 5-10 minutes, or until the tops of the buns are golden brown and toasted, and the cheese is bubbling around the edges. The smell at this point is just incredible!
Step 10: Rest & Slice
This is the hardest part: letting them rest! Let the cheeseburger sliders sit for about 5 minutes before slicing. This allows everything to settle and makes them easier to cut. Use a sharp knife to cut between the buns, creating individual sliders. Serve immediately while they’re warm and gooey!
What to Serve It With
These cheeseburger sliders are so versatile, they fit in almost anywhere! For breakfast (yes, breakfast!), I love them alongside a strong cup of coffee. The savory goodness is surprisingly perfect to start the day, especially if you’re having a lazy weekend. For brunch, I like to plate them a bit more elegantly – maybe with a side of fresh fruit or a light salad. A mimosa or a bloody mary pairs wonderfully here. If you’re serving these as a main course for a casual dinner, they’re fantastic with classic sides like baked beans, potato salad, or even a simple coleslaw. They make a fun, interactive dinner for the family. And for cozy snacks? These are it. They’re perfect for game day munchies, movie nights, or just when you need a little pick-me-up. I’ve even paired them with a creamy tomato soup on a chilly evening, and it was pure comfort. Trust me, they’re a hit no matter how you serve them.
Top Tips for Perfecting Your Cheeseburger Sliders
I’ve made these cheeseburger sliders more times than I can count, and I’ve definitely picked up a few tricks along the way. First, for the beef, don’t be afraid to really break it up while it’s browning. You want those little crumbles to meld with the cheese and sauce. For the onions, mincing them very finely ensures they cook down beautifully and don’t give you big chunks. When it comes to the cheese, I always mix in a bit of Monterey Jack with the cheddar. It melts so much creamier and prevents the mixture from getting stringy or oily. My kids actually prefer when I use all cheddar, so it’s really up to personal preference! A little tip I learned after a few tries: make sure your Worcestershire sauce and relish aren’t too old or dried out. They really add depth to the flavor. If you don’t have relish, finely chopped dill pickles work, but make sure to squeeze out some of the extra brine so you don’t make the mixture too watery. The butter topping is non-negotiable for me. It makes all the difference in getting that perfect toasted, slightly crispy top on the buns. Don’t skip the garlic powder in the butter if you can help it – it’s a game changer! And for the buns, Hawaiian rolls or Martin’s Potato Rolls are my absolute favorites because they have that perfect soft, slightly sweet texture that holds up to the filling. If you can’t find them, any soft slider bun will do, but these really take it to the next level. Lastly, always taste and adjust your seasoning *before* you add the cheese. Once the cheese is in, it’s harder to get an even flavor distribution. Be generous with the salt and pepper!
Storing and Reheating Tips
If by some miracle you have any leftover cheeseburger sliders, here’s how to keep them tasting great. Store them in an airtight container at room temperature for up to 2 hours after they’ve cooled slightly. If you’re not going to eat them within that time, pop them into the refrigerator. They’ll keep well in the fridge for 2-3 days. Just make sure they’re completely cooled before sealing the container. When you’re ready to reheat, the oven is your best friend. You can place the sliders on a baking sheet and warm them in a 300°F (150°C) oven for about 8-10 minutes, or until heated through. This helps them regain some of their original crispiness. You can also reheat them in a toaster oven. If you’re in a super hurry, the microwave works, but the buns might get a little softer. For freezing, I usually don’t freeze the assembled sliders because the buns can get a bit soggy upon thawing. However, you *can* freeze the cooked beef and cheese mixture. Let it cool completely, then transfer it to a freezer-safe container or bag. It should last in the freezer for up to 2 months. Thaw it in the refrigerator overnight and then proceed with the recipe steps as usual, baking in fresh slider buns. When it comes to the glaze, I always recommend adding it fresh right before serving. It keeps the buns from getting soggy and ensures that buttery, toasted flavor is at its best.
Frequently Asked Questions
Final Thoughts
So there you have it – my absolute favorite cheeseburger sliders recipe! I truly believe this is a recipe that brings people together, sparks joy, and makes any gathering feel a little more special. It’s proof that you don’t need fancy ingredients or complicated techniques to create something truly delicious and memorable. Whether you’re hosting a big party or just looking for a fun family dinner, these sliders are guaranteed to be a hit. They’re the perfect blend of comfort food and a sophisticated appetizer, all rolled into one irresistible package. If you love classic cheeseburgers, you are going to adore these. I can’t wait for you to try them and see the smiles they bring to your table. Give them a whirl and let me know what you think in the comments below! And if you end up making them, please share your own twists and tips – I love hearing how you all make these recipes your own. Happy baking (and eating)!
Classic Cheeseburger Sliders
Ingredients
Method
- Preheat oven to 350°F. Line an 11×15 inch baking dish with foil and lightly spray with nonstick spray.
- Slice the slider rolls in half; set the tops aside and place the bottoms in the prepared dish.
- In a small bowl, whisk together mayonnaise, ketchup, and mustard. Set aside.
- Heat olive oil in a large skillet over medium heat. Add diced onions and cook until soft and golden.
- Add ground beef to skillet; cook until no pink remains, breaking it apart as it cooks.
- Drain excess fat, then stir in French Onion Soup Mix and Steak Seasoning.
- Remove from heat. Mix in mayonnaise mixture and coat beef evenly.
- Spread beef mixture over the bottom roll layers. Top with cheese slices, then with pickle slices. Cover with the top roll layer.
- Brush melted butter over the top and sprinkle with sesame seeds.
- Cover with foil and bake for 15-20 minutes until cheese melts. Let stand for 5-10 minutes before serving.