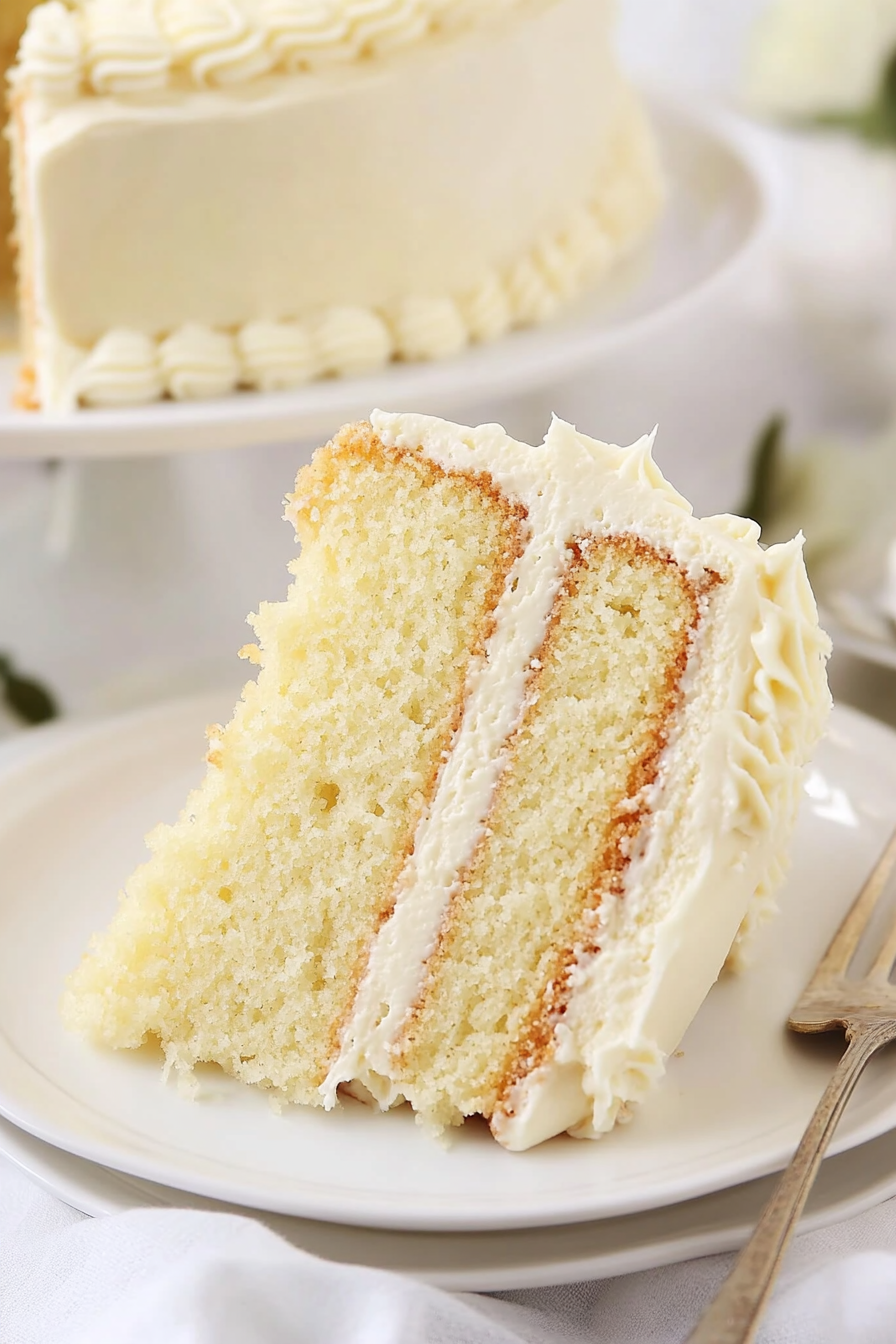
Perfect Vanilla Cake Recipe for Any Celebration
Oh, this vanilla cake. It’s the one I always go back to, the one that feels like a warm hug on a chilly afternoon, and honestly, the one that has saved me countless times when unexpected guests pop over or a serious sweet craving hits. There’s just something so incredibly comforting about a perfectly baked vanilla cake, isn’t there? It’s the foundation of so many wonderful desserts, but honestly, this particular vanilla cake recipe stands beautifully on its own. Forget those fancy, multi-layered creations that take hours and leave you stressed; this is pure, unadulterated vanilla goodness that’s surprisingly easy to whip up. It’s like the friendly, reliable best friend of all cakes. I’ve tried countless variations over the years, from super rich butter cakes to lighter sponge versions, but this one hits that perfect sweet spot – moist, tender, and bursting with that unmistakable vanilla flavor that just makes you close your eyes in delight. If you’re looking for *the* vanilla cake recipe that will become your new favorite, you’ve found it.
What is this dreamy vanilla cake?
So, what exactly *is* this magical vanilla cake recipe? Think of it as your ultimate, no-fuss, everyday vanilla cake. It’s not trying to be anything it’s not – it’s just a wonderfully straightforward, incredibly delicious vanilla cake that delivers on all fronts. The name itself, “My Go-To Vanilla Cake,” says it all. It’s the recipe I pull out when I need a reliable, crowd-pleasing dessert that doesn’t require a pastry degree or a trip to a specialty store for obscure ingredients. It’s essentially a perfectly balanced cake batter, infused with plenty of real vanilla, that bakes up into a tender, moist crumb. It’s the kind of cake that reminds you of childhood birthdays or cozy afternoons spent baking with loved ones. It’s approachable, forgiving, and guaranteed to bring smiles. It’s the canvas upon which you can build any dessert dream, or just enjoy as is, pure and simple.
Why you’ll love this recipe?
There are so many reasons why I keep coming back to this vanilla cake recipe, and I just know you’re going to fall in love with it too! First off, the flavor is just out of this world. We’re talking a deep, rich vanilla flavor that isn’t artificial or overpowering. It tastes like pure vanilla bean goodness, and that’s because we’re generous with the vanilla extract, and sometimes, if I’m feeling fancy, I’ll even toss in a little vanilla bean paste for an extra punch. It’s a flavor that truly sings. Then there’s the texture – oh my goodness, the texture! It’s incredibly moist and tender, with a delicate crumb that just melts in your mouth. No dry, crumbly cake here, I promise. And the best part? It’s surprisingly simple to make. You don’t need any fancy equipment or complicated techniques. It’s a one-bowl wonder for the most part, and it comes together in a flash. This makes it incredibly cost-effective too; the ingredients are all pantry staples that you likely already have on hand. Plus, this vanilla cake is a chameleon! It’s perfect as is, but it’s also the ideal base for any frosting you can dream up, a fruit topping, or even just a dusting of powdered sugar. It’s a lifesaver for busy nights or when you need a last-minute dessert. What I love most about this is its versatility and its sheer reliability. It never lets me down, and it always tastes amazing. It’s like the chocolate chip cookie of cakes – always a winner.
How do I make my go-to vanilla cake?
Quick Overview
Making this vanilla cake is a breeze! You’ll essentially cream butter and sugar, add in your wet ingredients, then gently fold in your dry ingredients. The key is not to overmix, which ensures that wonderfully tender crumb we talked about. It bakes up beautifully in one or two layers, and the aroma that fills your kitchen is pure magic. It’s a straightforward process that yields incredibly rewarding results, making it perfect for bakers of all levels.
Ingredients
For the Main Batter:
This is where the magic begins! Using room temperature ingredients is absolutely crucial for getting that light, airy texture. I learned this the hard way years ago – trying to cream cold butter is a recipe for a dense cake! So, make sure your eggs, butter, and milk are all sitting out on the counter for at least 30 minutes before you start. For the flour, I always use all-purpose flour. If you’re looking to go gluten-free, I’ve had success using a good quality 1:1 gluten-free baking blend, but sometimes it can make the cake a *tiny* bit denser, so don’t be afraid to experiment. The sugar is granulated, of course, but don’t pack it down when you measure. For the fat, unsalted butter is my preference because it allows me to control the saltiness perfectly. And for the vanilla… oh, the vanilla! I am a huge advocate for using good quality pure vanilla extract. It makes *all* the difference. If you can find vanilla bean paste, I highly recommend adding a teaspoon of that too for those beautiful little vanilla flecks and an even more intense flavor. Baking powder and baking soda are our leavening agents here, working together to give us that lovely lift. A pinch of salt balances all the sweetness. And for the liquid, whole milk makes it extra rich, but I’ve also tested this with buttermilk and even a plain unsweetened almond milk, and it turned out wonderfully creamy each time.
For the Filling:
For this simple vanilla cake, we’re not really talking about a separate “filling” in the traditional sense, unless you decide to slice it and add some whipped cream or jam! But if you’re making it as a simple loaf or Bundt cake, you might want a simple glaze or topping. If you’re slicing it, some fresh berries or a dollop of lightly sweetened whipped cream are absolute perfection. I often just slice it warm and enjoy it with a glass of milk, and honestly, that’s a filling enough for me!
For the Glaze:
This is optional, but highly recommended for that extra touch of sweetness and elegance! It’s a simple powdered sugar glaze. You’ll need powdered sugar, a splash of milk (or water for a thinner glaze), and a little more vanilla extract. The key here is to start with just a little liquid and add more *very* gradually until you reach your desired consistency. You want it pourable but not too thin, so it coats the cake nicely without running off completely. If you want to get creative, you can add a bit of lemon zest or a drop of food coloring!
Step-by-Step Instructions
Step 1: Preheat & Prep Pan
First things first, let’s get our oven preheated to 350°F (175°C). This is super important so the cake bakes evenly from the moment it goes in. While the oven is heating up, prepare your cake pans. I usually bake this in two 8-inch round pans, but a 9×13 inch pan or even a Bundt pan works beautifully too. For round pans, I like to grease them thoroughly with butter or baking spray, then dust them with a little bit of flour, tapping out any excess. This ensures the cake won’t stick, and you’ll get those gorgeous, clean edges when you turn them out. If you’re using a Bundt pan, make sure you get into all those nooks and crannies with your grease and flour!
Step 2: Mix Dry Ingredients
In a large mixing bowl, whisk together your all-purpose flour, granulated sugar, baking powder, baking soda, and salt. Give it a good whisk to combine everything evenly and break up any lumps. This step is important because it ensures that your leavening agents are distributed properly throughout the batter, which leads to a consistent rise. Don’t skip this! I usually give it a good minute or two of whisking until it all looks homogenous.
Step 3: Mix Wet Ingredients
In a separate medium bowl (or the bowl of your stand mixer if you’re using one), cream together your softened unsalted butter until it’s light and fluffy. This usually takes about 2-3 minutes. Then, gradually add your granulated sugar and continue to cream until the mixture is pale yellow and appears fluffy. This is called creaming, and it’s a crucial step for incorporating air into the batter, which makes the cake light and tender. Next, beat in your eggs, one at a time, making sure each one is fully incorporated before adding the next. Scrape down the sides of the bowl as needed. Stir in your pure vanilla extract and, if using, the vanilla bean paste. Make sure everything is well combined. You should have a beautiful, fragrant, creamy mixture.
Step 4: Combine
Now, it’s time to bring those wet and dry ingredients together! We’re going to do this in stages, alternating between the dry ingredients and the milk. Add about one-third of the dry ingredients to the wet ingredients and mix on low speed (or stir gently with a spatula) just until combined. Then, add half of the milk and mix again until just combined. Repeat with another third of the dry ingredients, the remaining milk, and finally, the last of the dry ingredients. Mix only until the flour streaks just disappear. It’s really important not to overmix here! Overmixing develops the gluten in the flour, which can lead to a tough cake. A few tiny lumps are perfectly fine. You want a smooth, luscious batter.
Step 5: Prepare Filling
As I mentioned before, this vanilla cake is so good on its own, it doesn’t *need* a separate filling! But if you’re planning to slice it into layers for a more celebratory cake, this is when you’d prepare your whipped cream, buttercream, or jam. For a simple, elegant dessert, just a dusting of powdered sugar or a light glaze is fantastic. If you’re using the glaze recipe below, you’ll prepare that while the cake is cooling.
Step 6: Layer & Swirl
If you’re using two round pans, divide the batter evenly between the two prepared pans. You can use a kitchen scale for precision if you like, or just eyeball it. Smooth the tops gently with a spatula. If you’re using a 9×13 inch pan, just spread the batter evenly in the prepared pan. For a Bundt cake, pour all the batter into the greased and floured Bundt pan. There’s no swirling required for this simple vanilla cake, just smooth, even batter is all you need for a beautiful result.
Step 7: Bake
Place your prepared pans in the preheated oven. If you’re baking two round cakes, I recommend placing them on the middle rack, with a little space between them, for the most even baking. Bake for 28-35 minutes for round pans, or 30-40 minutes for a 9×13 inch pan, or 40-50 minutes for a Bundt cake. The best way to check for doneness is to insert a toothpick into the center of the cake. If it comes out clean or with a few moist crumbs attached, your cake is ready! If there’s wet batter on the toothpick, bake for another few minutes and check again. Ovens can vary, so start checking a little before the suggested time.
Step 8: Cool & Glaze
Once your cake is baked, let it cool in the pans on a wire rack for about 10-15 minutes. This allows the cake to set up a bit before you try to remove it, preventing it from breaking. After the initial cooling, carefully invert the cakes onto the wire rack to cool completely. If you’re making the glaze, whisk together the powdered sugar, a tablespoon of vanilla extract, and enough milk (starting with just a tablespoon or two) until you have a smooth, pourable glaze. Once the cake is completely cool, drizzle or pour the glaze over the top. Let the glaze set for about 15-20 minutes before slicing. If you’re not glazing, you can dust it with powdered sugar once it’s cooled.
Step 9: Slice & Serve
Once your cake is completely cool (or just slightly warm for a more rustic feel), it’s time to slice and enjoy! Use a sharp knife for clean cuts. This cake is wonderful served on its own, with a cup of coffee or tea, or as a base for your favorite toppings. If you’ve made a layer cake, now is the time to add your frosting or filling between the layers and on top. It’s best served at room temperature for optimal flavor and texture.
What to Serve It With
This vanilla cake is so wonderfully versatile, it fits right in at any occasion! For a simple breakfast treat, a slice with a strong cup of coffee or a creamy latte is absolute heaven. I love it lightly toasted sometimes, with just a tiny smear of butter. For a more elegant brunch spread, I’ll often frost it with a light cream cheese frosting or a raspberry buttercream and arrange some fresh berries artfully on top. It’s a beautiful centerpiece that feels special without being fussy. As a dessert, the possibilities are endless! Serve it with a scoop of good quality vanilla bean ice cream (yes, more vanilla!) or a rich chocolate ganache. A simple berry compote is also divine. For those cozy, late-night cravings when you don’t want to bake a whole fuss, a warm slice with a glass of milk is pure comfort. My kids especially love it with a simple dusting of powdered sugar after school. It’s honestly my go-to for potlucks because it travels well and everyone always asks for the recipe!
Top Tips for Perfecting Your Vanilla Cake
I’ve baked this vanilla cake more times than I can count, and along the way, I’ve picked up a few tricks that I think really elevate it. For the best texture, always, always, *always* use room temperature ingredients – I can’t stress this enough! It helps everything emulsify properly, leading to a lighter, more tender cake. When you’re mixing the wet and dry ingredients, resist the urge to overmix. Seriously, just mix until you *barely* see any streaks of flour. A few small lumps are your friends here; they mean you haven’t developed too much gluten, which keeps the cake soft. If you’re making a layer cake, make sure your pans are greased and floured really well, or even line the bottoms with parchment paper. This ensures easy release, and nobody wants their beautiful cake to stick! I’ve learned that overmixing the batter is probably the most common mistake people make, and it’s the quickest way to a dense, tough cake. Trust me on this one! For ingredient swaps, if you don’t have whole milk, any milk will work, but whole milk or even buttermilk will give you the richest flavor and most tender crumb. I’ve even tested it with a plant-based milk like almond or oat milk, and it’s still delicious. If you find your cake is browning too quickly on top before the inside is cooked, try tenting it loosely with a piece of aluminum foil for the last 10-15 minutes of baking. And for the glaze, the secret to that perfect consistency is adding your liquid *very* slowly, a teaspoon at a time, until it’s just right. You can always add more liquid, but you can’t take it away! Finally, don’t be afraid to experiment with flavor additions. A little lemon zest in the batter, or a dash of cinnamon, can add a wonderful twist, but for that pure, classic vanilla flavor, sometimes less is truly more.
Storing and Reheating Tips
The great thing about this vanilla cake is that it stays wonderfully moist, even after a few days. If you’ve got leftovers (which is rare in my house!), you can store it at room temperature, well-covered, for about 2-3 days. I usually use a cake dome or plastic wrap to keep it fresh and prevent it from drying out. If you’ve frosted it with a cream cheese frosting or any frosting containing dairy that needs refrigeration, then it’s best to store it in the refrigerator. Just make sure to bring it back to room temperature for about 30 minutes before serving for the best flavor and texture. It’s surprisingly good even after being chilled! For longer storage, you can absolutely freeze this cake. Let it cool completely, then wrap it tightly in plastic wrap, followed by a layer of aluminum foil. It will keep well in the freezer for up to 2-3 months. To thaw, unwrap it and let it come to room temperature on the counter, or gently warm a slice in the microwave for about 15-20 seconds if you prefer it slightly warm. If you’ve glazed the cake, I find it’s best to add the glaze *after* thawing if you’re freezing it unglazed. If you do freeze a glazed cake, the glaze might get a little sticky as it thaws, but it’s still perfectly delicious.
Frequently Asked Questions
Final Thoughts
There you have it – my absolute favorite, go-to vanilla cake recipe! It’s the kind of recipe that brings joy to baking and pure bliss to eating. It’s proof that you don’t need complicated steps or fancy ingredients to create something truly special. This cake is a testament to simple goodness, and I hope it becomes a staple in your kitchen just like it is in mine. It’s perfect for birthdays, holidays, or just because you deserve a slice of homemade happiness. If you love this simple vanilla cake, you might also enjoy my easy chocolate cake recipe for those days when only chocolate will do, or perhaps my moist lemon loaf for a zesty pick-me-up. Baking should be fun and rewarding, and this vanilla cake recipe always delivers. I can’t wait to hear how yours turns out! Don’t forget to leave a comment below and share your own baking adventures or any creative twists you’ve tried. Happy baking!